Archive
Tool Chest Open for Business
 With the drawers in place and sliding freely, I began placing tools into the chest. Top drawer has marking and measuring tools along with my roll of chisels and block planes. The second drawer remains partially empty as I determine what I need at hand. The third holds my specialty planes and blades, router, fillister and rabbit.
I have had them this way for the past couple of weeks and am well satisfied. The chest is a good height and I have access to all that I need. Best of all is the casters that allow me to roll it out of the way or close at hand depending upon my project.
There are still several items to complete: knobs on the other tills, the lock and of course the finish. I intend to put finish on when the weather is consistently warmer and the other items as I get time.
This was a great project and my hand skills have moved forward very rapidly. The first hand cut dovetails are in this project along with many hours of planed boards.My confidence has soared and I have a finished project that is proving very useful.
Stanley # 3 Shows Up

The runners are glued into the chest. Clamping the drawers into my vice I reached for for my Stanley #4 Plane to begin fitting them. After a couple of passes across the dovetail pins I realized that the plane in my hand was in fact a #3. I acquired this plane several months ago and after flattening the sole and sharpening the blade it sat in my tool box.
As the plane glides across the ends and sides, I test its weight and balance. The tote fits securely in my hand and as I begin and end a pass it lifts with my hands. The balance is extraordinary and I appreciate the slightly smaller size on the ends of the drawers.
Admittedly I enjoy cleaning and working with different tools and I am fortunate to have a number of planes to use. Although differences can be subtle and planes can be used for a range of work, it is enjoyable when you find one that fits a task perfectly.
After finishing and fitting the first drawer I continue to work on the nex t two, until they glide across the runners. I still have to insert plugs in the bottom grooves , but I will do this at a later time.
I expect there to be more movement in the tool chest after I return it to the garage and will have to make some adjustments as the humidity rises in the summer.
Tool Chest Glue Up
 Finally all of the parts are made and I can begin assembling and gluing the interior of the chest.I don’t think the garage has been over 25 degrees for the past several weeks so there is little chance of glue being efffective. Therefore I moved the chest inside the house for a couple of days to allow it to warm and the lumber to move if it desires.
The first step is installing the saw till. You can find details of how I assembled this on a prior blog. I cut four pieces of oak that will fit on each side of the till which will slide in between the pieces. I attached these to the side of the chest using hide glue and screws. Drilling small holes like these really makes my Miller Falls drill shine.

I did have a minor problem when I sheared the drill bit attached to the countersink. The hand drill certainly did not provide enough force to cause this problem, and yes at only a couple of it’s a financial disaster just frustrating. I’ll have to start cruising the tool shows for some old countersinks that are of a better quality (anyone out there have success with other types or brands?)

In the back corner of the chest I installed an area to place the few moulding planes that I own. This was made fr two pieces of wood dovetailed together. Then I installed pieces of oak on each side of the ends to hold it in place.
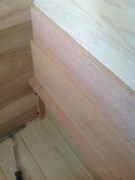
I installed two more supports in the corners for the drawer runners. These were also glued and screwed into place. Next came the bottom drawer runner which rests on two of the drawer supports. I debated back and forth on how to attach this runner and the two above. I even got great insight from John at woodworksbyjohn.blogspot.com. If you haven’t been to his blog yet give it a try.
Based upon the thickness of the runners I decided that gluing them in would be best. A little hide glue and gentle persuasion with a rubber hammer and they fit into place. I set the drawers in temporarily, they will have to be planed to fit.

Divide and Conquer
After writing my last blog, I wandered out into the garage and began thinking about how to best utilize the

drawer space. It did not take long to begin placing planes and blades into the deepest of the drawers. The drawers are approximately 30″ in length and 8 inches wide. They are longest at the top and shorten by 1/4″ each step down. This allows space for the runners. (this will become clearer when I get the runners in place and get some photos onto the blog).
The first tools that need a new home are my rabbit plane, plow plane and router plane. I have quite a number of blades with these planes and wish to keep them together and close at hand. They are too tall to fit into the top two drawers, so I tried them in the third. They fit nicely but I quickly realized that adding dividers to this drawer would help keep the tools organized and the various blades with its tool. This is why I waited to glue up the drawers allowing me the option of making changes.

Looking around the garage I found pieces of 1/2″ poplar left over from the drawer sides. I set up my planer and planed them down to 1/4″. The plow plane has the most components so I decided to place a divider for each plane and make an area to store the plow plane accessories.
I disassembled the drawers and using my 1/4″ dado blade placed slots in in of the drawer sides. I reassembled the drawers dropped the dividers in place and ‘whammo’ nicely divided drawers.

