Back of the Saw Till
Several weeks ago I began the process of building a home for my handsaws. Admittedly I don’t have a handsaw problem…yet, however I do have a tool problem. I need a home to store them safely and this is why I have been building the tool chest and along the way a saw till. Following along with Shannon Rogers and the Hand Tool School I have built the saw till carcass and have reached a point where I need to prepare and install the back.
I prepared three boards approximately 1/2″ thick and then planned to cut a rabbit in the back of the carcass to support the boards.


Cutting the Rabbit along the inside of the carcass did not turn out as simple as it first appeared. Working without a plan sometimes gives you unexpected opportunities. In the case of the saw till the first chance to try a new skill came when I realized that I had not positioned the dovetails to hide the rabbit. I now had the job of cutting stopped rabbits that would not be exposed on the sides of the carcass.
I used my skew rabbit plane to cut the majority of the groove then using a chisel to finish them up leaving some material in the corner. Took a little more time than it should have, due to the chisel work but I am pleased with the result.
The back will consist of three boards and I have a choice of ship lapped joints or tongue and groove for their installation into the rabbit. After my great experience with tongue and groove on the tool chest bottom boards I decided to try it again on this project.
 I installed the 1/4″ cutter on my plow plane and proceeded to plow a groove on one side of the two outer boards. The other edge of these boards will rest against the carcass. I then notched the corner of these boards to fit the notches in the carcass.
As I mentioned in a previous post making the tongue for the joint using the veritas plow plane requires the installation of the conversion kit and blade. This is a simple process and only takes a couple of minutes to complete. One caution…clear an area of the bench so you can spot the screws and washer. I managed to drop the washer in a pile of shavings and for a couple of tense moments thought I had lost it. The pictures below show the additional skate which is part of the conversion kit. It is installed onto the plane and the blade fitted between this skate and the main skate.


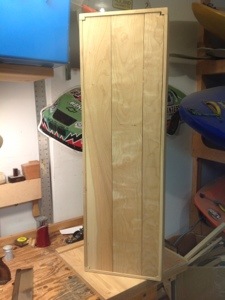
After 10 minutes I have placed a tongue on both sides of the middle board and installed all three into the back of the till. A few more parts and I can get my saws safely off my bench and out of the way.


I’m almost done with the Hand Tool School saw till myself. I made a bunch of mistakes along the way but learned a lot. Yours is looking great! What kind of wood did you use? Any plans on how your going to finish it?
I ended up using cherry that was sold as seconds due to its color. It worked great. I’ll probably use shellac for the finish.
Cool deal, I haven’t worked with cherry yet but I plan on using it to build the Hand Tool School final project, the tool cabinet. I just need to find somewhere to actually obtain some, up until now I’ve just been using box store lumber.
It is moments like this when you are forced to do something the hard way that are the most rewarding. The time you took to do that chisel work will pay off in so many ways later on. Nice work! Great photos too!