Tool Chest Glue Up
 Finally all of the parts are made and I can begin assembling and gluing the interior of the chest.I don’t think the garage has been over 25 degrees for the past several weeks so there is little chance of glue being efffective. Therefore I moved the chest inside the house for a couple of days to allow it to warm and the lumber to move if it desires.
The first step is installing the saw till. You can find details of how I assembled this on a prior blog. I cut four pieces of oak that will fit on each side of the till which will slide in between the pieces. I attached these to the side of the chest using hide glue and screws. Drilling small holes like these really makes my Miller Falls drill shine.

I did have a minor problem when I sheared the drill bit attached to the countersink. The hand drill certainly did not provide enough force to cause this problem, and yes at only a couple of it’s a financial disaster just frustrating. I’ll have to start cruising the tool shows for some old countersinks that are of a better quality (anyone out there have success with other types or brands?)

In the back corner of the chest I installed an area to place the few moulding planes that I own. This was made fr two pieces of wood dovetailed together. Then I installed pieces of oak on each side of the ends to hold it in place.
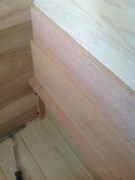
I installed two more supports in the corners for the drawer runners. These were also glued and screwed into place. Next came the bottom drawer runner which rests on two of the drawer supports. I debated back and forth on how to attach this runner and the two above. I even got great insight from John at woodworksbyjohn.blogspot.com. If you haven’t been to his blog yet give it a try.
Based upon the thickness of the runners I decided that gluing them in would be best. A little hide glue and gentle persuasion with a rubber hammer and they fit into place. I set the drawers in temporarily, they will have to be planed to fit.

