Saw Till Shelf
The sun is out and the thermometer is hovering near 50 degrees. Opening the garage door the light has flooded into my corner of the garage and I can hear the birds chirping outside. I feel like a prairie dog cautiously lifting its head above the burrow and looking around. Woodworking in natural light is a great improvement and I’m looking forward to a long list of spring projects.
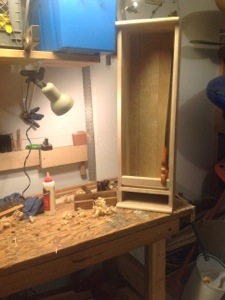
Today before I begin something new, I plan on tackling one of those projects that has lingered long enough. The tool chest is complete and I have cleared my bench of tools, but there remains 5 saws that have cluttered up the top of my cabinets for months. Dusting off the carcass of my saw till I struggle to recall what I have to do to finish it up and make room for new projects.
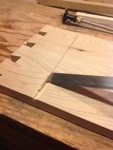
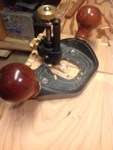
Glueing together two boards I prepare to make a shelf to divide the saws from a future drawer. Then after planing it square and to the correct thickness, I cut dados across the till sides. First I mark the bottom of each dado with my square and marking knife. Using a chisel; a knife wall is created and I cut the side of the mortise with a saw using the wall as a guide. Placing the shelf in the slot, the marking knife is used to mark the other side and a second knife wall cut. Eventually I use my router plane to complete the slot. This is repeated on the opposite side. Final fitting of the shelf is done with my plane.
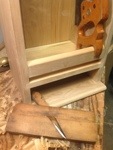
I now need to decide on a piece to support the saw handles and hold the saw in place. Shannon Rogers in the Hand Tool School mortised a piece across the front of the till covering the shelf joint. I have decided to go a different route and create a mortise and tennon joint and inserting a cross piece to hold the saws. The crosspiece is cut to size and to add a little change in the till I decide to round over the top. I have one pair of hollows and rounds and this seems to be an ideal time to try them out. The wooden planes make short work of the cross piece and I went ahead and rounded the top and bottom of the till to match. I use Paul Sellers mortising method to cut mortises on each side

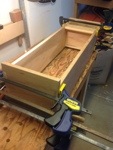
After test fitting the cross piece and mortises I glued up the case using hide glue. All went together well and I now have most of the components for the saw till. Remaining on the project is to install the back, make french cleats to hang the till onto the wall and come up with some means to separate the saw blades on the back of the till. Another day and I should be done. I am very excited to get my saws off of the bench and move onto other projects. Now if I can just figure out where the wall studs are…………..

It was almost 90 here yesterday! Maybe even a little too hot for woodworking. Is that till from a plan or of your own design? I’m about to join the Hand Tool School and I know that there is a till in that course. Either way it looks great!
Bill
The till came from the hand tool school. A couple of cosmetic differences. It was a great project for working on dovetails and chisel skills. The hand tool school has really helped my skills and its been a lot of fun.