Archive
Small Tool Chest Bottom
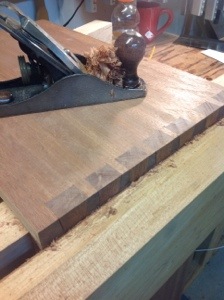
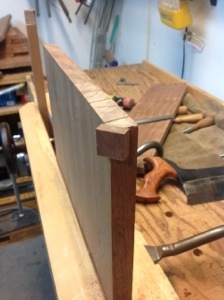
The bottom of this tool chest is a frame like the lid, with a single panel. Looking closely at the grain I took a chance and decided to split the waste from the tenons using a chisel. This is definitely my preferred method to remove the waste and if all goes well, much quicker.
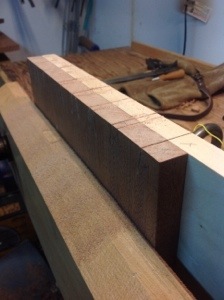
Grain direction is the critical element when using a chisel to remove the waste. After laying out the tenon and sawing along the bottom I look at the grain and try to determine where it will split. If the grain looks like it will split into the tenon I stop, grab my saw and cut the tenons. If the grain looks like it will split parallel to or away from the tenon I place the tenon in my vise and make some test cuts.
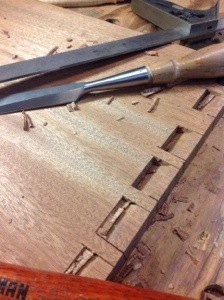
 I place my chisel approximately half way into the waste and and on one side and give it a tap. Watching the split I can confirm that the wood will split where I intend. I then move to the other end and a place my chisel half way and make another test tap. If this works I go ahead and remove the waste. Using this method of checking each end of the tenon has been particularly helpful with the Sapele. The grain can change dramatically over a few inches and where I can use a chisel on one end of the tenon I may not on the other.
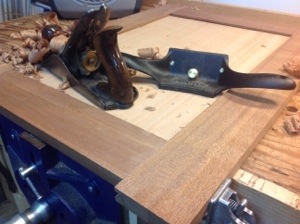
I saw two of the tenons and split the other two and quickly finish the mortise and Tenon joints. Most of the joints fit well, but I still have a little bit of work to smooth the joints. Rigging up a clamp n my vice I am able to support the bottom while I use a plane and cabinet scraper to smooth all of the parts. Sapele has been fun to work, but I could never have gotten by without my cabinet scraper.


Lid – Small Toolchest
One of several features in this project is the design of the too chest lid. The lid teaches the methods necessary to make a door with mortise and tenon joints and raised panels. Knowing that I need to develop a twist free lid I begin this stage by making a mortise guide. Similar to the guide I made for the table project, I begin with a scrap piece of ash with the grain running vertically and then carefully cut and plane a piece of Oak to 1/4 inch that will be placed as a guide for the chisel. I learned from my first guides that grain direction and wood choice is critical. The vertical grain on the ash will prevent bending and the horizontal grain on the oak will resist wear.


The guide which is a Paul Sellers Design works brilliantly when you need a perfectly straight mortise. With the guide gluing, I turned to the rails and grabbed my plow plane to cut grooves for the panels. It took me approximately 45 minutes to cut all of the grooves for the top and bottom panels. If I had sharpened up when I began, instead of waiting until the last couple of pieces if would have gone much quicker.


With the grooves in place I turn my attention to marking up all of the mortises and tenons. This is definitely an area where I have a high probability to make a mistake, so I slow down, double check my measurements and think carefully through the process. Wild doing the marking I ganged all of the rails together to ensure that the markings are precise from one to another. Also I work from one end only, eliminating errors that may come from slight deviations in length.


With six mortises and tenons completed the chest design begins to come to life. Next, the bottom and raised panels!

Enhanced Dovetail – Small Tool Chest

The center rail between the drawers is a combination of mortise and dovetail. Not a particularly difficult joint but since it is at the front of the chest very visible. The basics steps for the joint are to lay out the mortise using the center rail for size. Then I carefully chopped out the edges of the mortise, finishing up with my hand router to ensure a smooth and even mortise. The tail is marked onto the rail with my marking knife and using a hand saw and chisel cut to size. Carefully fitting the rail into the mortise on the one end, I then repeated the process on the other side.
After planing the joint smooth I’m content with the result. A little more practice and this will add a unique feature to other projects.
A Quick Repair

While taking one of the small tool chest sides out of the vise it slipped from my hands and hit the floor. Of course it landed on a corner, and as always it was the corner that would be most exposed. Looking at the damage to the corner I considered if it could be left or needed to be repaired. Replacement of the board is not an option because it is a tool chest for myself, the wood is expensive and repairing the damage would be a fun challenge.
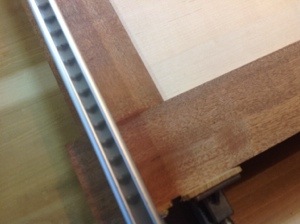
I’ve made a few repairs over several years some successful and some looking worse than the original damage. I am a repair amateur but willing to learn. This corner looked like the perfect opportunity to trim the damage off and insert another piece planing to fit. Searching through my scraps I found a piece of wood that appeared to have similar grain. Next I cut and chiseled off the piece that I wish to replace and cut a replacement piece.Trimming carefully with a chisel I attempted to match up the replacement piece to the wood. I the glued it in place and used tape to hold it while the glue dried.


A little work with my smoothing plane and the repair is in place. Not a perfect match but when the lid is glued on top I don’t think it will be noticeable. Now if I can avoid dropping anything else………
Small Toolchest Dovetails
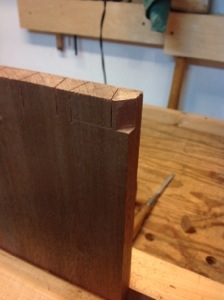
The carcass of the small tool chest is held together with dovetail joints. Nothing very unique but a chance for me to remember some of the subtleties of ensuring tight joints. Square boards, planed end grain, careful marking and sawing. When I prepared to cut my first dovetail (tails first in my case), I placed a board behind to use as a guide for the opposite end of the board and the face board. This allows me to index my saw to the already cut tails on the board.


I enjoy watching the many methods that people use to cut dovetails, there is the obvious tail and pin debate, the coping saw vs chisel debate, marking with a knife vs a pencil and so forth. I’ve developed a style that I use on most occasions with subtle differences to add variety. Today I think that I will use a chisel rather than a coping saw for removing the waste material.
Communication with my coping saw is a little strained at the moment and I enjoy the rhythm of using a hammer and chisel. After marking the tails with a pencil, I used my marking knife to mark the bottom of the waste and a knife edge. I then chiseled into the board approximately midway and repeated until all of the tails were complete. Marking the pins, I used the same process, saw to the line and remove the waste, fitting each board. Planing the finished product smooth I am very happy with the final product.