Archive
Box Making – Every Dovetail deserves an adjustment
There are people that make perfectly fitting dovetails every time and I don’t envy their lack of opportunity to adjust the dovetails they make. Typically I will have at least one dovetail that needs some work along with a saw cut that went a little too far and perhaps somewhere the wood chipped. Frequently I can also pick out the dovetail that was cut first. Which suggests that I should make a practice dovetail to increase my focus before beginning on the real thing.
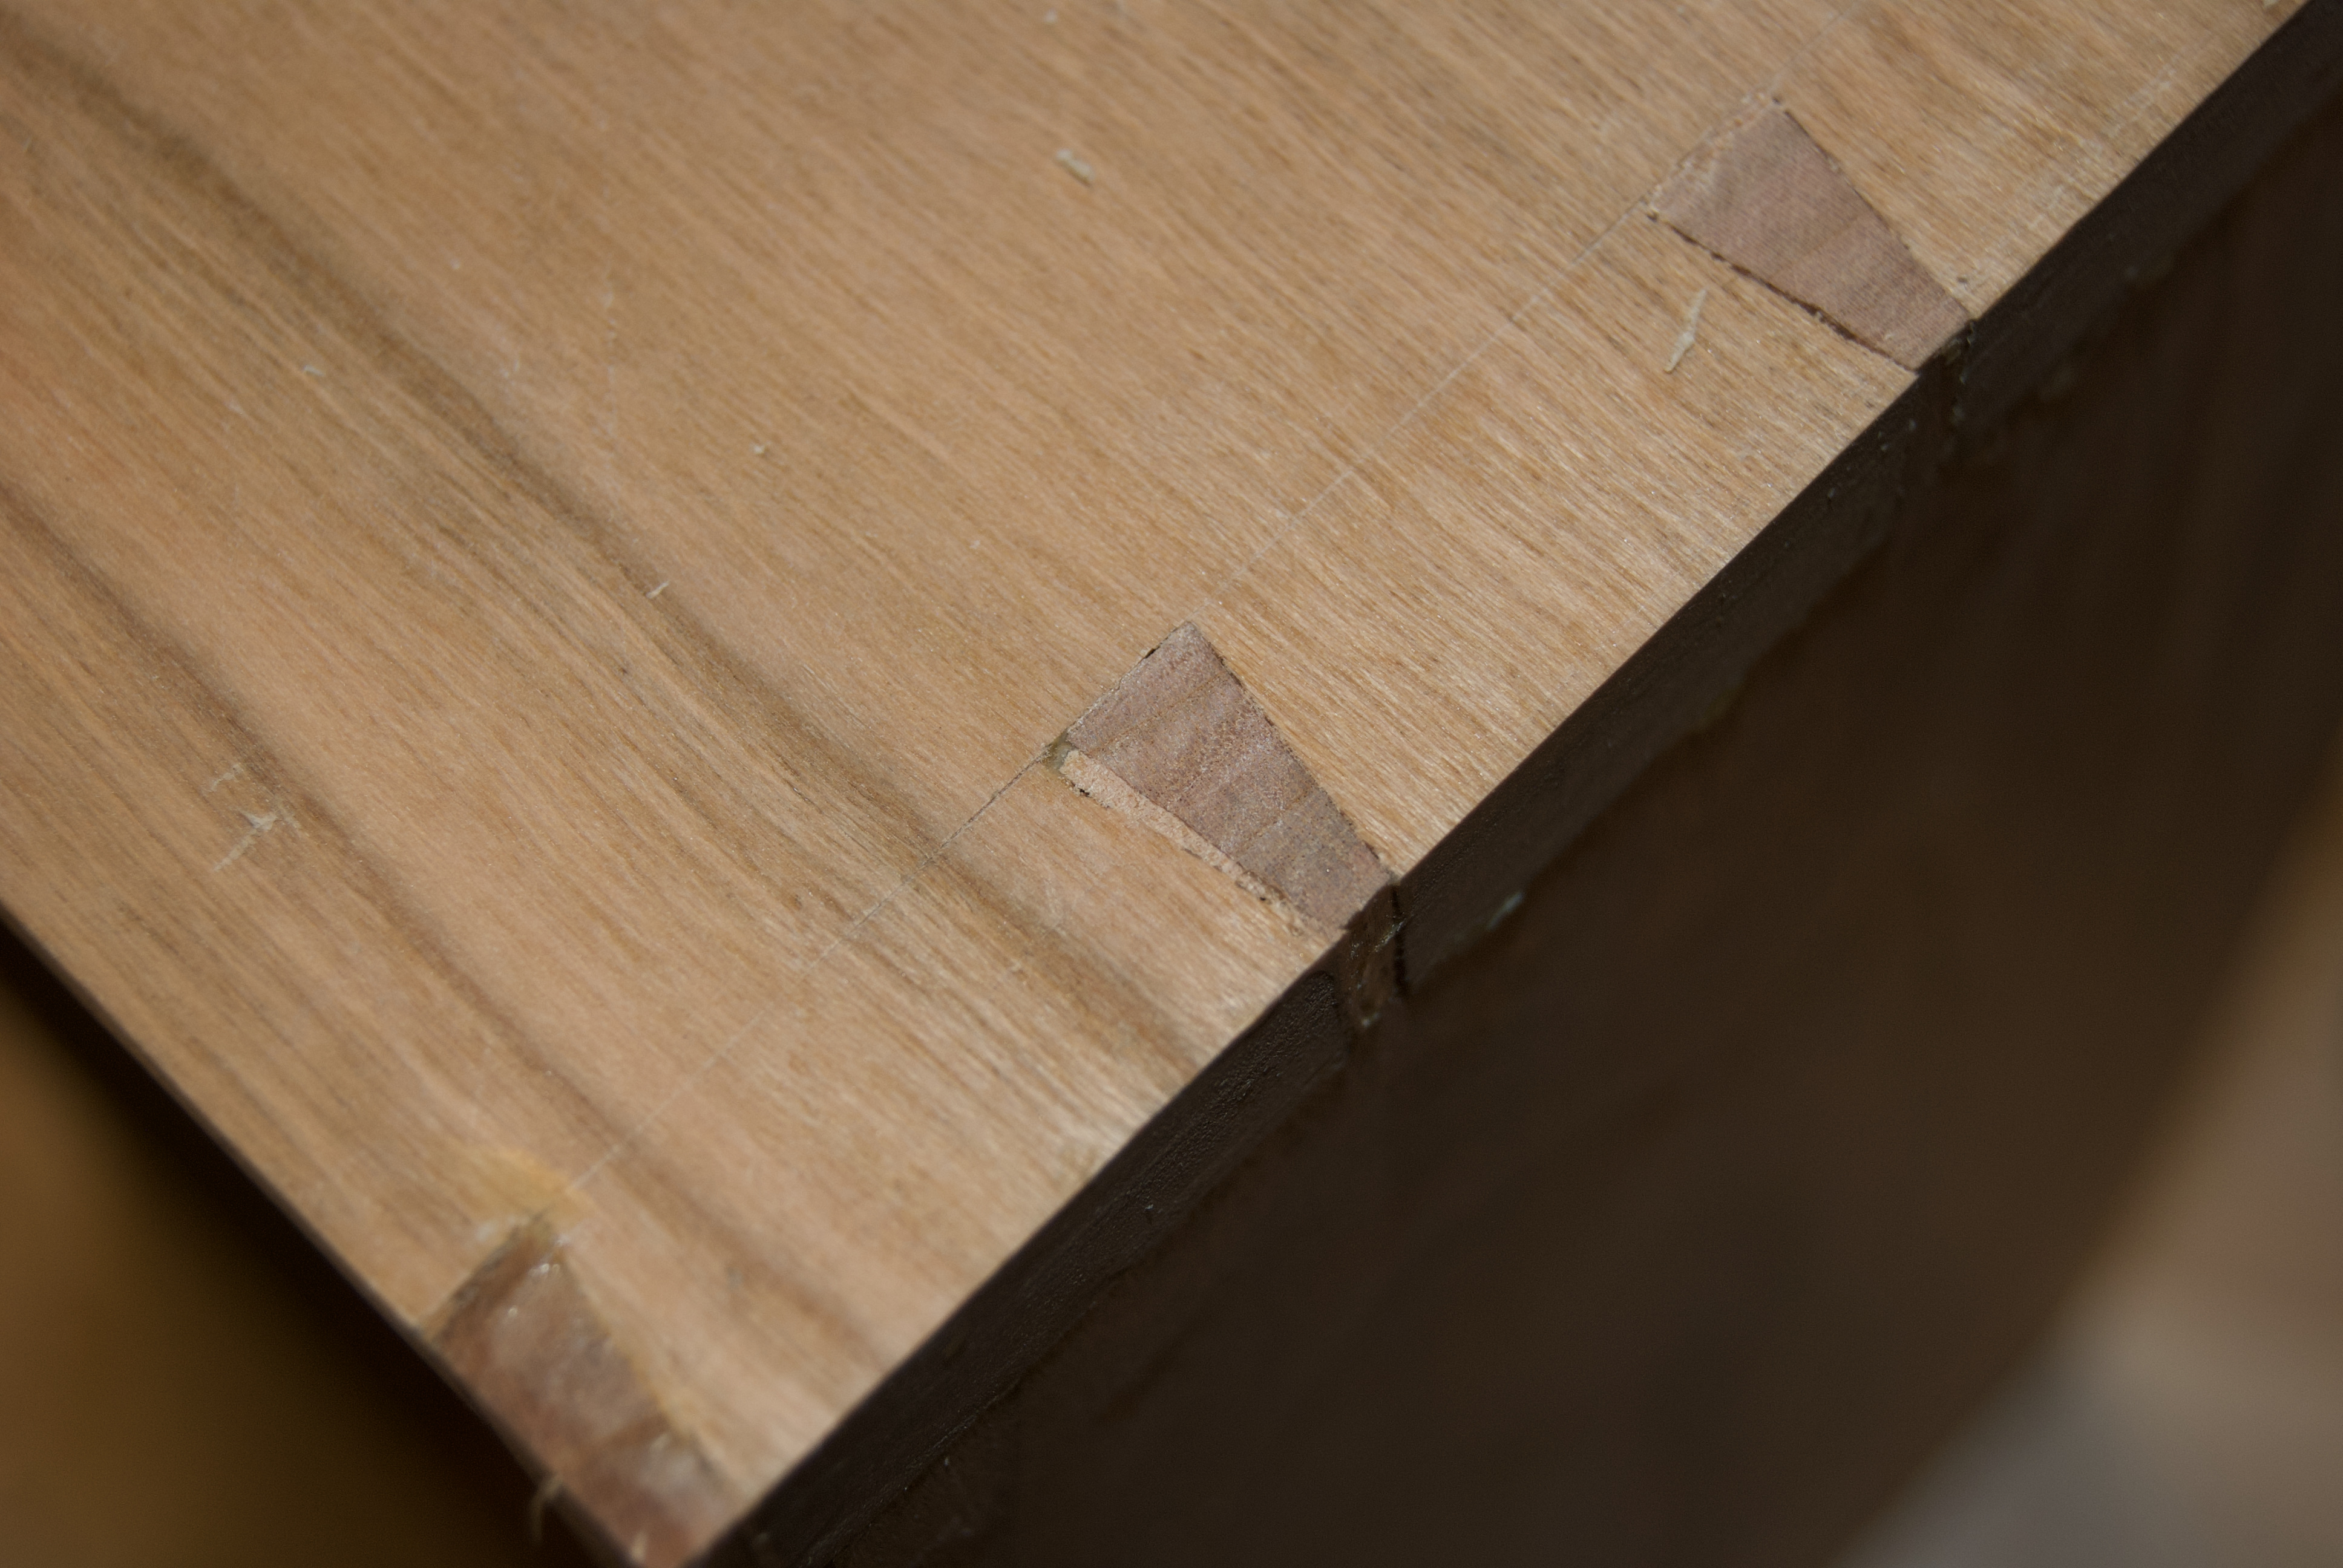
With this box I have three corners that look good with only a couple of minor changes required but the fourth corner needs a little work. Nothing major the joints are strong and fit well just a few cosmetic touches.

Filling in the minor gaps is simple, find wood that is similar in color ensure you match end grain to end grain and long grain to long grain and trim the wood to fit the gap and glue in place. Once the glue is dry trim with a chisel and plane it smooth. In most cases the gap disappears and will never be noticed. If needed you can fill in some fairly large gaps!
Box Making – Glue Up
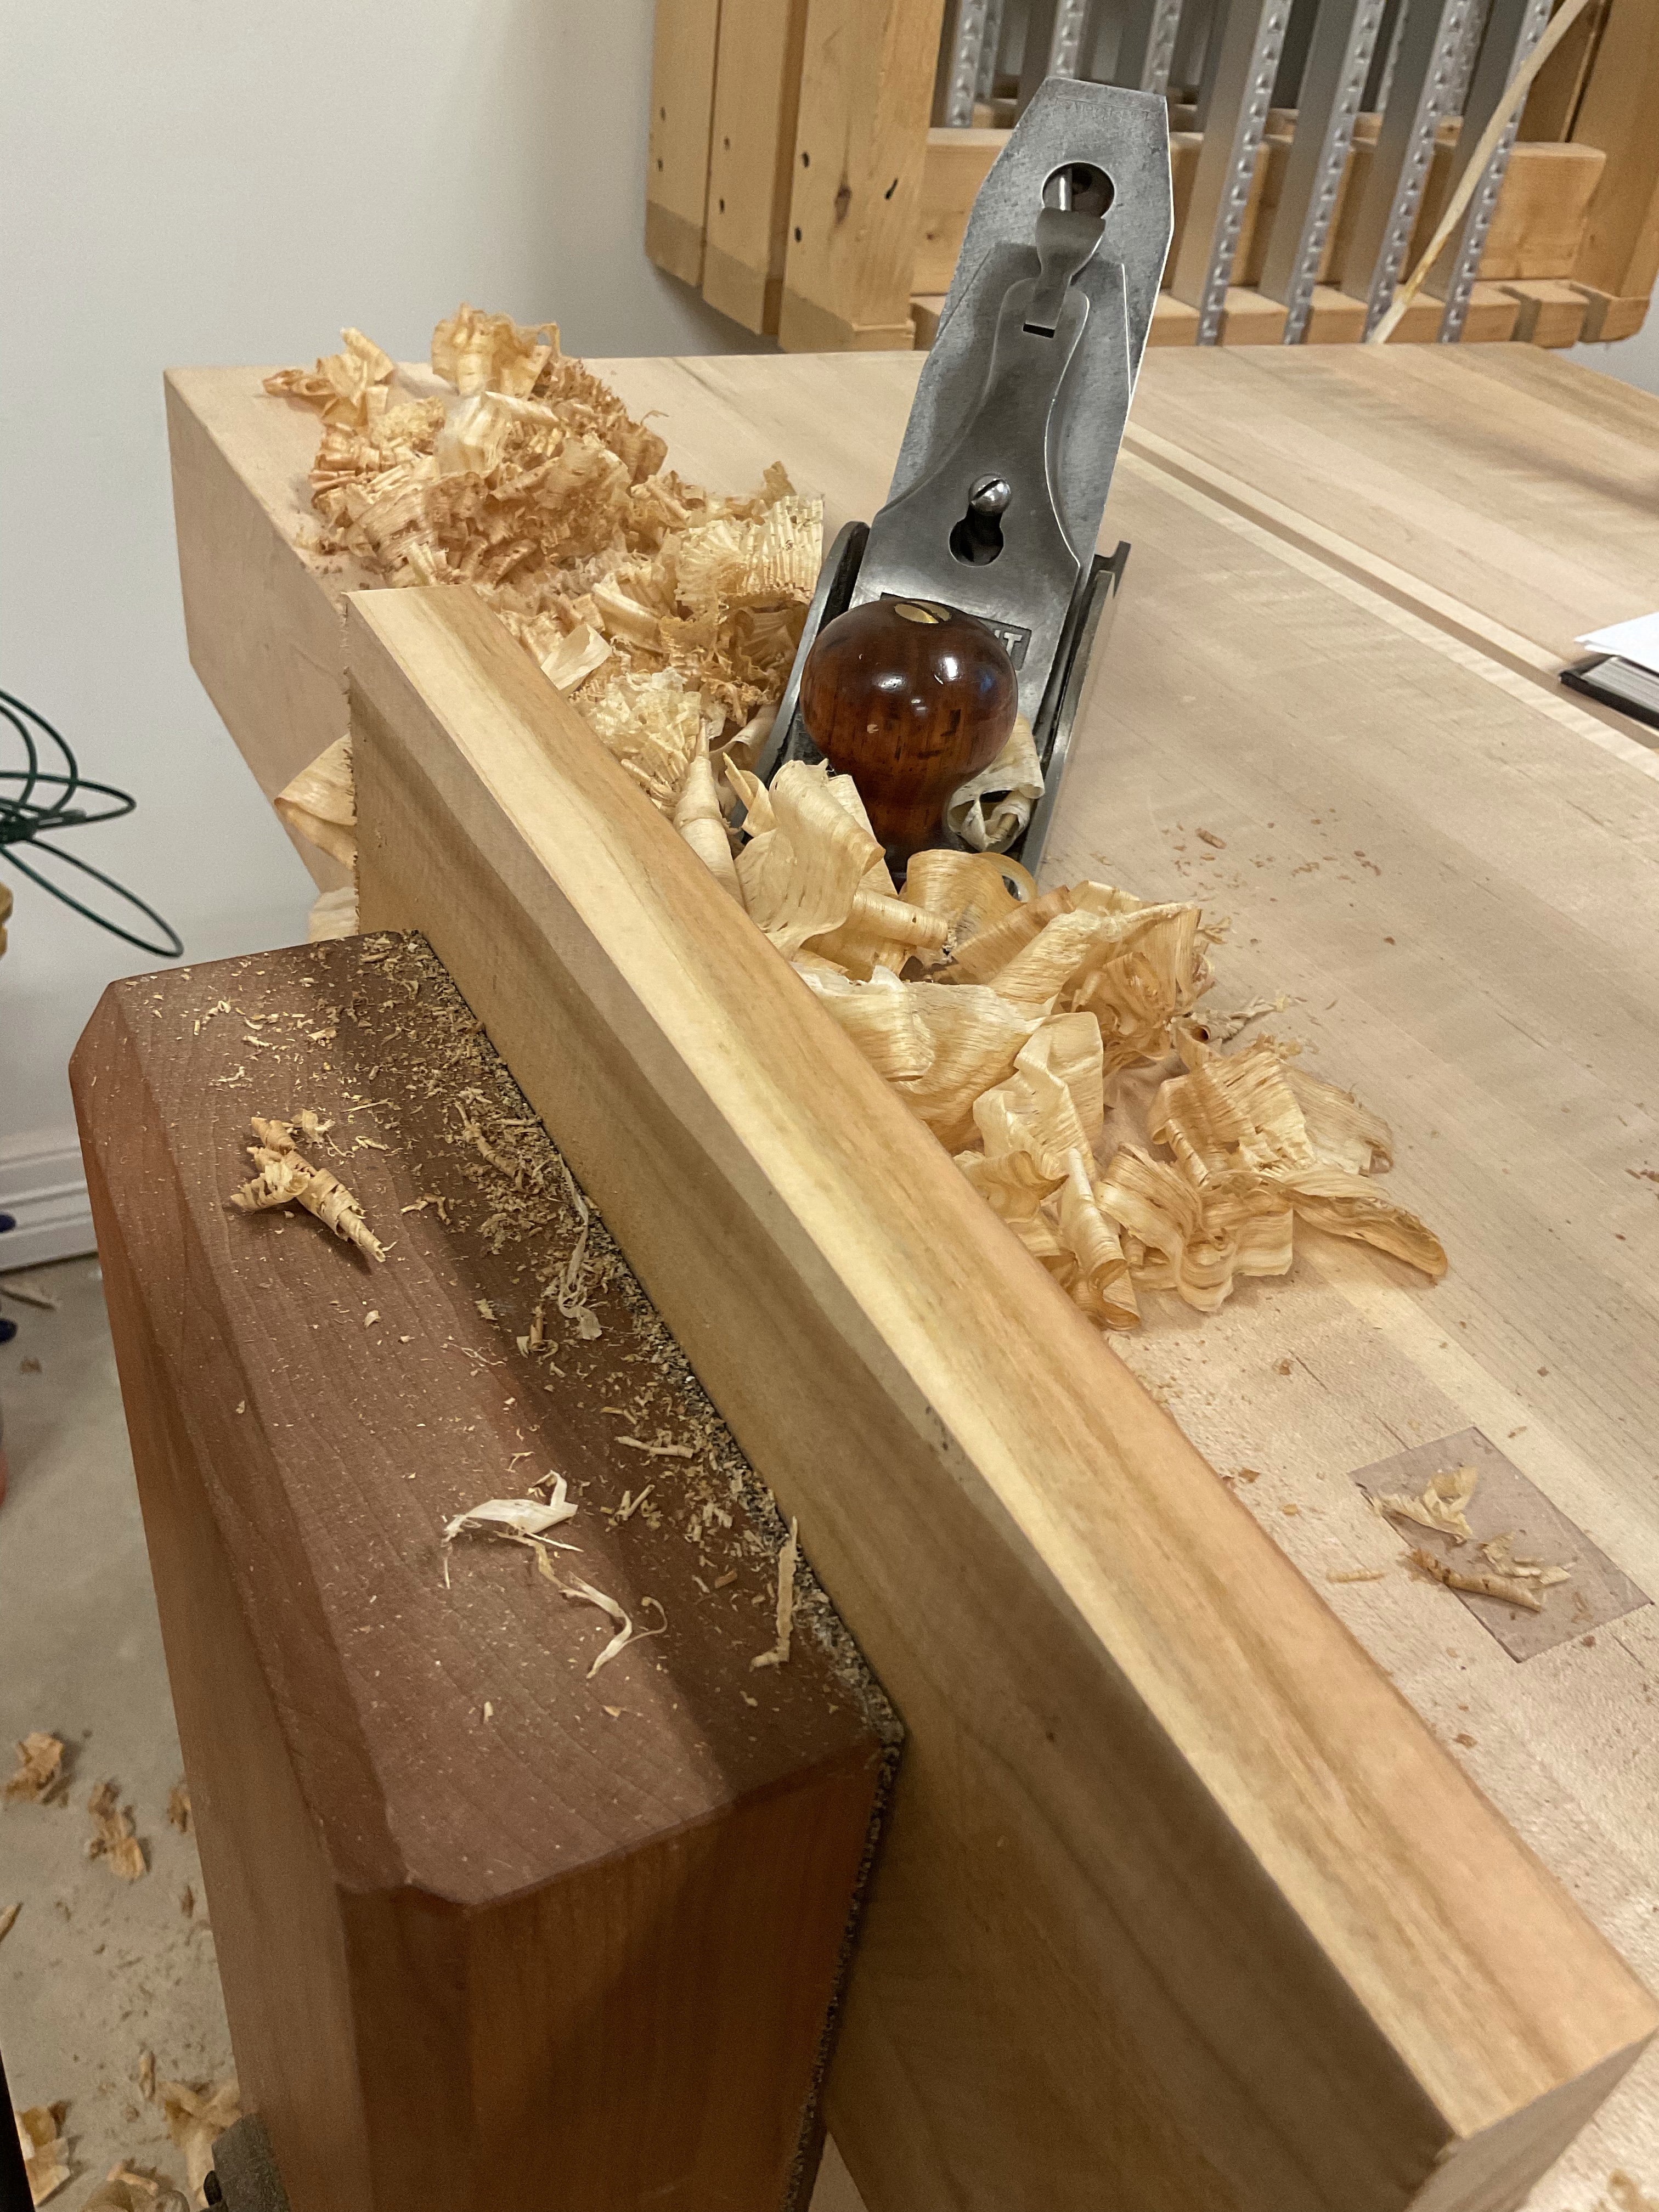
Before glueing up the box I needed to install the grooves for the future sliding door. I thought this could be done quickly on the table saw, but after a minute realized that it would not leave a flat groove since the saw teeth are offset. I grabbed the plow plane and in a few minutes had a 3/8 inch upper groove and 1/4 in lower groove completed. In most of the woodworking I do, it is often quicker to do the work by hand and much more pleasant.
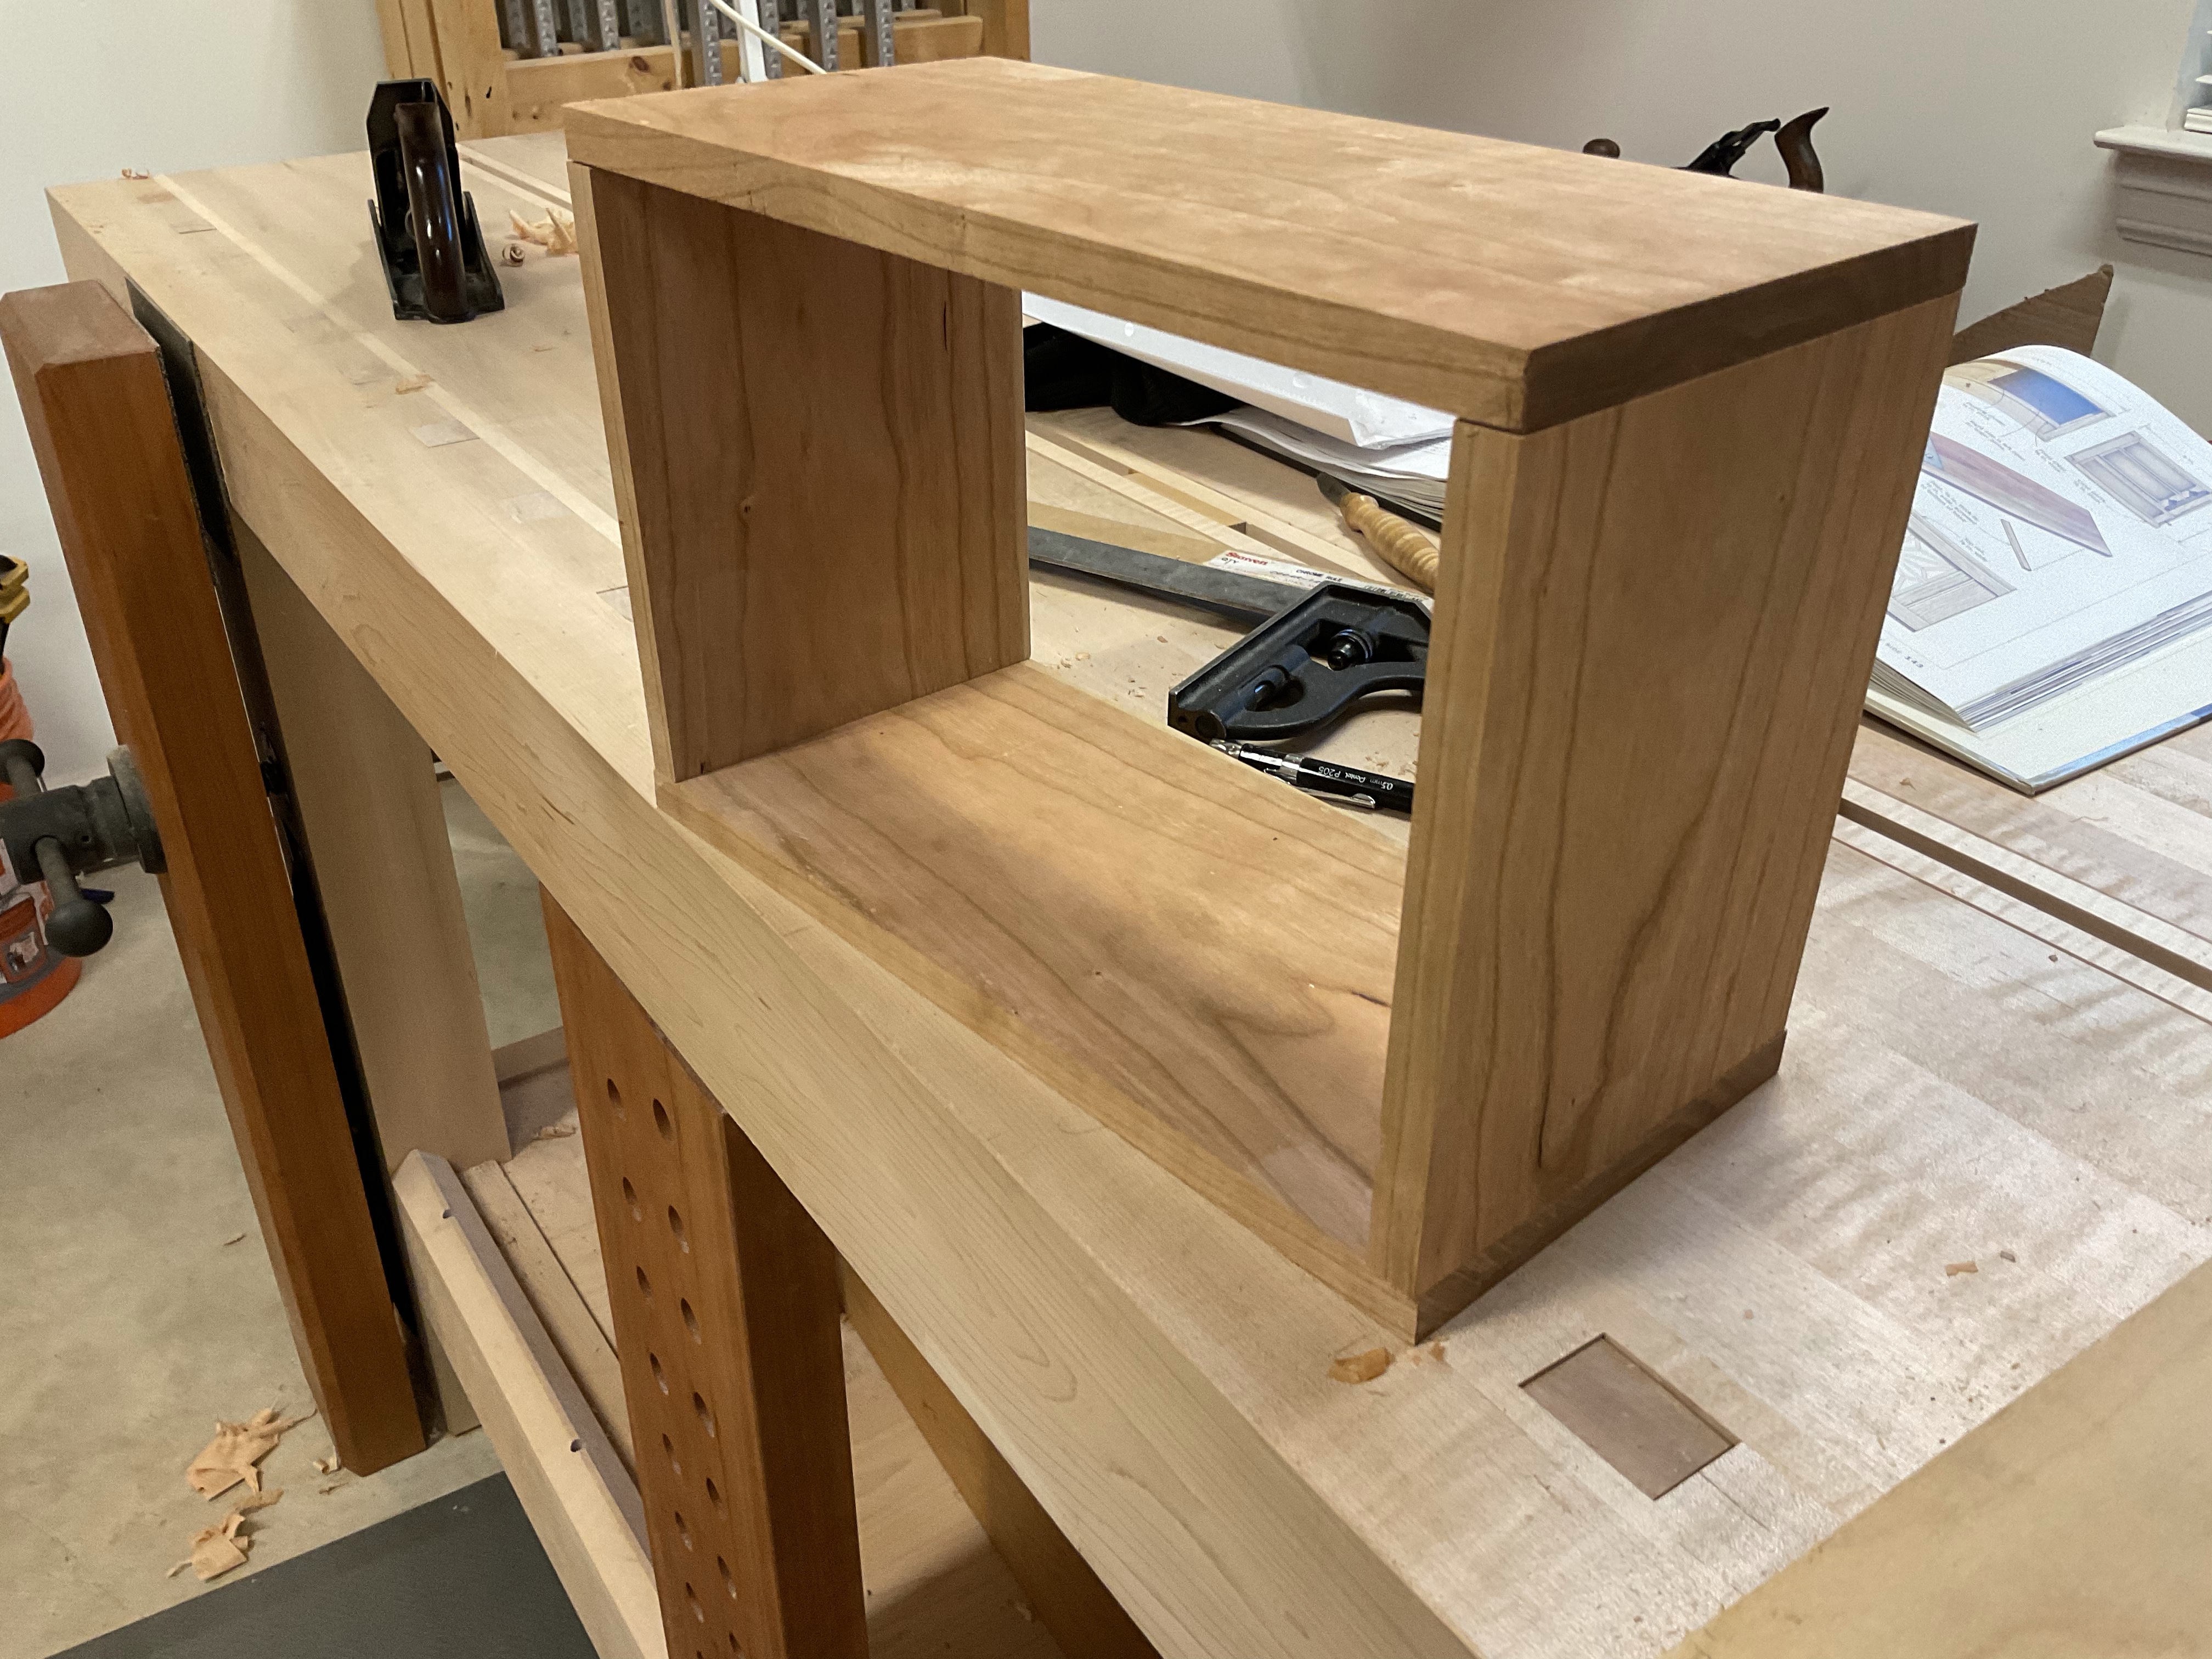
There are more clamps then usual since I continued to have some minor warping from the humidity. I did not glue the back or shelf in place just let them ride free in the grooves.

This is a typical dovetailed box with only the integrated divider to consider so I didn’t plan on extensive practice prior to putting it together. But I did lay out all the clamps and place some brown paper on my bench. I did make some cauls to help glue the ends and then forgot to take a picture of the final glue up.

There are people that make perfectly fitting dovetails every time and I don’t envy their lack of opportunity to adjust the dovetails they make. Typically I will have at least one dovetail that needs some work along with a saw cut that went a little too far and perhaps somewhere the wood chipped. Frequently I can also pick out the dovetail that was cut first. After the glue up we’ll se how I did.
Box Making – Wood Prep
Local hardware stores provide great service and often have greater service then the big box stores. The 4MM bolt that I needed to fix the planer took me to three stores before it was found. I realize that everyone needs to make a profit and that it is costly to keep inventory that has low turnover but three stores to find two screws?
With he planer fixed and adjusted I proceeded to prepare the pieces for the walls of the box. The piece of lumber that I had was 25% pith so I ran it through the bandsaw and planer to get it down to the 1/2” thickness.
Careful with the order of the boards to maintain some congruity with the grain direction I could envision the dovetails and final look. Next I grabbed boards to glue up for the back and carefully laid them out to keep the grain looking similar.

After many years of woodworking its only in the last couple that I have made more effort to watch the grain and it certainly pays of in the finished project. Next dovetails and rabbits.
Box Making halted by a 4mm Screw!
Warm water splashed my face as the river’s rumble passed into the darkness, it is warm, very warm. With a jerk I find myself awake, a thunderstorm rumbling overhead and Scout licking my face looking for comfort.
Admittedly it has been a long time since I jumped headlong into a project. The shop is all but complete and my excuses no longer hold sway. Grabbing a piece of cherry left over from another project I began sizing it up for a couple of boxes I noticed in Mike Pekovich’s book ‘The Why and How of Woodworking’ not sure I’ll make the exact box, but its a simple way to get back into the swing of woodworking.

The cherry board that I have on hand is 5/4 and I need to get it down to approximately 1/2”. It’ll work great because approximately half the board is the pith. I used my Bad Axe Tool Works D8 saw to break the board down and there was a big smile on my face the entire time. The saw was singing and dust dropped quickly onto I the floor. There is something very satisfying about cutting cherry with a hand saw. If you’ve never used a Bad Axe Saw try one, the filing is magnificent. Even if you don’t get the chance visit the web site its full of great information about saws, saw sharpening etc.

Grabbing the Sargent 409 I flattened one side of each board in preparation for running it through the planer. My jointer sits in its box by the door and I can’t recall the last time I sued it. Just seems quicker to use a hand plane and a lot more pleasant! Turning to my planer I check the bed to make sure I eliminate as much snipe as possible and notice that one corner is sagging. A quick peak and the problem becomes clear a small screw 6mm to be exact is missing and there is no doubt that if it’s in my shop I long since swept it up! Stumped for the lack of a tiny screw!

