Archive
Small Tool Chest – Goes to Work
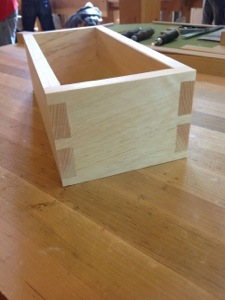
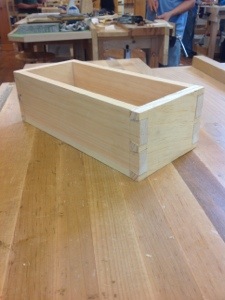
Here it is! A completed Paul Sellers’s design tool chest!


A quick run down of the chest’s features and joinery.

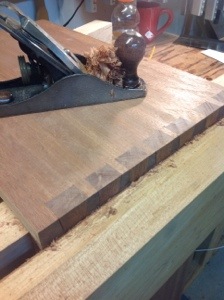
 The carcass of the tool chest is made from 7/8″ Sapele as a single box, then separated with a hand saw to produce the lid. The rail between the two drawers has a mortised dovetail that adds additional strength and a little character that is missed unless you look carefully. This portion of the project provides great opportunity to practice not only joinery skills, but hand planing skills. When the lid and box are separated it takes some time to get the required fit. The ever changing grain of the Sapele added to the challenge.
Hand cut mortise and tenon joints are used to produce the top and bottom frames. The top panels were raised by hand using a #4 stanley plane and the grooves with a veritas plow plane.


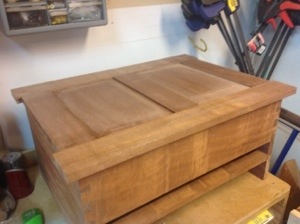
Building the drawers required half blind dovetail joints, a housing dado with wedged through tenons and drawer pulls.

Finally the chest was finished with two coats of shellac and two coats of polyurethane followed with wax. A very satisfying project with many enjoyable techniques. This is a project from Paul Seller’s Masterclass Series. As tools begin to fill the drawers, my mind wanders to future projects; stools, desks, chests and other great challenges.
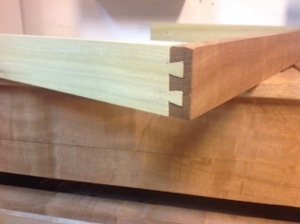
Small Tool Chest – Half Blind Dovetails
 I have a fair amount of confidence in my through dovetails. Generally they come out well and only occasionally do I have to make a repair or repeat a cut. Half Blind dovetails is a different experience. In fact I have no experience at all and when I have made drawers that required a clean face I have made through dovetails and used a face board.
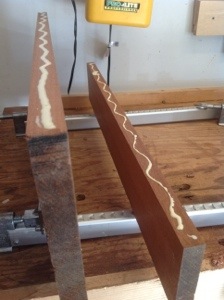
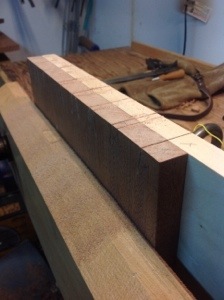
I begin by preparing stock for the two drawers. The front of the drawer is obviously Sapele. The sides and back could be Sapele, but I like the look of contrasting woods so I dig through my offcuts and come up with poplar and Oak. The key to any dovetail is to begin with well prepared stock that has square edges.I carefully plane the sides then take a few minutes to sharpen my blade and smooth the end grain. Two years ago I would have hesitated before planing the ends and left them to the saw cut from a table saw. Now I just sharpen the blade and plane three quarters of the way across from one side, Reverse the board in the vice and finish up the work . There is something particularly satisfying when smoothing end grain. The blade makes a crisp sound and if all is right the grain comes away like flowers of a petal.

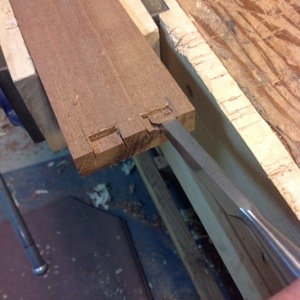
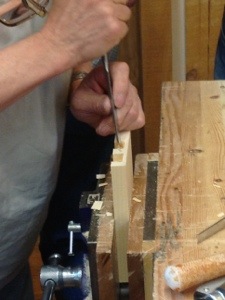
The next task is to lay out the dovetails and sides. Experience tells me that the clearer you mark your work the less chance for a mistaken cut. I always take the time to mark each line and then mark the material to be removed with an X. It guides the cuts, ensures I place the saw on the correct side of the line and reveals what the work should look like when completed. In the picture you can see that I am using a backer board for the cut. This board will be used to transfer the cut lines from one side of the drawer to another ensuring a perfect match.
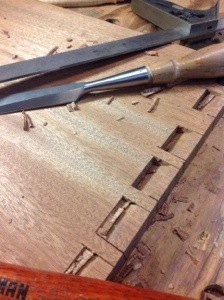
I saw out the tails for both sides of the first drawer and then pause realizing that I need to resharpen my saw. I’ve been sharpening my own saw’s for the past year and have found it a fairly easy task. I tend to wait too long before resharpening saws however, making the task more difficult than it should be. After five minutes I finish off the tails for the second drawer and begin layout of the pins. This is where I am moving into new territory with the half blind pins.
I am following Paul Seller’s method that he demonstrated when I was in his class. I’m certainly glad that I took detailed notes and follow them for this task. There seem to be many ways to cut all manner of dovetails and it is fun to look around the internet and listen to people’s passionate explanations of
 how their method is best. This is the only way I know how to cut half blind dovetails so I have no experience for comparison. It takes me a couple hours to chop out and fit all of the pins and when I am done I am fairly satisfied.
My only regret is not using the red oak for all of the sides. It is much prettier and I am more satisfied with the crisp lines that I leave after chopping away the wood.
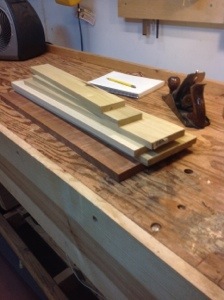
Small Tool Chest
Uncut boards stacked on a bench, notes jotted on a page of paper, and tools freshly sharpened ready for work, bring a sense of anticipation into the shop. Taking a few moments I run my hand down the rough boards and think about the trip they have taken and the sights they have seen. One of the gifts of working wood by hand is a sense of respect for the lumber and an intimate knowledge of the way it has grown and the life it has seen. Not to say that working wood with machines doesn’t bring this respect for others, just that it was missing when I used them. I rarely took the time to feel the grain, study the best way to plane a board and listen to the planes and chisels for messages on how to proceed.
Today I’m starting on a new project that I am very excited about, it’s a smaller tool chest designed by Paul Sellers and is part of his masterclasses series. There are many unique features and as I build I’ll share what I can. I went to a new lumber yard and spent some time looking a several options for the tool chest. Many of you may disagree with the choice, but I chose to build in Sapele. Yes expensive; however I hope to be looking at this chest for a very long time.
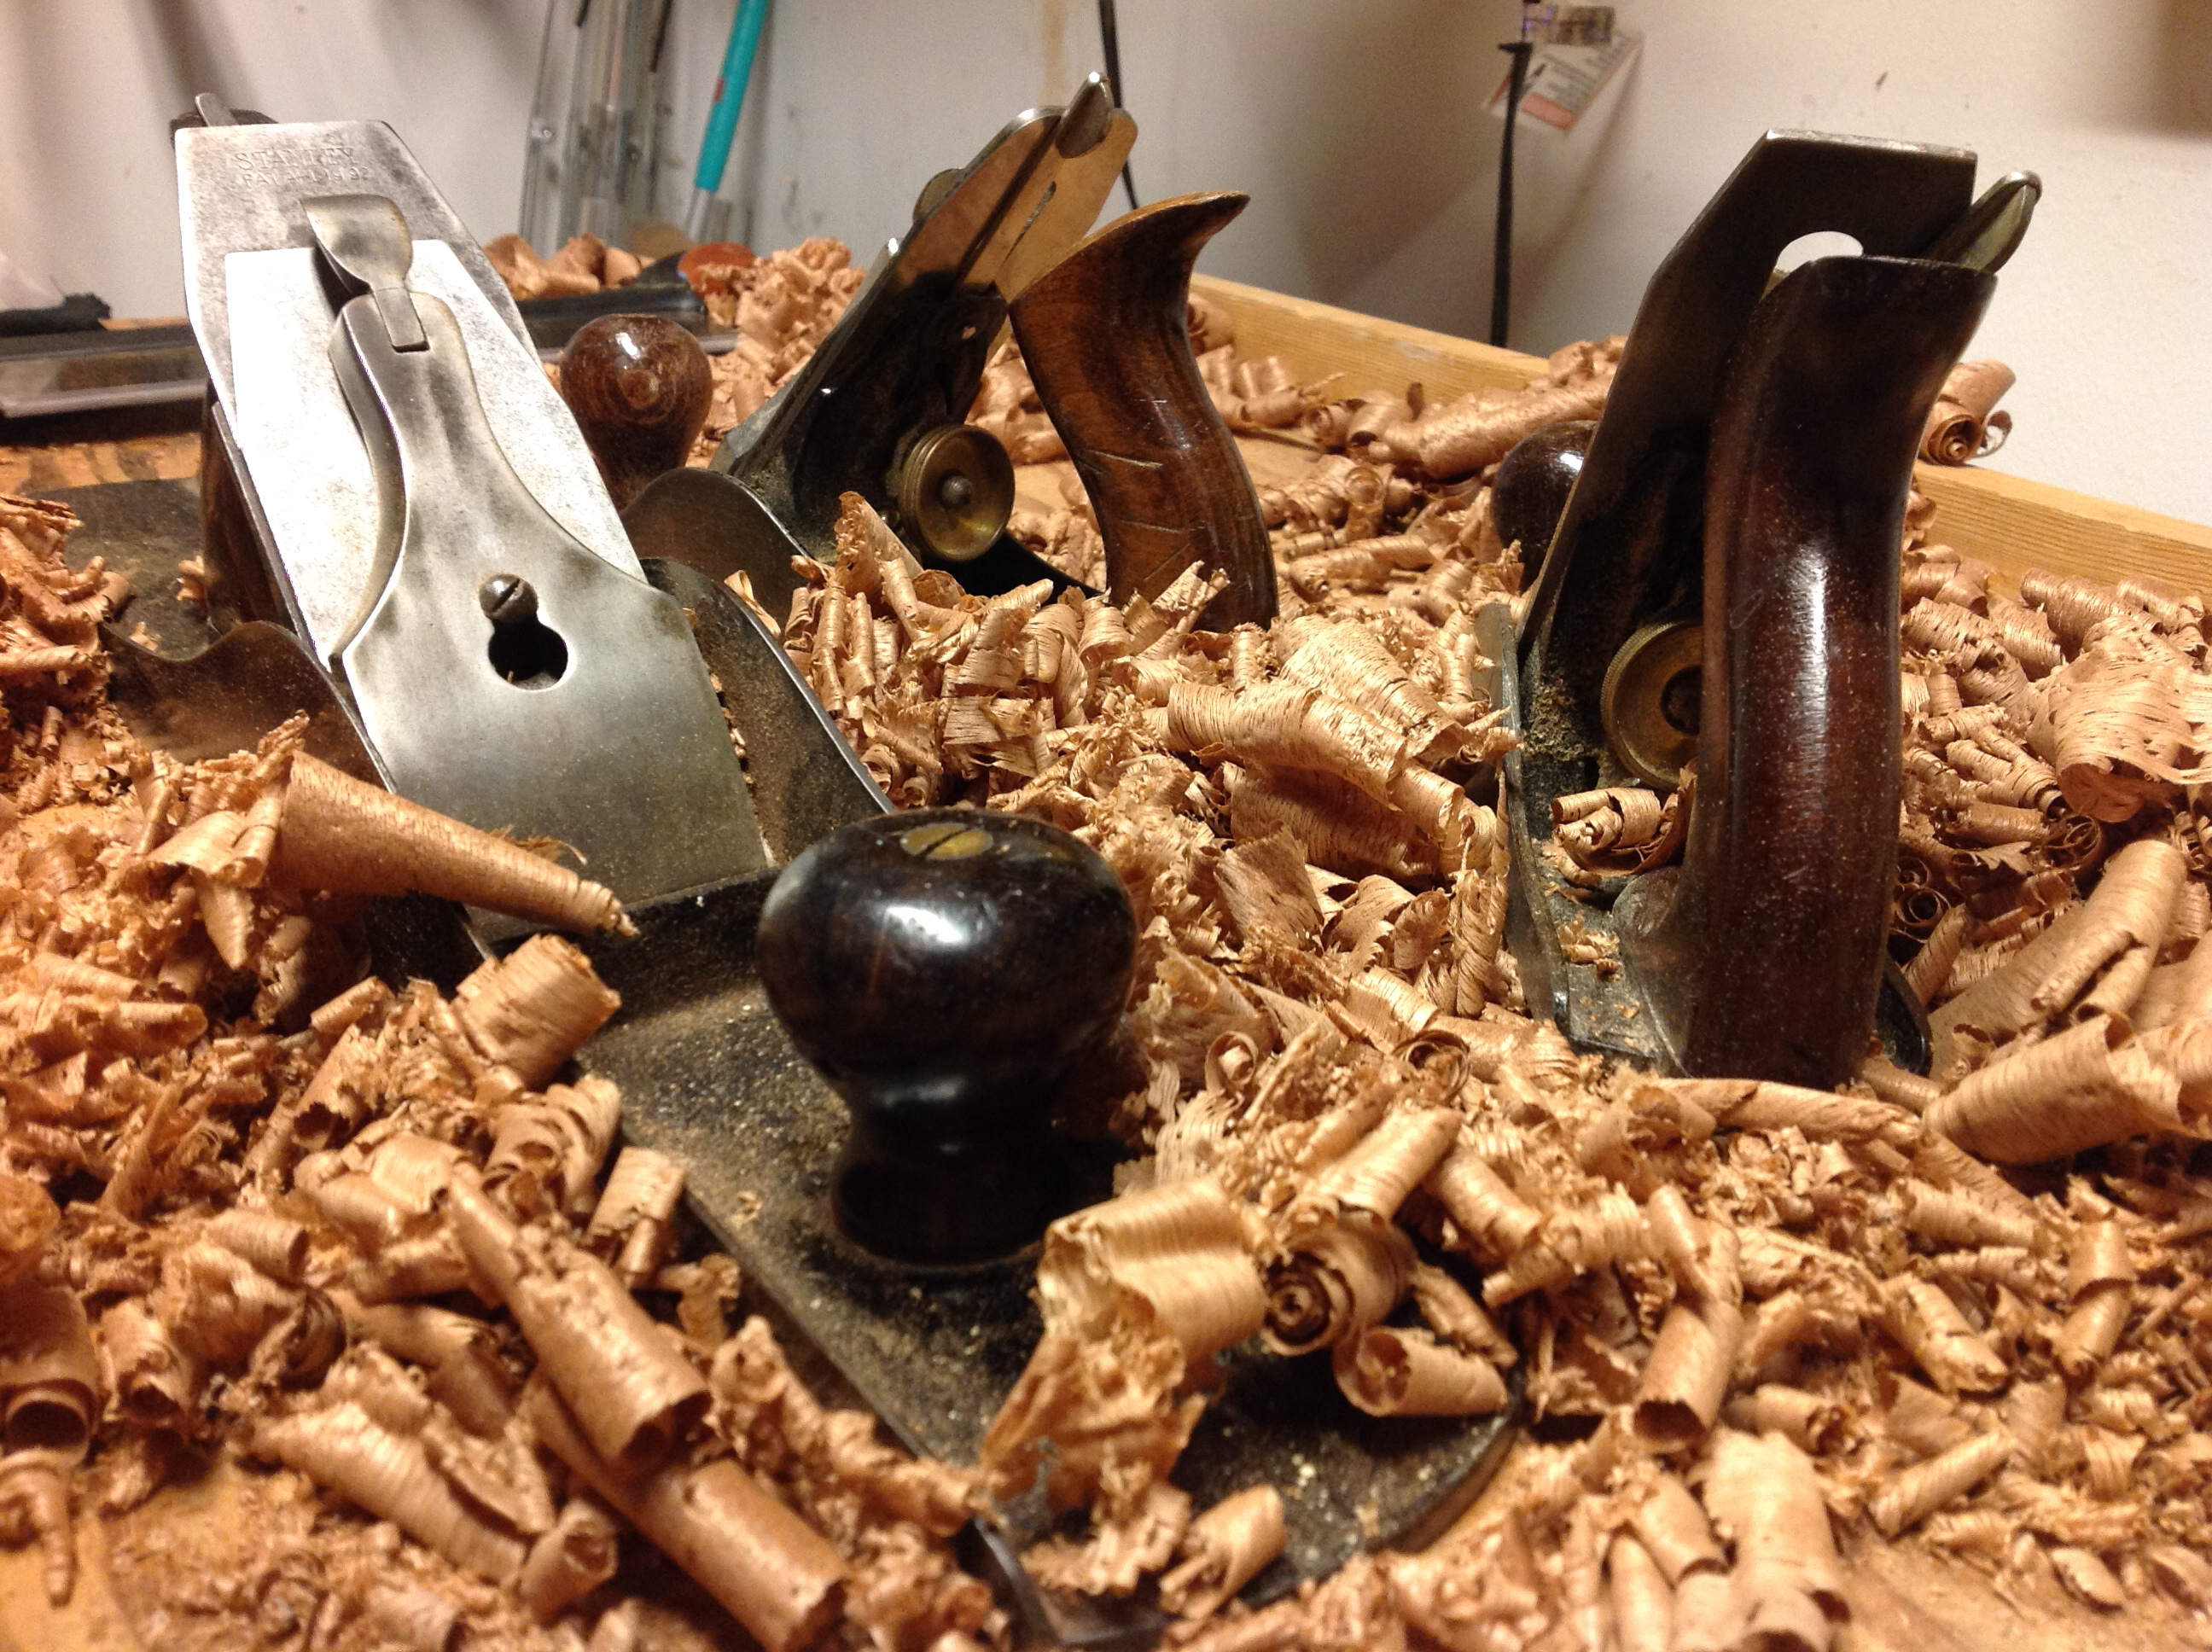
I cut the boards to rough length, planed one side by hand and the other by machine and set out to glue up the panels for the sides. For the last couple of projects I have been planing one side by hand to remove any twist or cup. I do have a jointer, but I find it easier to flatten one side by hand. It’s also a lot more pleasant than listening to the roar of the jointer. Flattening one side of the board could easily be done with one plane, but if you have a jointer and smoother why not use them. In this case I used a Stanley #7 and Stanley #4 and because I like the little guy, the #3 for the edges. No, I did not stage the picture. This is just where they ended up when I was done.
I enjoy working different woods and learning how they react to the tools. Sapele planes beautifully and although the grain is very complex I had little tear out. I do anticipate some later on. The smell of the lumber has caused me to founder for a memory. It is very distinct and hopefully sooner or later I will find the lost memory.
I glued up three panels for the two sides and the back of the chest. They are 11 3/4 inches high and in a short time I was able to plane the edges square and glue the boards together. I am really enjoying my new clamps. in particular I like the handle used for tightening them. I have never like the design with the through pin that slides back and forth on my previous clamps.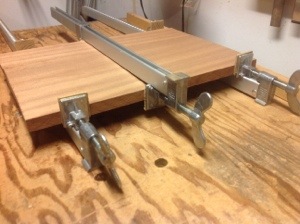
Small Toolchest Dovetails
The carcass of the small tool chest is held together with dovetail joints. Nothing very unique but a chance for me to remember some of the subtleties of ensuring tight joints. Square boards, planed end grain, careful marking and sawing. When I prepared to cut my first dovetail (tails first in my case), I placed a board behind to use as a guide for the opposite end of the board and the face board. This allows me to index my saw to the already cut tails on the board.


I enjoy watching the many methods that people use to cut dovetails, there is the obvious tail and pin debate, the coping saw vs chisel debate, marking with a knife vs a pencil and so forth. I’ve developed a style that I use on most occasions with subtle differences to add variety. Today I think that I will use a chisel rather than a coping saw for removing the waste material.
Communication with my coping saw is a little strained at the moment and I enjoy the rhythm of using a hammer and chisel. After marking the tails with a pencil, I used my marking knife to mark the bottom of the waste and a knife edge. I then chiseled into the board approximately midway and repeated until all of the tails were complete. Marking the pins, I used the same process, saw to the line and remove the waste, fitting each board. Planing the finished product smooth I am very happy with the final product.

Paul Sellers – day 2
Day two arrived with a chill in the air, but the sun came out and the many flowers and leaves looked brilliant on the hill sides. I arrived at the class a little area and wandered up the road to peak at the sheep and new lambs. It’s a joy to watch them leaping and running in the grass.
People were more talkative today as we gained knowledge of each other, we watched each other work, sought help and freely spoke. Tensions began to lift as everyone focused on their tasks. There was laughter and story telling as we worked.
 Paul began the day by demonstrating glue up of the box. One thing to note is his extensive use of his vise for everything. I’ll talk more later but the vise was his third hand for holding parts while spreading glue, and clamping the piece together. Paul has been building boxes along with us so that he is demonstrating as we go. Next he showed how to chisel the nubs (pins) that protruded and plane all of the edges and faces leaving a very smooth finish.
The pictures below are of the edge planing which is done without removing the heal of the plane from one side to the next and the planing of the sides which was done in the vise with a board raising the center. My fellow classmates range in age and experience and it is fun watching people complete their first dovetails and improve on their previous experiences. It was also fascinating watching Paul and his very talented assistant Logan demonstrate how to repair mistakes, many which became very difficult to spot. I bet on most of the museum pieces in the world there are many patches that go unnoticed.


The dovetailed “shells” were set aside while the glue dried to prepare the top and bottom of the box. I missed photographing the the top and bottom of the boxes, but all of the edge rounding was done with a Stanley #4 and a tiny piece of sand paper. You can look at my weather station blog if you want a few more pictures. I’m finding less and less use for my router.
Paul misses few opportunities to pass on knowledge and when a couple of us finished ahead of the group he called us up to the bench and demonstrated how to make blind dovetails. Hs explanation was clear and concise and the results excellent. He works and teaches with such passion that you sit in awe until he cracks a friendly joke and banters back and forth with the students. This is how woodworking should be taught from someone that has worked the trade, has the passion to teach and the knowledge to throw in all of the extra tidbits that the books and videos miss.
I’m noticing that Paul is very humble in his work, this may be contrary to some. His confidence and experience could be mistaken for slight arrogance, but sitting and talking with him reveals his true nature. There is so much more to tell and I have a notebook full of lessons and thoughts, but I think to fully appreciate what is happening in this class you must be here. One thing I discovered not through Paul but through other participants is the books and videos that Paul has written. The book which I saw on a bench is amazingly detailed and well written, if you can’t make the class this and perhaps the videos would have to suffice. By the way these were not mentioned or harped on by Paul making a sales pitch in any way, rather by others in the class. I’m looking forward to tomorrow and all that it will bring.


Paul Sellers – day 1
Awoke this morning the the sound of gentle rain amongst the leaves. It was very calming and a great start to the first day of Paul Sellers 9 Day Foundations class. Classes are held at the Maplewood Center for Common Craft located between Schuylerville and Greenwich, NY which is a beautiful part of the country.
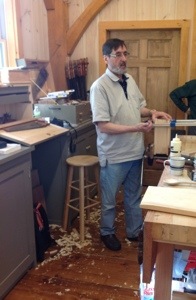
The first step is to prove that I am actually at the school, so here is a photo of Paul, who’s bench is right behind me.

We spent some time breaking the ice, talking philosophy and seeking common ground, after all spending 9 days with a group of 18 people that you have never met will take effort. Then Paul got to work. Introducing sharpening, tools and techniques. If you have ever watched his videos, read his blog, participated in his masterclasses or seen him on Facebook he is absolutely genuine. He practices what he teaches and his good humor, experience and total passion for woodworking was present throughout the day.
I’ll take more pictures of the workshop over the week but it is a beautiful timber framed building with great light and a nice open feeling.
The class grabs stools and huddles around Paul’s work bench listening, taking notes and asking questions. He explains, demonstrates and then sends us back to our own benches to practice the lesson.
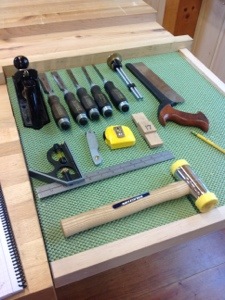
The basic tools that we have for the first day were set out neatly at each bench. As you can see there is a total of fourteen including a pencil. These are the same or similar to the tools Paul uses in his blog and the online Woodworking masterclass series. I noted some more tools in a box stored under the bench, which I am sure will be used later in the class.
Looking at the photograph you can see a Stanley #4 Plane, set of Narex chisels, Veritas dovetail saw, Veritas marking gage, combination square, Thorex hammer, Stanley 10-049 knife, tape measure, shop made marking gage and if you must know a Dixon Ticonderoga pencil. At this point I am sure that is the secret to all of Paul’s skill so I snuck out and ordered 10 cases. (Just kidding!)
The tools are incredibly sharp and ready for use. Tomorrow I will take a picture of the bench which is the same design as Paul describes in his blog with a quick adjustment vice.


Lesson one began with making a dovetail, yes the joint that makes woodworkers tremble in fear. Paul’s simple instruction and process was concise and when put into practice produced some very nice results. This was not my first time cutting this joint, but it was the first time I began to really understand how to effectively cut it. I struggled with the saw initially, but made my way through the joint. Paul next took time working with the class on sawing technique, in particular only using the weight of the saw to make the cut. After watching, and listening (a critical part of understanding the performance of the tool) we made many test cuts. Brilliant, this was one of those moments that I came to the class to grasp. Once I truly unloaded the saw, it was poetry in motion. The second item that Paul passed on concerned correcting a mis-aligned saw cut. If the saw begins to wander from the line it does not help to apply pressure to the saw plate to force it back to the line, this in fact makes the mis-alignment worse because the curve of the plate against the side of the cut forces the teeth in the opposite direction. Instead lift the saw up to the point where the problem began and use the teeth to cut down your planned line. It seemed obvious when he explained it to the class, but it was another piece of information to tuck away.
After spending time listening to Paul’s teachings around his bench and watching his demonstration we began the first of three projects (many of these are shown in Paul’s book) a dovetailed box. The class worked along and with the wonderful sounds of saws and chisels we spent a relaxing and informative afternoon. In fact I entered “the zone” my eyes were focused, my ears tuned into the sound of the saw and chisel and and my focus was purely on working with wood.
How long I worked like that I am unsure, but when I looked up complete with the lesson I was a little ahead of others. This gave me the opportunity to do a little extra project and make my own dovetail guide with a little help from Paul. It’s simple and very effective and since I have been using one belonging to the school all day. I now have my own to take home. I’m looking forward to the rest of the week.

Skirt Boards
Adding the skirt boards to the tool chest should be a fun challenge. As I looked at the chest and began to formulate a plan It became clear that I needed to do a little more smoothing. Most of the problems I had with the dovetails on the carcass were caused by inconsistent planing of the boards. Once you begin assembly you have to be more creative when it comes to positioning work pieces.Placing the chest over the end of my bench I was able to clamp it down firmly and plane the sides until I was satisfied. I then had to position the chest so that I could plane the ends. since It would not fit over the end of the bench as it had on its side, I placed it adjacent to the bench and clamped it in place using the tail vice. I carefully planed all the corners square using a block plane and a #4 plane. I then took my number 7 and planed the sides between the corners using a long straight edge to ensure they were not bowed. It took about twenty minutes to complete all four sides.


This is the first time that I have really wished for a much heavier workbench. As I planed the sides the bench moved quite a bit and wobbled slightly. I’ll make some more notes for
 my bench build in the future. I next milled all of the pieces for the skirts leaving them long so that I could fit each one individually. All of this added wood is going to make a very heavy chest, it will have to be weighed later.
I took one of the end skirt boards marked a 90 degree line and cut it careful and then squared up the matching side skirt. Marking and cutting the dovetails for this corner I took the lessons that I had learned from the chest carcass and took extra time to clean between the tails and the pins and had some very nice dovetails. Carefully working my way around the chest I reached the final board. Getting this one to fit correctly took some very careful measurements. My assistant came out to help me as I clamped the dovetailed boards together and then carefully marked the lengths I needed with a marking knife. An hour later and I had all the dovetails cut and the bottom skirt was completed with the exception of the chamfer.
Moving ahead I gathered my stock for the upper skirt and dust seal. These boards required more prep work since one had a nasty twist, but after about 15 minutes I had it true enough to use. The upper skirt only required one dovetail which made it a very quick process.
