Attaching the Bottom, Small Tool Chest
Fall is definitely yielding to the incoming winter today. I wandered into the garage this morning and it was a balmy 38 degrees (3 C) and after turning on the heater, wandered off to walk the dog. Hand work is a little tough when it is this cold and giving the heater an hour to take the chill out of the air will make a big difference. Outside the temperature is hovering in the low teens and the ground crunches under my feet from the heavy frost. The cool breeze on my cheek, beautiful blue sky and quiet of the morning make up for the chill.
Back inside I realize that I need to make some progress today and get the top and bottom lids finished and glued up. Hopefully this will put me in position to get the drawers done after Thanksgiving.
Spending quite a bit of time on the carcass I check the fit and finish, look for alignment issues and any gaps. Once the bottom is attached it will become much more difficult to scape away any tear out and any gaps will become a permanent reminder of a rushed morning.
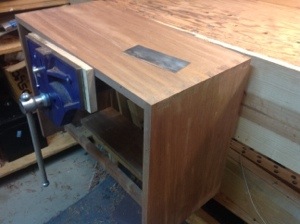
Placing the entire carcass in my vice makes the entire process much easier. When I bought the vise earlier this year I debated on the size I needed . It seemed a little extravagant to purchase one with a 15″ opening at the time but I have not regretted it. As I work the piece with planes and scrapers it is rock solid, at a great height and easy to reposition. My only regret is that I wish I had mounted it a 1/2 inch further out from the bench to allow more room to get my fingers behind a board.

I test fit the bottom and make some more adjustments to remove any gaps and then prepare for the glue up. The bottom will be attached with glue and screws to ensure that it can support the weight of the drawer above. The screws will be counter sunk and I will plug them at some point. Once glued, I placed the box inside to allow the glues to cure at a reasonable temperature.

looks like its coming together nicely. I cant wait to see the final result. I have been spoon carving in the cold and have finally moved the whole process indoors. A bit tricky in an apartment.