A Defining Moment – Lid Attached
Attaching the lid is similar to the bottom with the exception that I will not use screws. I don’t want the plugs on the top of the chest and it is not supporting much weight. The challenging part about the lid attachment is the preparation I need to make for the following step, separation of the lid from the carcass.
There is a very slight bend in the front board of the chest and I realize that I can take the bow out when I attach the lid but when I saw it apart the bow will return to the lower portion. To prevent this I measure the upper shelf and cut it to size. After the lid is separated I will be able to squeeze the shelf into place on the lower part and know that it is not bowed. The shelf is made from 1/4″ mahogany plywood. I use a marking knife to ensure there are no splinters.


After sharpening my plane, time is spent smoothing the carcass and ensuring the lid fits leaving no gaps. I enjoy the sound of the plane as it slices through the grain and it only takes a few minutes to smooth everything. A sharp blade is a must when doing this work.
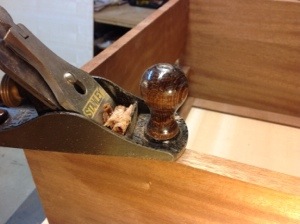
When the Dovetails were laid out we left a thicker tail where the lid was to be separated. Using my marking gage I locate the larger tail and mark off the location of the cut. It is 1/8″ wide and I cautiously mark around the entire carcass. I have worried about forgetting this step since to glue the lid on prior to marking would be a major problem. Marking a 1/4 inch around the lid I use my plane to form a round over, then I’m ready for glue up.
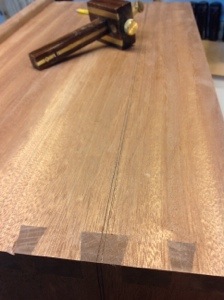

 There is a defining moment in each project when you can see the finished project. Now that I have the carcass, bottom and lid in place I can step back and look at the dimensions and evaluate the chest. I like the way it looks and the simplicity makes the joints stand out. The next stage is to separate the lid and build the drawers. First I carry the chest into the house so that the glue can bond where it is warm!

Very nice! Can’t wait to see it finished.
Thanks, I’ve been enjoying your wrk for some time now.