Archive
Hanging Tool Cabinet – Shelf divider
I’ve never counted the number of times I assemble and disassemble a project as I build. It’s part of the process and and essential for measuring and fitting each piece.The cherry in this project is fighting me. The change in humidity and temperature is causing the parts to swell and I have had to adjust the dovetails. Unfortunately there are a couple of cracks which hopefully will disappear with some adjustment.


With the through tenons done and the case reassembled I can measure carefully for the center divider. This is another through tenon so I took care in all of the measurements. The photographs below show the shape of the divider and the final product.


Slowly the cabinet is beginning to take shape.
Veritas Shooting Plane
With the shooting board complete it’s time to give the shooting plane a whirl. Over the last couple of years I have been watching eBay, antique stores, and shows for the Stanley 51 shooting plane. Last fall I finally saw one in person while at the Midwest Tool Collectors meet. It, along with a fine looking #52 shooting board sat quietly in a display with a monstrous price tag; after a few moments I hesitantly asked if I could take a look and with a nod permission was granted. In my hands its weight was evident, and it looked well maintained and ready to work. However unable to overcome the price I moved on. This may not be the last time I see a #51, but It will be the last time I’m specifically looking to purchase one.
Seeking other avenues I turned to Lie Nielsen and Veritas. I like both companies and have tools from each. This past year at the hand tool show in Iowa I had looked at the Lie Nielsen #51 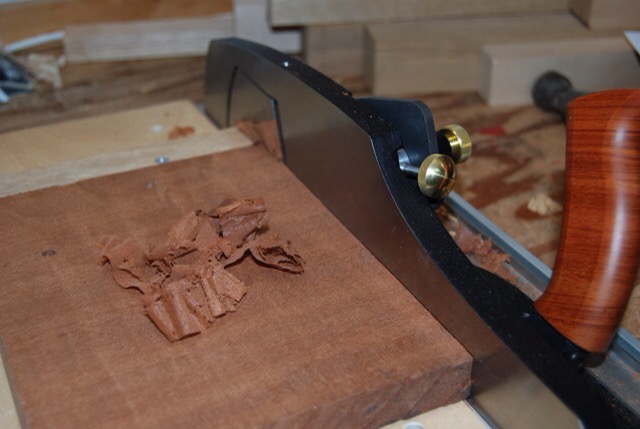 and the Veritas Shooting Plane. They functioned well, felt good in my hand and appeared to be what I was looking for at a more reasonable price than the hard to find original version. Coming towards the end of the year I had to make a choice and feeling confident with the quality of each, reading every review I could find, I put in my request for the Veritas version. Am I happy with the decision absolutely! Would I have been as happy with the Lie Nieslen…most likely. So instead of a review, here’s my introduction to the Veritas Shooting plane.
The first observation of this plane is its weight, too lazy to grab a scale, I’ll just say it is surprisingly heavy. It has a very sleek modern look like many of the Veritas tools it have similarities to the original tool but many improvements.
When purchasing the plane there is a choice of o-1 or PMV-11 steel. There have been several positive reports on the PMV-11 steel so I sprung for the extra $12. Without another blade It’s impossible to make a direct comparison, but at this point I am very pleased, it holds an edge and sharpens easily.
It took a few minutes to get the plane adjusted to plane an exact 90 degree face. but once done with the allen bolts tightened I don’t expect to do it again apart from minor adjustments.

There are many new experiences with this plane, bevel up, blade steel etc. I’ll take some time to fully understand it, but so far I like what I have.
Many of you know that my tools are stored in the garage. They live in my small tool chest or in the larger anarchist tool chest.This subjects them to all the temperature changes the midwest can offer and I have at times struggled with surface rust. With more experience (better maintenance) this has become less and less of a problem. I do keep each of my planes in a plane sock. Some of you will yawn and chuckle, but I have found them very effective and have not had to clean rust from a plane in a few years. I’d strongly recommend trying them if you are struggling with rust. There are many places to purchase them, mine happen to come from Lee Valley tools.


Hanging Tool Cabinet – Shelf 2 oops
The shelf not only fits into the dado but also consists of a pair of through mortises. Through mortises are a great challenge and enhance the appearance of a piece along with making a great joint. After milling the shelf pieces I carefully measured and cut out the two pins.

Upon completion of both ends it was immediately apparent that my great looking pins were not correct so I milled another piece and started again.
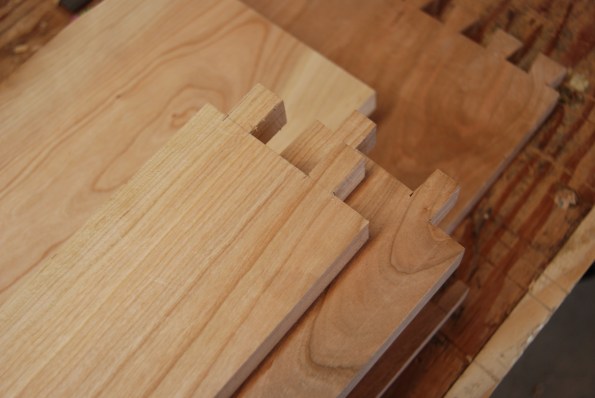
I missed the subtle step so decided that more practice was in order. The photo above shows both pieces, the bottom one being correct.
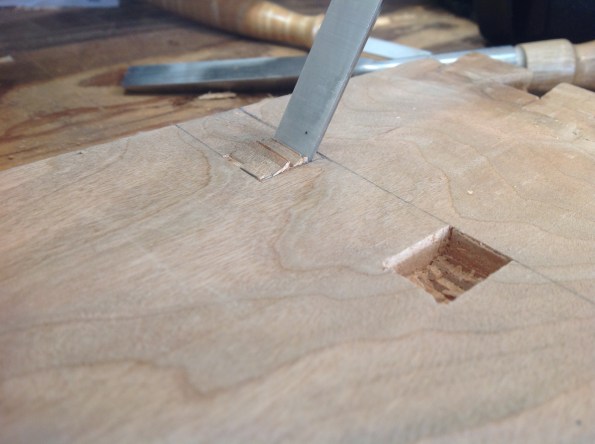
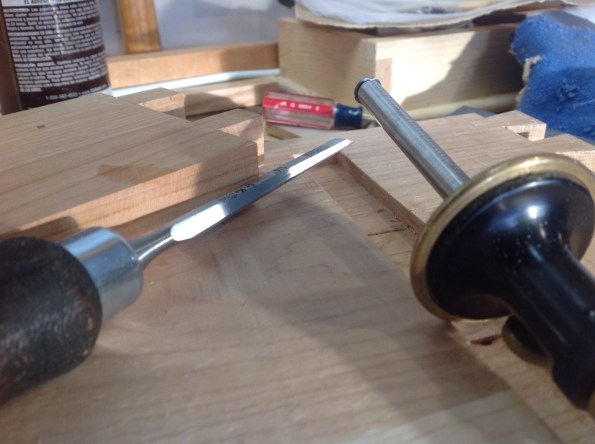
Next is the creation of the mortises for the tenons. Making a through mortise is all about careful measurement followed by patient chiseling.
Hanging Tool Cabinet – Shelf
The bottom of the cabinet consists of two drawers topped with a shelf. The shelf is carefully fitted using dados and through mortises.

The dados come first, one on each side. Laying them out carefully, I placed both pieces together marked with a knife and then began work with a chisel followed by the router plane. The router plane is the most used plane I own beside my number 4. If you are new to hand tool woodworking it is a must have tool. I use a Veritas model, but there are many others out there.

In a short period of time the dados were complete.
Dovetails and more..
The heaters were turned on early in anticipation of completing the dovetails for the hanging tool cabinet. Outside the snow fell in large flakes, blanketing the ground and creating that muffled silence that only comes with snow. Within an hour I completed the first set of dovetails.

Laying out the last set, I looked up to see my 17 year old son watching, in his hand a piece of paper and a smile. Taking off my headphones I watched him wander over to the scrap bin and begin choosing pieces for a project. The scrap bin is open season for any projects that may come up.


Setting aside the dovetails, I collected the tools he asked for, helped him with the stuck clamp and enjoyed the afternoon. He now has a stand for his computer monitor designed and built by himself and my dovetails can wait happily for another day.


Sea Chest
A year or more ago I was given a dovetailed chest. If I recall it came from an officer on a Great Lakes freighter and was used to keep his personal items while on board. The chest measures 28″ long, 13″ deep and 11″ tall. When it was given to me the paint had been removed so the joints were easy to view.
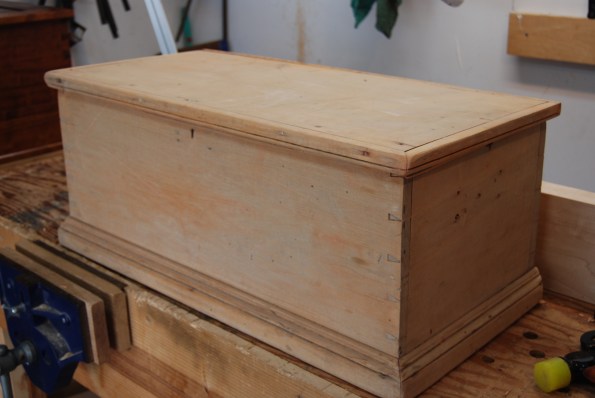
The trim is nailed around the top and bottom as are the bottom boards. The dovetails have quite an angle, more than I would typically use, but may be fun to try on a project.


All of the hardware was in jars inside the chest including the lock.


Inside the chest there is a definite tinge of red so i assume that it may have been the original color, at least inside. Also the hinge locations have been moved and new mortises installed at one time. I’m debating what to do with the chest. It seems that I should repaint it to keep it in fair condition, possibly with milk paint.


Lastly I wonder at the story of this chest, the travels across the lakes and the owner.
Tool Cabinet Dovetails
Haven’t chopped dovetails for a while, certainly is nice to empty my mind grab a chisel in one hand and a hammer in the other and work away.
A couple of thoughts recent dovetails have been in Sapele and Oak, Cherry takes a slightly different touch. It’s a fun challenge and as I move from joint to joint the accuracy improves.


Hearing Protection
There are a couple of safety items that I am adamant about, hearing and eye protection. Damaging either could be devastating to quality of life not only affecting yourself, but those around you. When using power tools these items are no brainers but over the last couple of years I’ve also noticed that while chopping with chisels, by the end of the day I can have some ringing in my ears. Admittedly I have sensitive hearing and wear ear plugs in movie theaters because I find them uncomfortably loud. Putting ear plugs in is a simple solution, however I also enjoy listening to podcasts while in the garage. Turning up the volume slightly I can listen with the plugs in my ears, but it is not ideal.
Listening to WoodTalk several months ago I remember a discussion about hearing protection and bluetooth speakers, I’ve also seen modifications made to ear muffs. Digging back through the Wood Whisperer’s site I was able to find the discussion and links to the earmuffs and accessories. After a little more research which resulted in stunned disbelief at the cost of alternatives, I used the Wood Whisperer link to Amazon and purchased the components. If I have heard about a product on WoodTalk and decide to purchase I tend to link through the sites of the hosts, after all if they are going through the trouble of reviewing and assembling the componets they might as well get credit.
After the Christmas crunch the package arrived. There are three components to make this work. Earmuffs, a bluetooth link, and a dooley whopper. With everything ready to go I linked the components to my Ipad using bluetooth and amazingly it all worked. A couple of hours later I took them off very happy with their functionality. I get my podcasts, keep my hearing and no more fumbling with earplugs.


Sharpening
Sharpening – There is a myriad of techniques and to each technique every woodworker adds their own idiosyncracies. I’ve tried several and I believe they all work. After talking with someone the other day I realized that it’s something I’ve never really discussed on the blog.
 Here’s mine… hand sharpening, three diamond plates , one strop; occasional use of jig when my hand sharpening gets a little out of hand. Simple right! Didn’t satisfy you did it?
EZ Lap diamond plates in 250, 600, 1200 grit. Why these plates? Found them on Amazon had a good price. I’ve been using them for a few years now.
 Jig for holding plates – Found this simple jig for holding the plates on Paul Sellers’ blog. It was quick to build and works great. Hard to tell in the picture, but I used a table saw to cut all the edges of the cut outs for the plates. Then a hand router to cut to depth. Although not the most lovely appearance after a few years, it continues to serve me well. I use auto glass cleaner on the plates. It contains very little water, therefore eliminating the rust component.
 Strop – Piece of wood, leather from local craft store, green stuff from harbor freight tools glued to an 8″x 4″ board. I keep it in a vice on the side of my bench and use it constantly. I have no idea what grit the green sharpening compound is, but it works.
Still need more?
25 strokes on 250, check burr, two strokes on back to remove burr.
25 strokes on 600, check burr, two strokes on back to remove burr.
25 strokes on 1200, check burr, two strokes on back to remove burr.
30 hard strokes on strop, two strokes on back to remove burr.
 I do have a flaw in my technique. I tend to push a little harder on the right side when sharpening thus over time my chisel and irons are not square. When I reach the point of no return I grab a jig and straighten out the iron. I purchased this jig for about $14.00 for Lie Nieslen, I see they now sell their own version for $125. I’m sure they have made modifications and improvements, but I’m perfectly happy with this jig. It is similar to the earlier eclipse models and handles all of the chisels and irons I have. Look around, I’m sure someone is selling them.
Last but not least, I use camelia oil on the exposed metal. The final picture are the water stones that sit idle. Maybe I’ll need 8000 + grit one day…..


Midwest Tool Collectors Association
Last August the Midwest Tool Coolectors had one of their meets nearby. Fortunately this one is open to the public for a small fee and each year.It’s always fun to poke through the piles of old chisels and look for bargains. Didn’t find many that were cheap but following are a few pictures of items that caught my eye. Click on the saw photographs. The blade has been divided into demonstration of correct and incorrect sharpening techniques


