Archive
Arts and Craft Side Table – Lower Rails
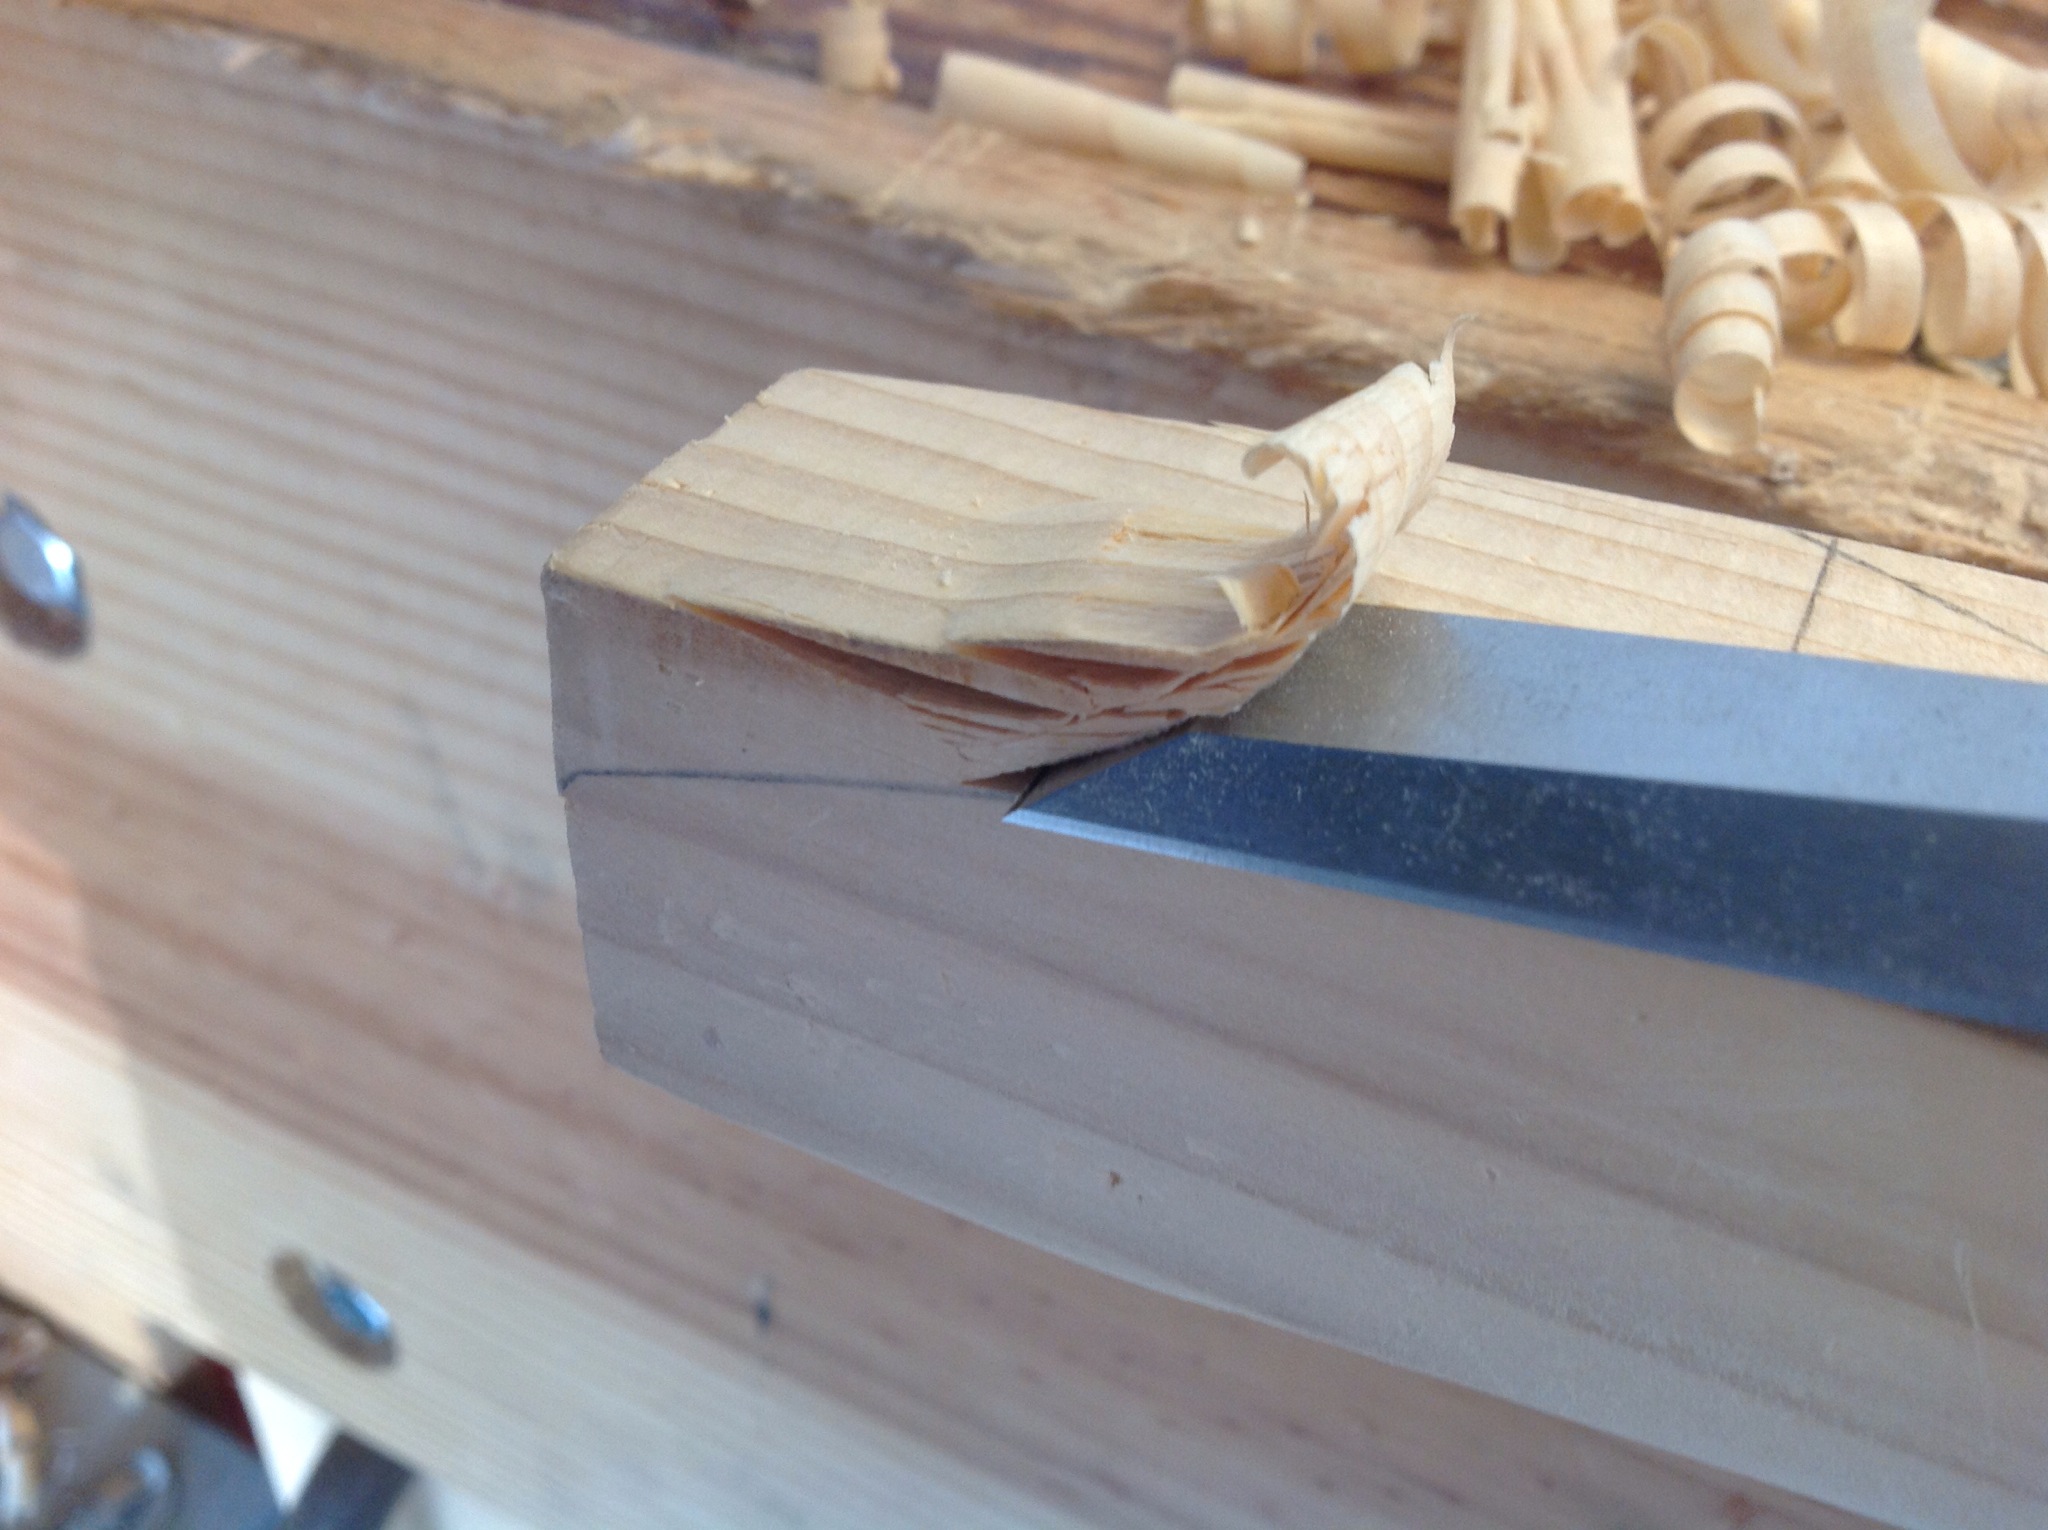
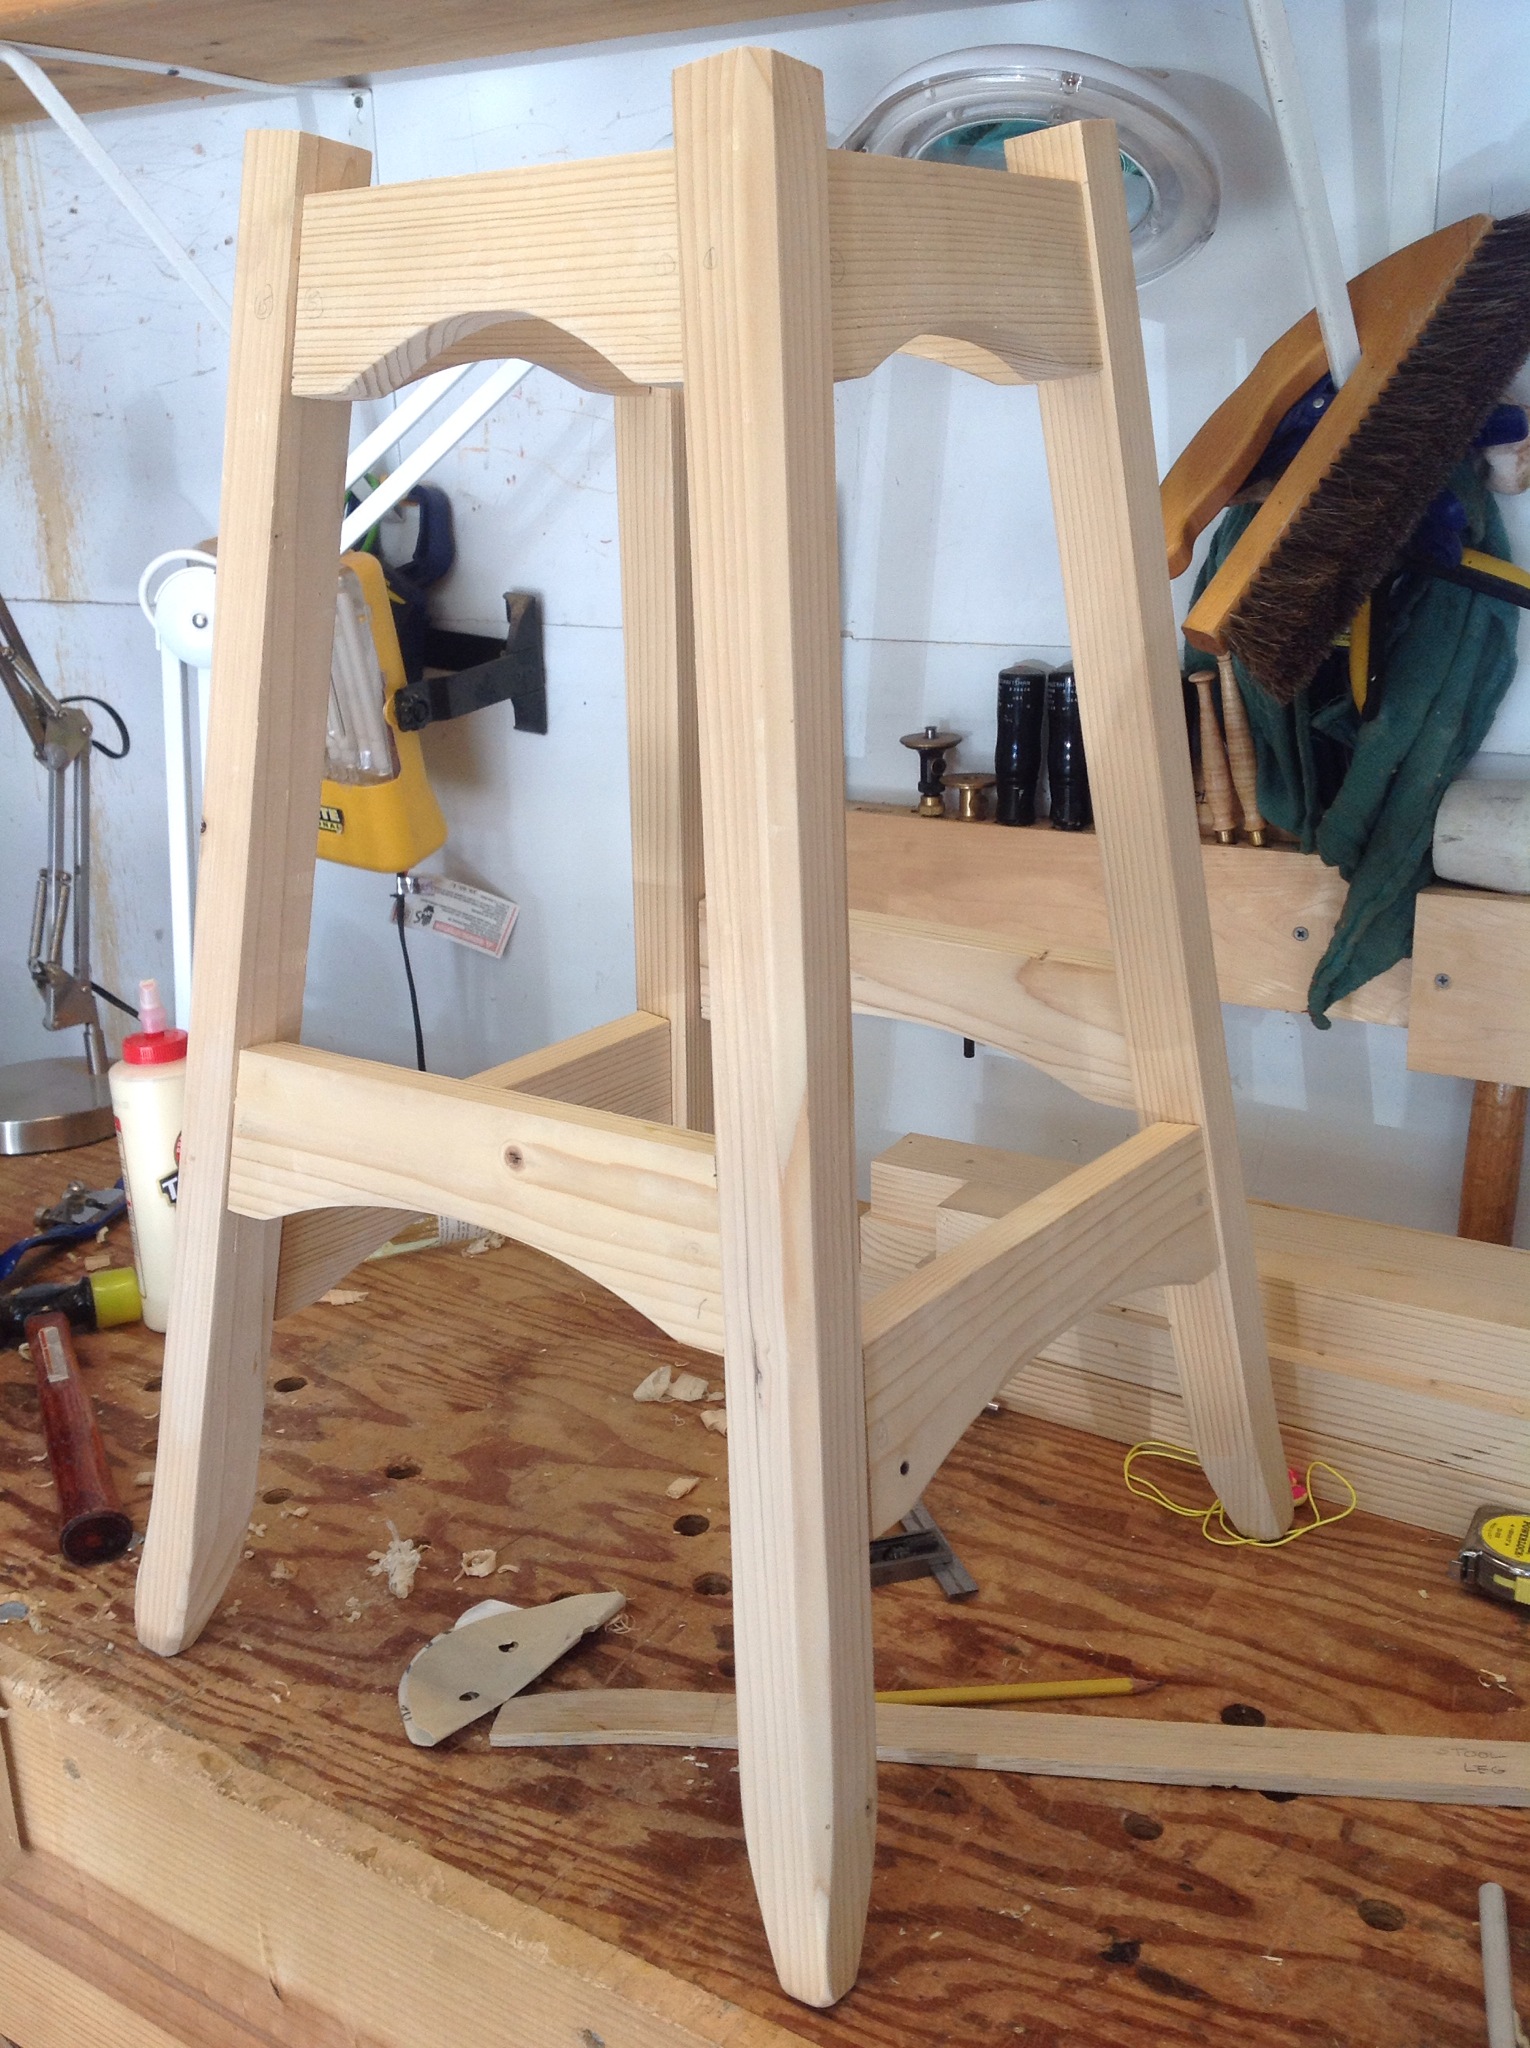
The table is held together with a pair of lower and a pair of upper rails. The previous post shows the through tenon attaching the lower rails to the legs. The rails are held together by a cross over lap joint.
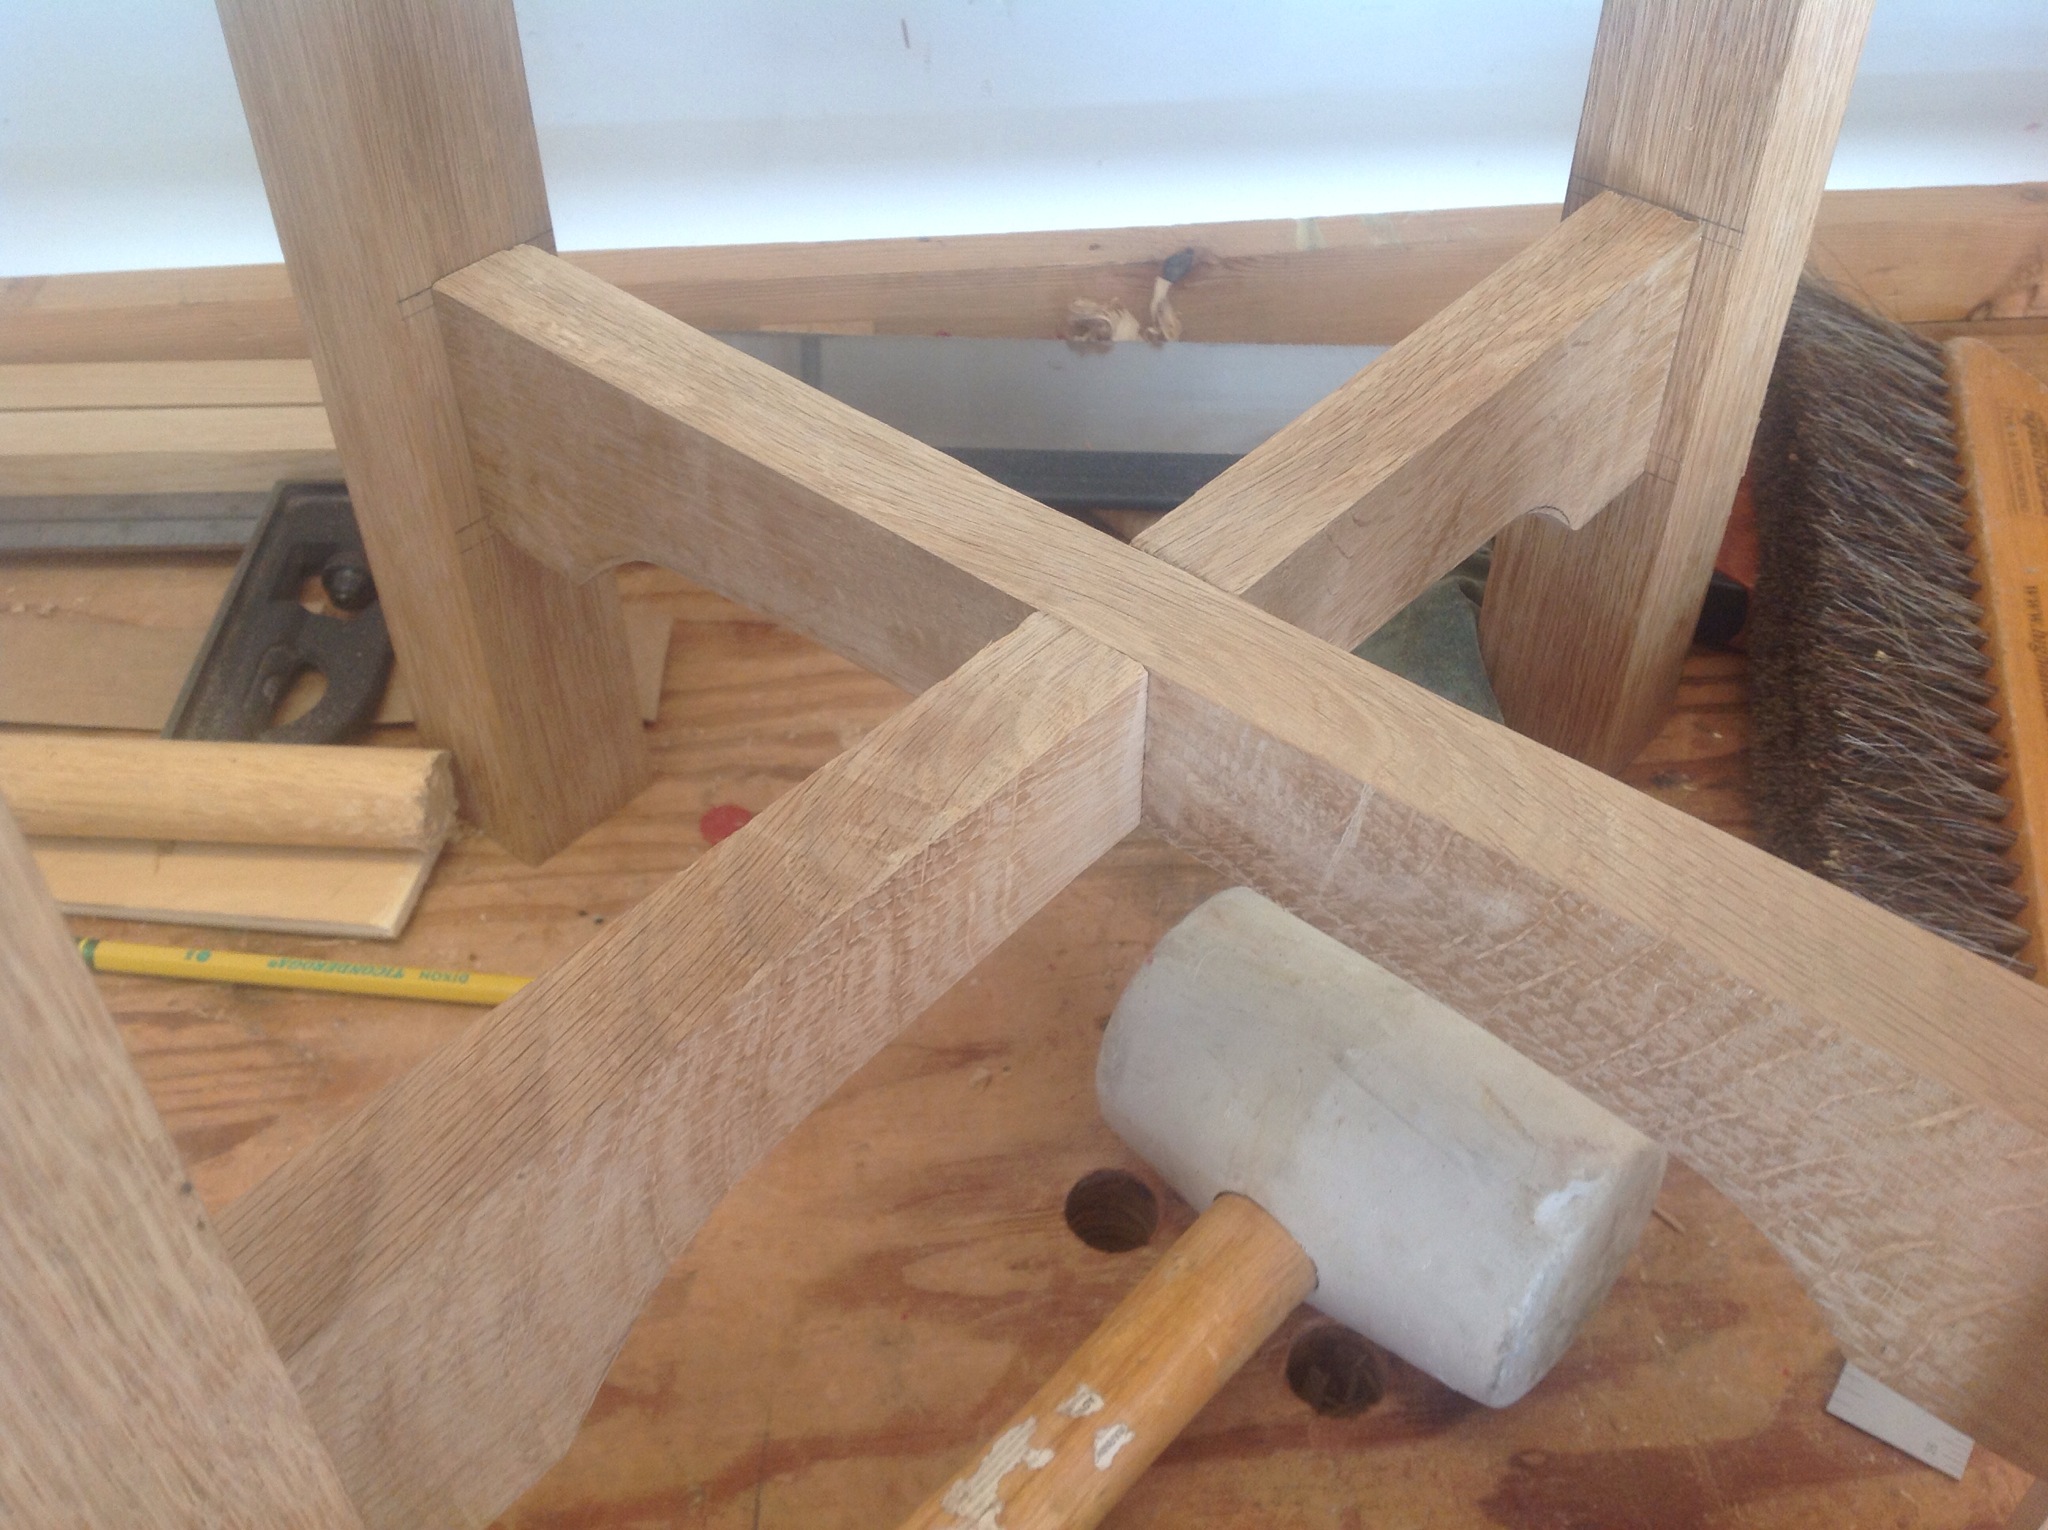
Making a joint like this requires me to carefully lay out and think through how it fits together. The number of times that I have cut this joint on the wrong side is embarrassing. Today with care I was able to do it in one shot. A little blow out on the bottom of the joint which will fortunately be hidden is the only problem.
With the Joint fitting properly the rails could be shaped using a chisel and spokeshave.

The upper rails will be dovetailed into the top of the legs with any luck tomorrow.
Arts and Craft Side Table Tenons
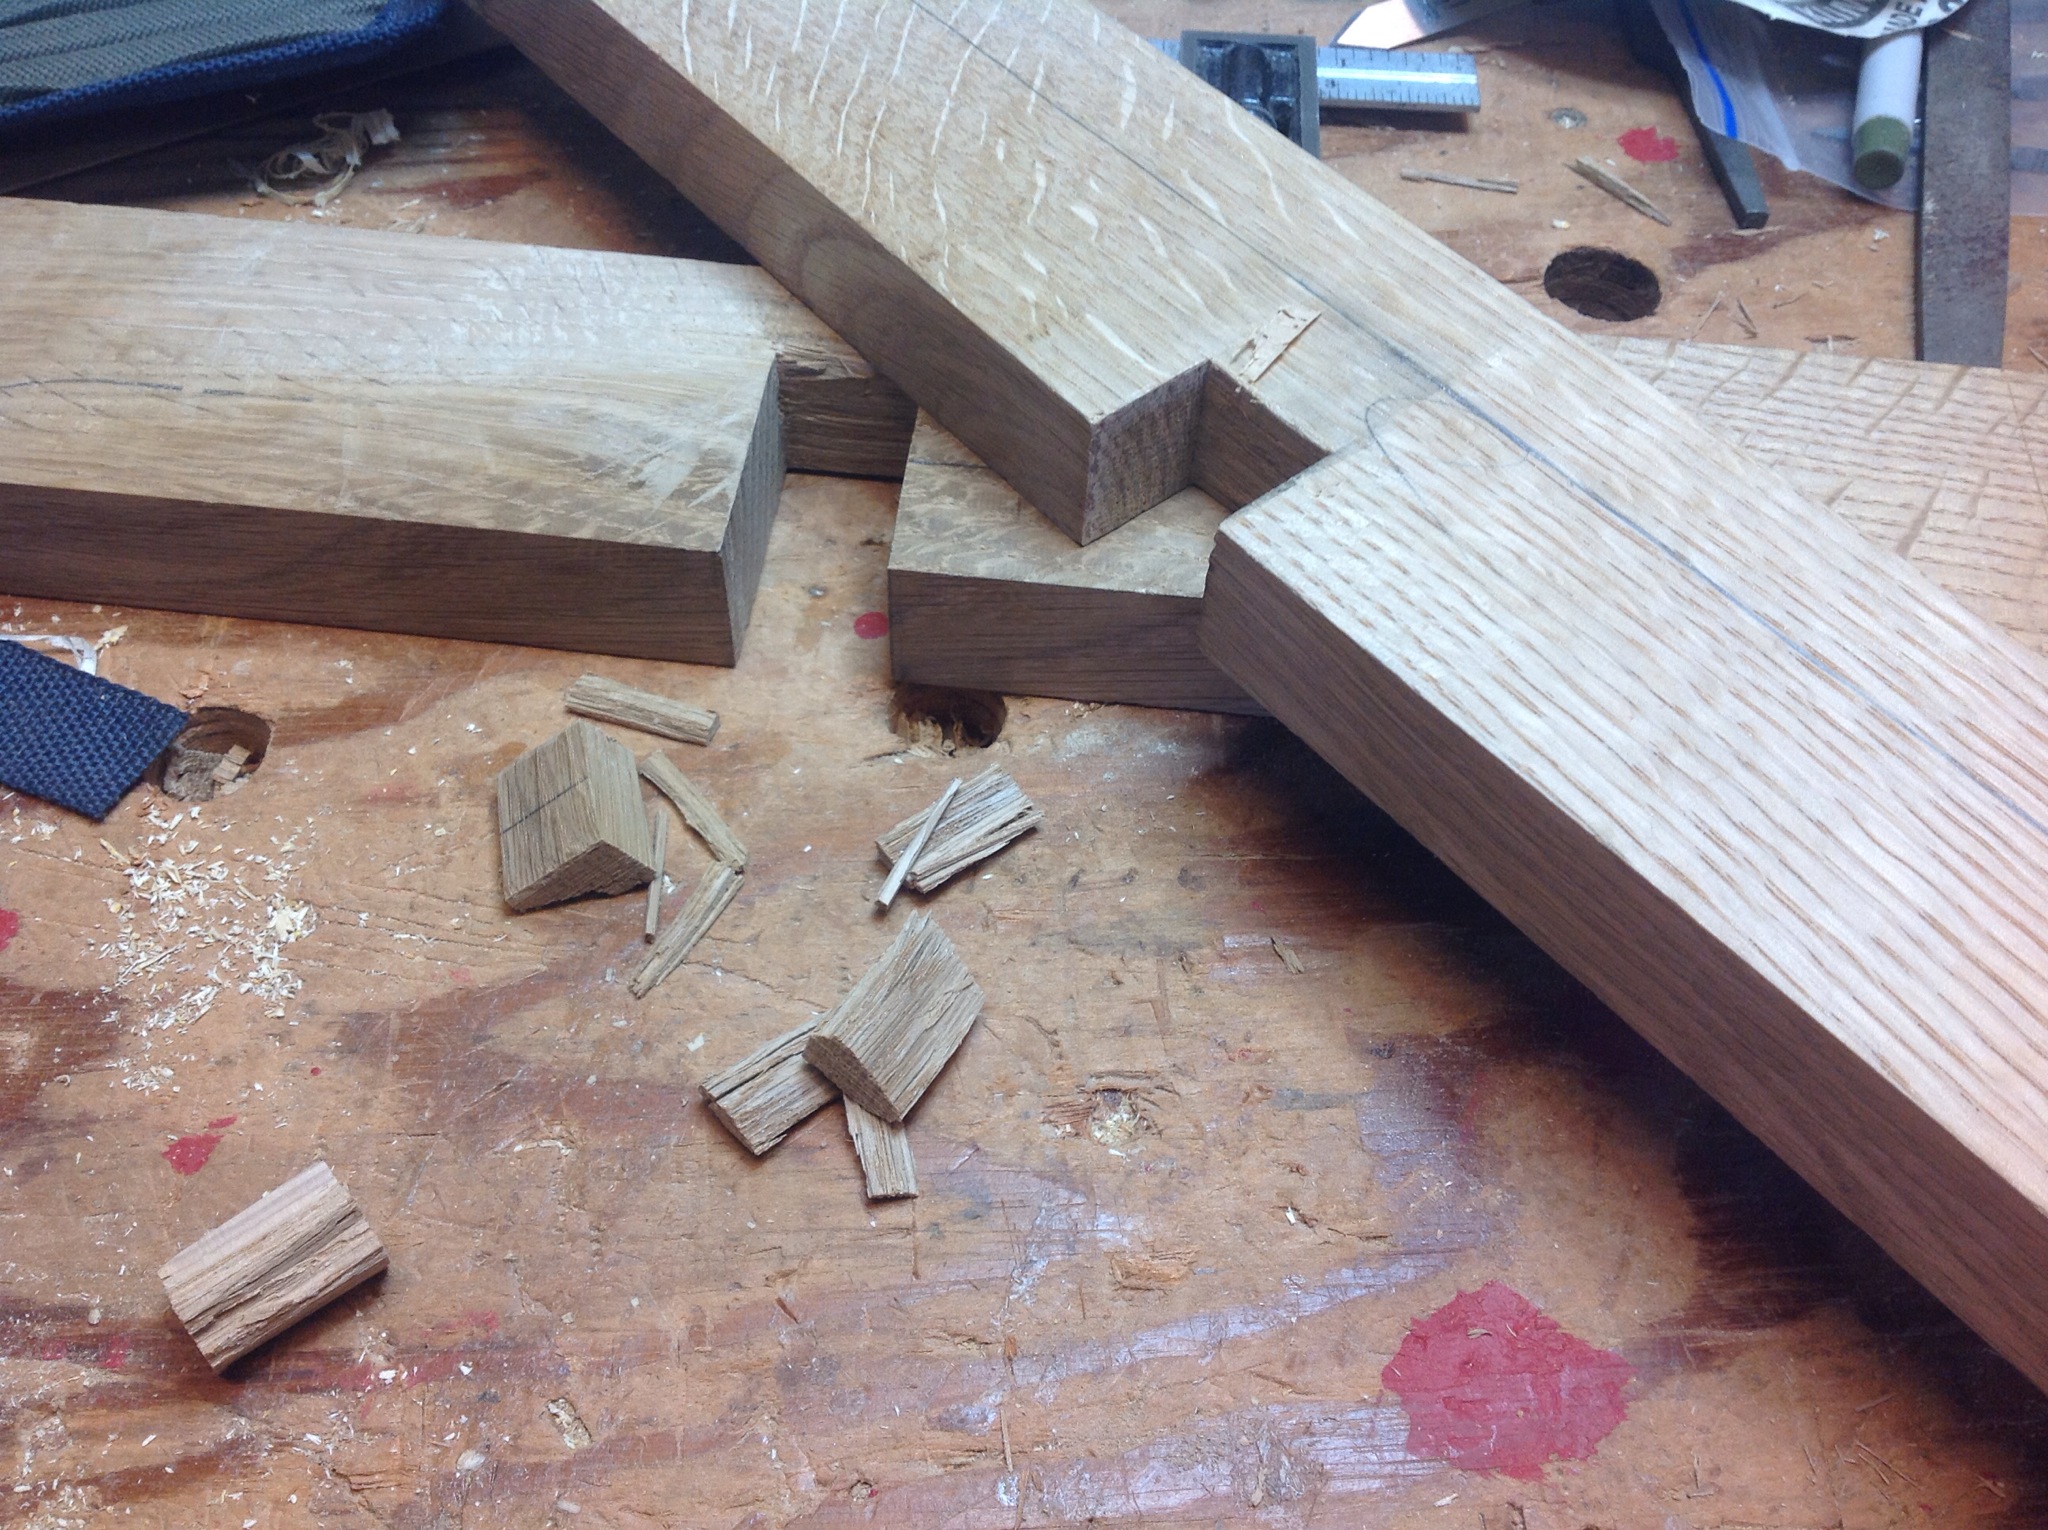
Started cutting the Tenons today to match the mortises on the legs. Through tenons so it is worth taking extra time to ensure they are tight. Used the saw for the cuts with a router plane to clean up and ensure a good fit.
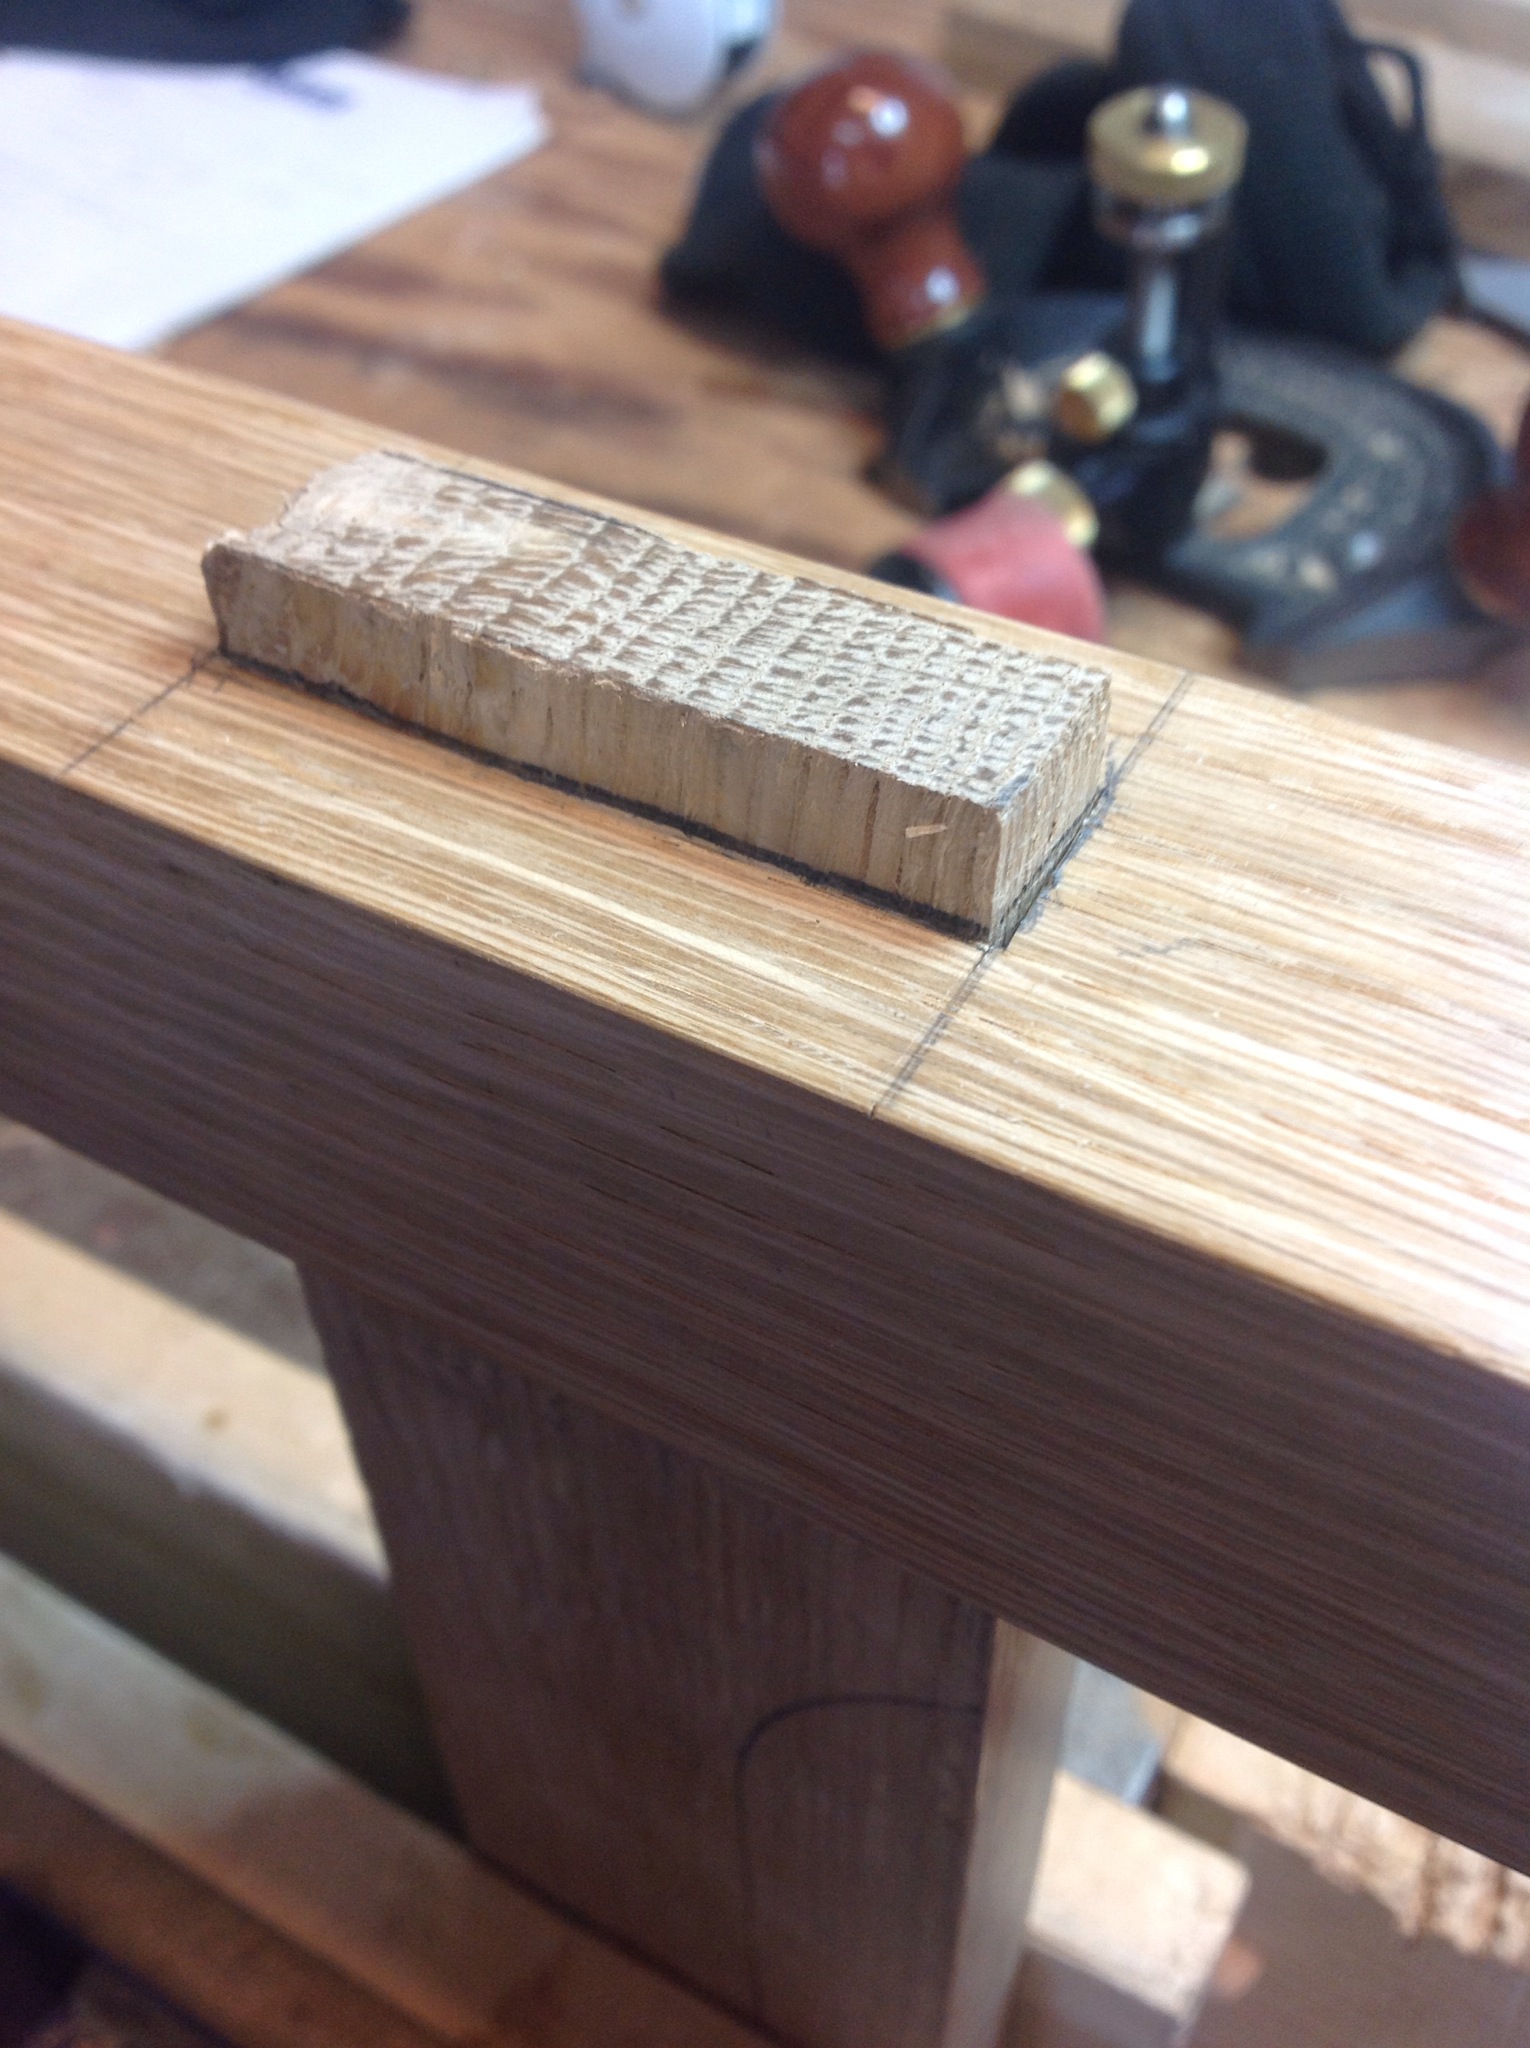
My favorite part of through tenons is shaping the exposed end. I do this with a #4 plane and a file for final smoothing.

When I’m done with the sides a chisel makes short work of chamfering the ends. The grabbing the same file I give them a final smoothing.

Arts and Craft Side Table – Mortises
After all the lumber was milled and cut to size I spent time carefully laying out the mortises. The plans call for through mortises at the bottom of each leg, so I took my time to ensure I didn’t cause any damage to surrounding areas. Additionally the legs are visible on three side since the top will be circular.
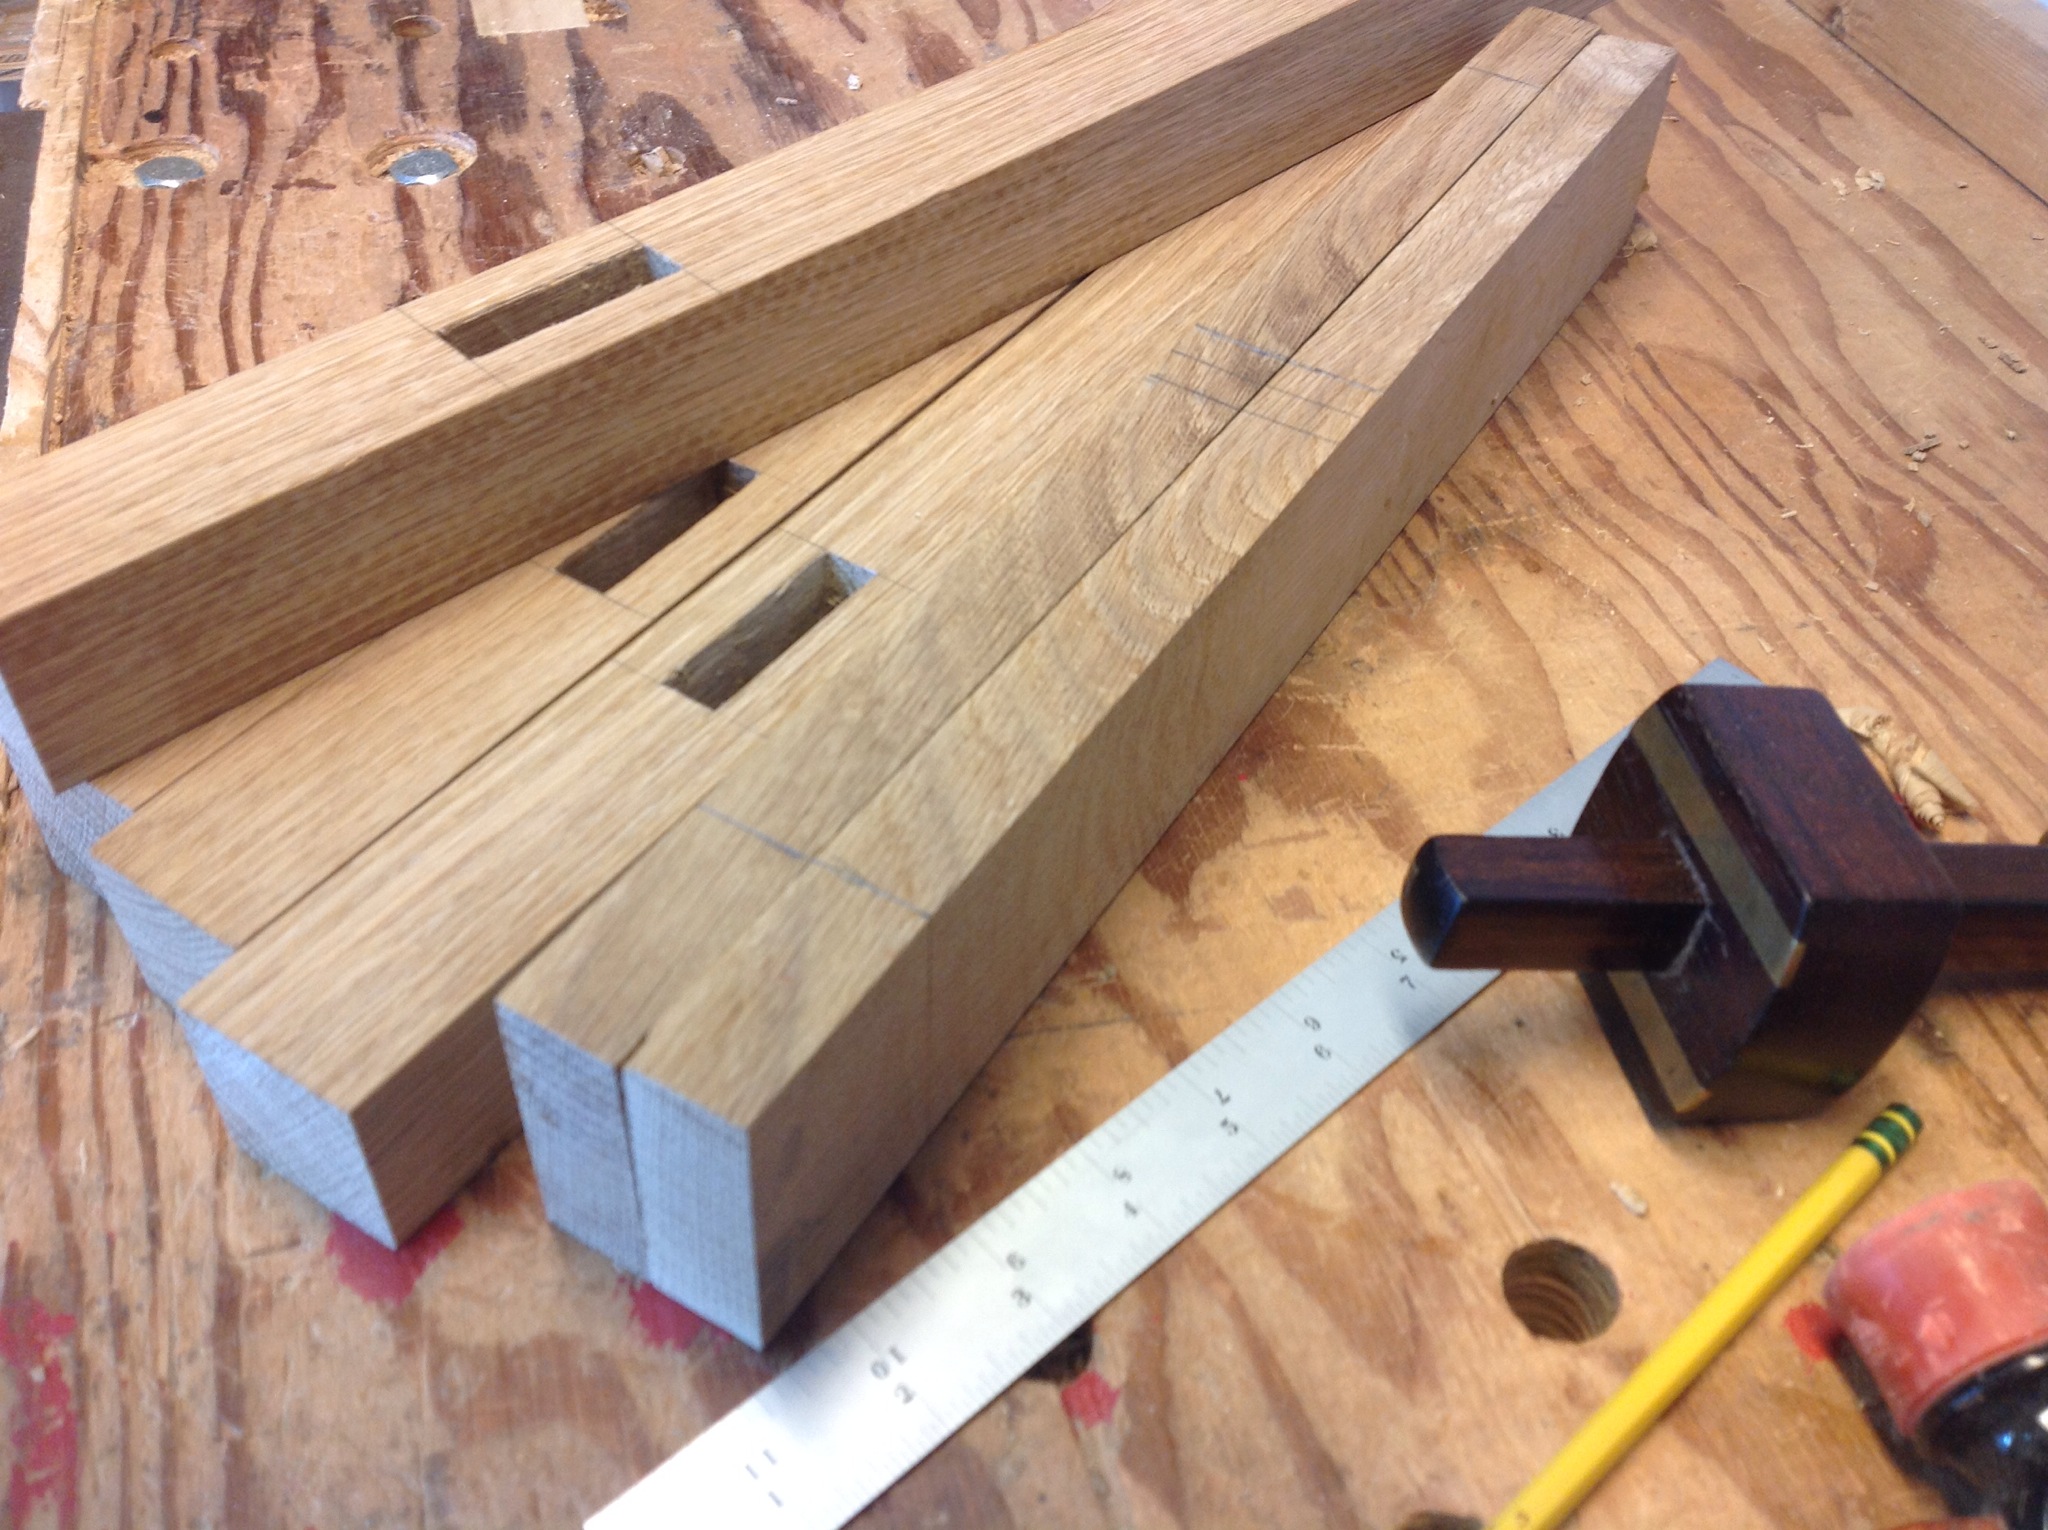
A couple of hours and the mortises are in place with no real problems. It was very relaxing to chop away and I could feel my stress fall away. Took a couple of sharpenings of the chisel but each mortise on took a pass from each side. The first pass was about an inch deep then I flipped the piece and chopped the remaining half inch from the other side.
Before cleaning up for the day I laid out the tenons on the lower rail and the center bridal joint. Haven’t cut one of those in a while so I’ll have to think about the best approach this evening. The upper rail is dovetailed into the top of the leg which is also a technique that I’ve done infrequently. One of the reasons for this table was the couple of joints that will make it fun.
Arts and Craft Side Table, the beginning
Next to the couch where I nap, there is a side table that supports my iced tea. It functions well, but the table has no warmth and it’s design leave me feeling empty. Looking for a simple table online for a few months to provide inspiration, I have not found anything that meets my criteria. In an act of submission I noted a design in Fine Woodworking that will do until a different design comes to mind.
This morning was spent milling the pieces of lumber for the legs and digging for enough pieces to make the top. Failing to find enough lumber I will have to purchase some next week. I’m glad to be listening to my planes slice through oak and feeling for the changes in grain.

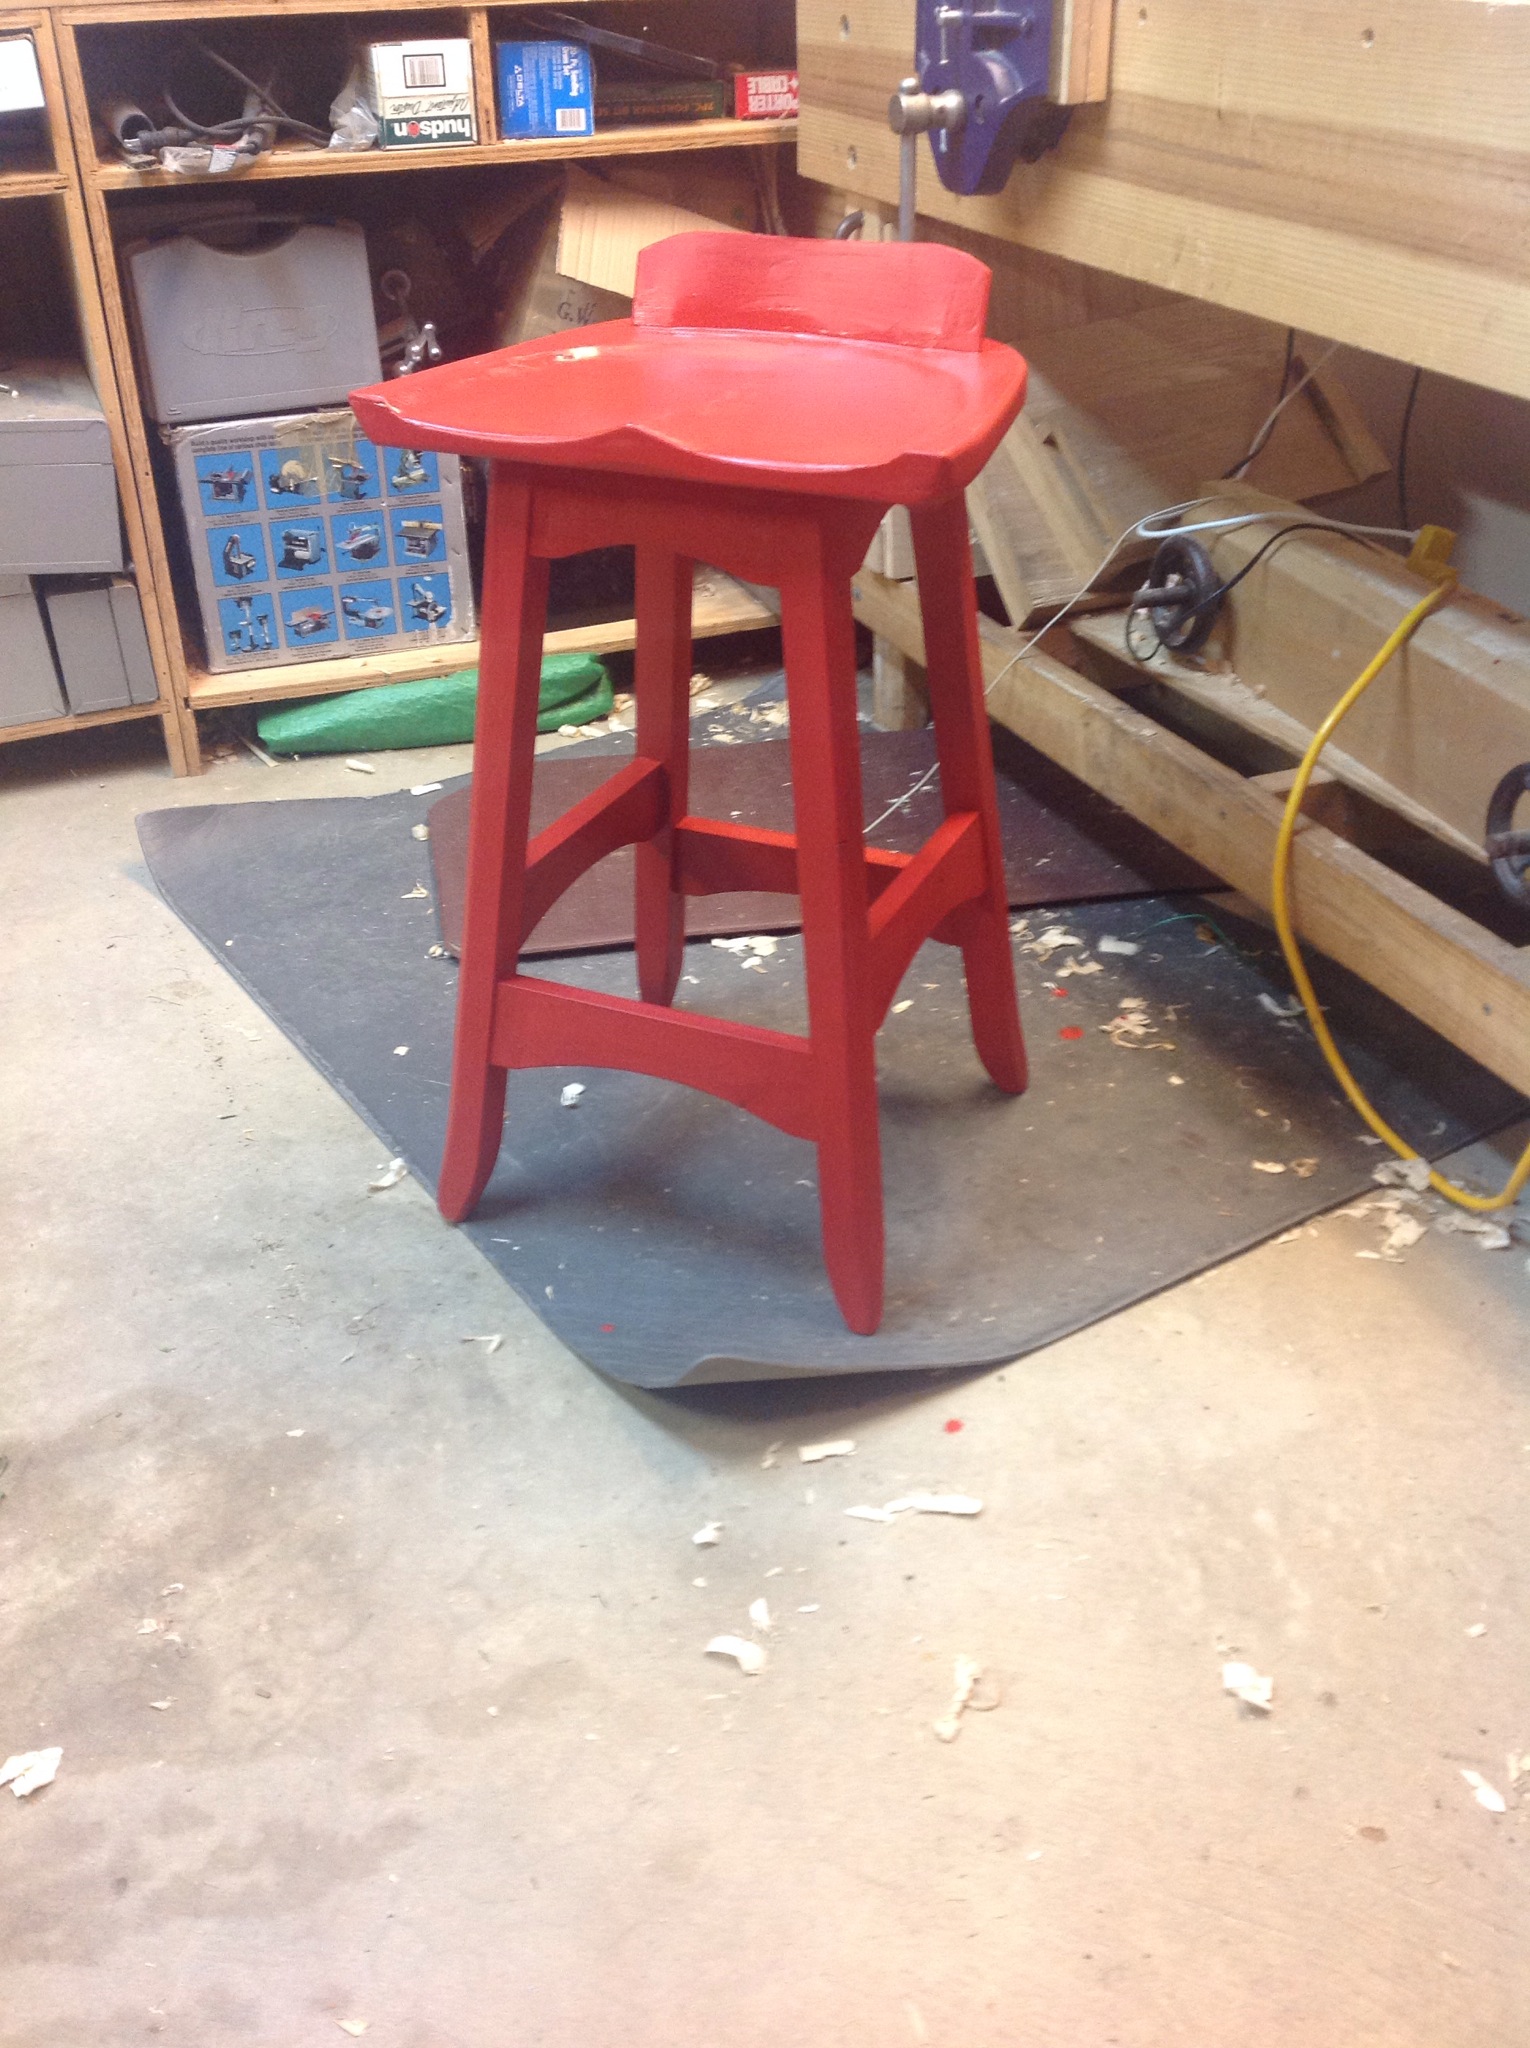
Bench Stool Finished
When I completed my tool chest over a year ago I purchased a can of paint which has stayed on the corner of the kitchen counter. Red chili did not seem to be right for the chest so I submit it here as a possible color for the completed stool. A couple of thoughts as I finish this project.
1. How in the world did it take this long?
2. I don’t really like working in soft woods!
3. It was fun making the tenons and mortises especially with the angles.
4. The stool is really comfortable.
5. One day I will stage a photograph without the clutter.
6. Onwards to the next project!
Bench Stool in one piece
With all of the parts complete, I attached a couple of pieces for the screws and attached the seat.

Next the back support was attached with glue. I am still not sure of the size and shape of the back support but it is now attached.
Fin

Finally the seat is attached using screws.

Of course who could forget the little repair needed when I sent the chisel through the leg.

Seat shaping
Throughout the past week time was spent shaping the stool seat. As demonstrated by Paul Sellers I used a #7 gouge. This is my first experience with this tool and it has been fun. Took a little time to work out the sharpening technique, but all is well.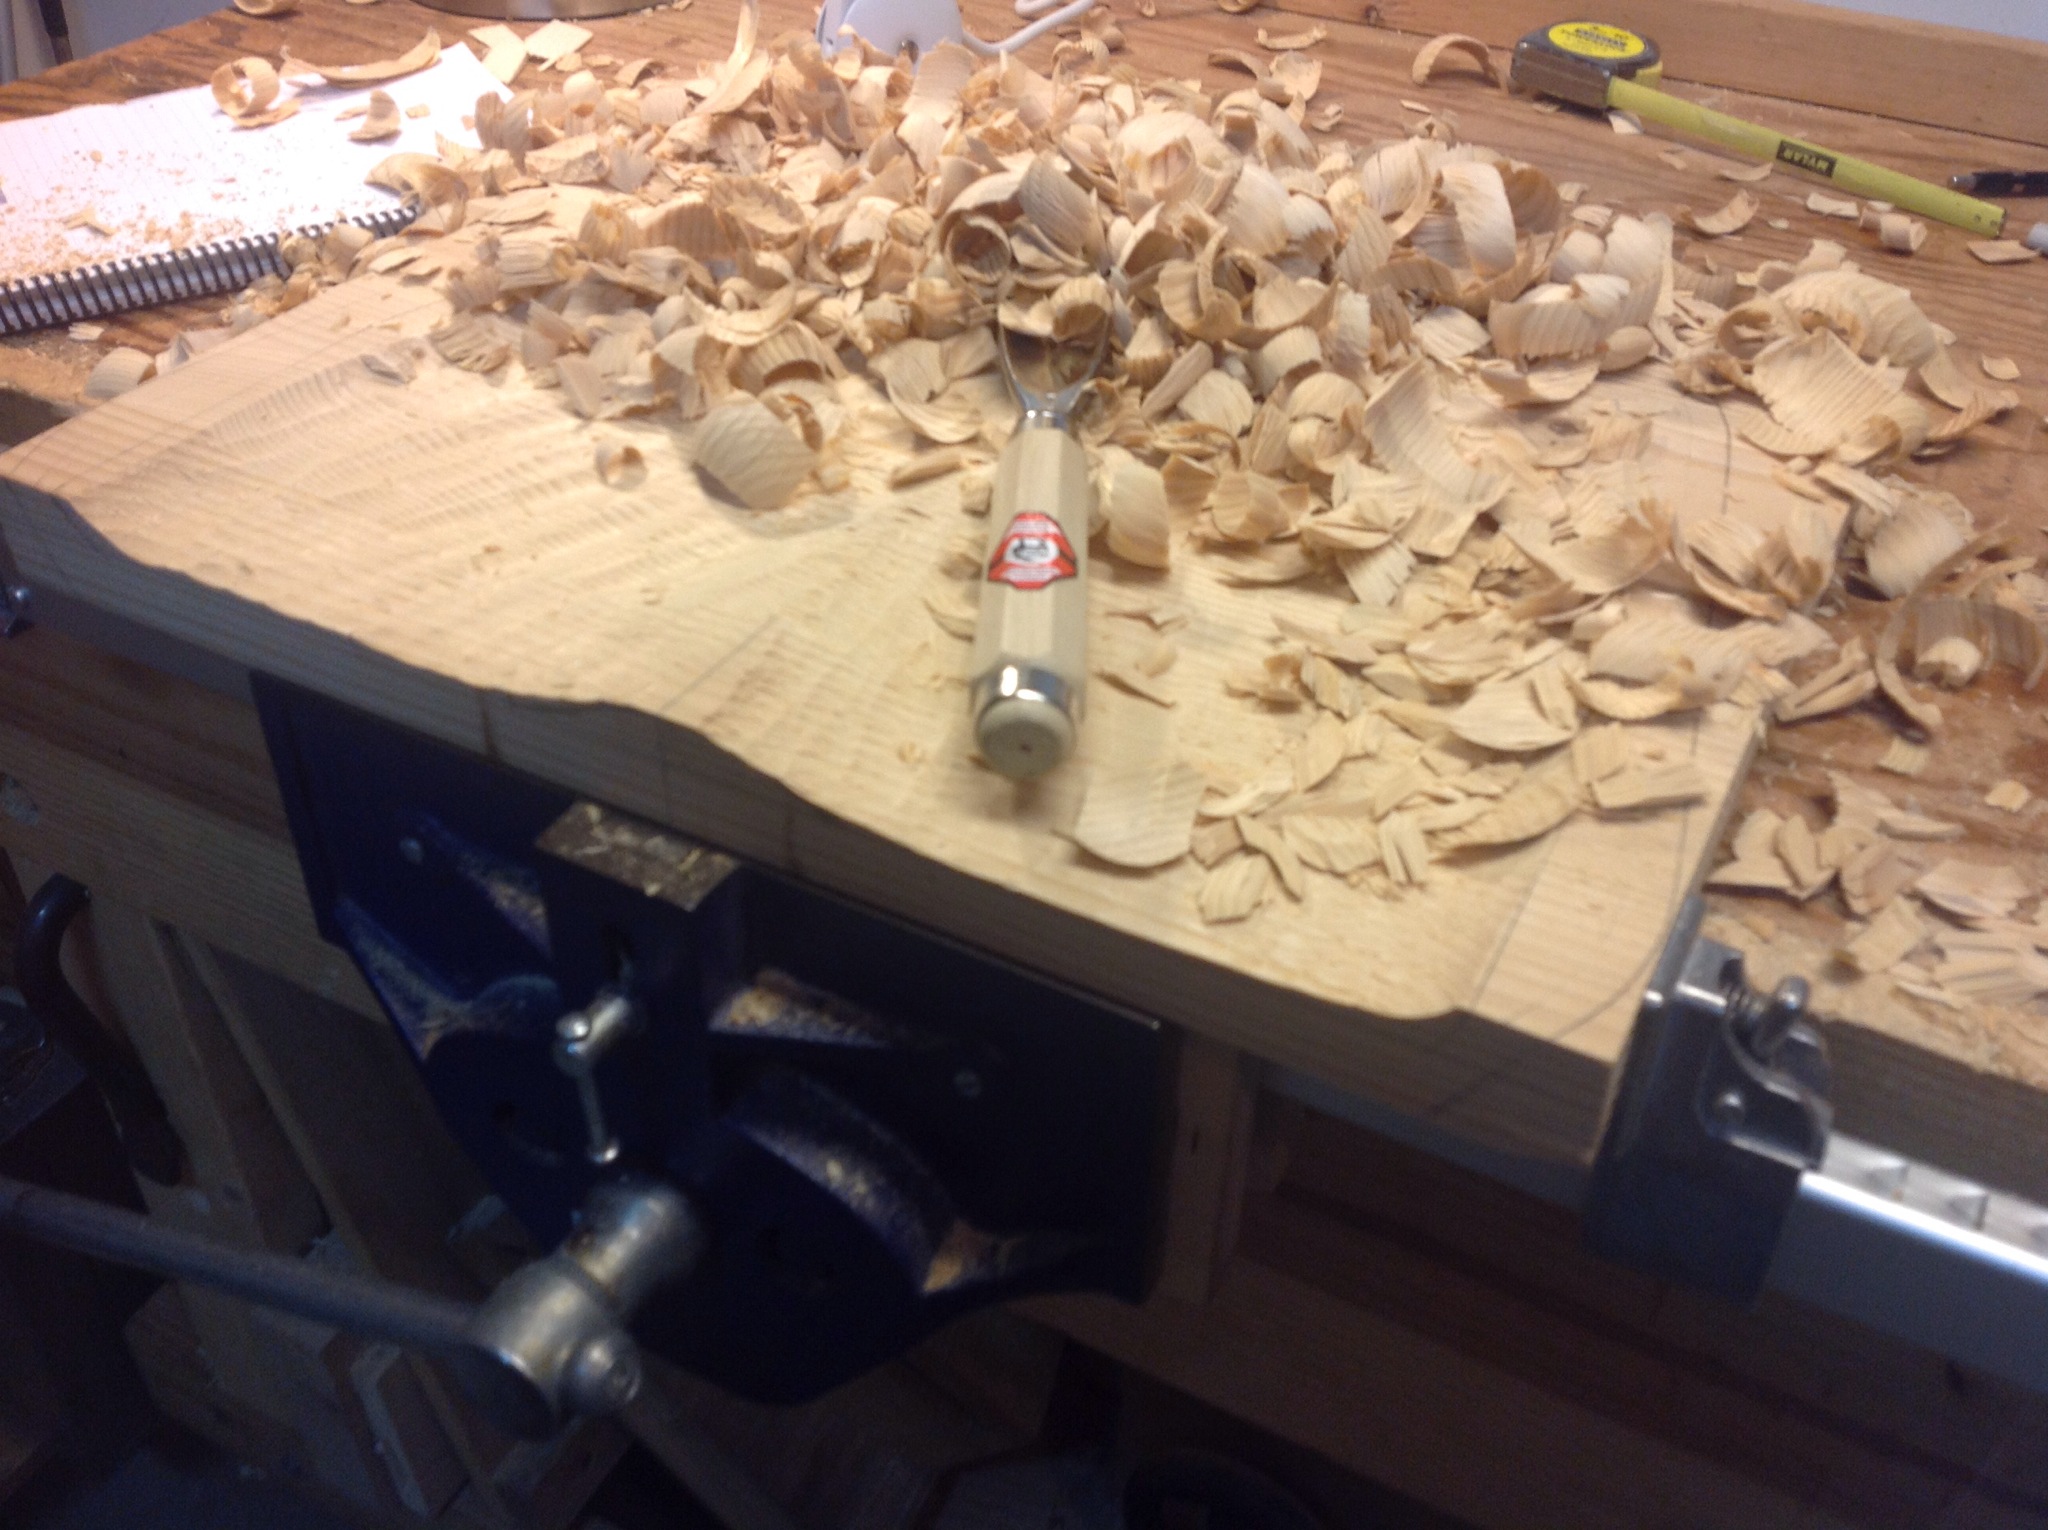
The most surprising aspect is how little time it took to get the shape I wanted. If I am calculating correctly approximately two hours over a couple of evenings. There are a few areas that need to be smoothed and some shaping in the front to ease the edges, but the bulk of the work has been completed. In the background of the photograph is the plane that I began last winter specifically for this project. It worked fairly well and helped with the smoothing after using the gouge. Doing this project again I would make a smaller plane.
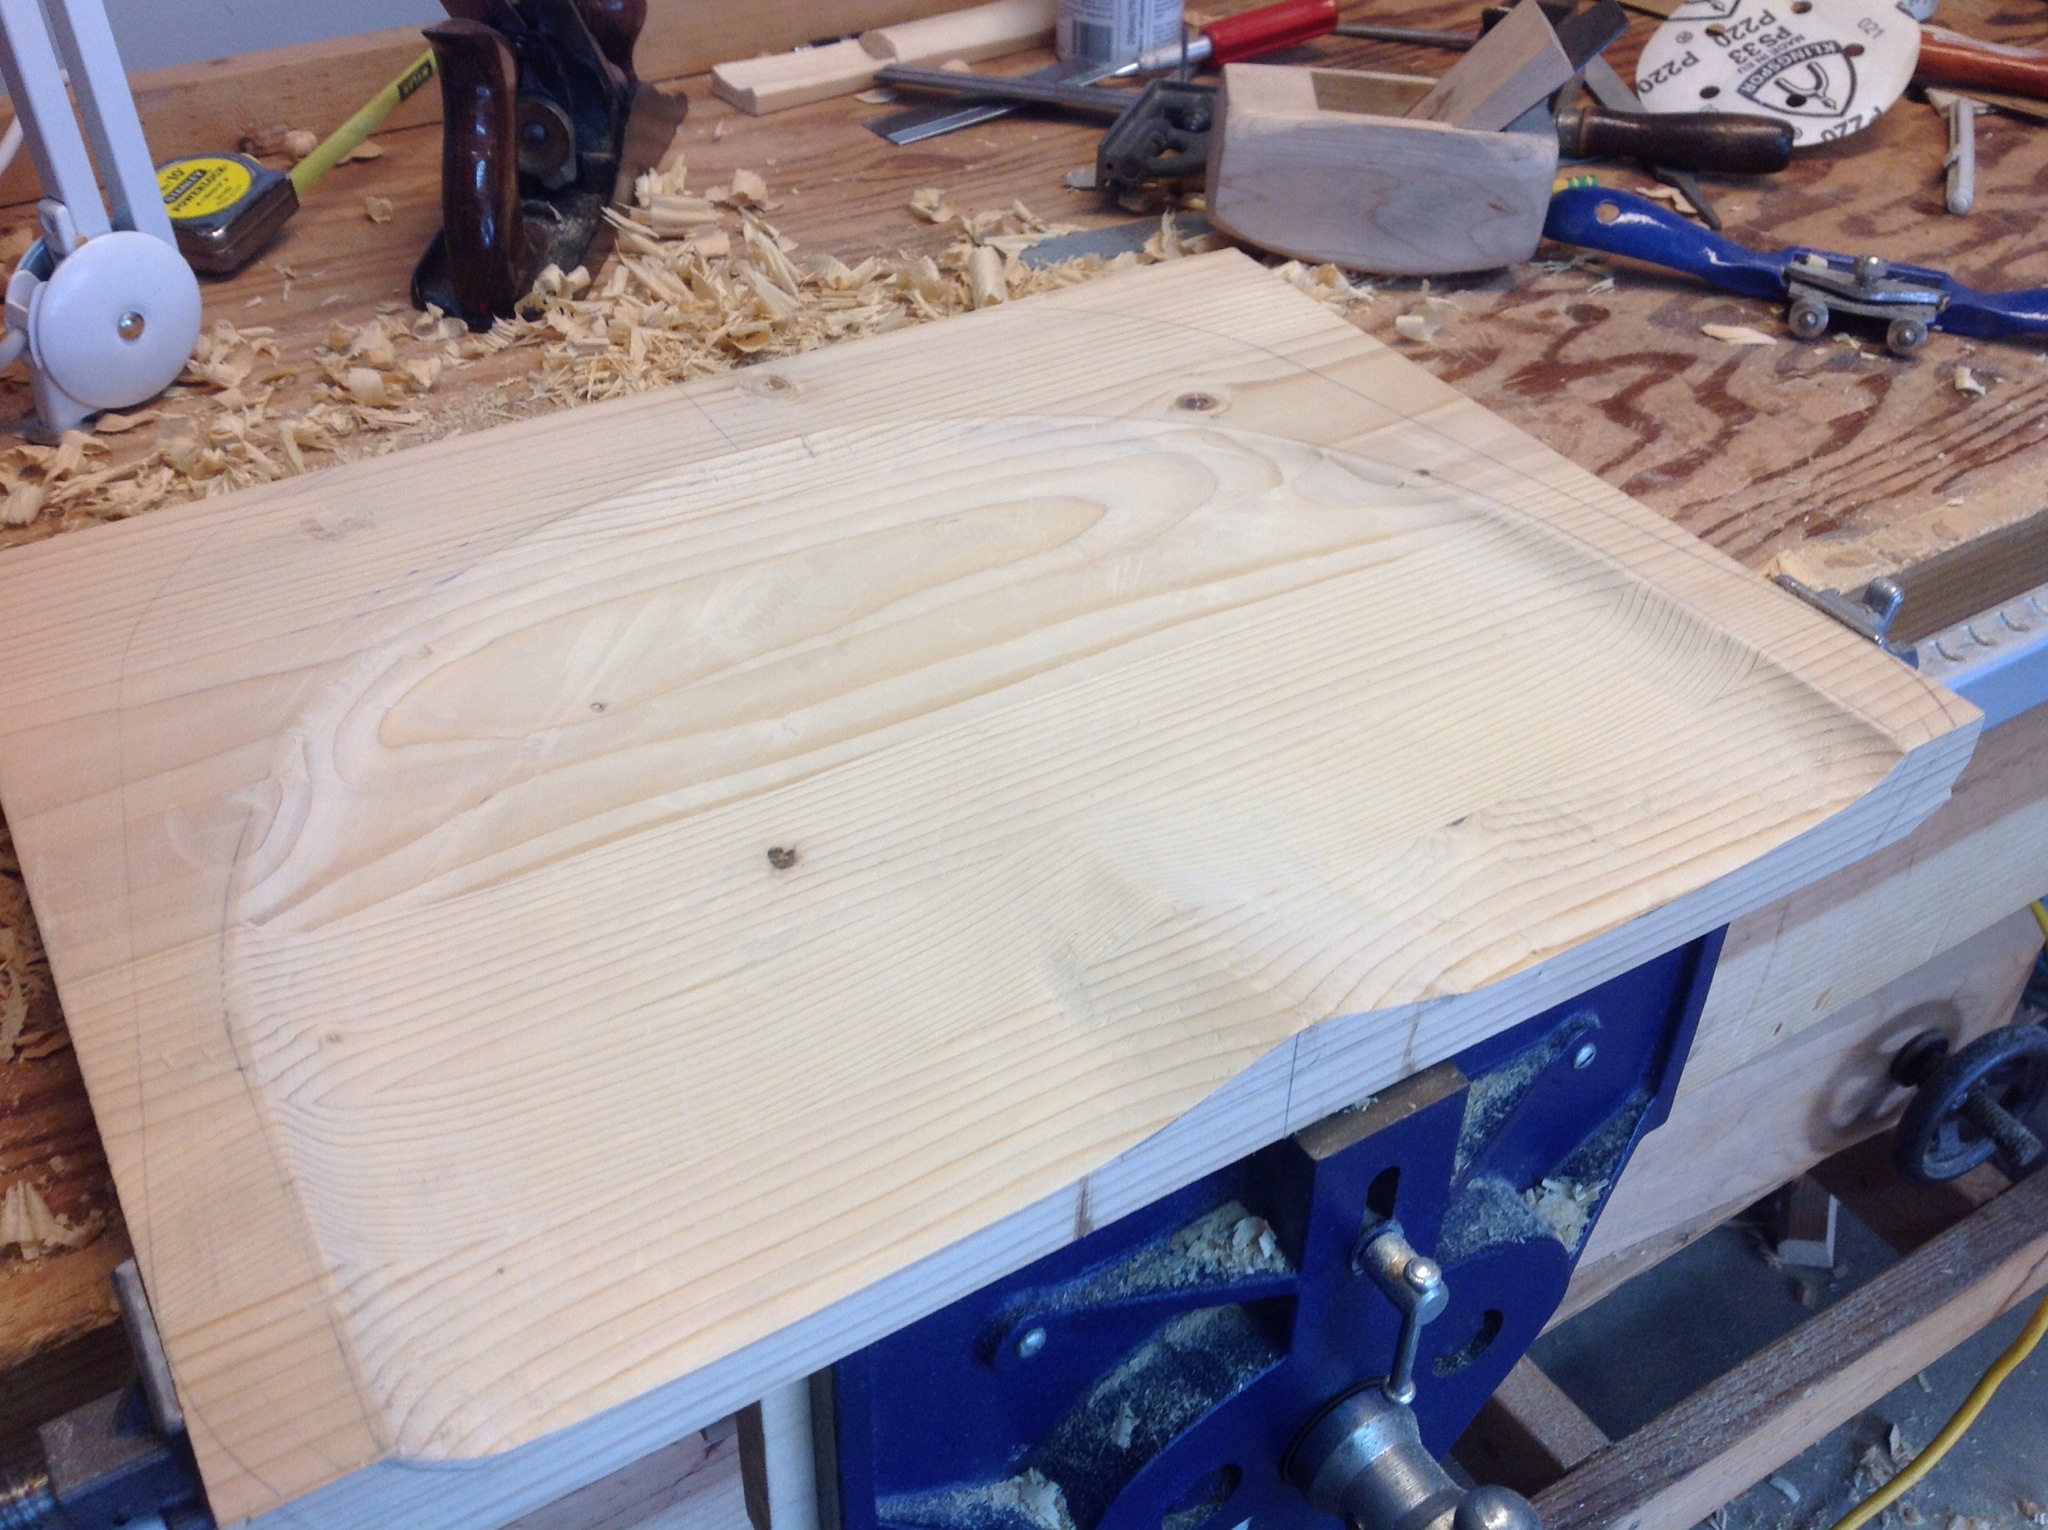
Stool Seat
A stool is not very functional without a seat. As brought up by one of my friends in a comment, I will be carving a tractor style seat for the stool. It is a little intimidating but I have to begin carving.

I began preparing wood for the seat and after several frustrating minutes trying to match edges realized that I was using the wrong tool. Swapping from a Stanley #4 to a #5 it only took a couple of swipes to flatten the ends and make a perfect match. I have been doing so much finish planing lately that I didn’t think about the advantages of a slightly longer plane.

While the glue dried, I went ahead and glued up the stool.
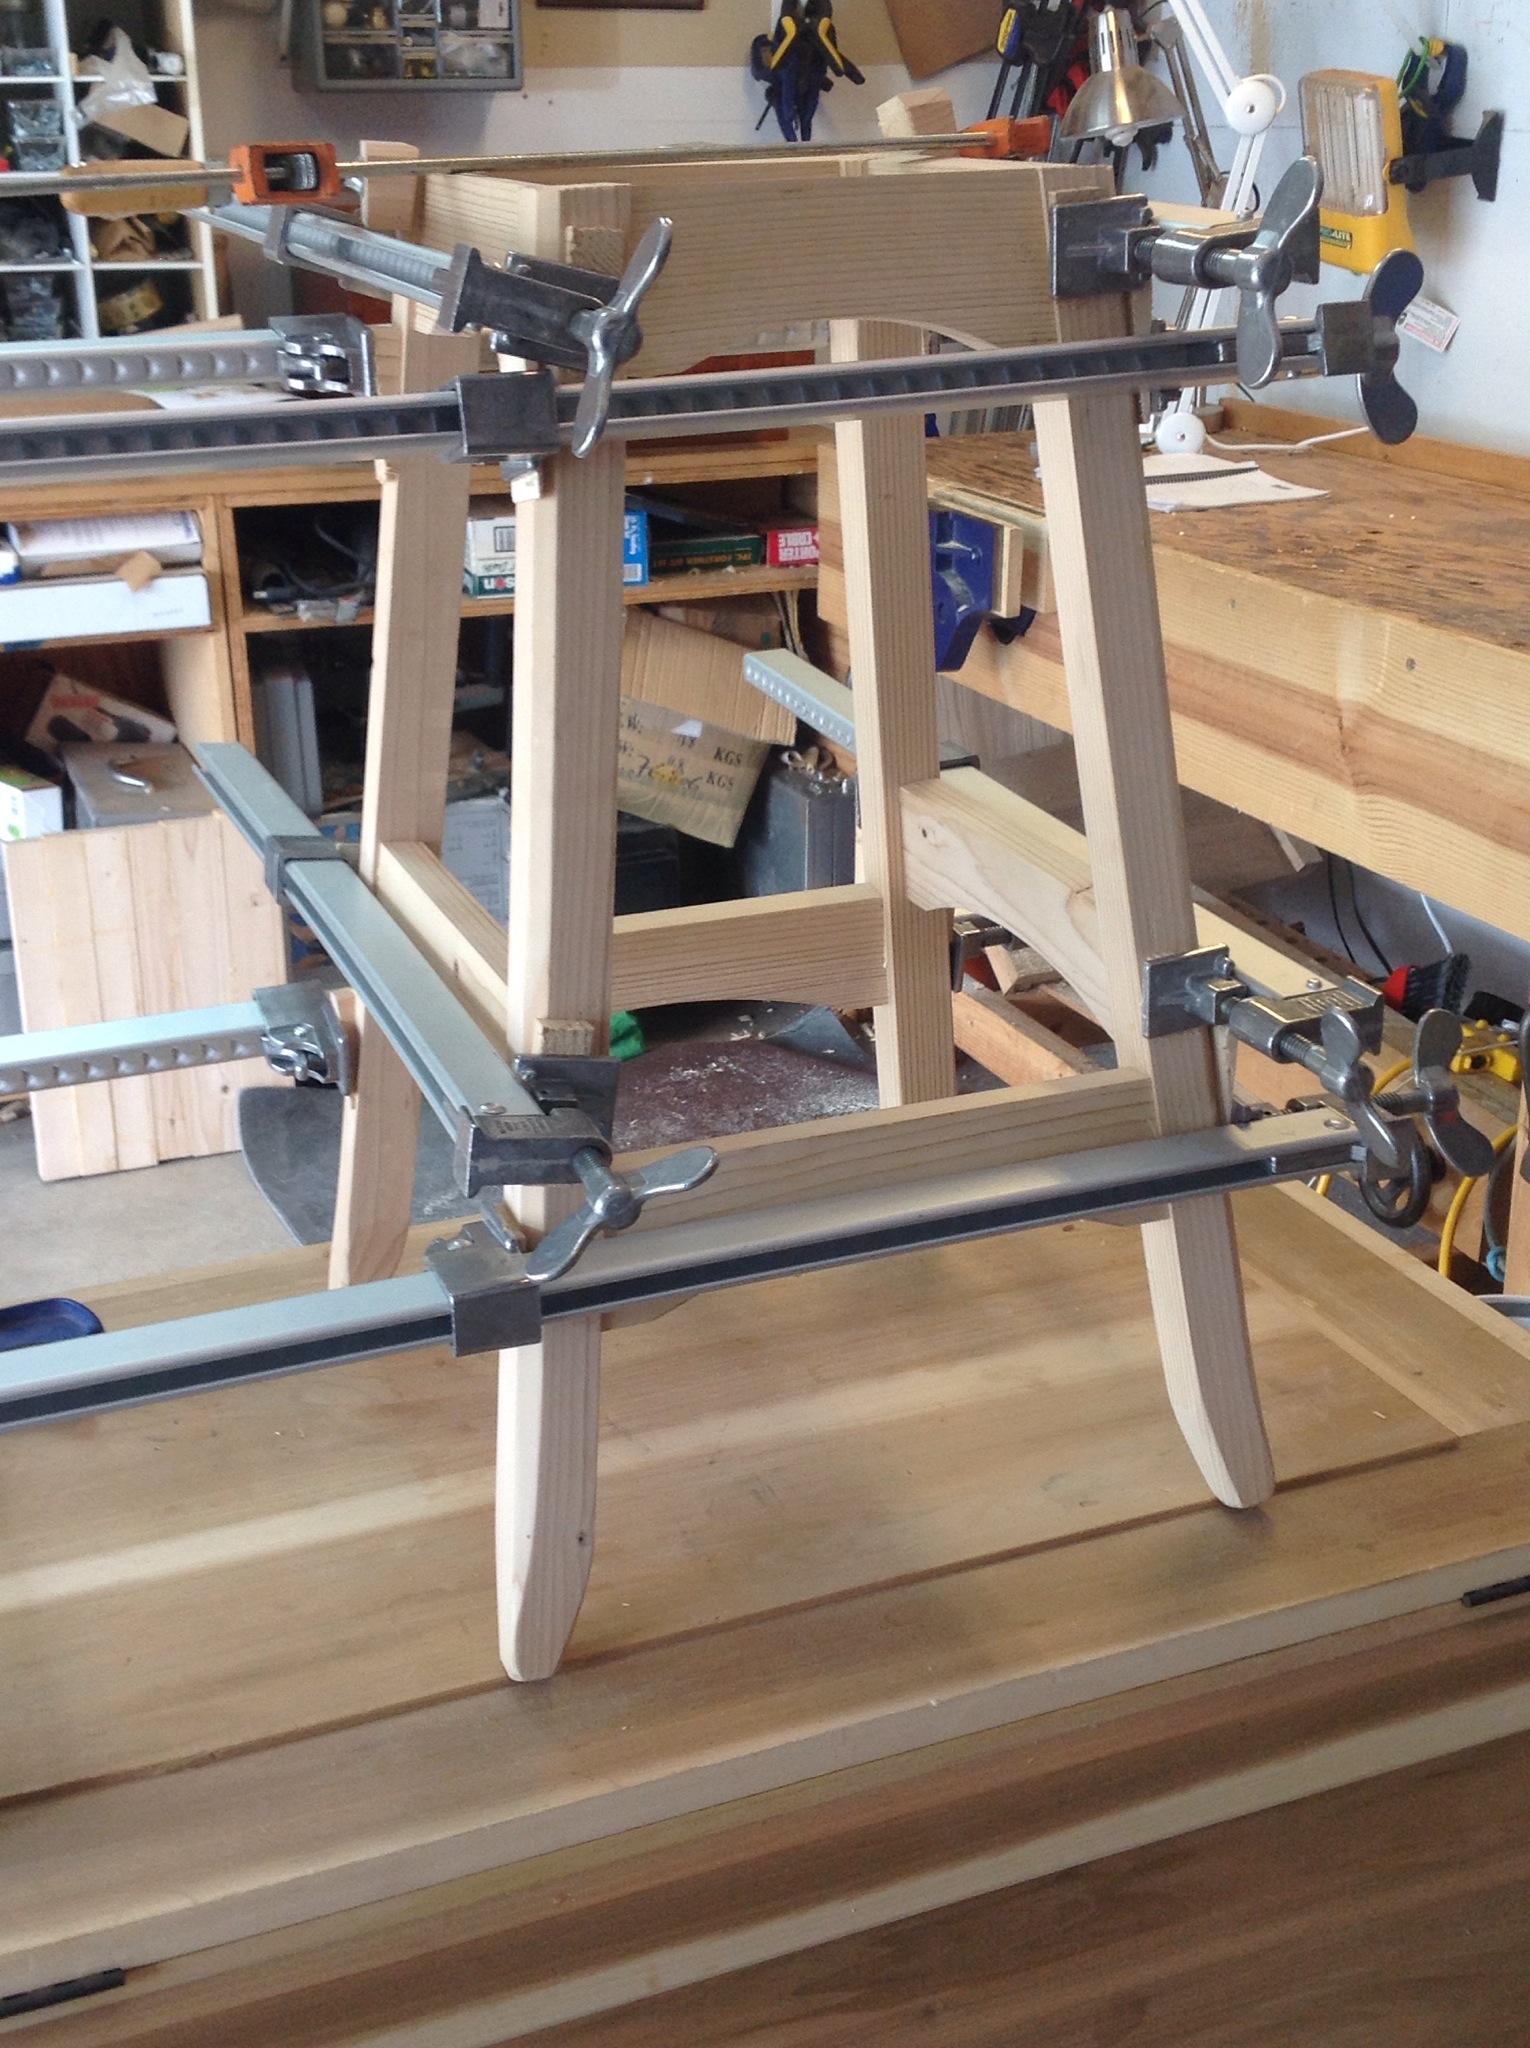
Shaping the Stool Legs
It’s the subtle shaping of wood that adds character to a piece. Although I am only making a stool for my shop it’s fun to add a little lightness to the piece by trimming some wood from the legs.

Grain
Working wood by hand forces you to pay particular attention to grain direction. With eyes open your awareness of change is heightened. While smoothing the arches on my stool with the spokeshave I noticed this subtle change in the wood grain.

Makes me wonder what caused this change…..kiln drying the wood? Or a more natural change in the tree’s environment?
When I notice the smells and textures of the wood, the world is a better place.
