Archive
Arts and Craft Side Table Finished
A final coat of wax this morning and the side table is complete. This was an enjoyable project, the joinery was a challenge, but the project small enough to complete relatively quickly.


The through mortises have such a different grain then other parts of the table. It makes the careful fitting worthwhile.
As I tidy my bench and spend time sharpening planes and chisels my mind wanders. I smile at my small tool chest as the tools are put away; I look across at my son sitting upon the shop stool, for a moment it’s peaceful.
Arts and Craft Side Table – Finishing
This morning was spent easing the top edges and preparing for finish.

Using a spokeshave the edges were trimmed. Took a little time and I found myself reversing the spokeshave, angling side to side and all but standing on my head to work through the various grain direction. Finally the edges were complete.
Attaching the top only took a few minutes and then I did a quick sanding, looking for tool marks and pencil marks that needed to be removed.

Finally a coat of sanding sealer is on and I will add another coat before the day is done.
Arts and Craft Side Table Top
Most of you know that the majority of my woodwork is by hand. Typically the only time I use power tools is during my stock preparation and then only after hand planing one side and the edges by hand.
The top of the arts and craft side table is round. As I thought about the best way to cut it, I decided to pull out my very dusty bandsaw and make a quick jig. 30 minutes later I had a quarter of the top cut, a stalled blade and a big mess. An hour later I had a roughed out table top cut with a hand saw and smoothed with a #4 and spoke shave. There’s still a little more work to get it perfectly round and smooth but sure was a simpler more peaceful process.

Side table Glue Up
A beautiful morning to spend a couple of hours dovetailing the upper rails to the legs of the table. Then I began the careful process of erasing all of the pencil marks, chamfering the bottoms of the legs so they don’t splinter and a quick sanding.
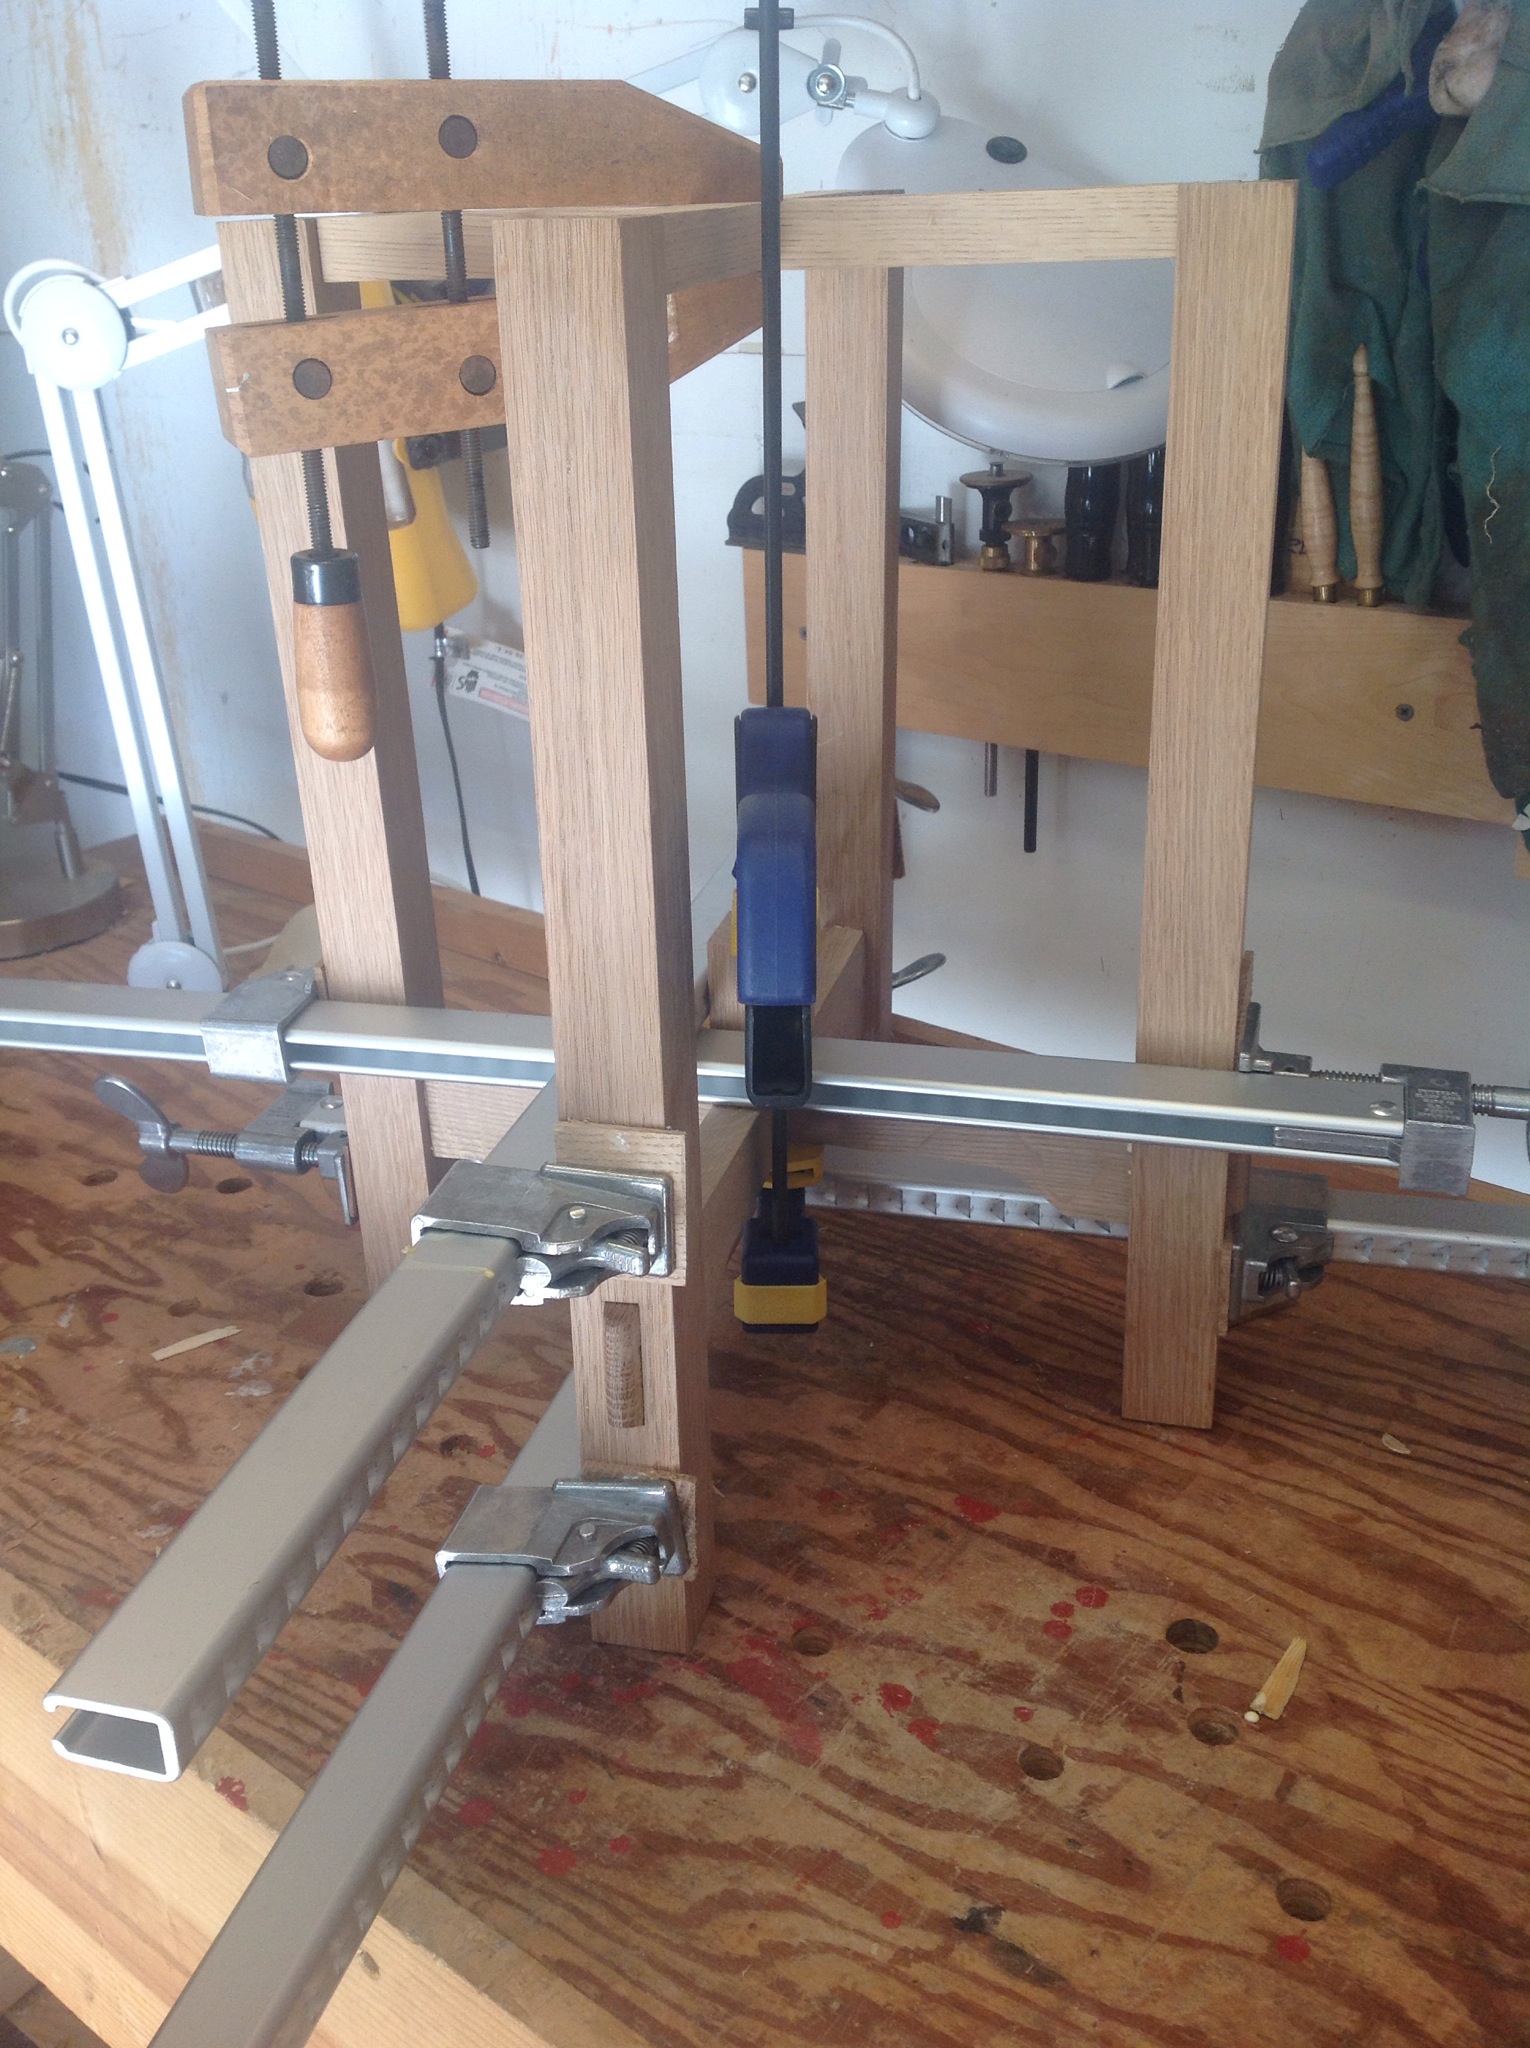
Glue up went without a hitch until I tried to insert one of the lower rails upside down. Fortunately the mistake was obvious and quickly rectified. With the clamps In place there was little do do except begin gluing up boards for the top.
Not sure how to finish but I am considering a natural look without stain to match the coffee table a made last year.
Arts and Craft Side Table – Lower Rails
The table is held together with a pair of lower and a pair of upper rails. The previous post shows the through tenon attaching the lower rails to the legs. The rails are held together by a cross over lap joint.
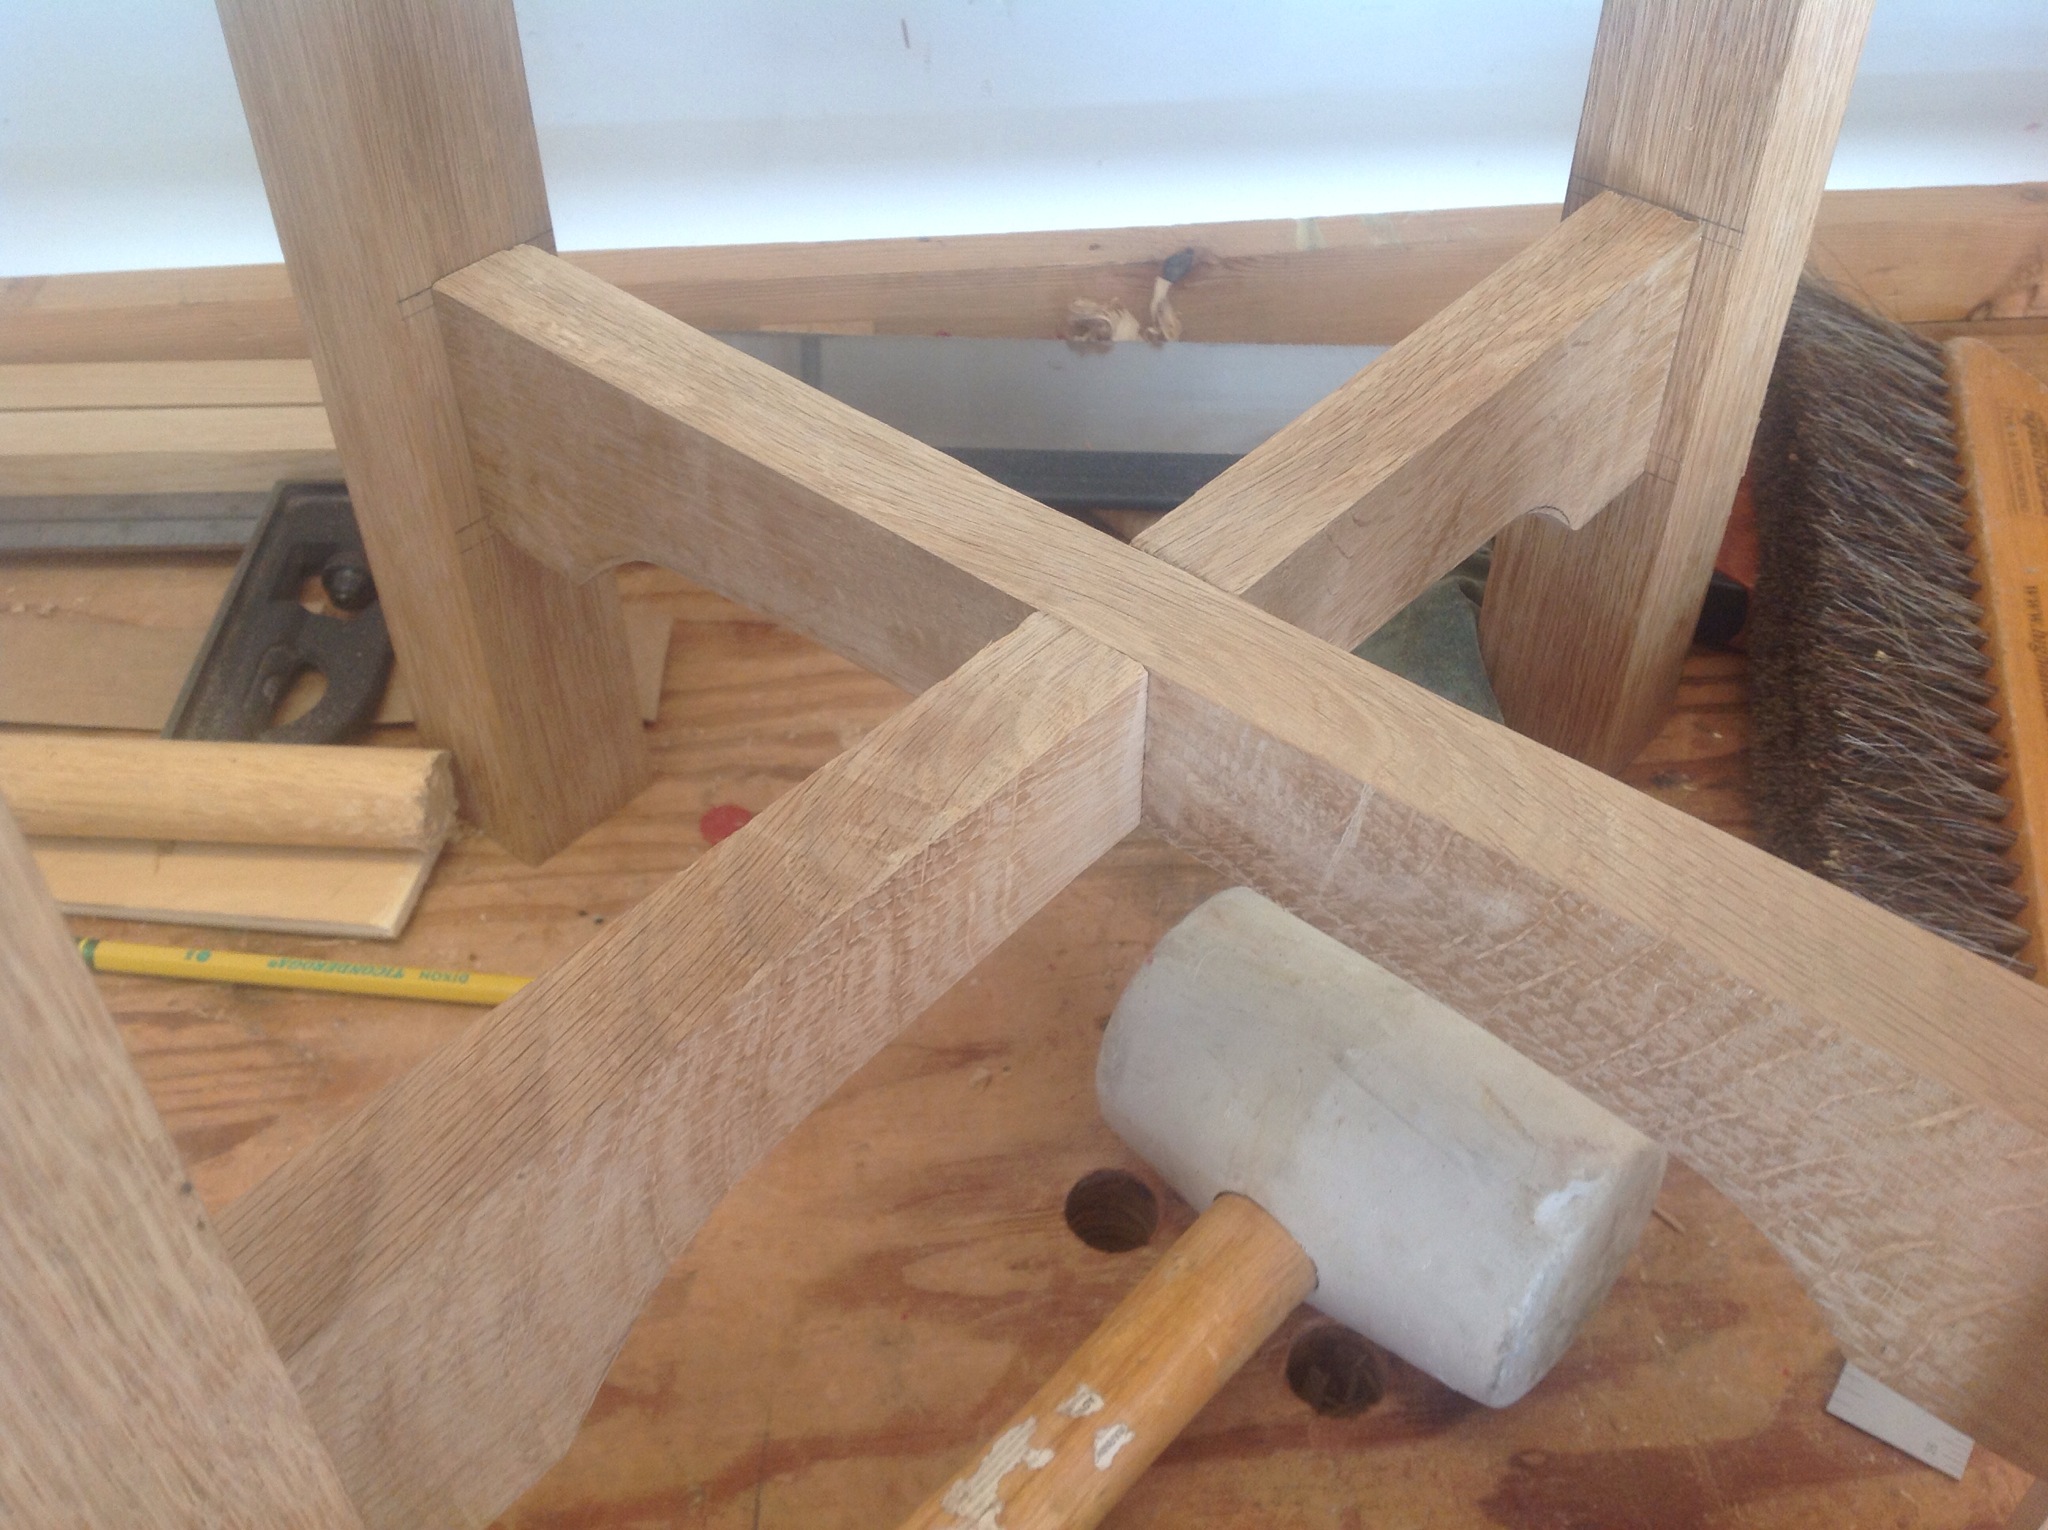
Making a joint like this requires me to carefully lay out and think through how it fits together. The number of times that I have cut this joint on the wrong side is embarrassing. Today with care I was able to do it in one shot. A little blow out on the bottom of the joint which will fortunately be hidden is the only problem.
With the Joint fitting properly the rails could be shaped using a chisel and spokeshave.

The upper rails will be dovetailed into the top of the legs with any luck tomorrow.
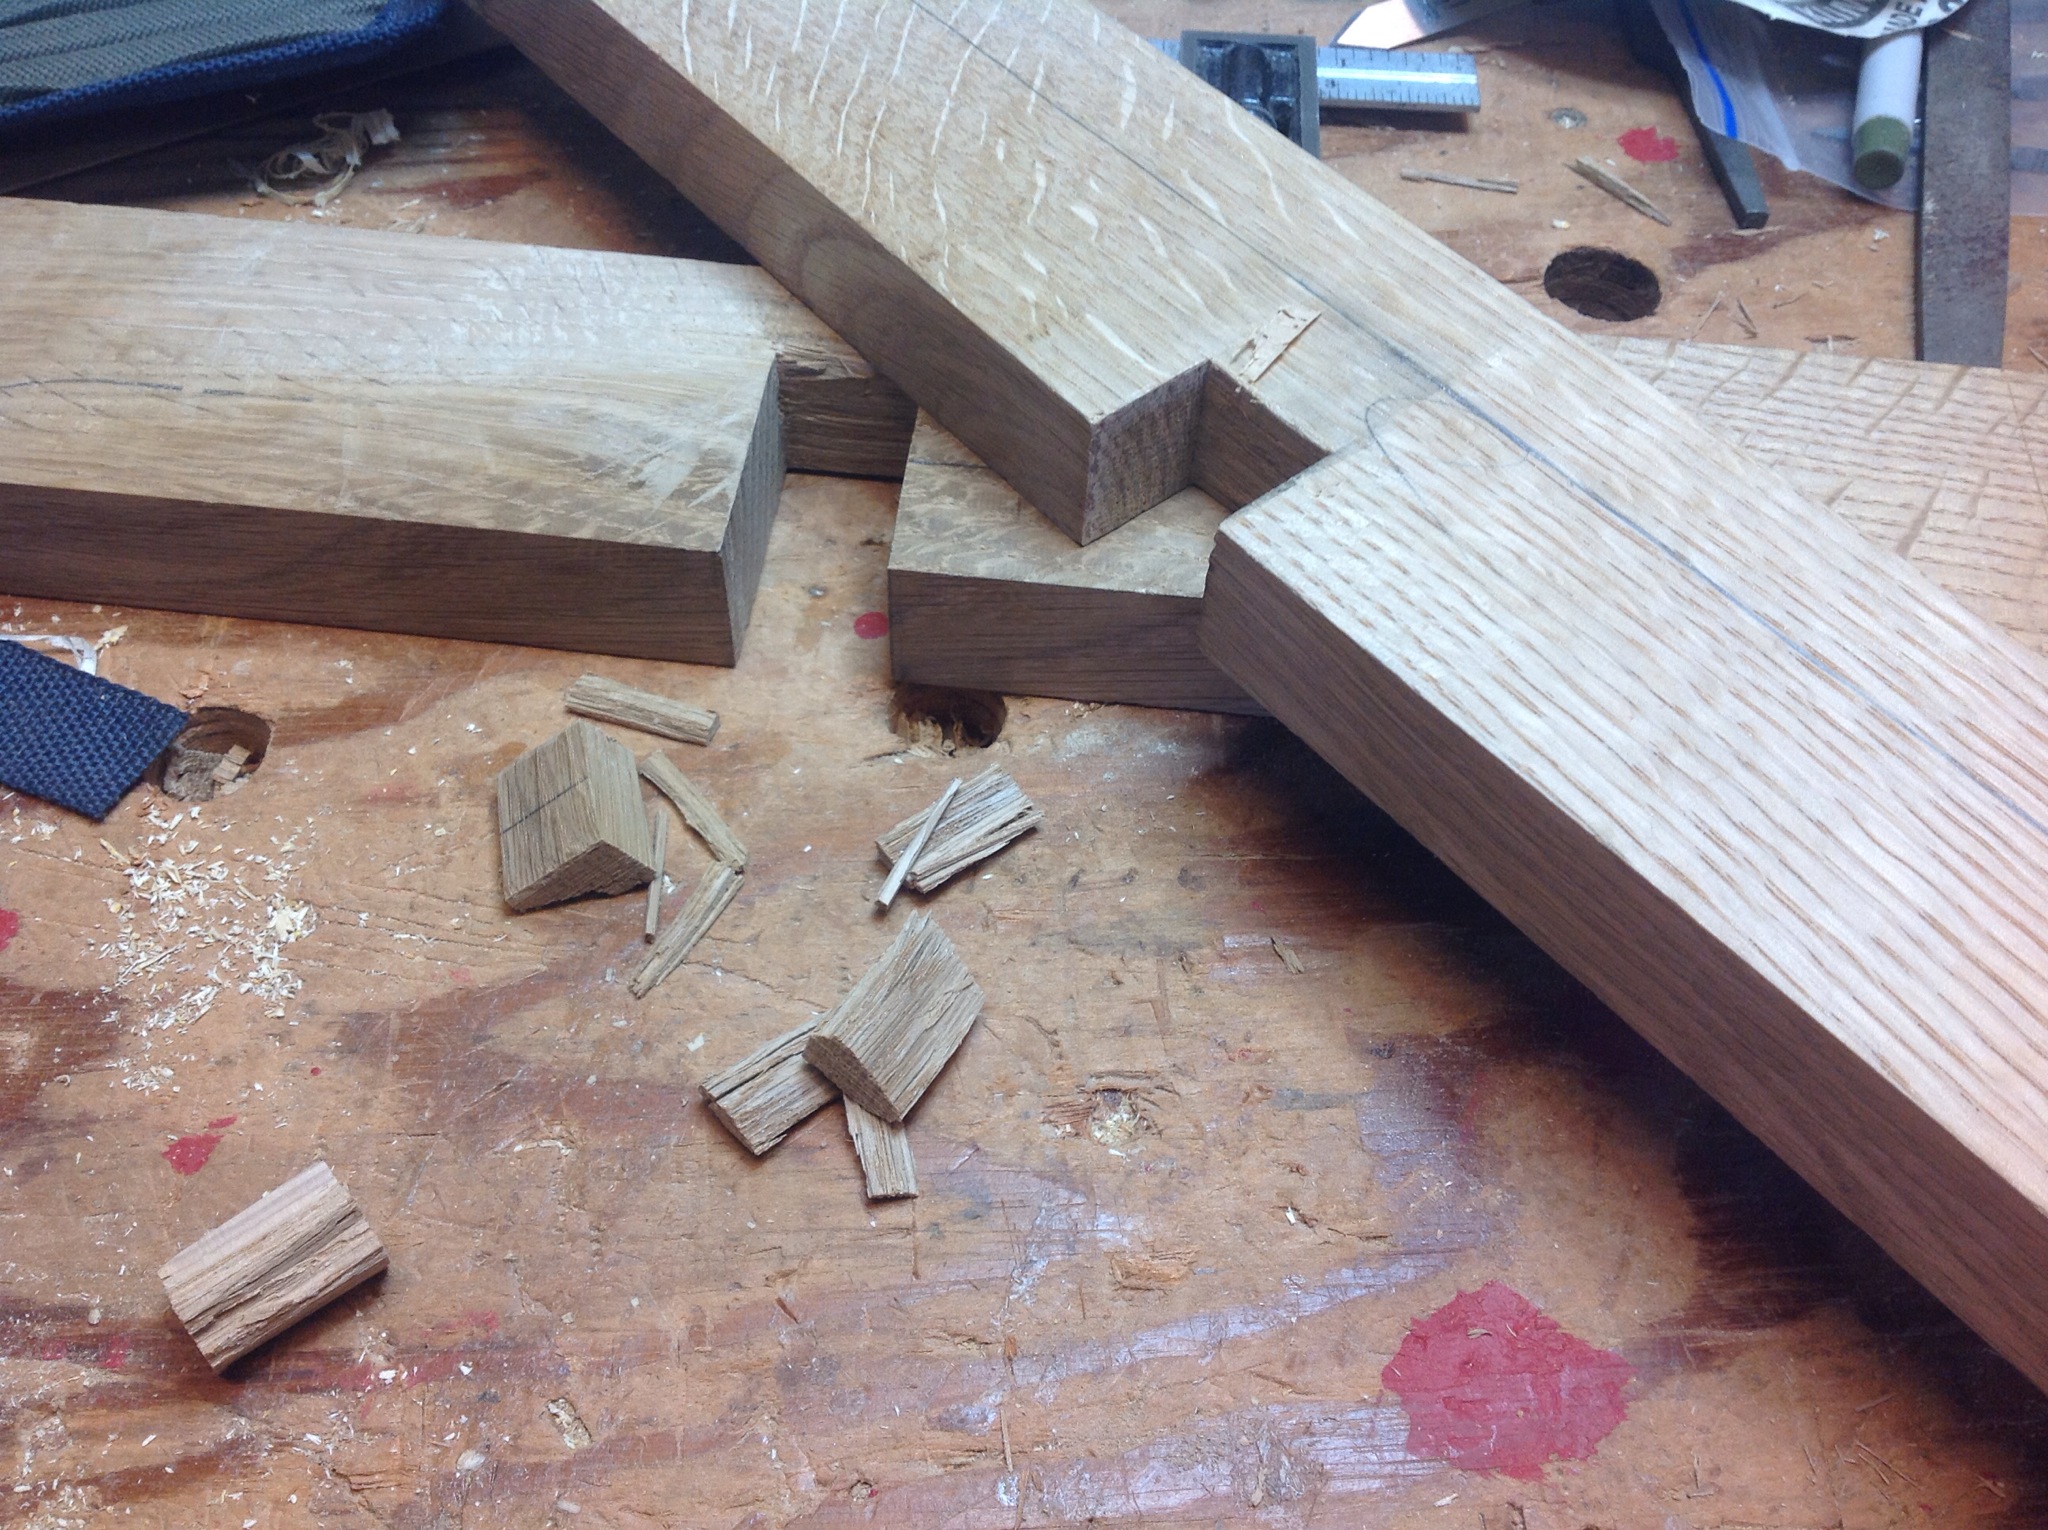
Arts and Craft Side Table Tenons
Started cutting the Tenons today to match the mortises on the legs. Through tenons so it is worth taking extra time to ensure they are tight. Used the saw for the cuts with a router plane to clean up and ensure a good fit.
My favorite part of through tenons is shaping the exposed end. I do this with a #4 plane and a file for final smoothing.

When I’m done with the sides a chisel makes short work of chamfering the ends. The grabbing the same file I give them a final smoothing.

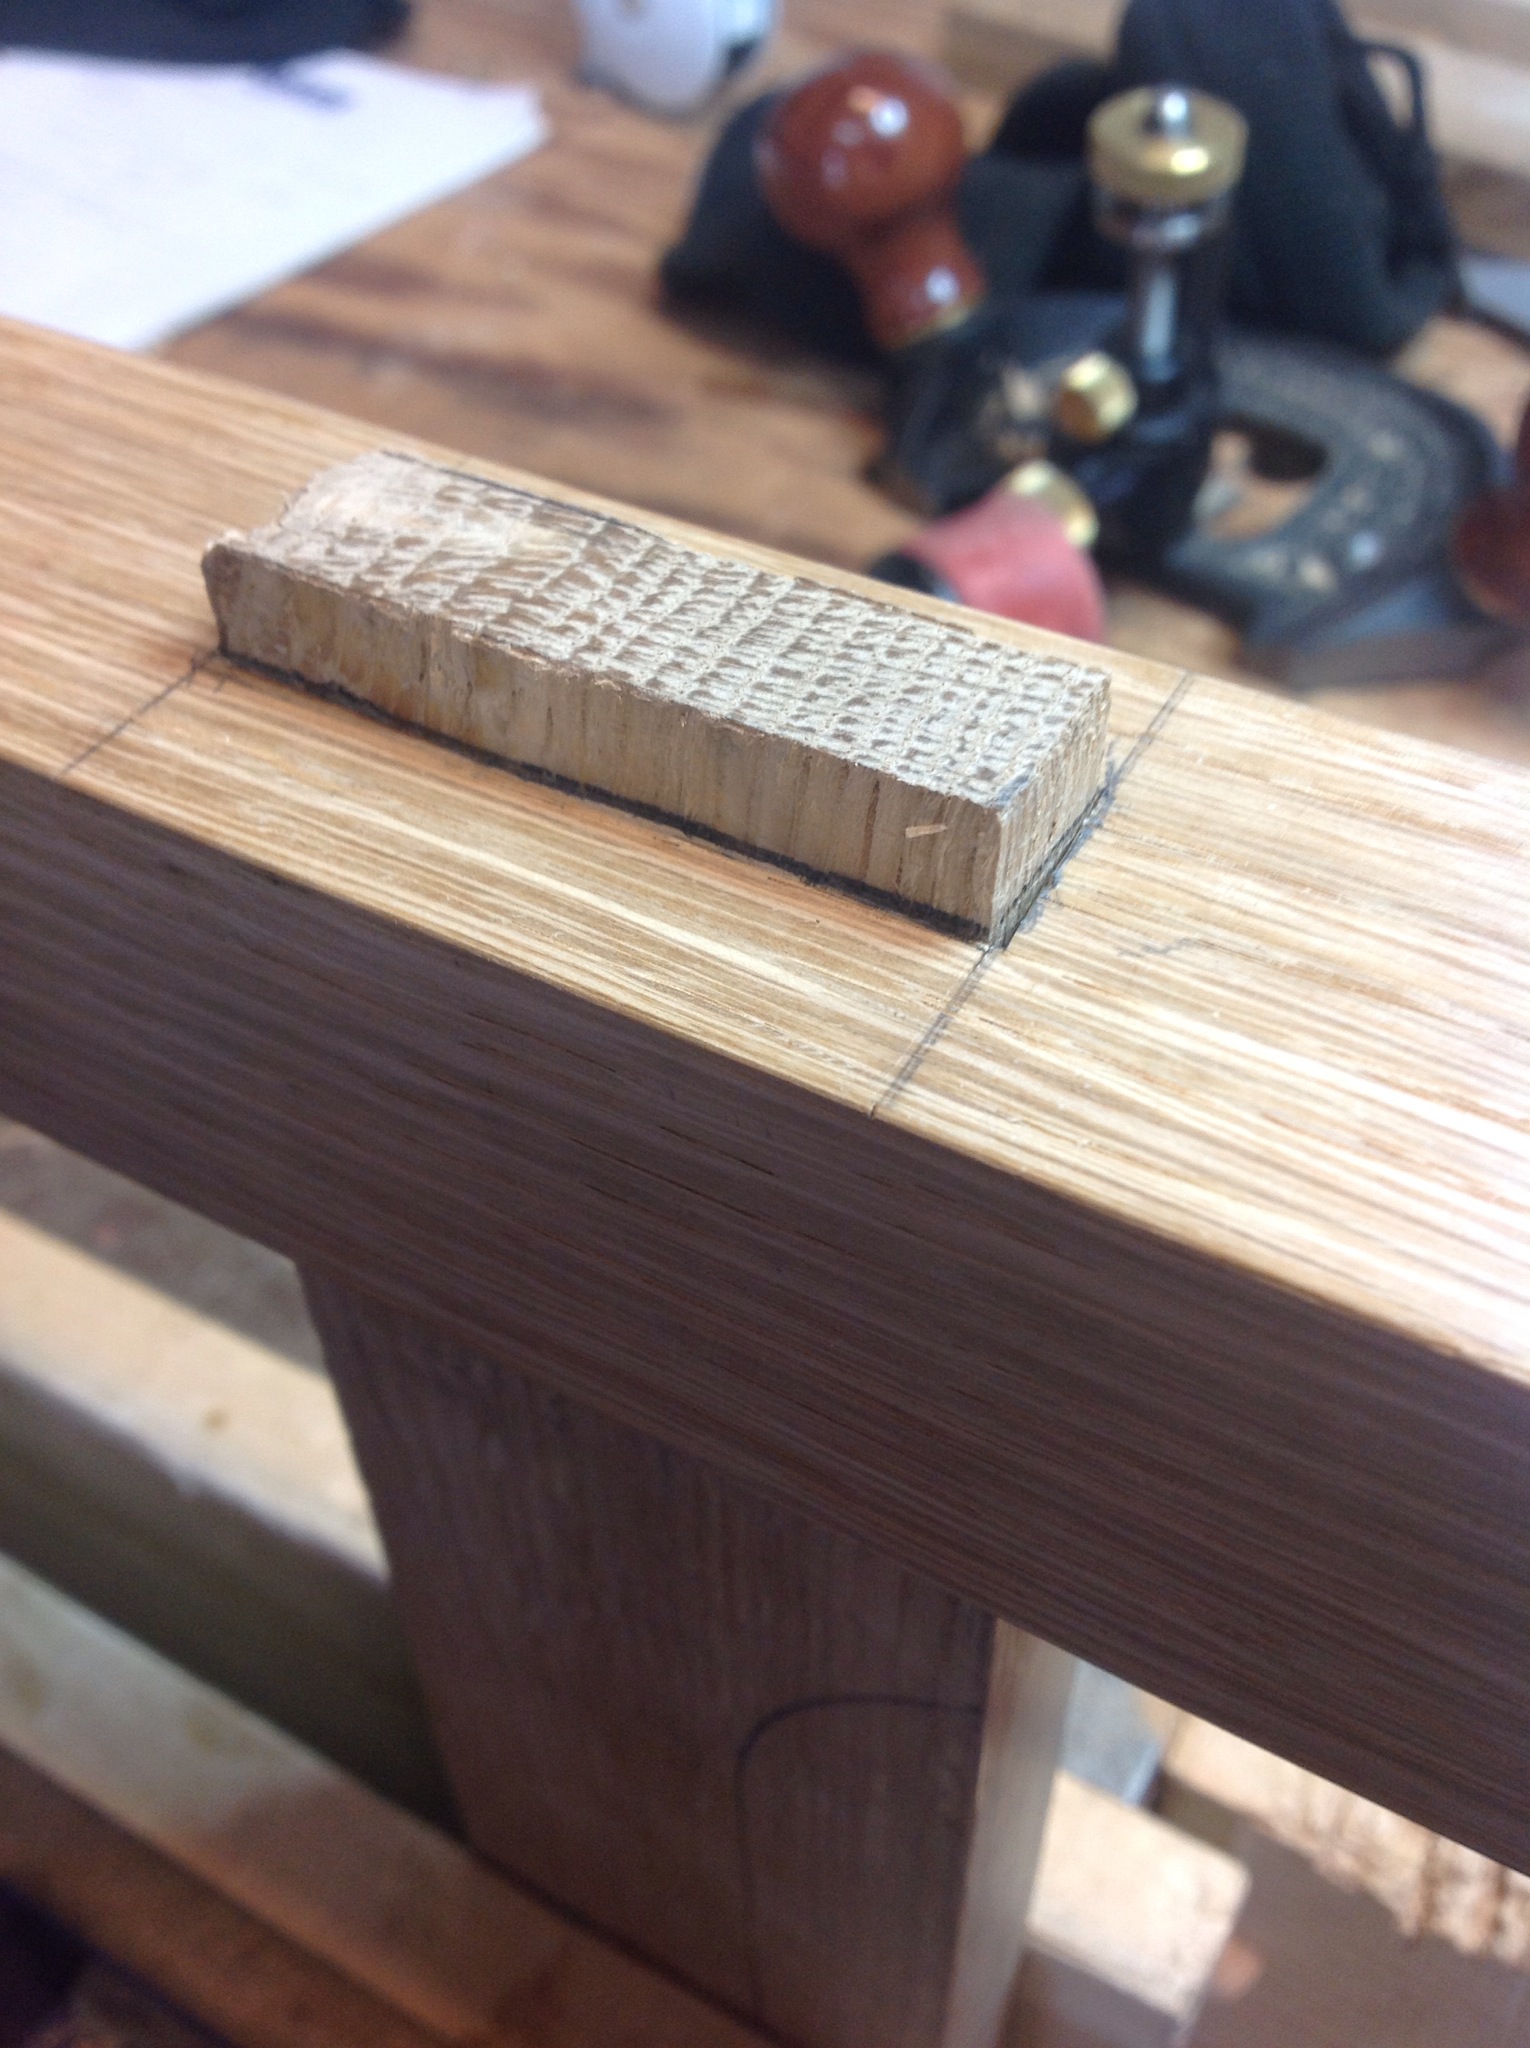
Arts and Craft Side Table – Mortises
After all the lumber was milled and cut to size I spent time carefully laying out the mortises. The plans call for through mortises at the bottom of each leg, so I took my time to ensure I didn’t cause any damage to surrounding areas. Additionally the legs are visible on three side since the top will be circular.
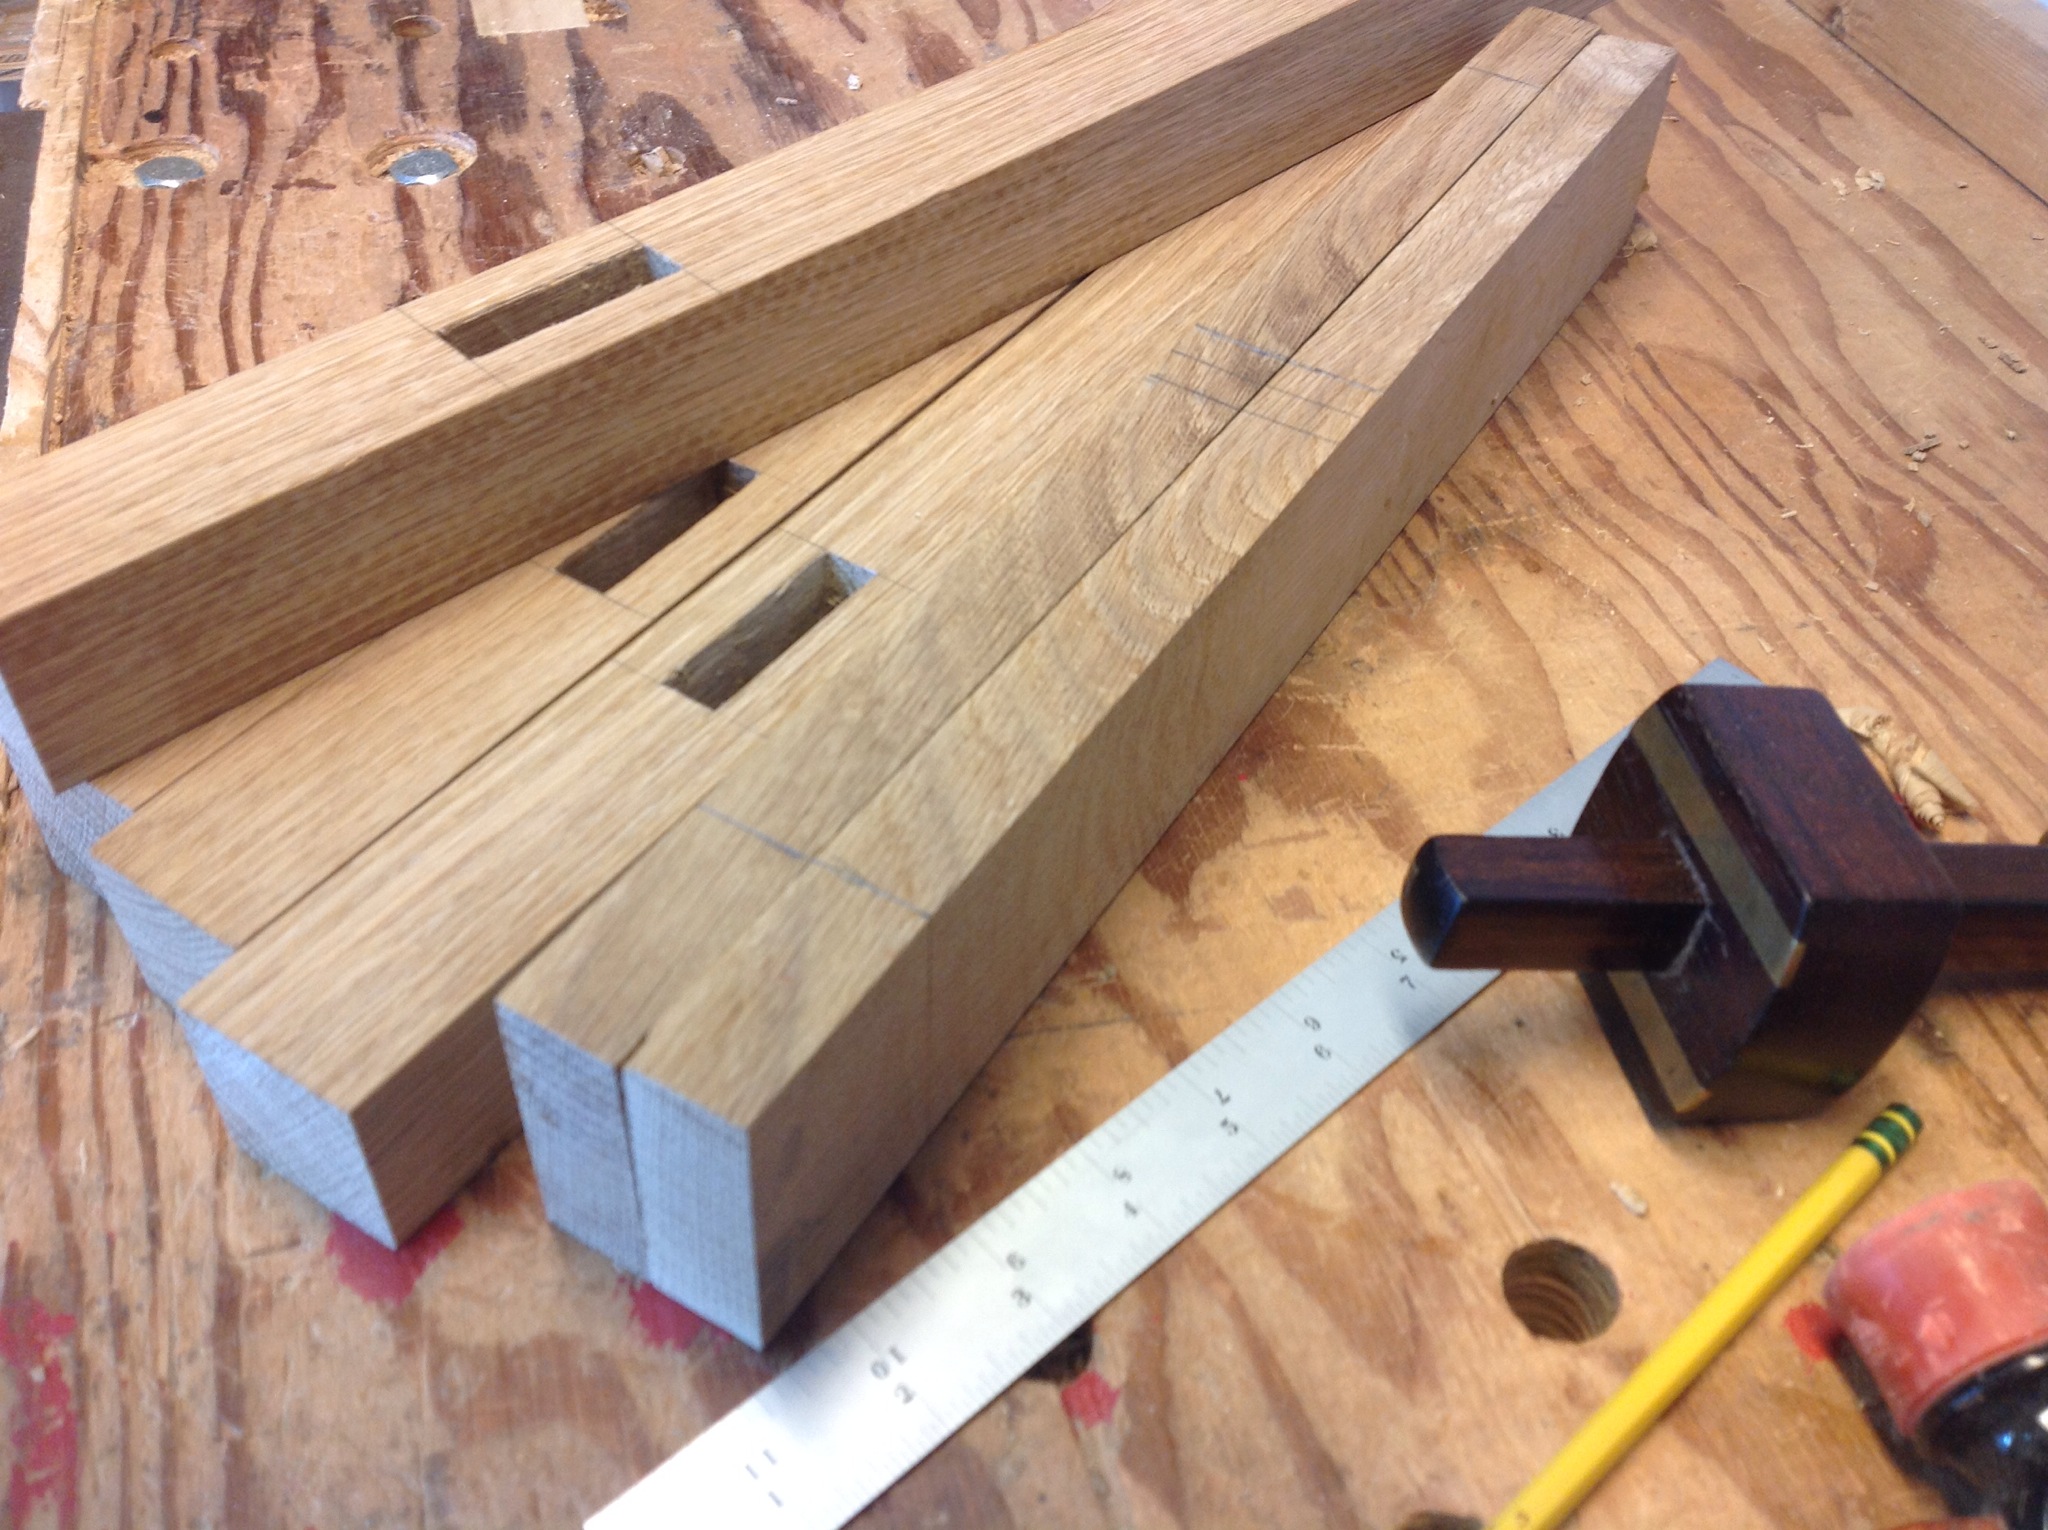
A couple of hours and the mortises are in place with no real problems. It was very relaxing to chop away and I could feel my stress fall away. Took a couple of sharpenings of the chisel but each mortise on took a pass from each side. The first pass was about an inch deep then I flipped the piece and chopped the remaining half inch from the other side.
Before cleaning up for the day I laid out the tenons on the lower rail and the center bridal joint. Haven’t cut one of those in a while so I’ll have to think about the best approach this evening. The upper rail is dovetailed into the top of the leg which is also a technique that I’ve done infrequently. One of the reasons for this table was the couple of joints that will make it fun.
Arts and Craft Side Table, the beginning
Next to the couch where I nap, there is a side table that supports my iced tea. It functions well, but the table has no warmth and it’s design leave me feeling empty. Looking for a simple table online for a few months to provide inspiration, I have not found anything that meets my criteria. In an act of submission I noted a design in Fine Woodworking that will do until a different design comes to mind.
This morning was spent milling the pieces of lumber for the legs and digging for enough pieces to make the top. Failing to find enough lumber I will have to purchase some next week. I’m glad to be listening to my planes slice through oak and feeling for the changes in grain.

