Archive
Saw Vise Difficulties
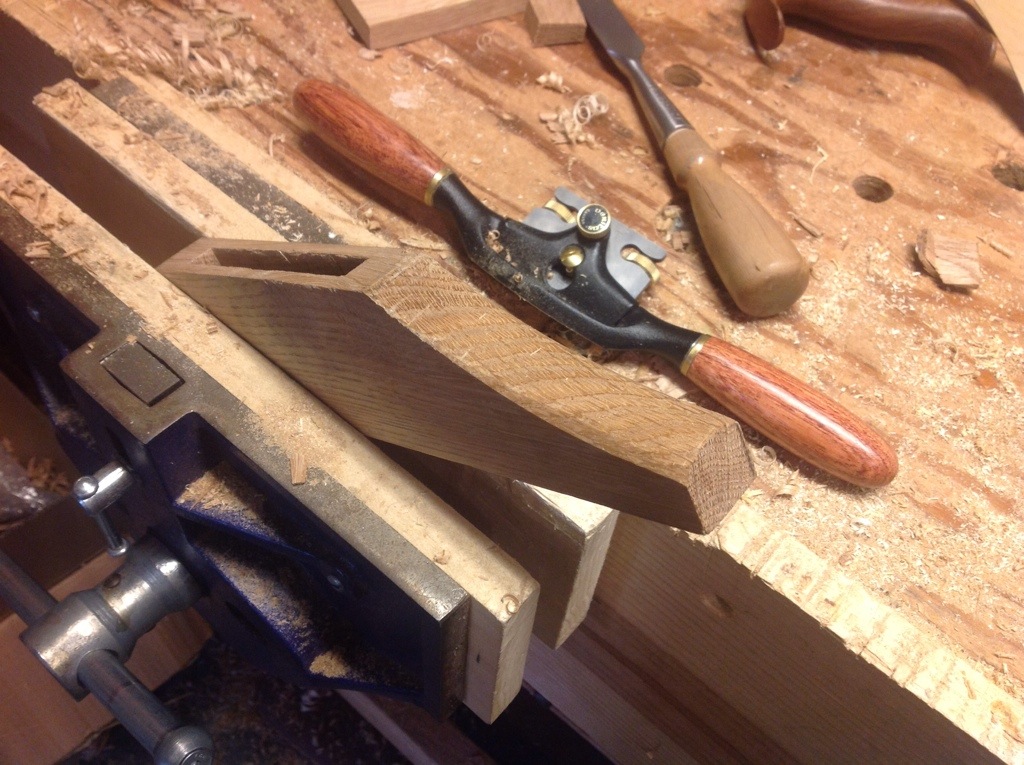
Looking down the file I can clearly see each tooth as I work to sharpen. The height is correct. However, I have come across a couple of problems that are probably related.

I did a poor job drilling the hole for the bolt that tightens the clamp. The cant does not allow the full force of the nut to tighten the vise. As I sharpened the saw slipped slightly. I will plug the bolt hole and re-drill to fix this and consider a small piece of Leather the hold the saw. The second item is the hinge is not as tight as I would like. It does not affect the clamp but bothers me. I may replug that hole and redrill as well. Seems that a little more patience in the drilling department is in order.

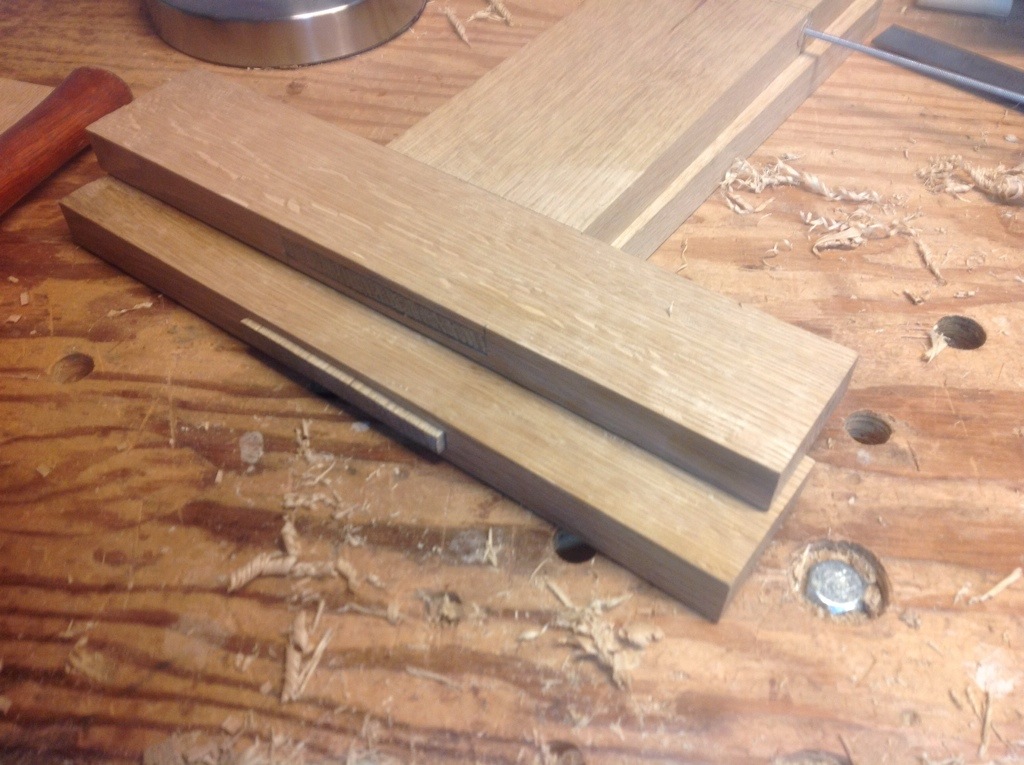
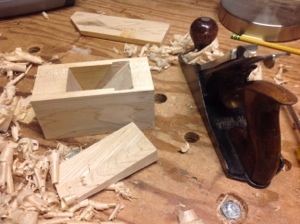
Saw Vise Glue Up
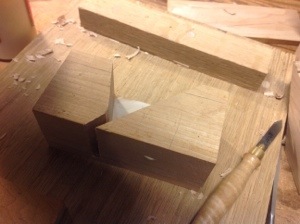
If you don’t plan wisely you end up with missed opportunities. Today was supposed to involve a ride to visit friends and attend graduation parties. Since everyone in the house with the exception of me is under the weather with a cold, it seemed best to stay close to home. Thus a free day that should have involved much woodworking. Except each step I needed to complete involved a glue up and the inevitable wait while things dry. By the end of the day I made and installed vise inserts that hold the saw, then glued the two pieces together. Tomorrow I hope to grab a few minutes and square everything up, install the hardware and put a touch of finish on the vise.
By Monday I will be filing saws and preparing for my next project. Which will be the stool I began over the winter and set aside when the temperatures plummeted.
Saw vise curves
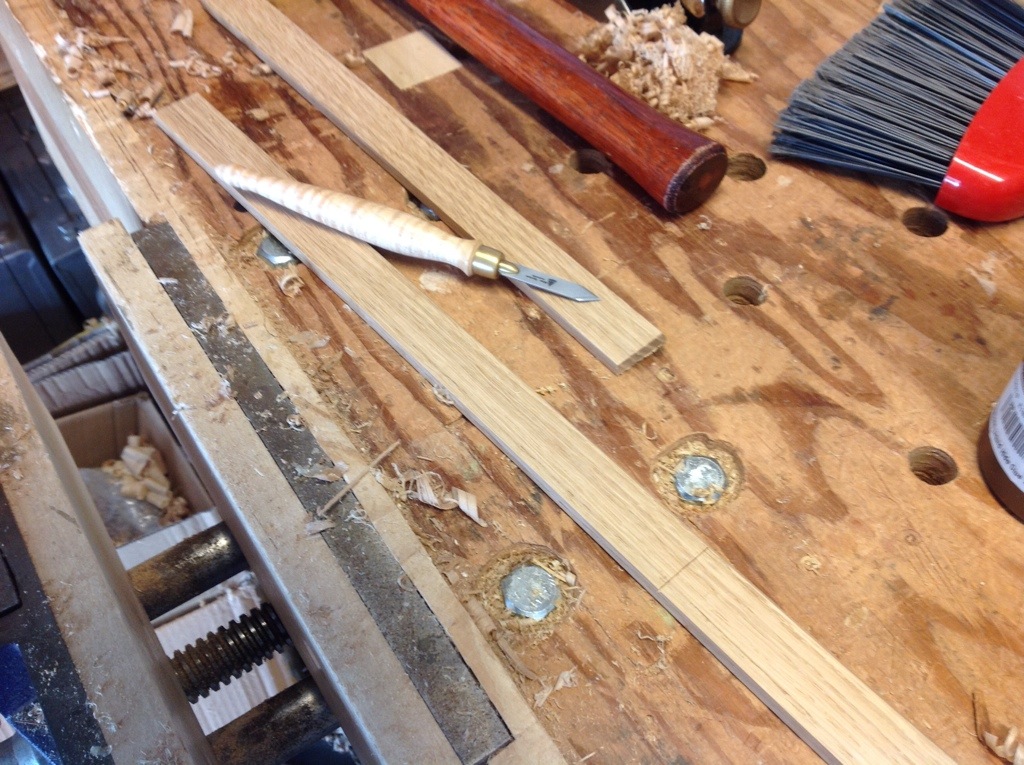
Taking a few minutes to add artistic flair to the saw vise. I cut curves onto each end of the cross piece. I did this using a saw and chisel finishing up with a spokeshave. A couple of people have asked me why I do it this way rather than use a coping or bow saw. The answer…I enjoy it. I don’t think it is any slower and it is fun popping out the wood with the chisel and attempting to follow the curve before finishing with a spokeshave.
All done with the curves, not bad for an hour. Perhaps I can finish up this weekend amongst a soccer tournament, 11 mile run, yard work, planting potatoes and all the other things that need to be done.
Saw Vise Mortises
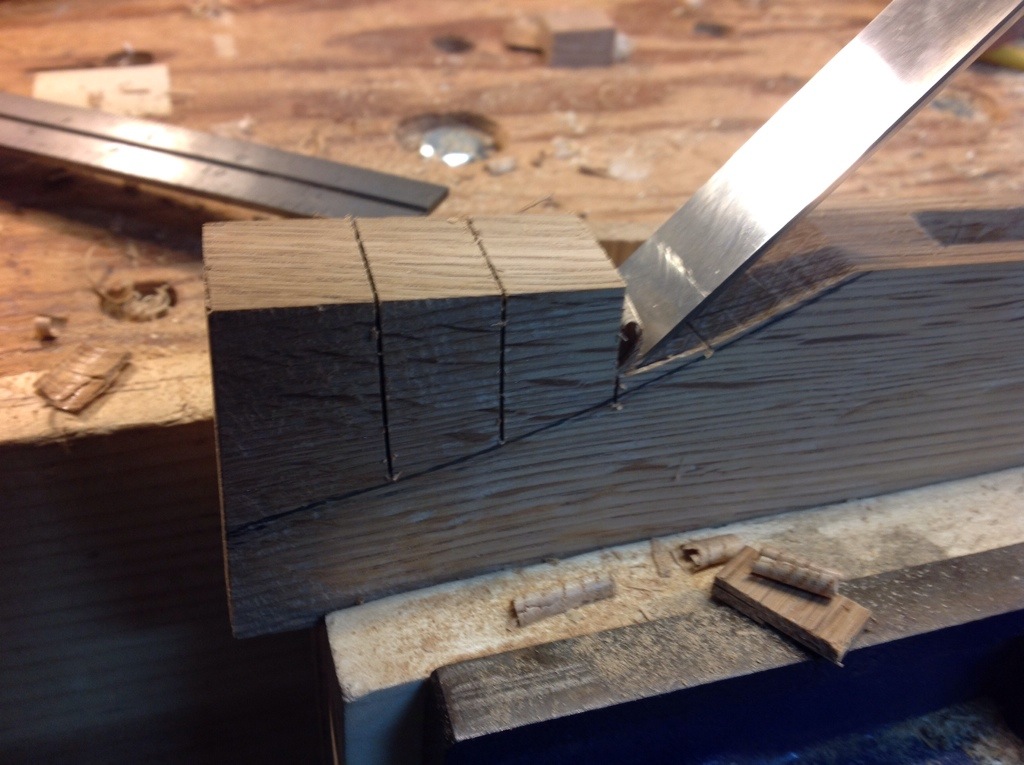
For such a simple project I certainly seem to be dragging it out. Today I managed to cut the two through mortise and tenon joints that join the sides and top of the vise. A little clean up and I’ll begin shaping the sides. A couple of people asked for the link to the plans on Paul Seller’s Site. It took me a few minutes since it was listed under saw chocks. I also see that Greg graciously added the link in the comments on the previous post.

Building a Saw Vise
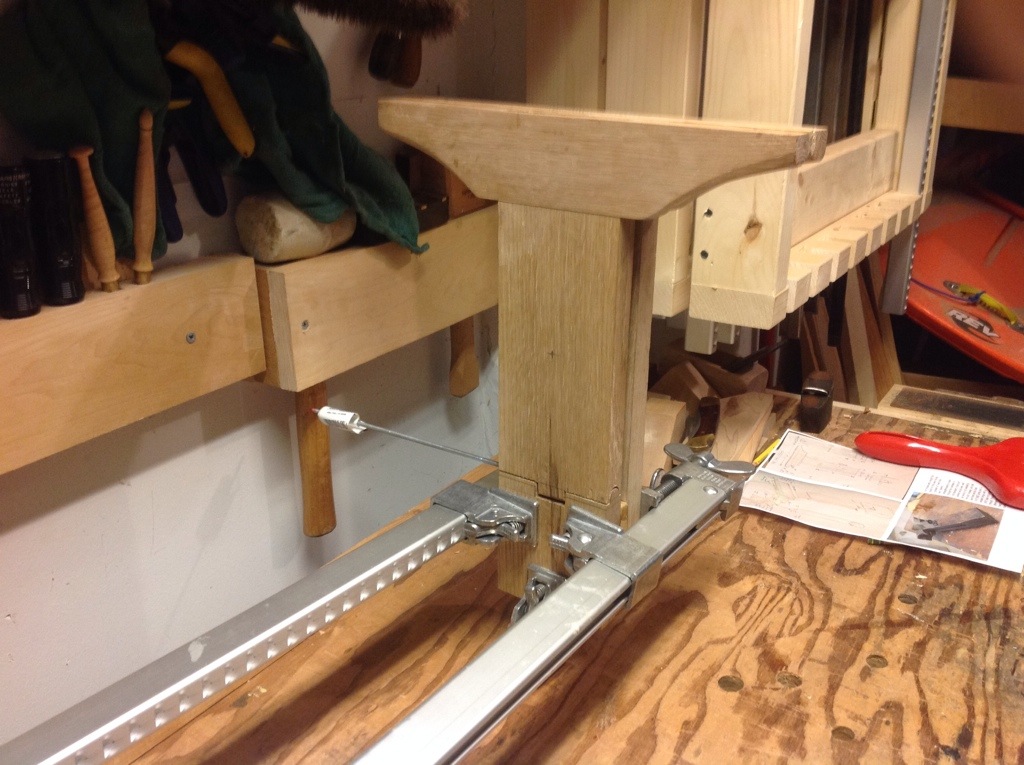
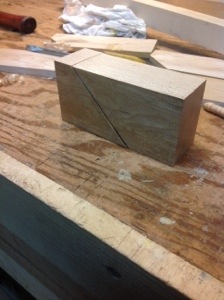
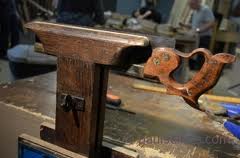 I managed a couple of hours of work on the saw vise this week. Using a plan I found on Paul Sellers’ web site, I began by roughing out the pieces for the vise. There are two sides, a spacer which fits between the two, and two cross pieces that are attached with a through mortise and tenon. The most interesting part of this project is the cutting of the hinge that allows the vise to open and close. This is new to me and apart from photographs on the internet I have not seen a wooden hinge. Certainly I have no knowledge of the best method to make one.
I started by cutting one of the sides into two pieces. Laying out the hinge with pencil I cut out the outline of the hinge. then a brace and bit was used to cut out the convex shape in one end. On the opposite piece, I carved the cylindrical shape using chisels until it fit into the opposing piece. I then ensured they fit together and drilled the hole for the pin. (The pin is a piece of threaded rod I had lying around). After some fiddling around I had a hinge.

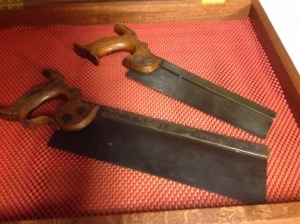
A Stranger in the Dark
Docklands to Canary Warf, take the Picadilly line to Tower Hill, wander around and blend into the crowd at the Tower of London, exit the main gate and return to the underground, make systematic changes across the city. Once you arrive above ground, walk to a nearby square, wait in the north corner adjacent to the bike parking. A man will hand you a package.
Or as my daughter said, ” you’re going to meet a stranger, a man you met over the internet, in a foreign city, in a park”!! At least I know she is receiving my fatherly advice…..and reflecting it upon me in my own quest for a couple of saws.
A couple of months ago I realized that I would be in London for a few days. I saw this as the perfect opportunity to look for hand saws. Scrolling through eBay, websites, “car boot sales”, I began looking for a dovetail and tenon saw. I soon realized that to make this work, I would need to find someone that had already been to the estate sales and was reselling the tools, I came across a site called Hackney Tools. A couple of months ago, I purchased two R. Groves and sons saws and Gary held on to them until I arrived in London.
Gary of Hackney Tools met me in the park saws in hand, with a happy smile on his face. We talked briefly and with a shake of hands, I pushed the saws into my backpack, Gary strolled back to work, forgetting that a picture would be great on each of our blogs. I headed back to the underground wondering how airport security would look upon a couple a saws….
Mortise Gauge
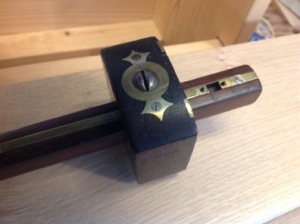
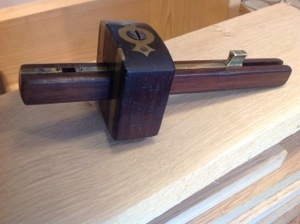 I’ve been thinking about another mortise gauge since I completed the coffee table a few months ago. There is convenience and accuracy in being able to set a gauge to a specific setting and maintain that setting through several steps of a project. There is a certain inconvenience to this as well. You can’t use the gauge for anything else! Fortunately a box appeared on my doorstep the other day and there were several items inside.
The first was this wonderful mortise gauge. I already have two marking gauges, the first is a Veritas wheel marking gauge. Obviously since it only has one marking cutter it is not designed for mortises (although you can use it that way with a loss of accuracy). I like the Veritas gauge ,it holds its setting and works well. However it is not a mortise gauge. The second is a mortise gauge from Crown Tools. Say what you want about the quality of crown tools…but this gauge has worked well for me and the only real complaint I have is it’s comfort in the hand. The corners are square and dig into your hand.
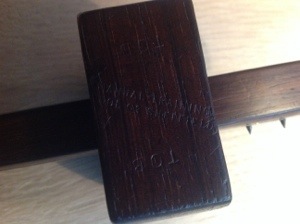
 A closer look at this gauge and you can see that it is stamped with the words ” Manual Training Tool Co Sheffield”. There is also a stamp of TOB which i assume is an owners stamp. I dug around and discovered that the Manual Training Tool Co Sheffield may be the same as found in Sheffield England around 1890-1910. You can read a little about it yourself on the internet.
More importantly to me is the feel of the tool. The edges are slightly rounded and it fits firmly in my hand with no awkward corners. The gauge moves with precision, the brass is practical, but gives it a classical look. This is what a mortise gauge should look and feel like and I am honored to give it a new home and put it to work. In this post I also wanted to make my English teacher (I’m sure she’ll never see this blog) proud by correctly using the term gauge not gage, two very distinct words!
Curved Plane

I noticed on Joe McGlynn’s blog a few weeks ago that Flair woodworks was having a stool build and was looking forward to participating. Watching the weather it became clear that spending a day in my garage wasn’t going to happen. I have two small heaters that do a decent job of warming my work area, however I can only raise the temperature 20-25 degrees, since it’s been hovering around zero for the last few weeks I have made a few short forays into the garage but have not settled into a project. The last report shows that I may have a couple more weeks to wait.
My next project will be a shop stool and I have milled a few pieces of lumber in anticipation. Most of my time has been spent making a curved plane for smoothing the seat. A couple of scrap pieces of maple make up the body.

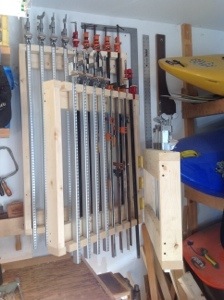
Clamp Rack
I spent the day cleaning my work area and getting ready for my next project. Part of the effort was building a rack to store my clamps and move them out of the way. I blogged during the week some of my thoughts and had some nice comments and ideas.
I had visions of wall mounts, carts, clamps vertical, clamps horizontal and then I stumbled across a couple of images on the web for the rack that I chose. Seems that there were several people with the same rack so I’m not sure who to credit but I built a rack that houses 27 clamps in three racks joined together with hinges.
No fancy woodwork here, I just screwed it together mounted it on the wall and inserted clamps. Back to hand tools tomorrow.

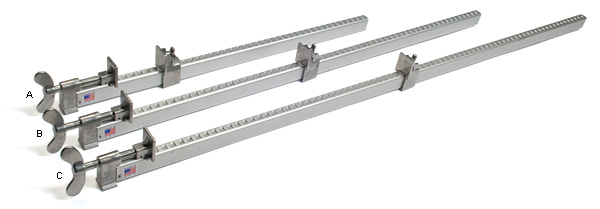
Dubuque Clamp Company
Many of you that read my blog regularly know that I have spent a week at Paul Sellers’ Foundations Class, I also am a member of his Woodworking Masterclass. Many of his lessons and techniques are excellent. He is also a fascinating person, extremely passionate about his craft and most importantly, helping people grow and develop as woodworkers. If you watch many of his videos you will notice one interesting thing that occurs repeatedly, the clamps he uses fail. The frame bends, the mechanism sticks, the adjustment breaks off, the entire end cracks. I’m chuckling as I write this, thinking of the many clamps in the classroom that kept piling up in the corner as they failed. Paul had added wood to the clamp as a stiffener to prevent the bending and it works. If I had the time, I would go back through the videos and note the number of times a clamp breaks. It would almost be like the old college drinking game where each time a clamp fails you have to drink a beer.
All of that being said I know that I will not be purchasing clamps from Harbor Freight. They may be cheap but they are frail, I have used them and I have watched them fail. The other clamp that was being tested in Paul’s shop was manufactured in the US by Dubuque Clamp Company. It can be found on Amazon and at Lee Valley Tools. Yes the clamps cost more than the clamps at Harbor Freight but I expect to be handing these down to my grandchildren.
With the Glue up of the coffee table on the immediate horizon I began counting up my clamps and thinking about the glue up and realized I did not have enough clamps. I have managed for many years with what I have, but the final glue of of this project brings together so many individual parts that I can not find a way around purchasing some new clamps. Fortunately I just had an email from Lee Valley and shipping is free. Timing is everything…….
