Archive
Hospice Cart
The Bar Cart will be donated to the local hospice for a fund raising event in a couple of months. I certainly have put some pressure on myself to make sure that I deliver the absolute best product possible. With the wheels completed I spent several hours yesterday drawing up plans and reaching decisions for the final dimensions. Over the next week the drawings will be cleaned up and placed on this site, although there will certainly be changes along the way.
With a cut list in hand I set out to my lumber dealer in search of White Oak Two hours later I was headed home with Red Oak. Why the change? There was a better selection of Red Oak, it was cheaper and most importantly they had some 10/4 for the legs. It will save me having to glue together boards to get my 2 1/4 in legs.
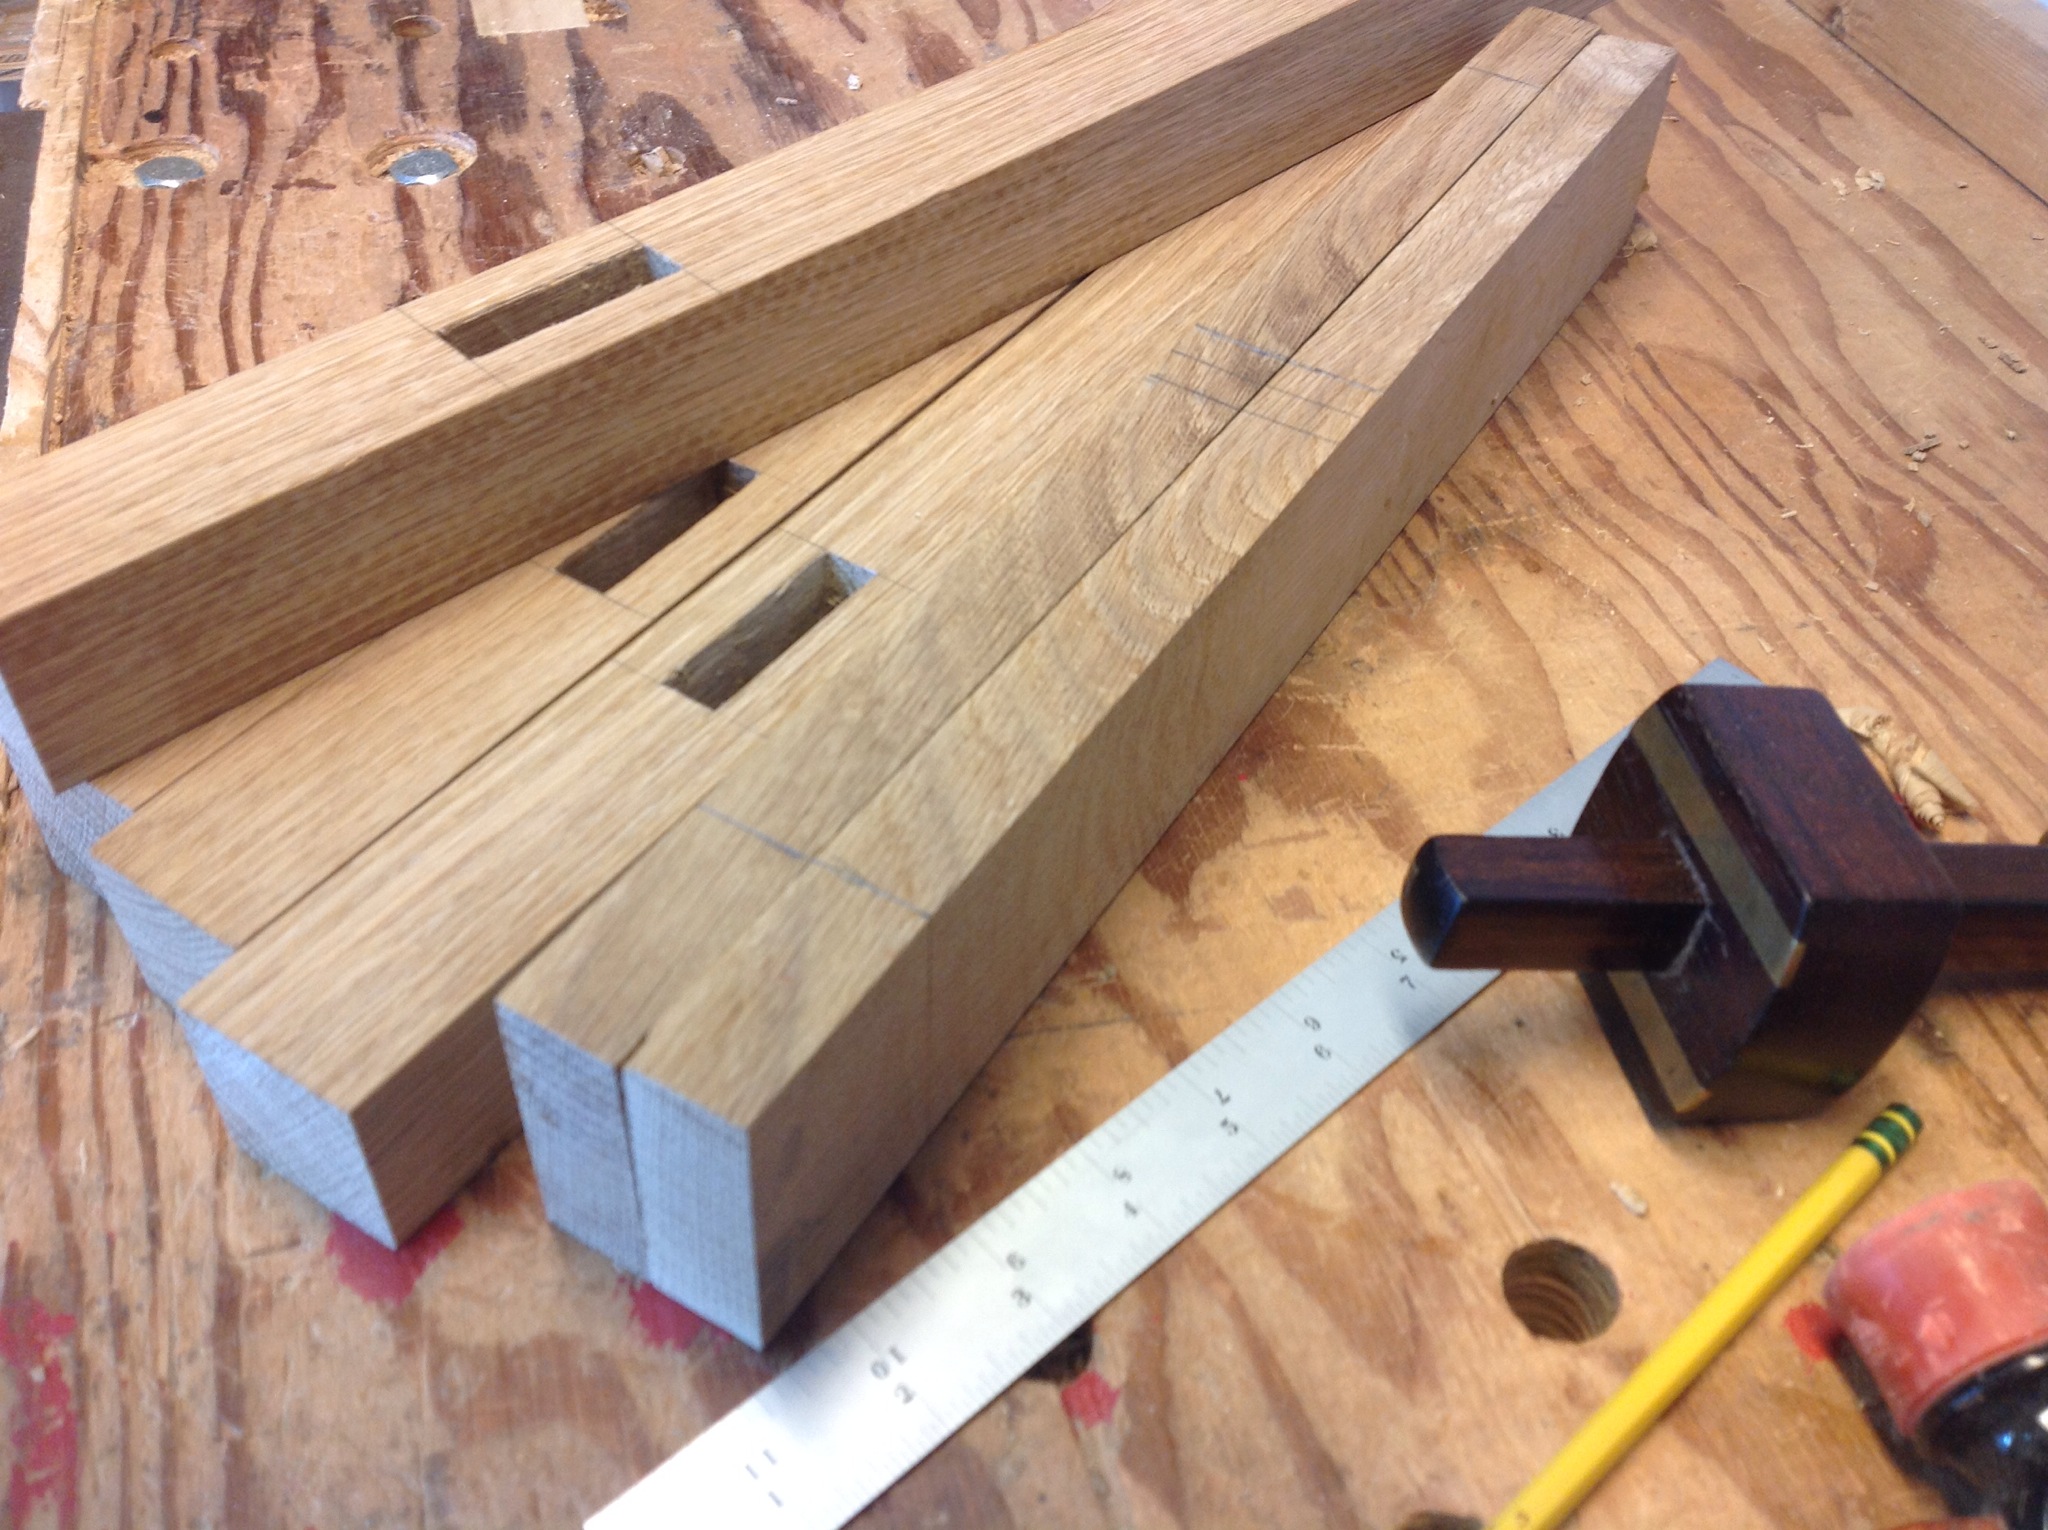
 First cut of the day, trimming the 10/4 down to make the legs. It was nice to get the Disston crosscut saw out and it took less then a minute to have a manageable size piece. I waxed it up before using it to ease the cut and give it a little protection. After a couple of hours I had four legs roughly dimensioned and read for final planing and cutting to length. The picture doesn’t show it, but a couple of pieces had some really nice medullary Rays.
 Hopefully I will get the would to final dimensions and layout all of the mortises so that I can have a mortise party next weekend. It’s nice to be moving ahead on a project. For a very rough diagram of the Bar Cart go back to my prior post on the wheels.
Cart Wheels 2
Picked up the cart wheels for the bar cart and they look great! Some discussion continues about which wheels to use for the first one so I’m still in limbo about the plans… 

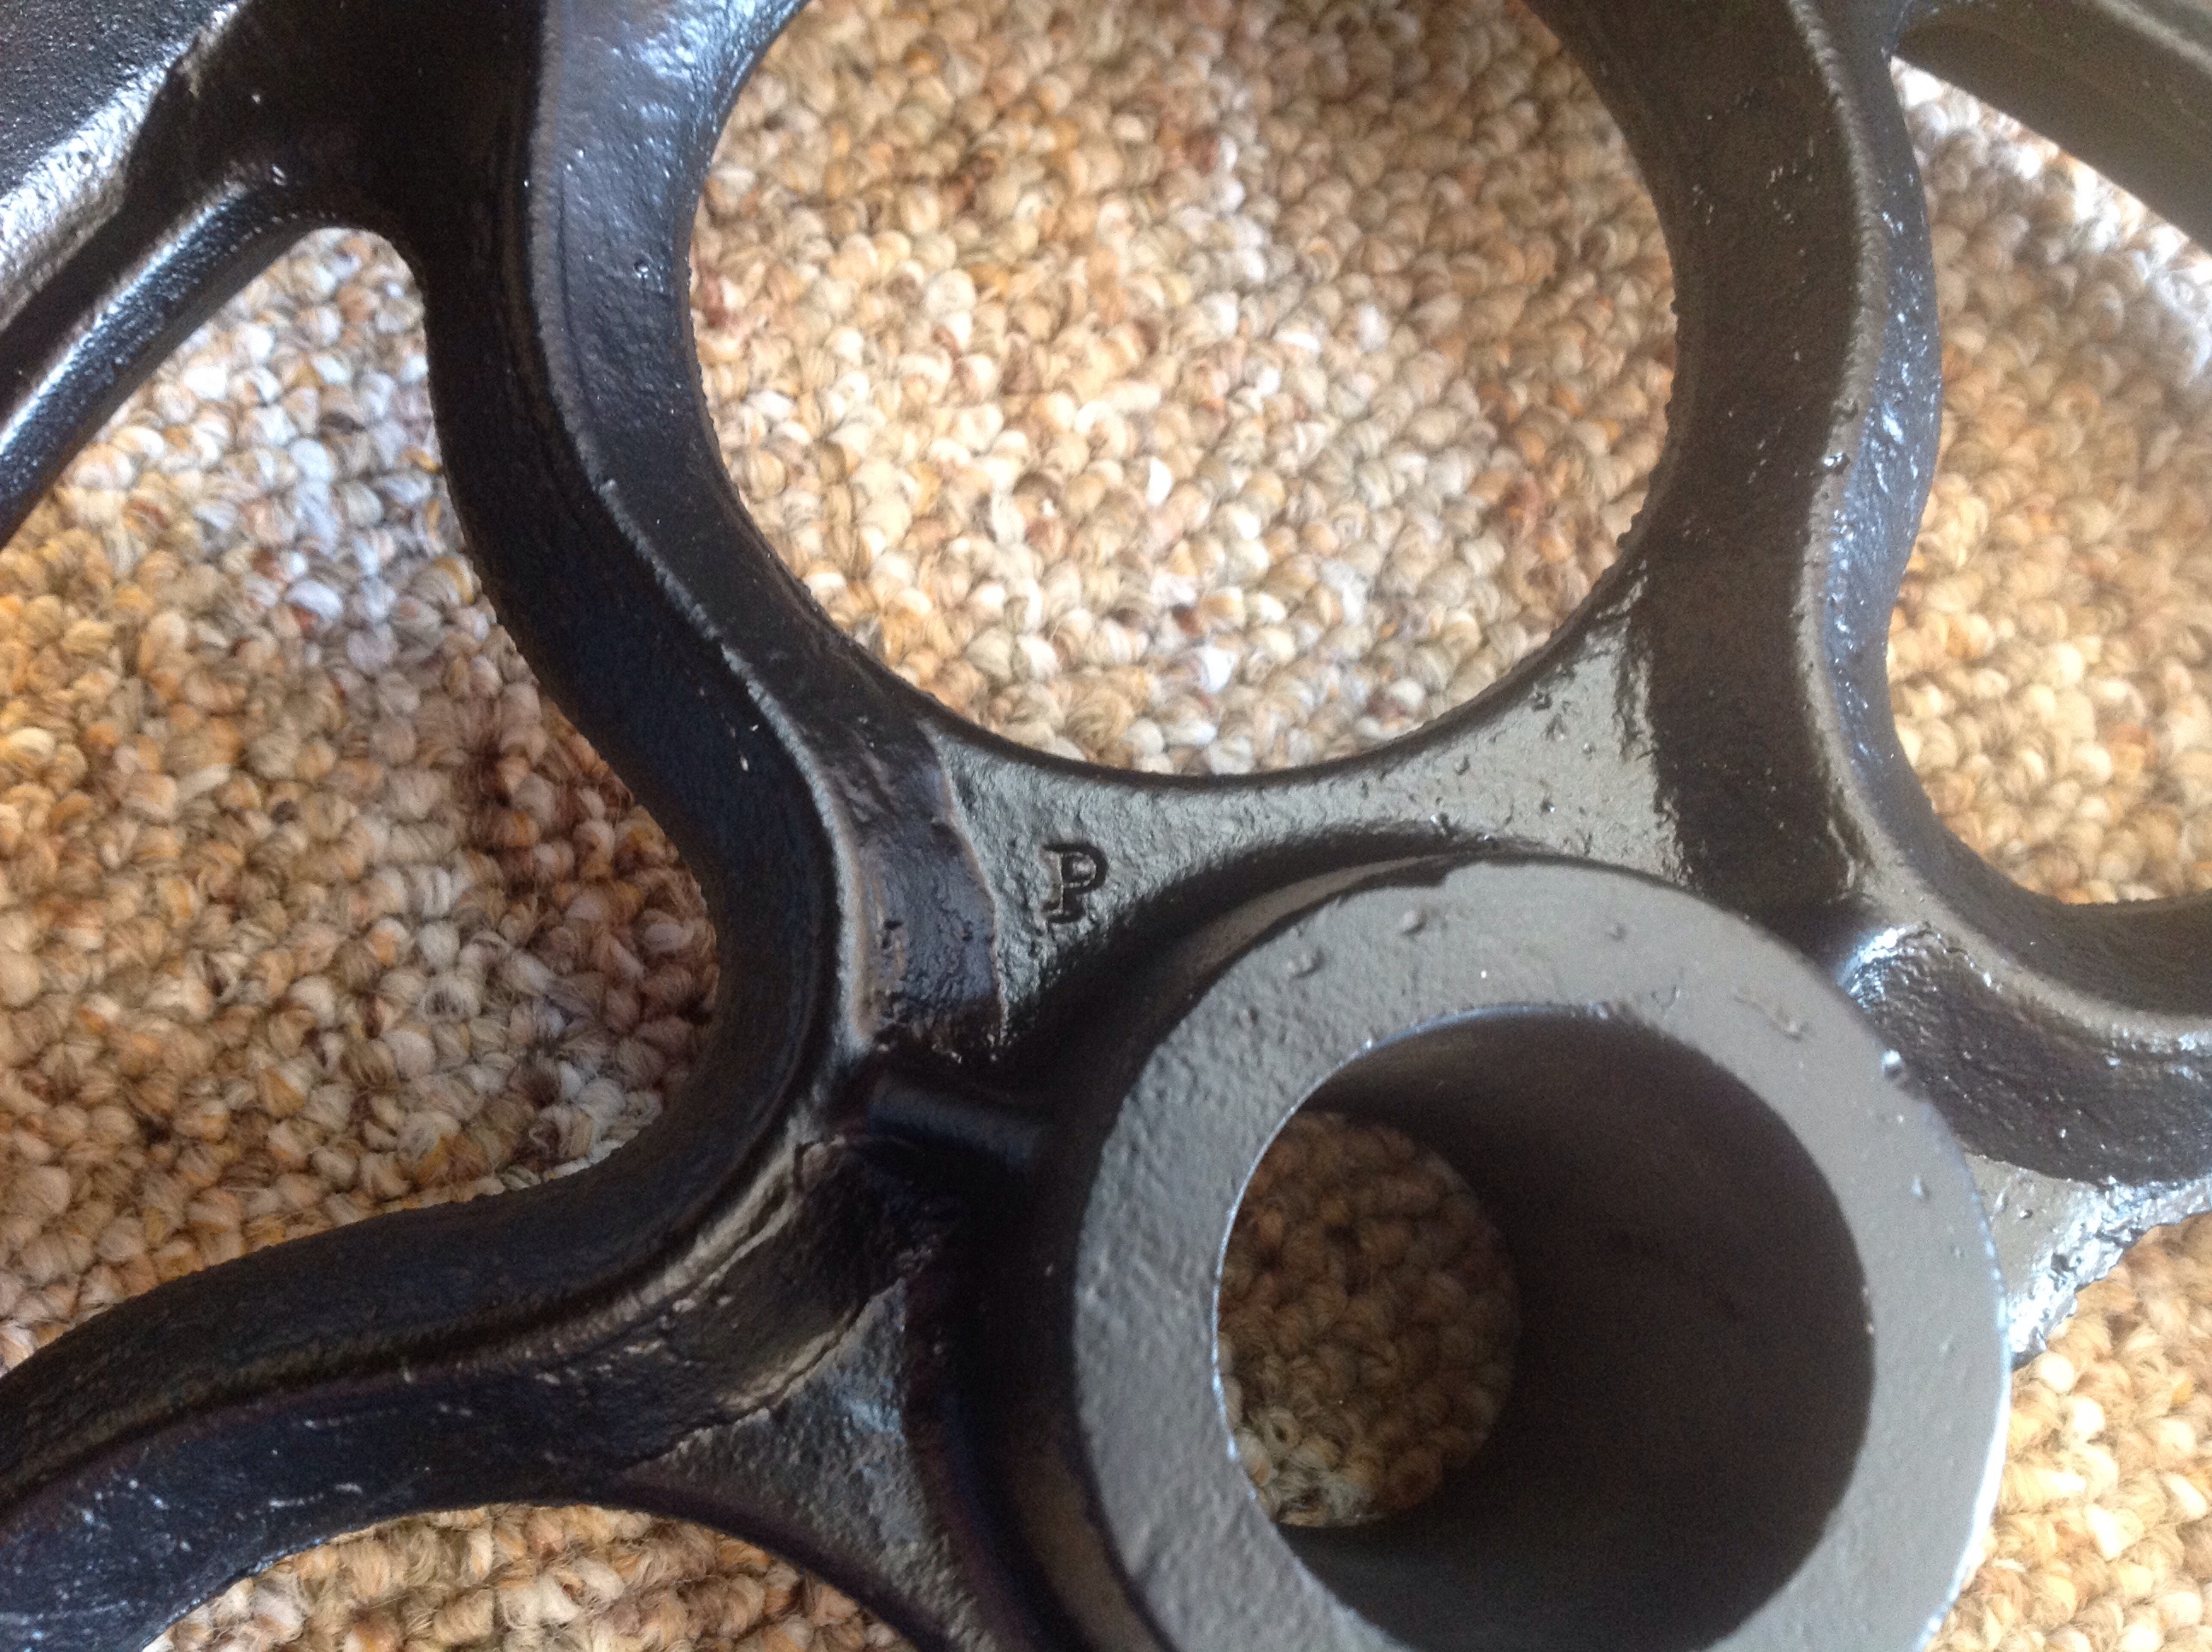
I’m a little curious about the screw heads and how they played a role in construction. I didn’t notice them when I picked them up at the sandblasters, can’t play with them now that the paint is on. The inscription is W&P M14. The curves of the second set capture my eye and even include grease nipples, although I’m sure they will need to be replaced after being blasted and painted. 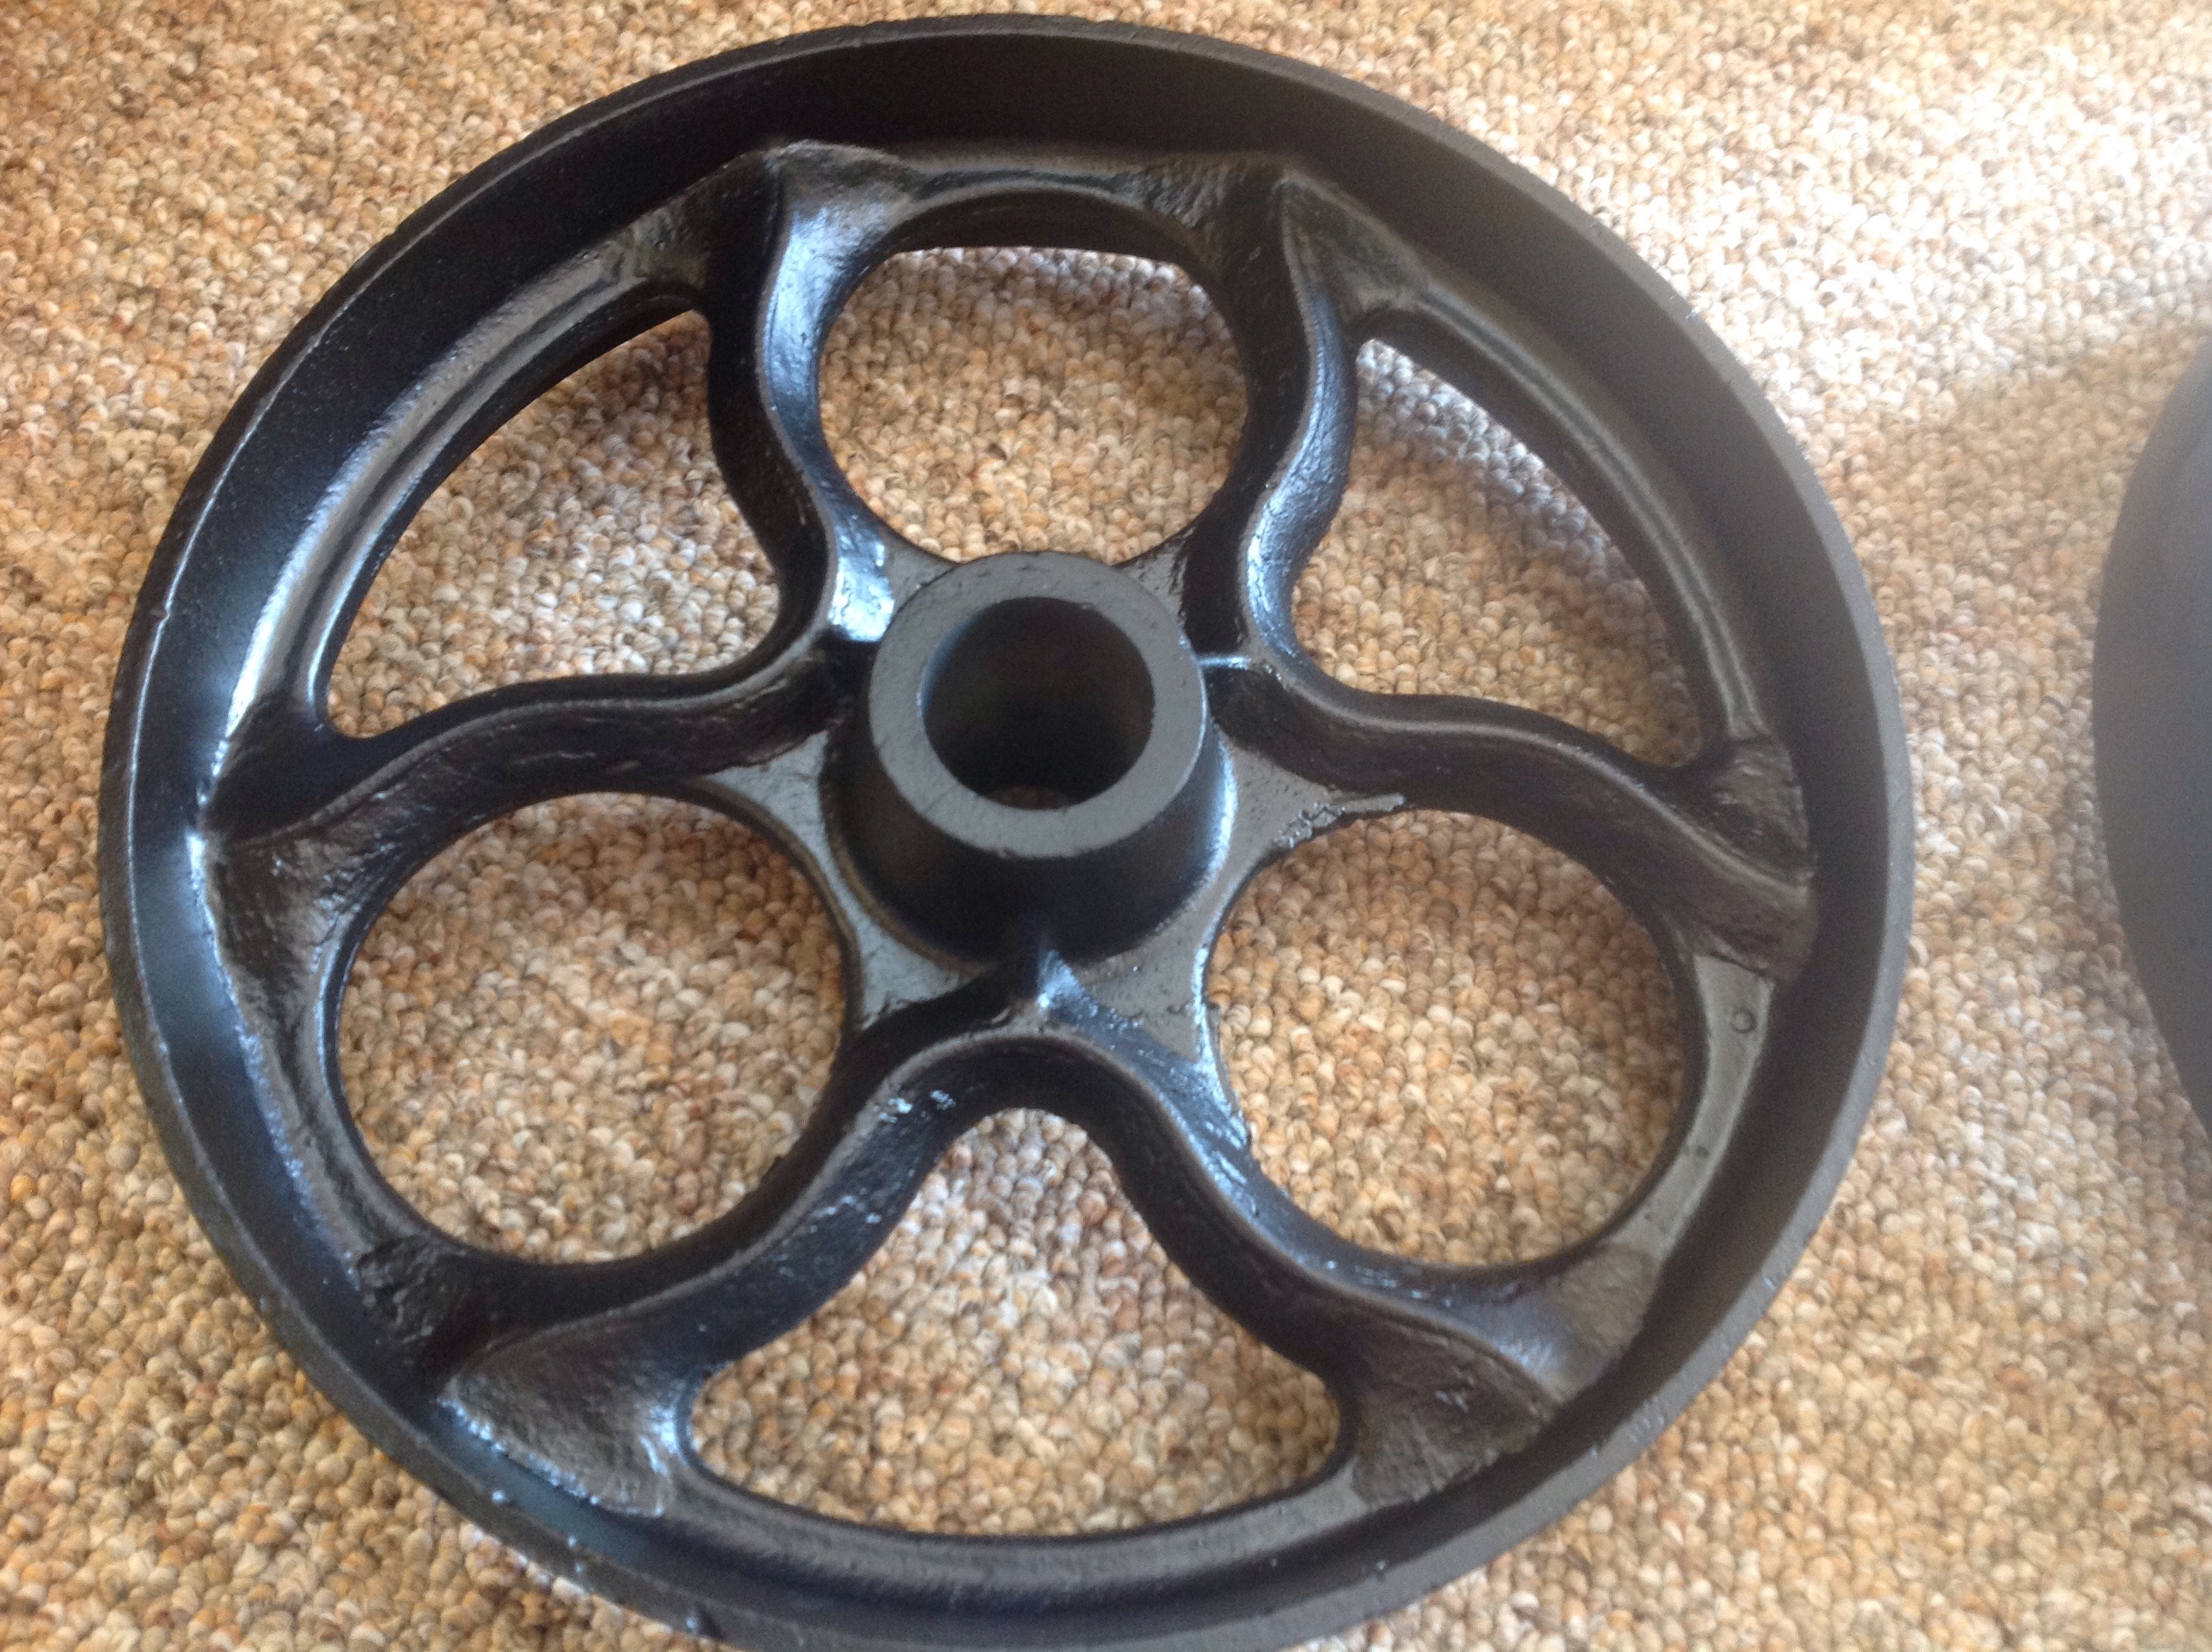
Cart Wheels
What do you do when it is below zero and the shop heater has no chance raising the temperature above freezing? Thinking, drafting, and planning! My wife spends a tremendous amount of time and energy volunteering and one of her favorite gigs is preparing for a hospice auction. This year I have been roped in to provide a cart that can be used as a bar. I have the picture below to work from.

Last weekend we picked up two sets of wheels and axles (I already sense a second cart). The wheels come from old factory carts and are heavy cast iron with a light coating of rust.

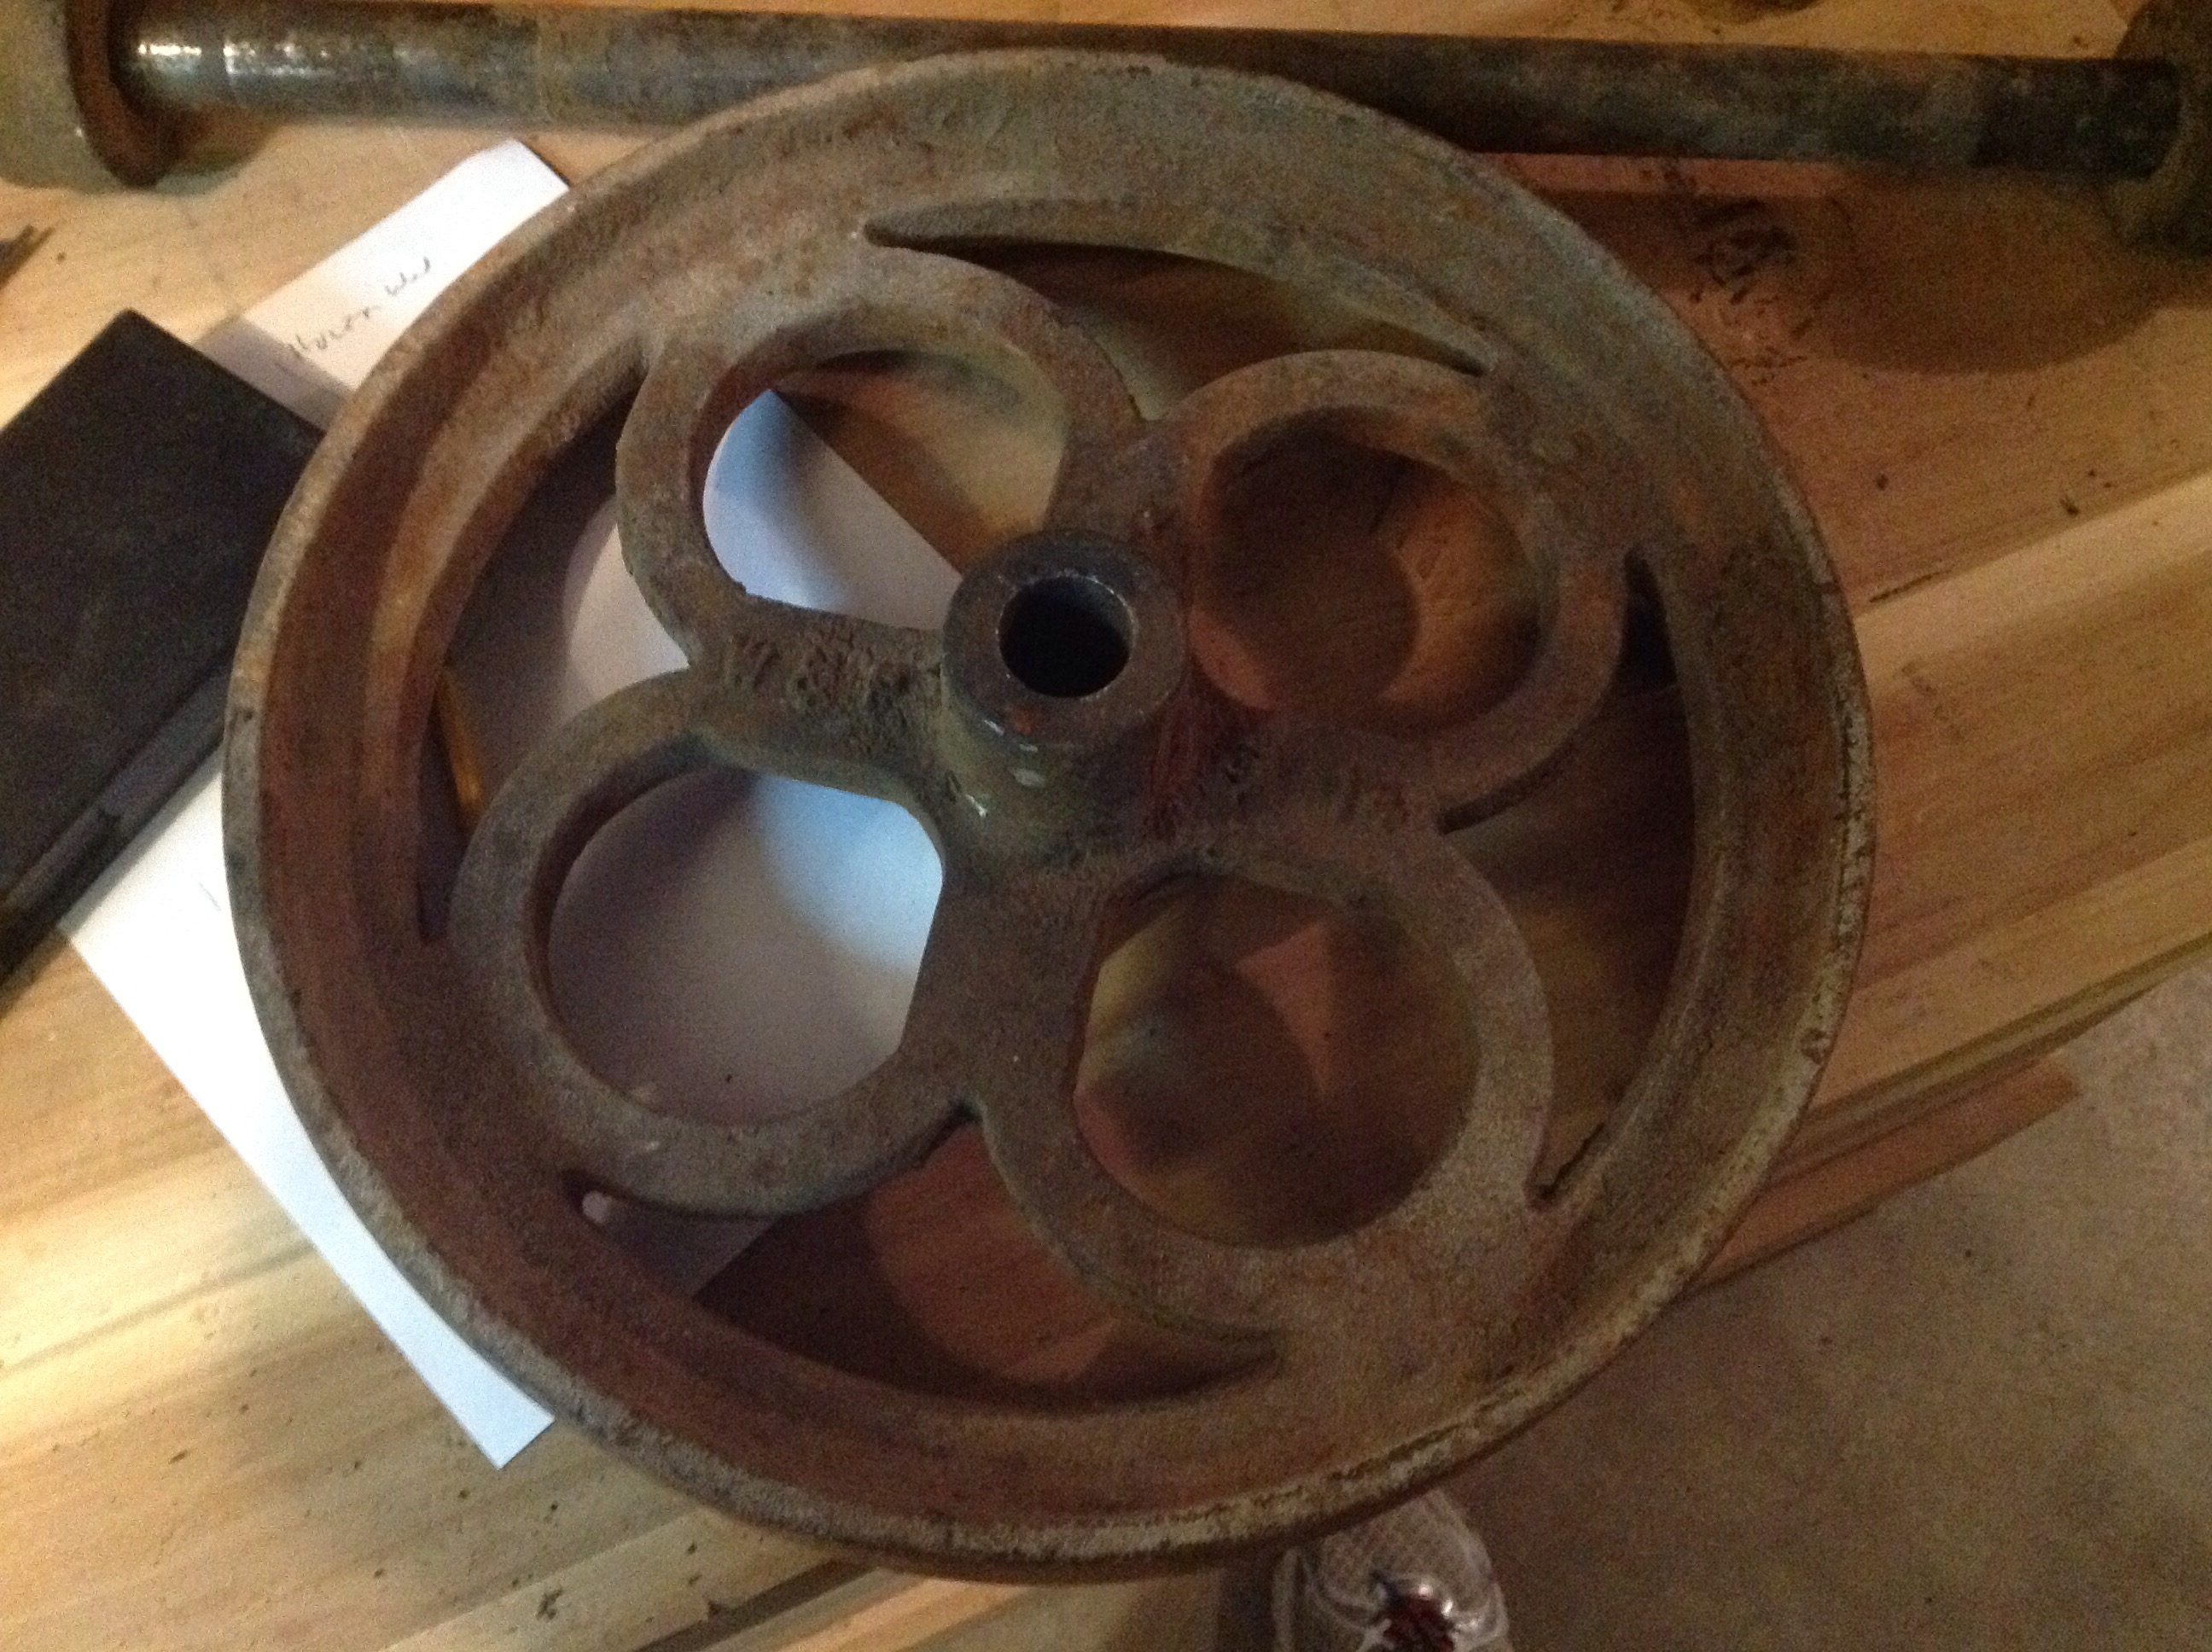
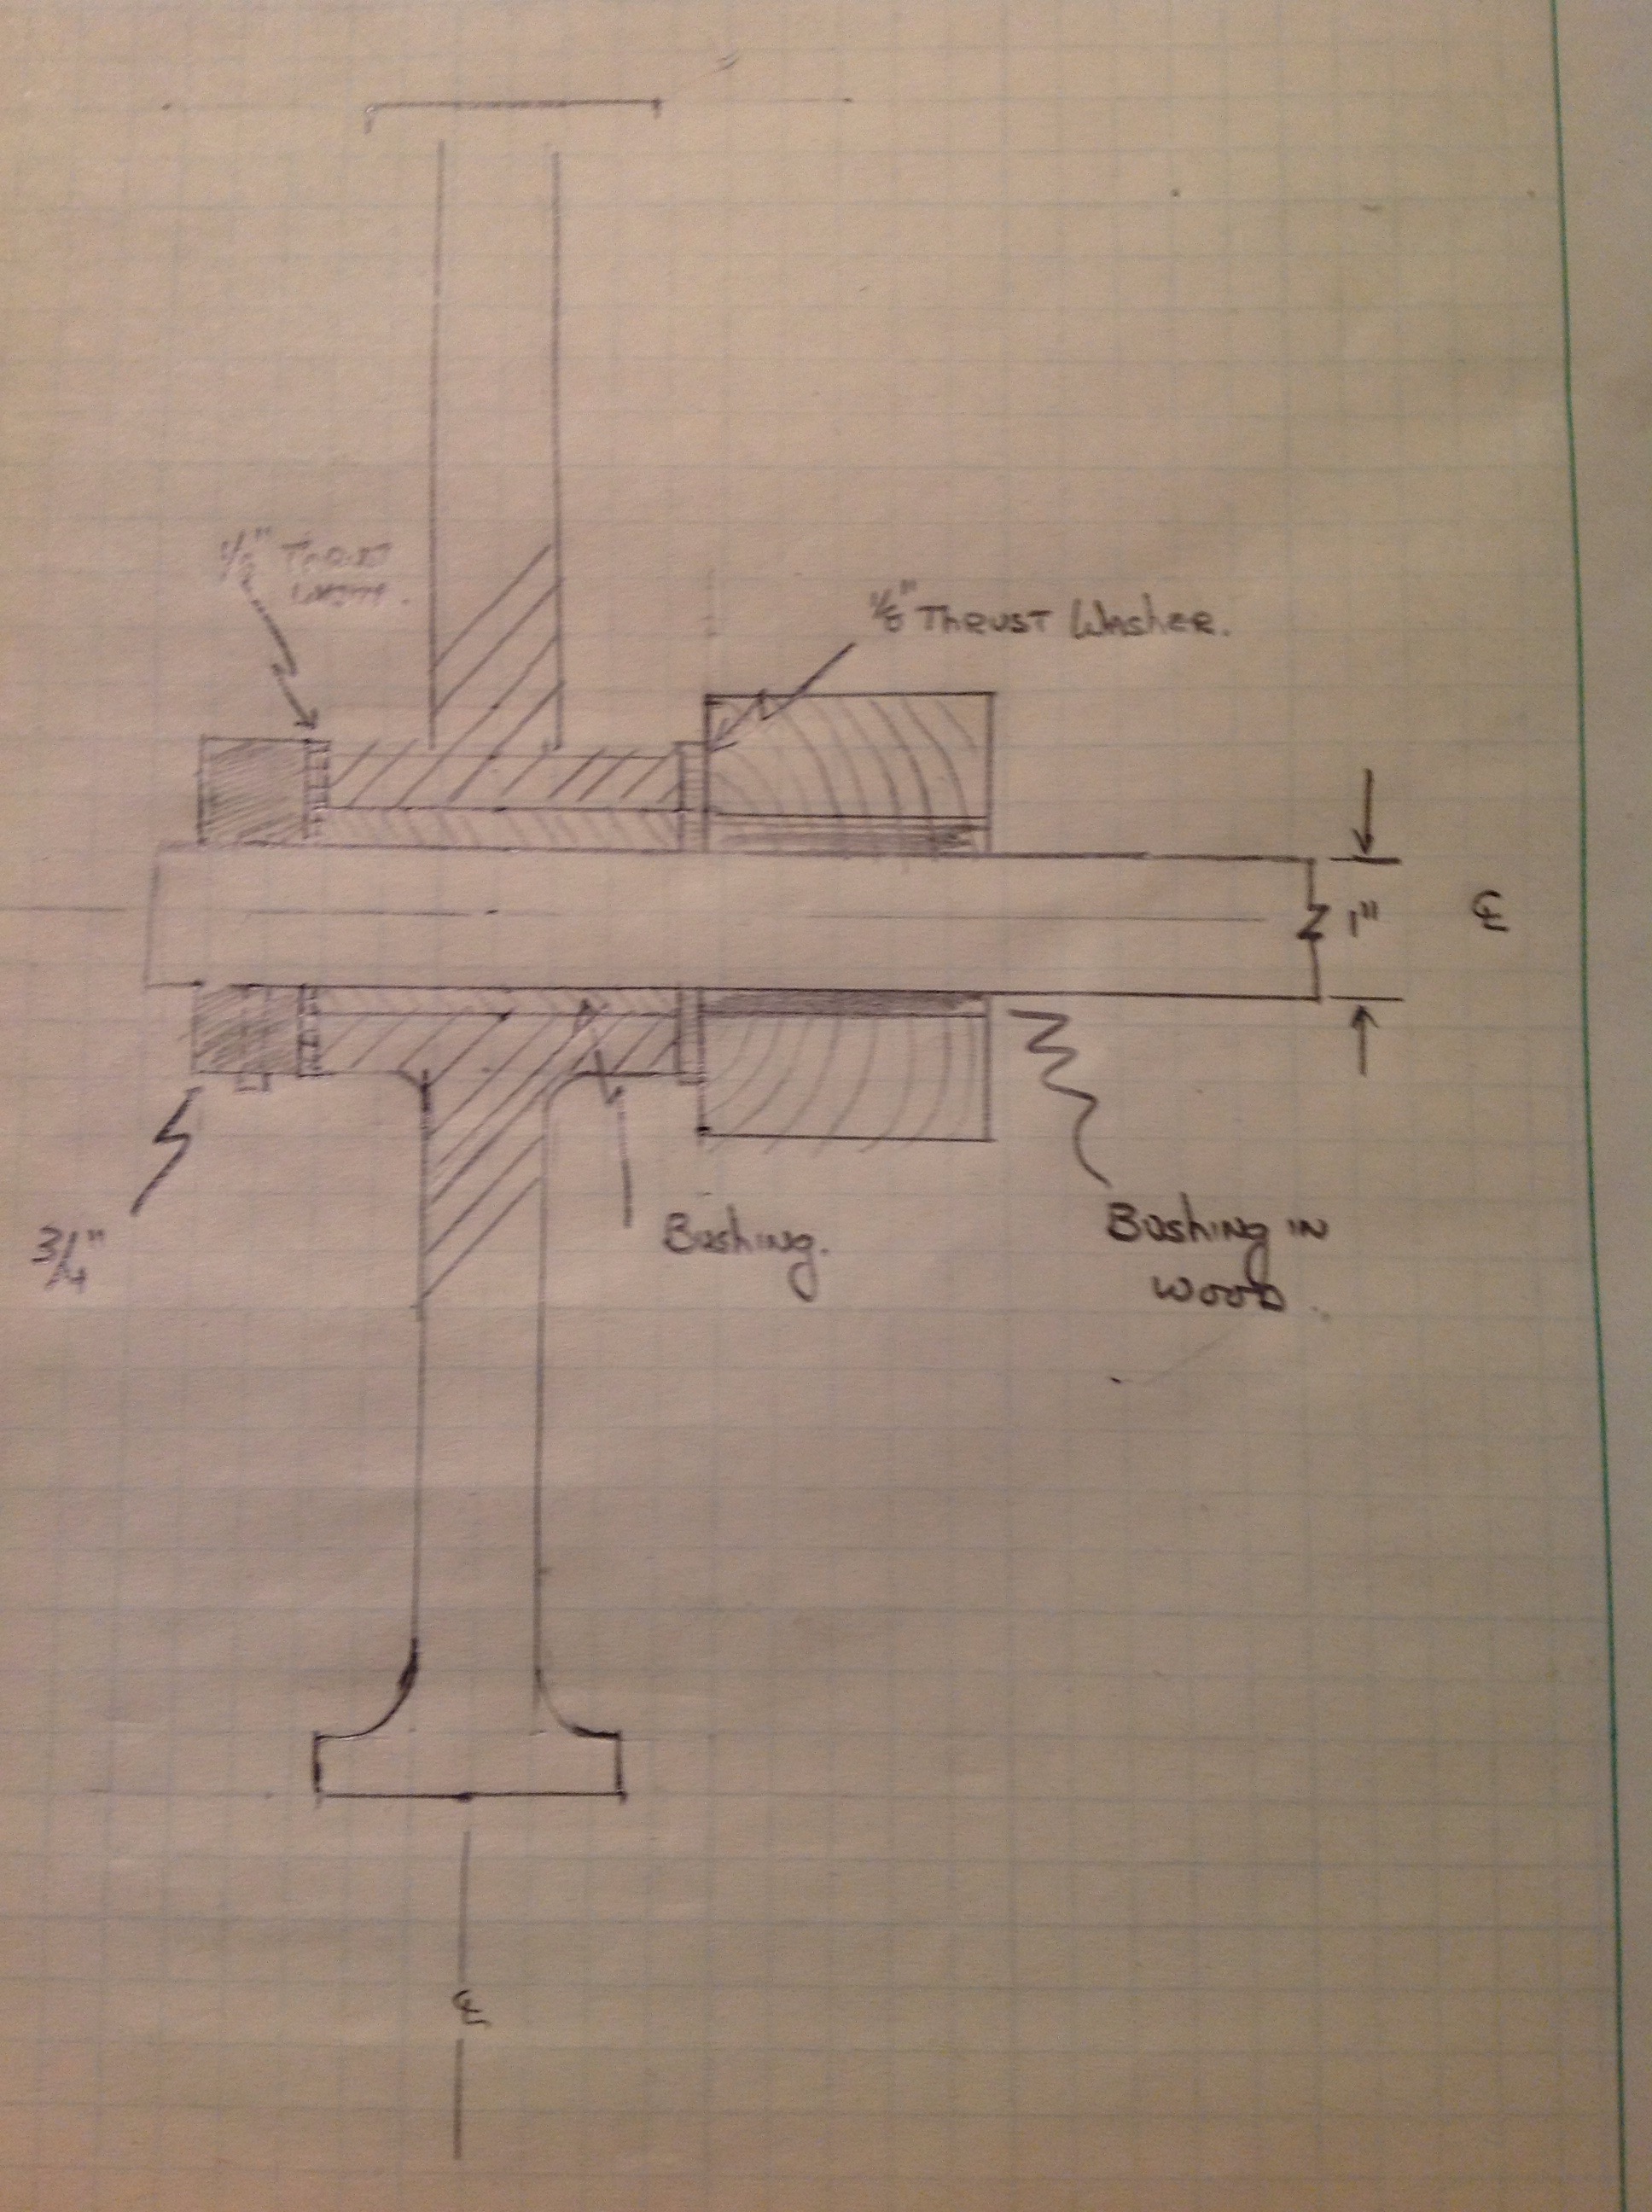
After a little bit of searching we found someone to sandblast them and another friend to give them a coat of paint. Before sending them off I took some measurements so I could move forward with the cart design. If these things were easy anyone could do it! It didn’t take long before the challenges started to add up. The first set of wheels didn’t fit one of the axles at all. May need some bushings to make them work. The second axle only fits on one of the other wheels the second wheel is 5/32 off ! My quick test fitting when we bought them involved one axle turned end for end into one wheel. Thank goodness for McMaster Carr. After a few hours of measuring and drawing and I’m ready to order bushings, washers and an axle that should put one set right. Didn’t have much else to do today with the cold so didn’t mind searching the recesses of my brain for what’s left of my engineering degree.
Arts and Craft Side Table Finished
A final coat of wax this morning and the side table is complete. This was an enjoyable project, the joinery was a challenge, but the project small enough to complete relatively quickly.


The through mortises have such a different grain then other parts of the table. It makes the careful fitting worthwhile.
As I tidy my bench and spend time sharpening planes and chisels my mind wanders. I smile at my small tool chest as the tools are put away; I look across at my son sitting upon the shop stool, for a moment it’s peaceful.
Arts and Craft Side Table – Finishing
This morning was spent easing the top edges and preparing for finish.

Using a spokeshave the edges were trimmed. Took a little time and I found myself reversing the spokeshave, angling side to side and all but standing on my head to work through the various grain direction. Finally the edges were complete.
Attaching the top only took a few minutes and then I did a quick sanding, looking for tool marks and pencil marks that needed to be removed.

Finally a coat of sanding sealer is on and I will add another coat before the day is done.
Arts and Craft Side Table Top
Most of you know that the majority of my woodwork is by hand. Typically the only time I use power tools is during my stock preparation and then only after hand planing one side and the edges by hand.
The top of the arts and craft side table is round. As I thought about the best way to cut it, I decided to pull out my very dusty bandsaw and make a quick jig. 30 minutes later I had a quarter of the top cut, a stalled blade and a big mess. An hour later I had a roughed out table top cut with a hand saw and smoothed with a #4 and spoke shave. There’s still a little more work to get it perfectly round and smooth but sure was a simpler more peaceful process.

Side table Glue Up
A beautiful morning to spend a couple of hours dovetailing the upper rails to the legs of the table. Then I began the careful process of erasing all of the pencil marks, chamfering the bottoms of the legs so they don’t splinter and a quick sanding.
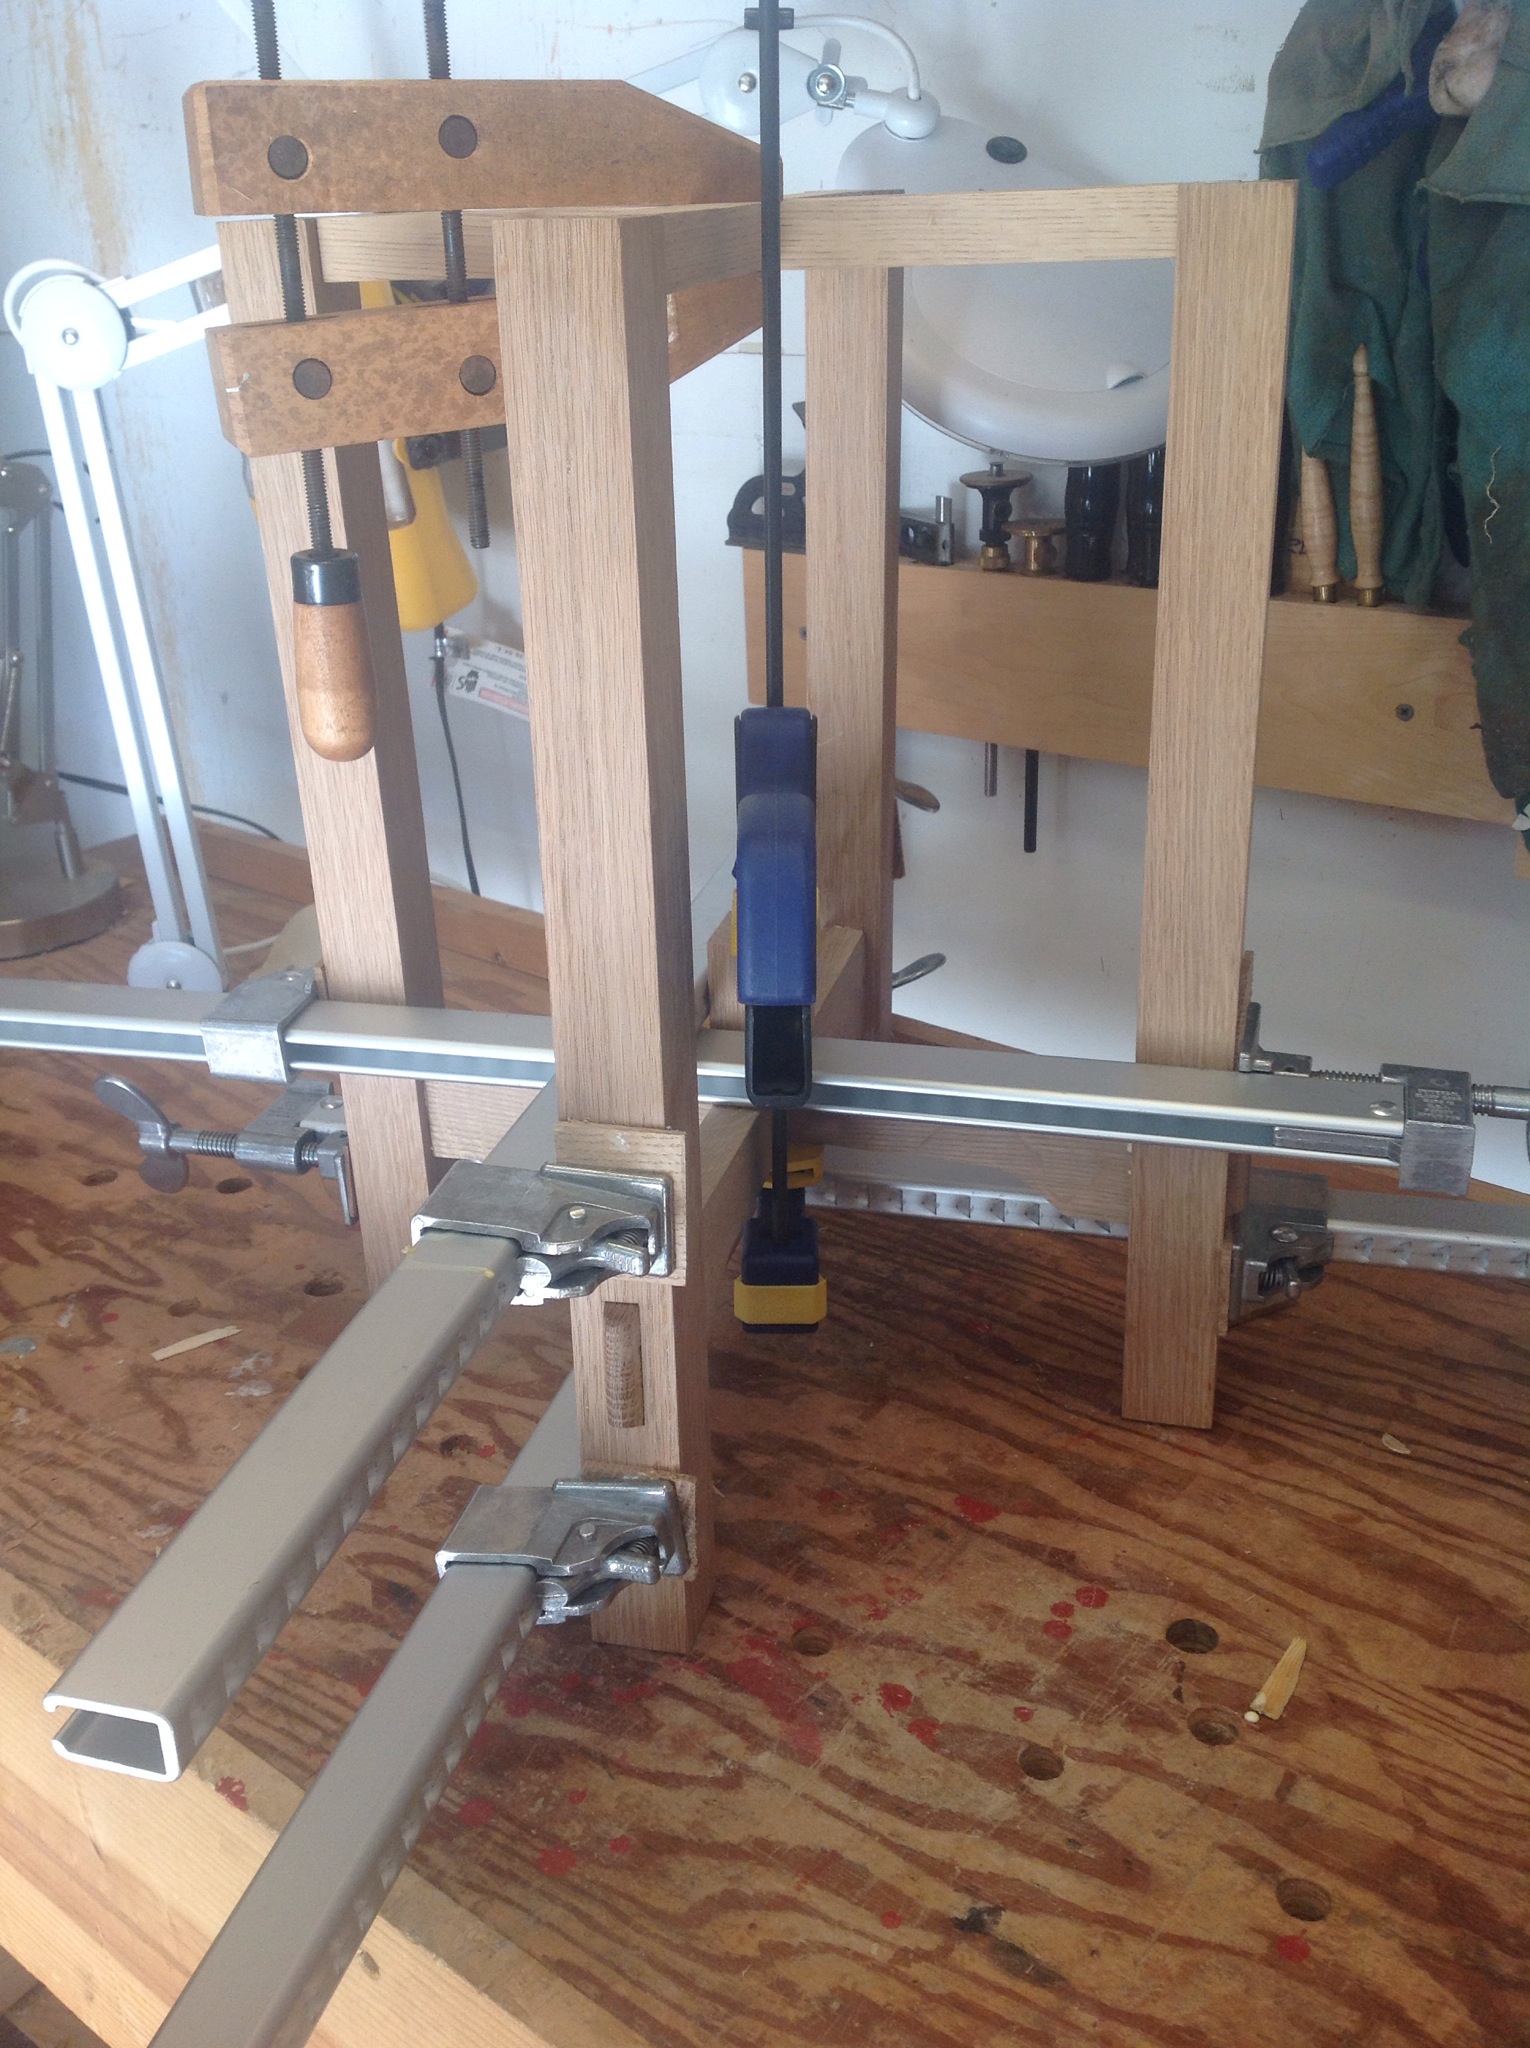
Glue up went without a hitch until I tried to insert one of the lower rails upside down. Fortunately the mistake was obvious and quickly rectified. With the clamps In place there was little do do except begin gluing up boards for the top.
Not sure how to finish but I am considering a natural look without stain to match the coffee table a made last year.
Arts and Craft Side Table – Lower Rails
The table is held together with a pair of lower and a pair of upper rails. The previous post shows the through tenon attaching the lower rails to the legs. The rails are held together by a cross over lap joint.
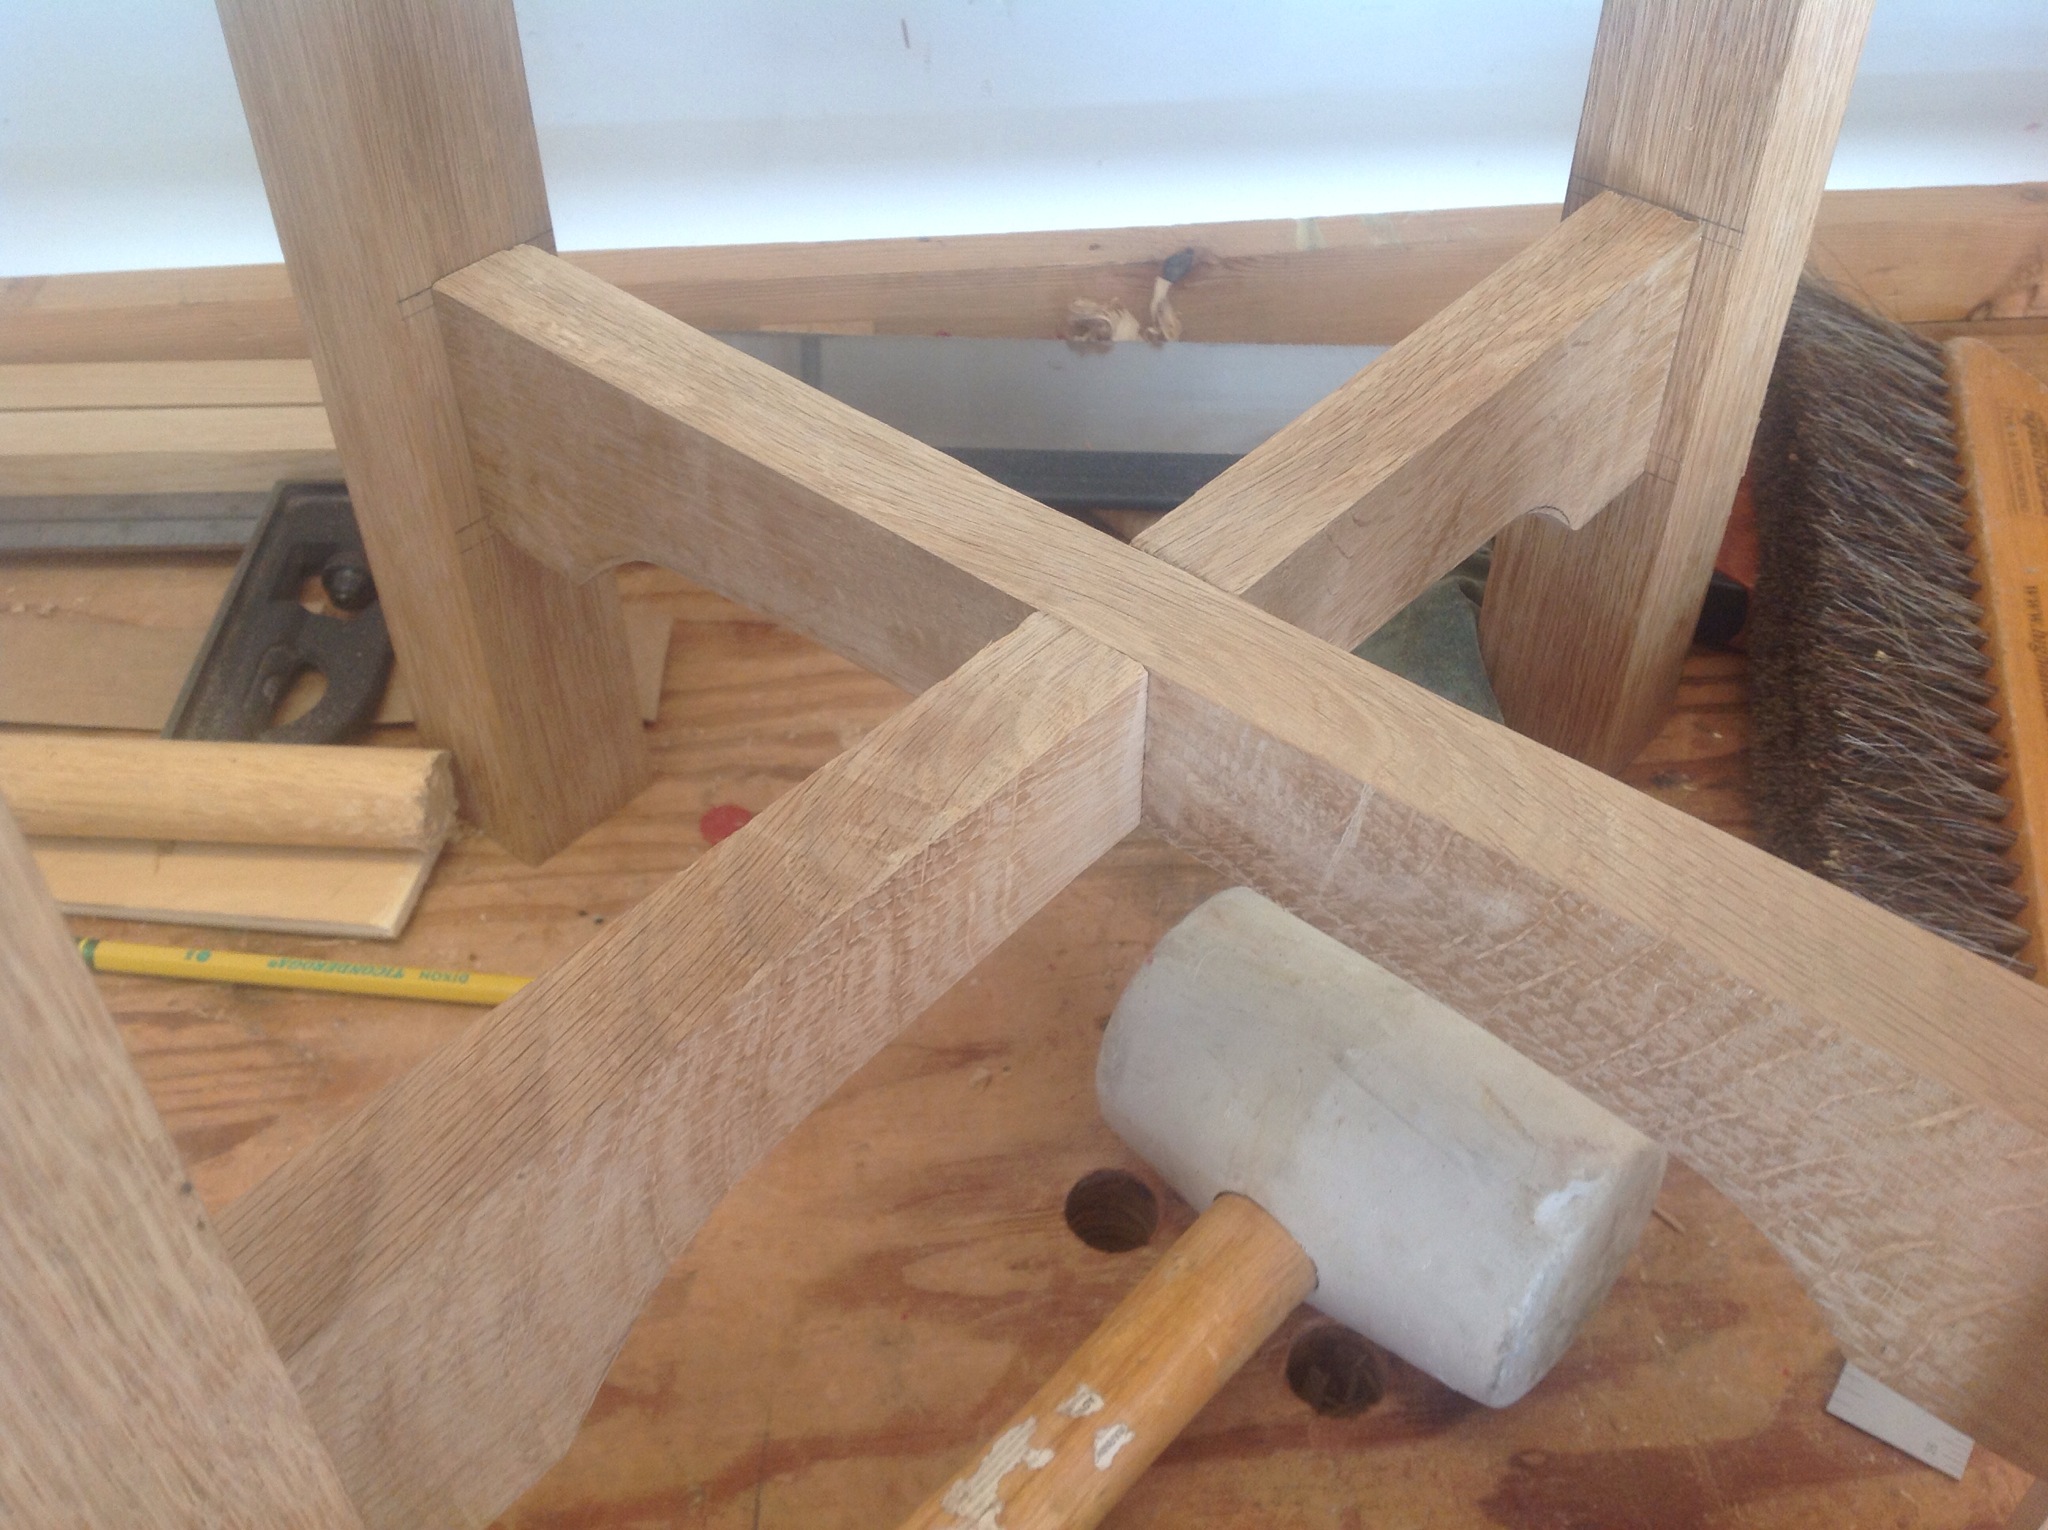
Making a joint like this requires me to carefully lay out and think through how it fits together. The number of times that I have cut this joint on the wrong side is embarrassing. Today with care I was able to do it in one shot. A little blow out on the bottom of the joint which will fortunately be hidden is the only problem.
With the Joint fitting properly the rails could be shaped using a chisel and spokeshave.

The upper rails will be dovetailed into the top of the legs with any luck tomorrow.
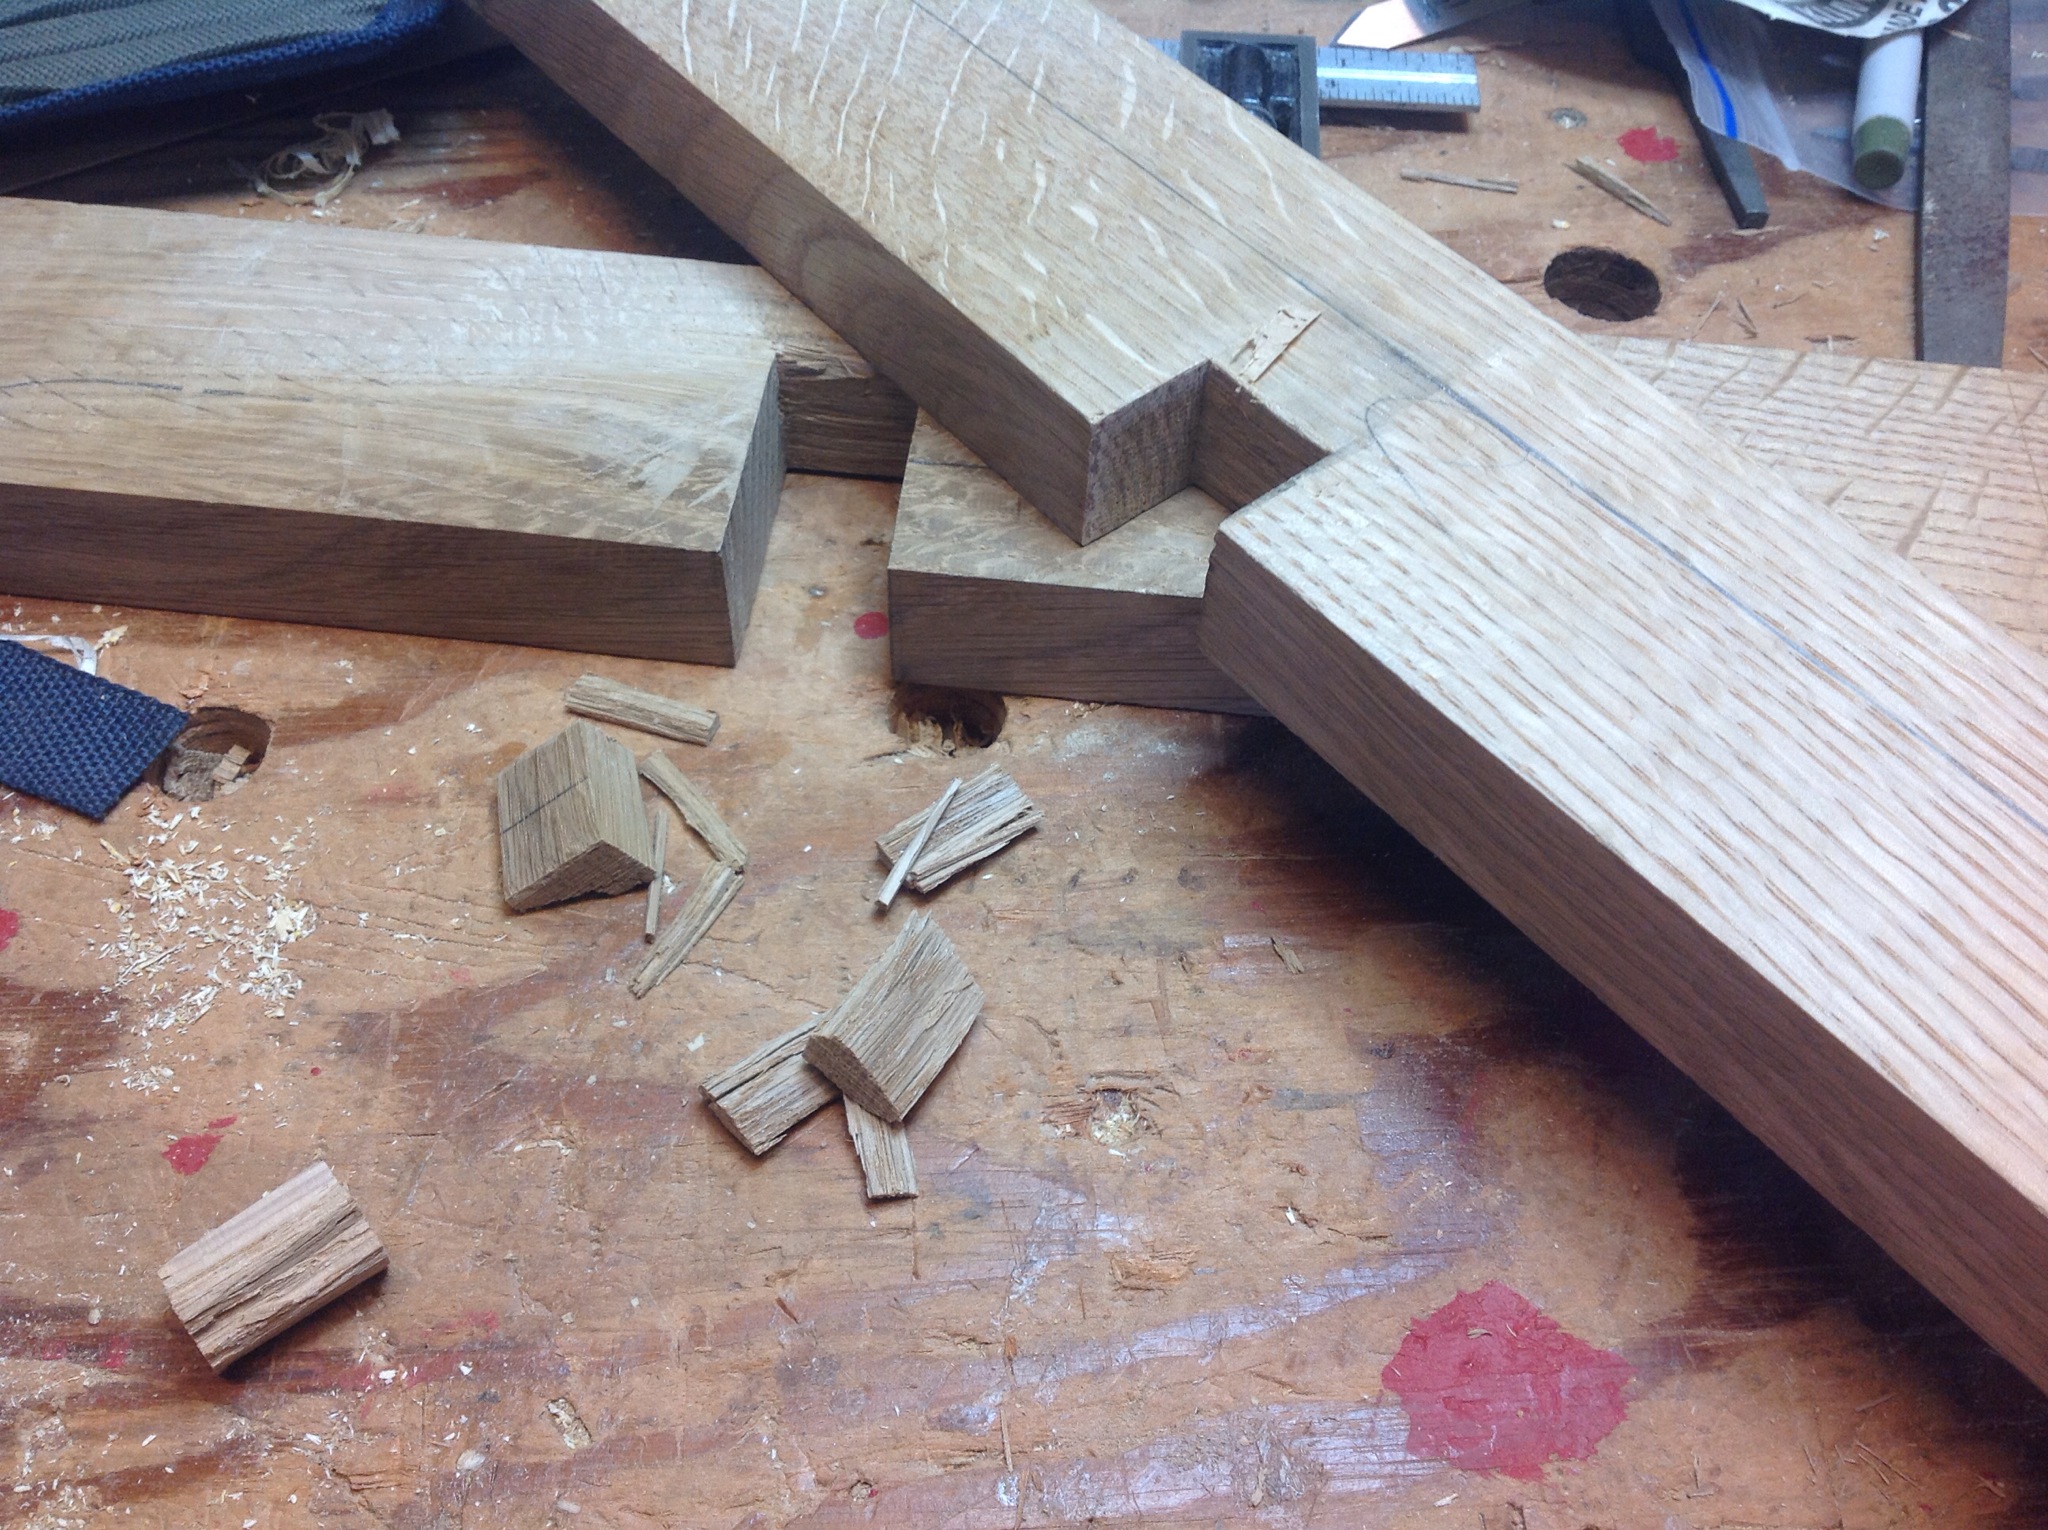
Arts and Craft Side Table Tenons
Started cutting the Tenons today to match the mortises on the legs. Through tenons so it is worth taking extra time to ensure they are tight. Used the saw for the cuts with a router plane to clean up and ensure a good fit.
My favorite part of through tenons is shaping the exposed end. I do this with a #4 plane and a file for final smoothing.

When I’m done with the sides a chisel makes short work of chamfering the ends. The grabbing the same file I give them a final smoothing.

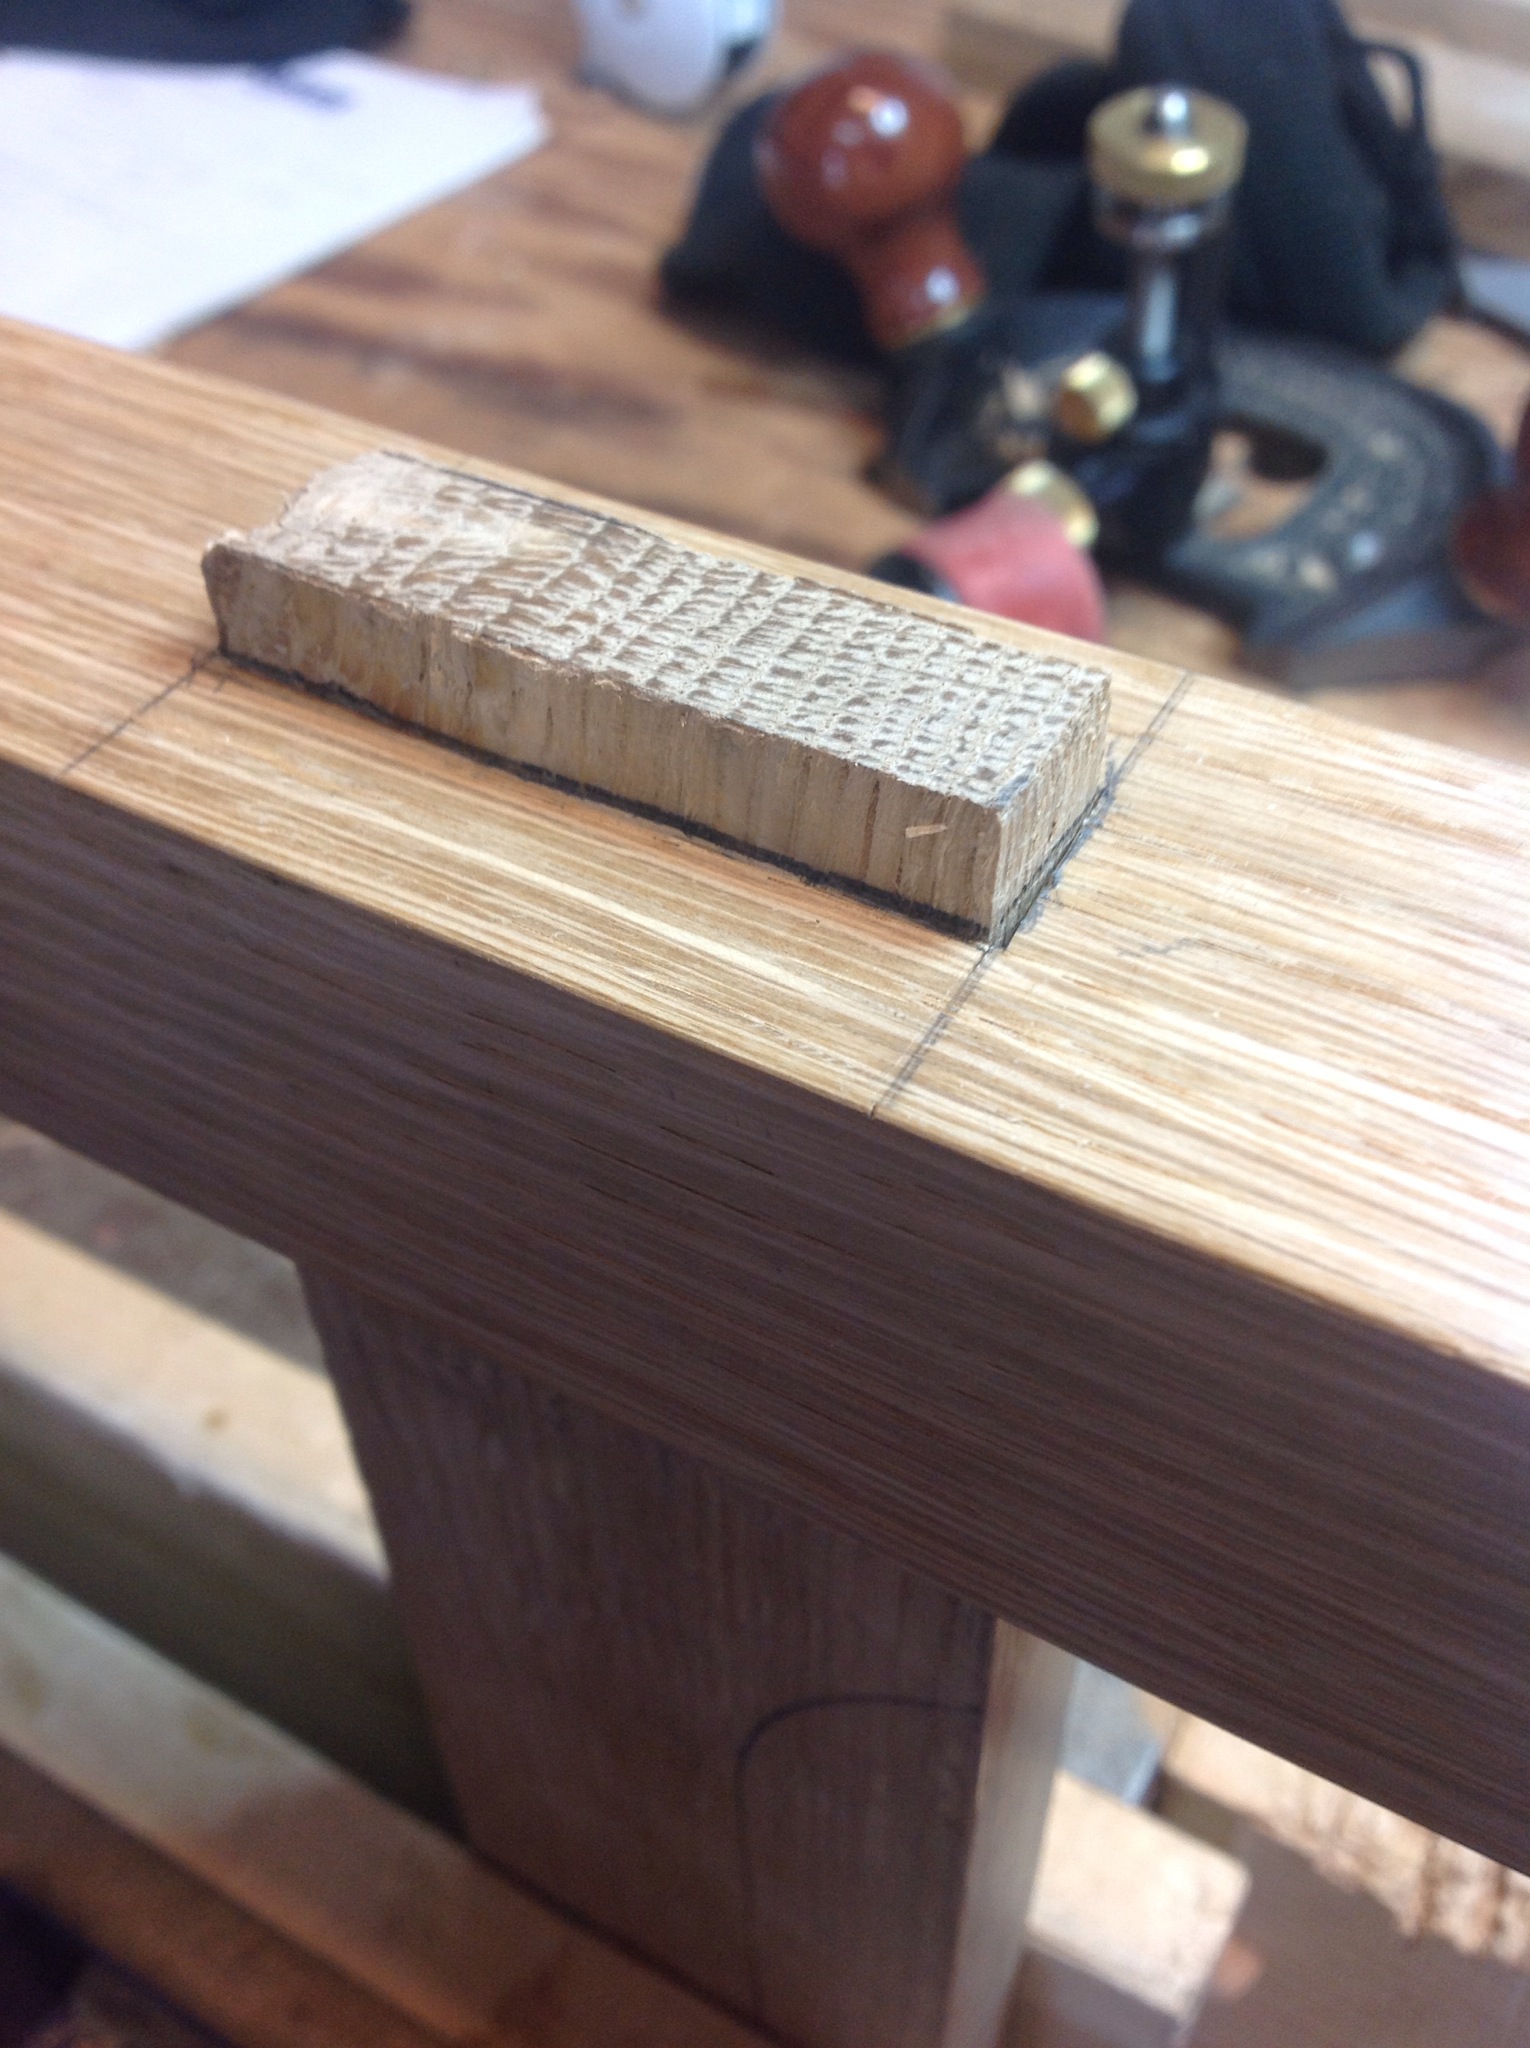
Arts and Craft Side Table – Mortises
After all the lumber was milled and cut to size I spent time carefully laying out the mortises. The plans call for through mortises at the bottom of each leg, so I took my time to ensure I didn’t cause any damage to surrounding areas. Additionally the legs are visible on three side since the top will be circular.
A couple of hours and the mortises are in place with no real problems. It was very relaxing to chop away and I could feel my stress fall away. Took a couple of sharpenings of the chisel but each mortise on took a pass from each side. The first pass was about an inch deep then I flipped the piece and chopped the remaining half inch from the other side.
Before cleaning up for the day I laid out the tenons on the lower rail and the center bridal joint. Haven’t cut one of those in a while so I’ll have to think about the best approach this evening. The upper rail is dovetailed into the top of the leg which is also a technique that I’ve done infrequently. One of the reasons for this table was the couple of joints that will make it fun.
