Archive
Roubo Gap Stop Revisit
Last week I posted about my Roubo gap stop. This was actually written last November and I failed to post it. This week I revisited the gap stop and made a few changes. Below is a picture of the puppy you saw in the post 40lbs heavier.

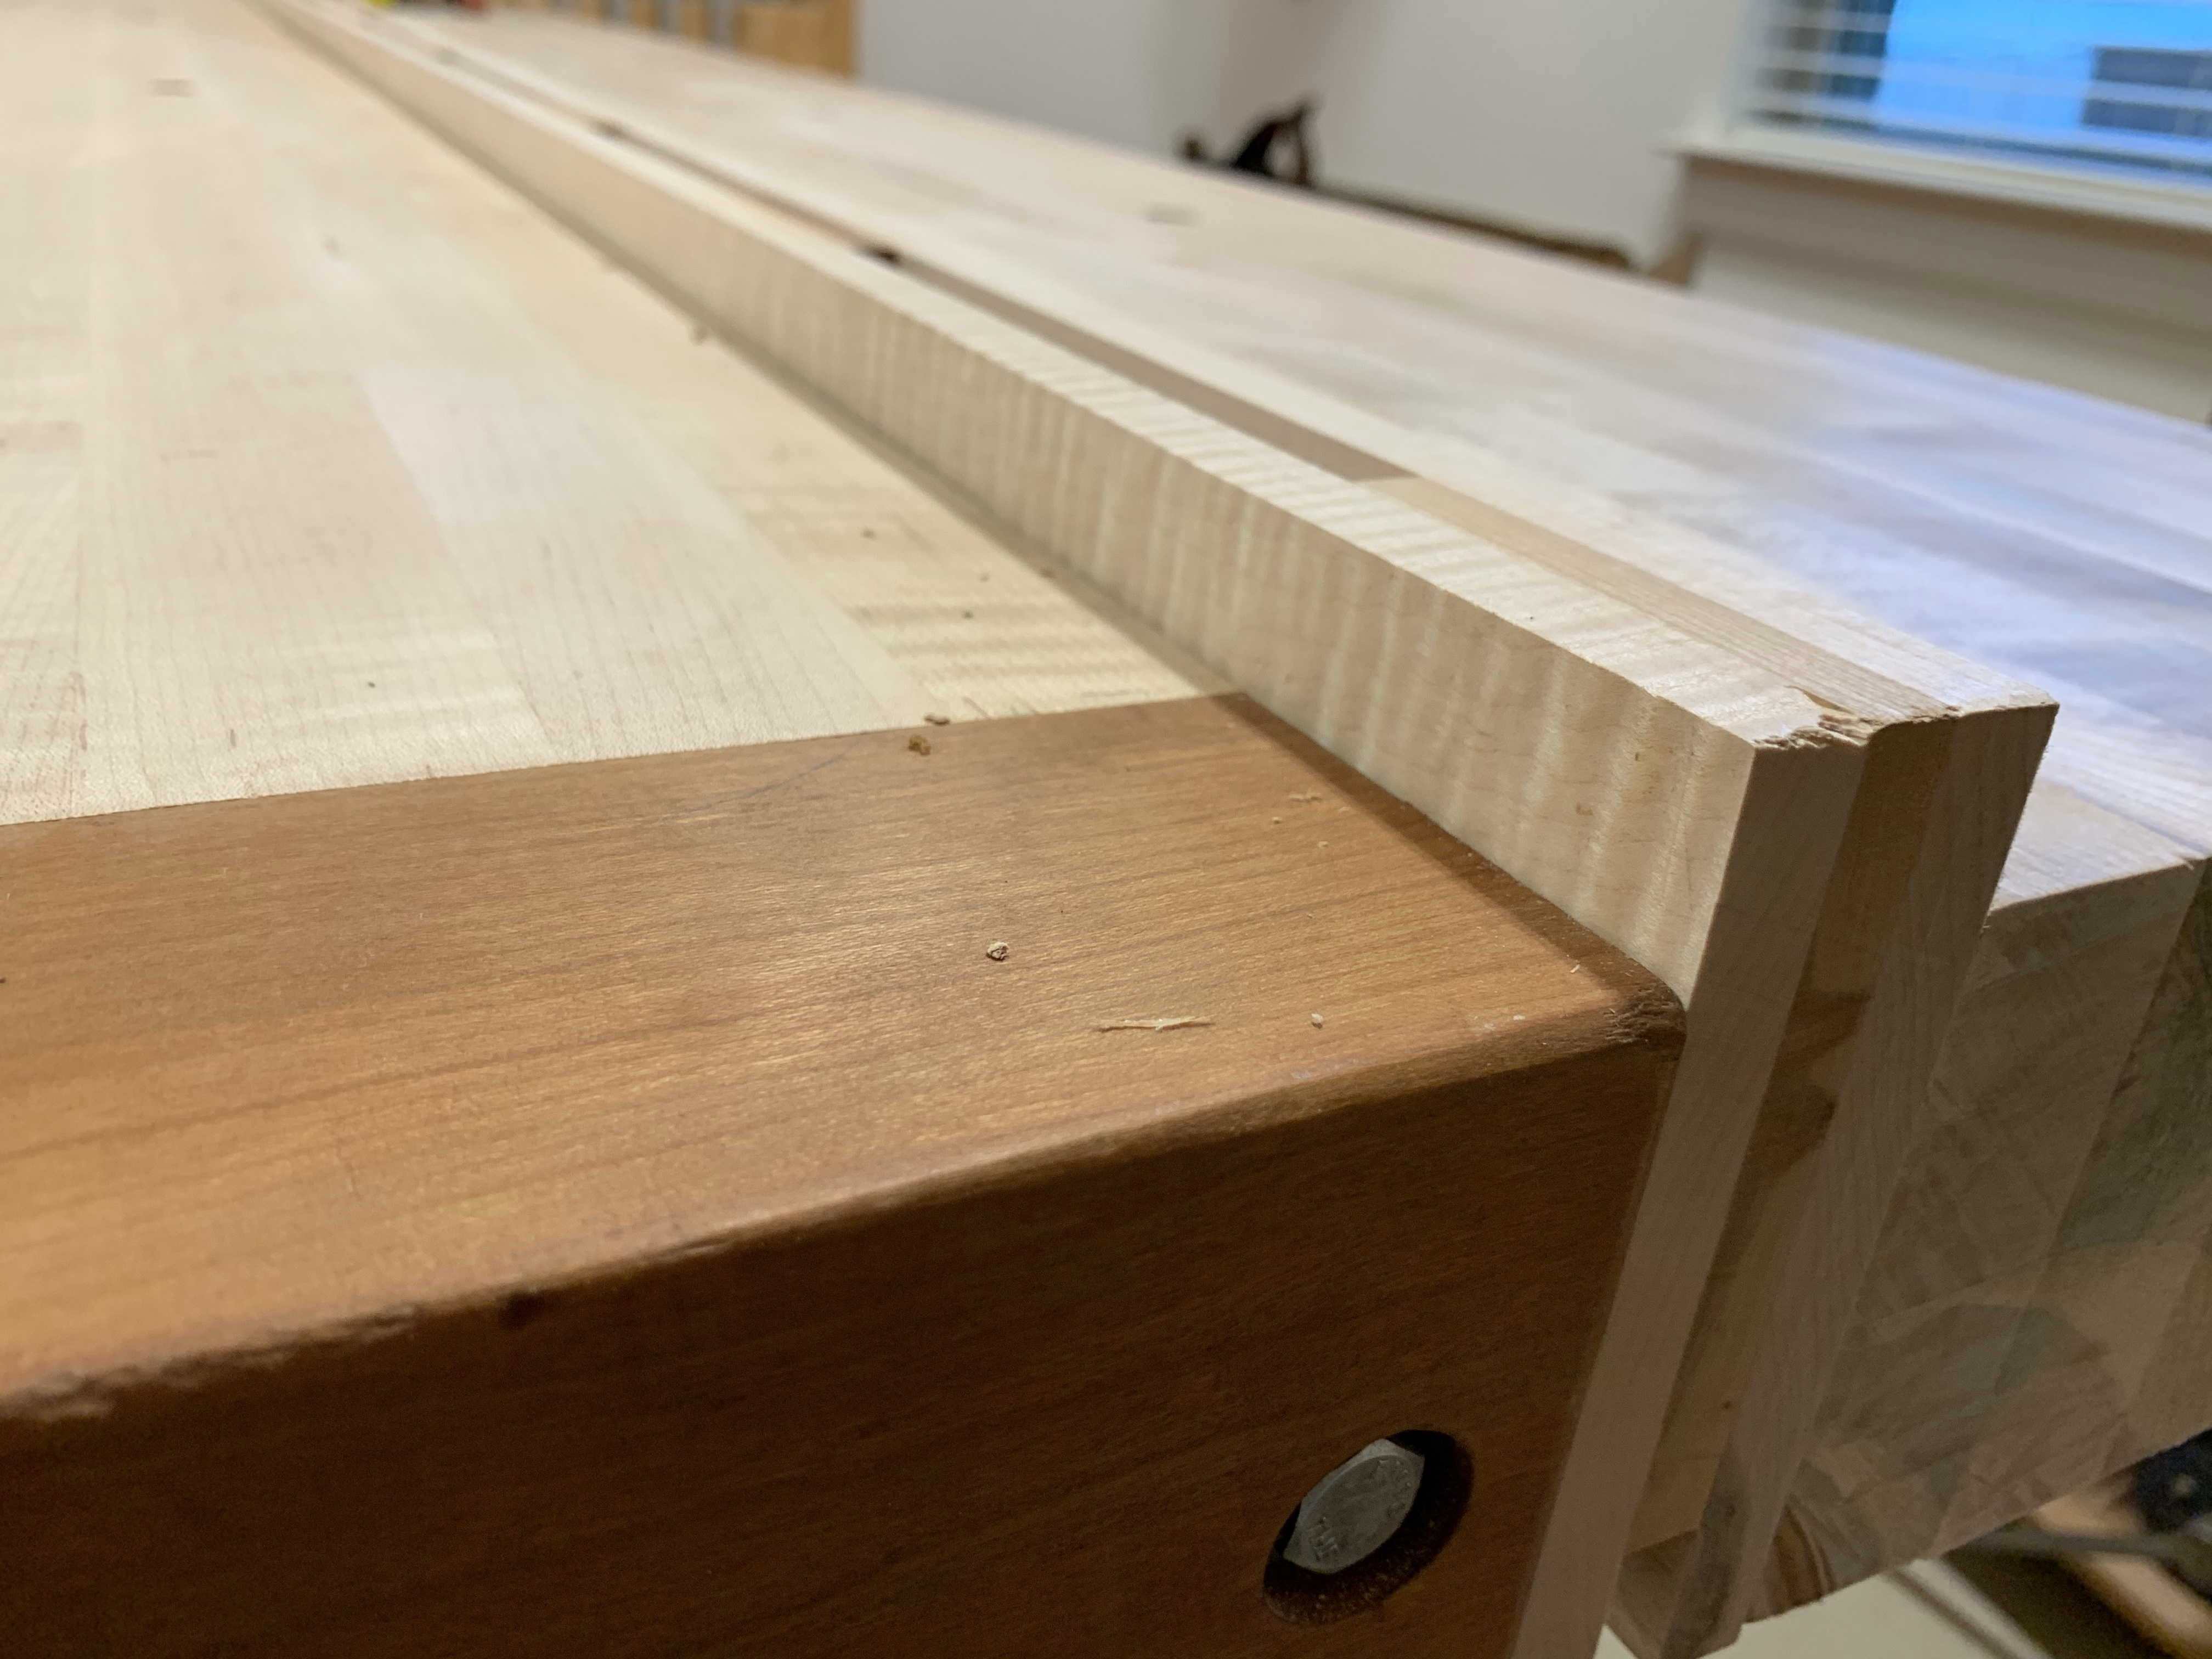
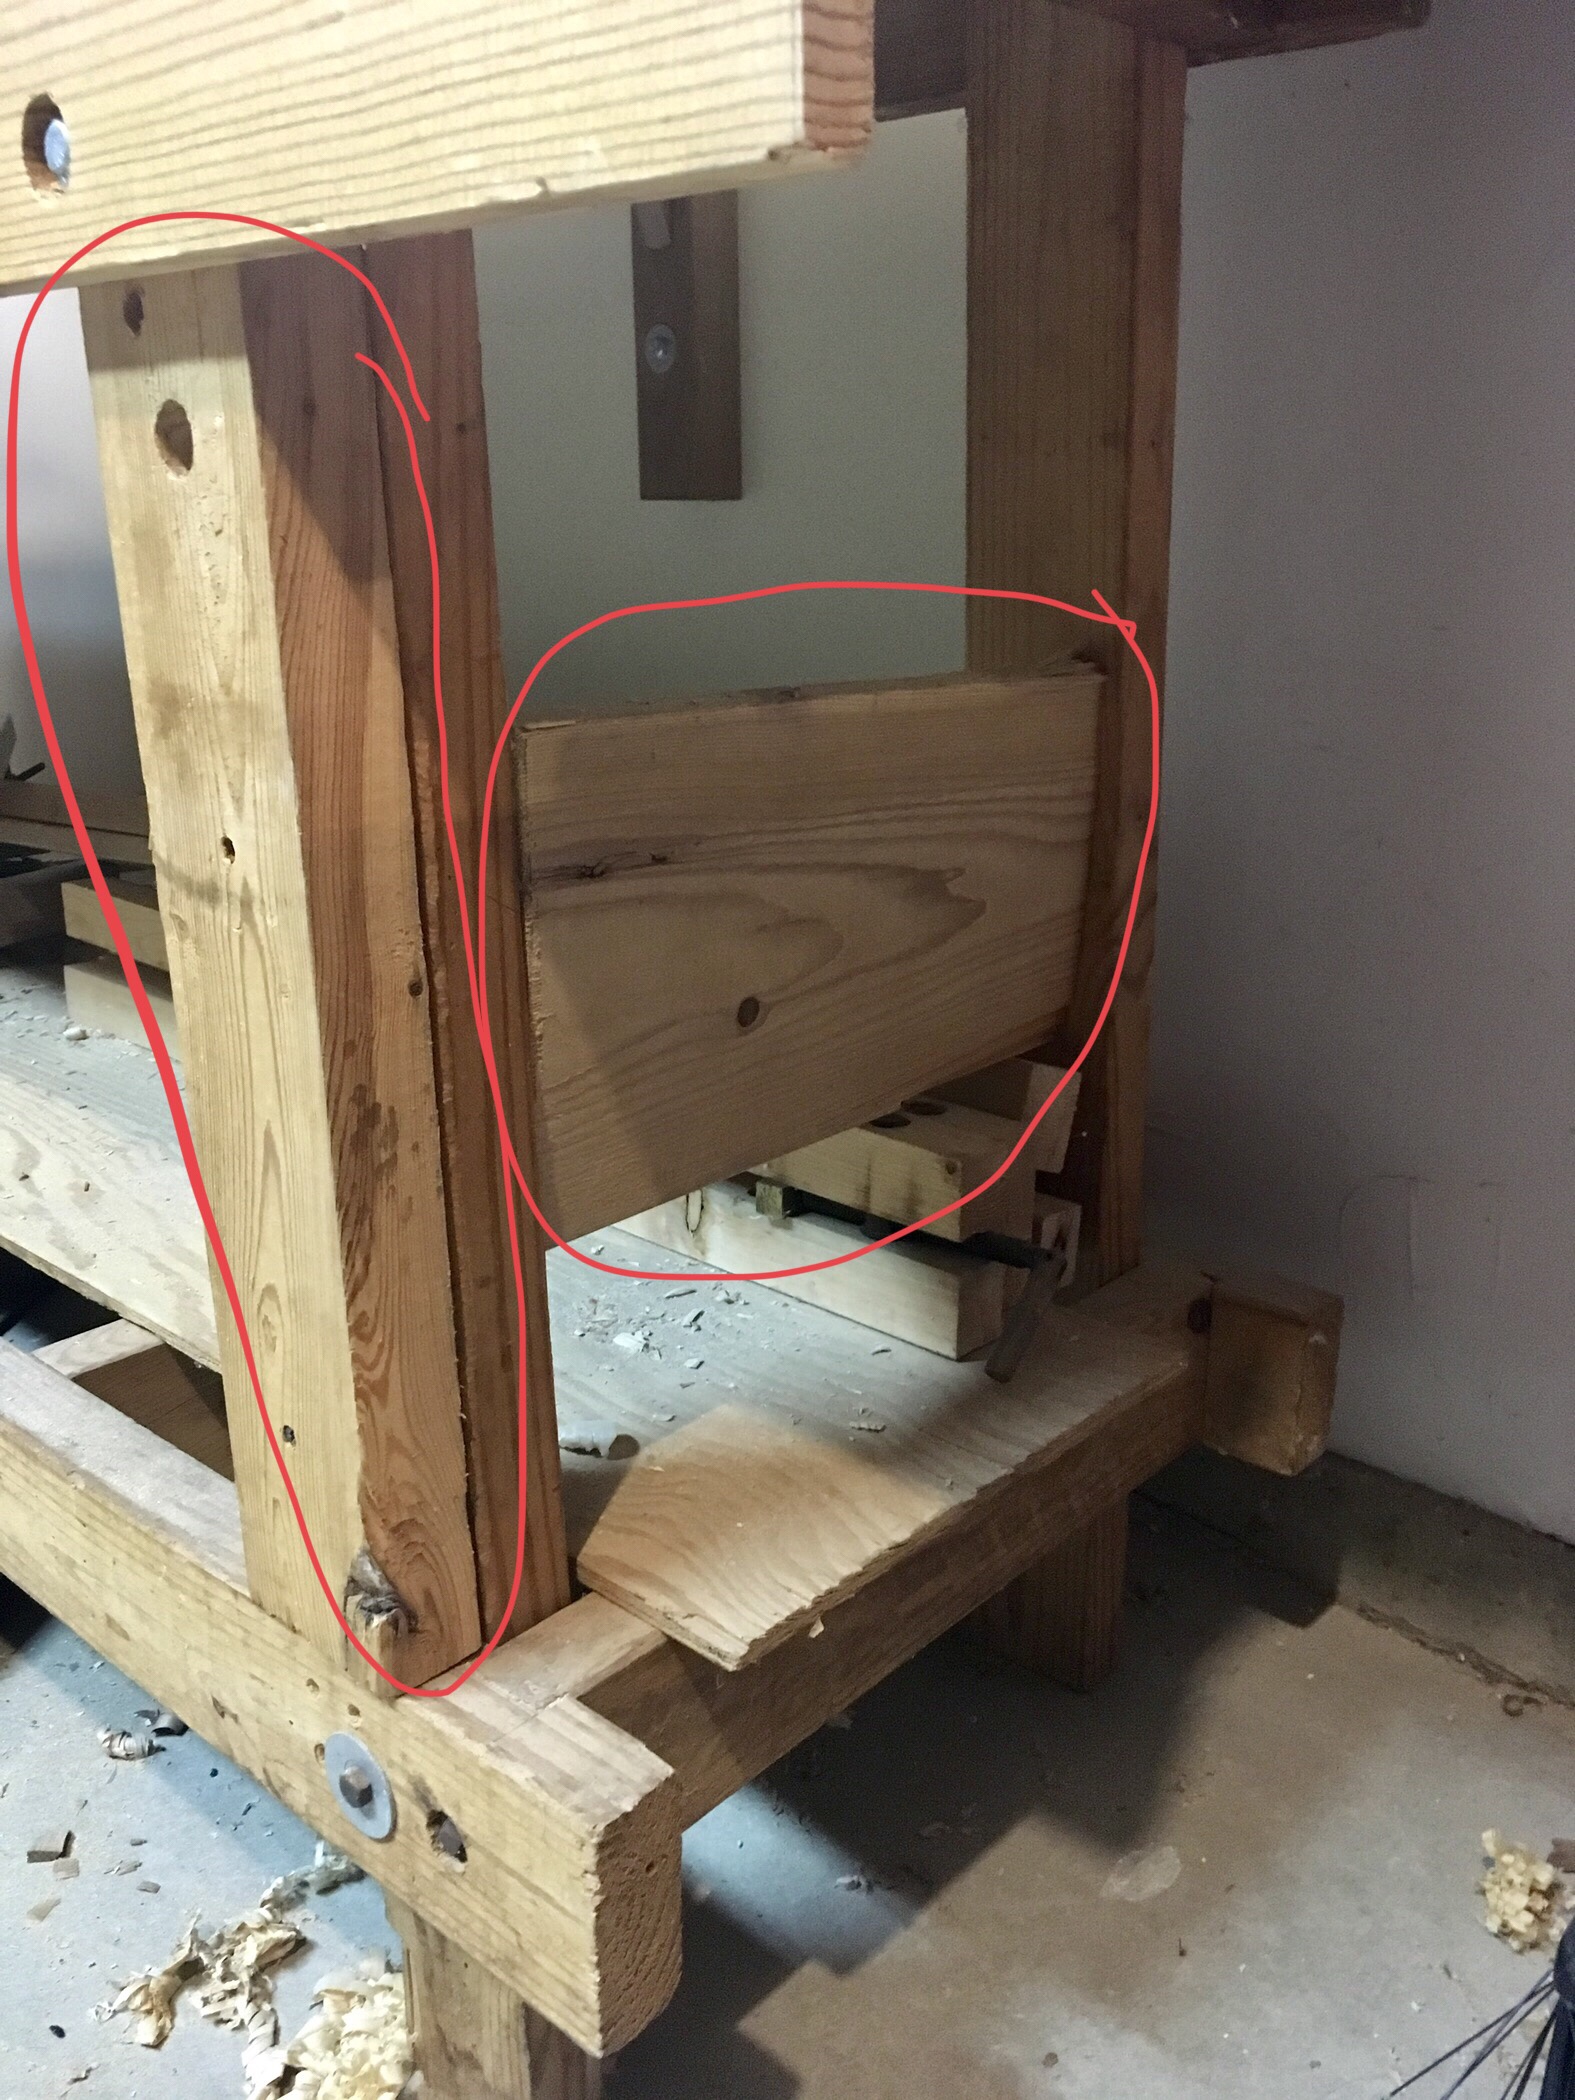
The gap stop was functional but with a very humid spring it needed some adjustment. After looking at it carefully I decided that it really needed to be reworked. First step was to correct the gap between the two bench tops.

I unbolted the sections and using a #7 Plane worked them down to the correct width. Next I found a couple of new boards and dimensioned them carefully, removing all of the twist and getting them to the correct width. The new boards along with a couple of extra blocks were glued together and when dry they only needed minor modification to fit into the slot. The rebuild of the gap stop took approximately half the time that I spent trying to fit and adjust the improperly made first stop.
Gap Stops, and Puppies
The day started early with what appeared to be a simple glue up with minor adjustments. Let no one think that the simplest of pieces take the least amount of time. The Roubo bench has many features that make it the most critical tool in a Hand Tool woodworkers shop. In the version I am building one of the features is the split top and subsequent gap stop. It’s another work holding device that I hope will become a useful tool.

Making the gap stop consists of gluing spacers between two pieces of lumber and fitting it into the gap. Nothing simpler, a great start to the day! It’s now one day later and it just fits, needs more adjustment and on top of that I’ve got a nice dent in the wall to repair….let me explain! Oh and I’ve not told anyone about the dent so let’s keep it quiet.
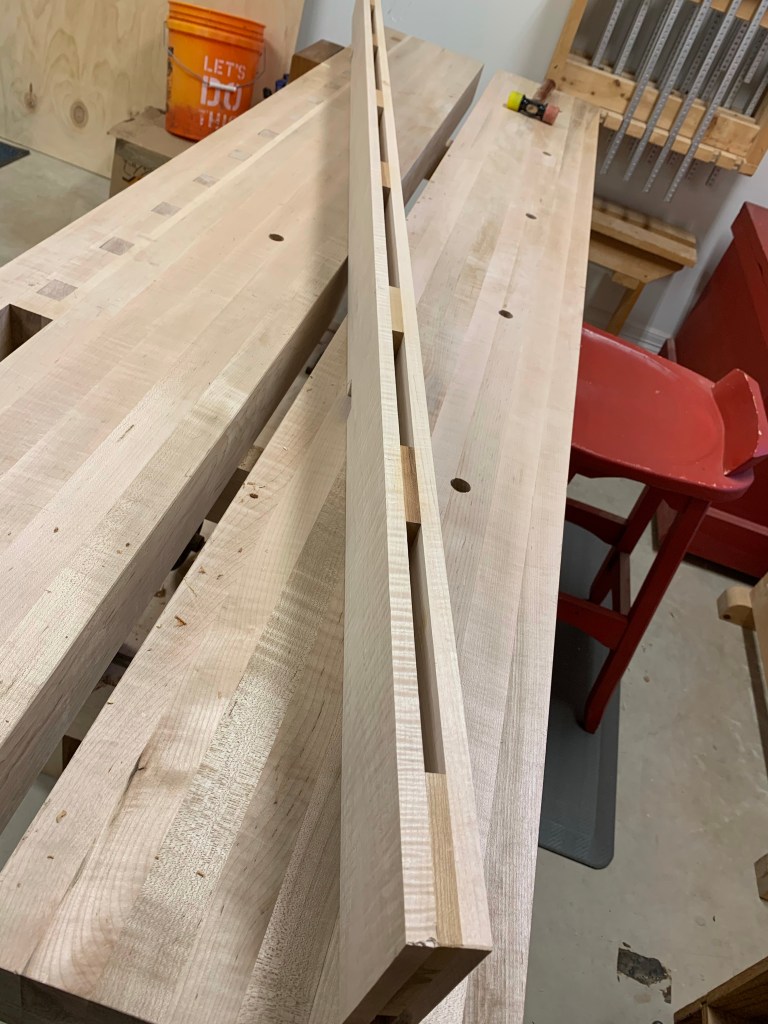
The Gap Stop consists of two boards, the length of the bench, approximately 1.5 inches wide. Spacers are used to glue the boards together providing a stop mid bench that can be used for planing against. The spacers also provide an area where tools can be placed so they don’t roll off the bench.
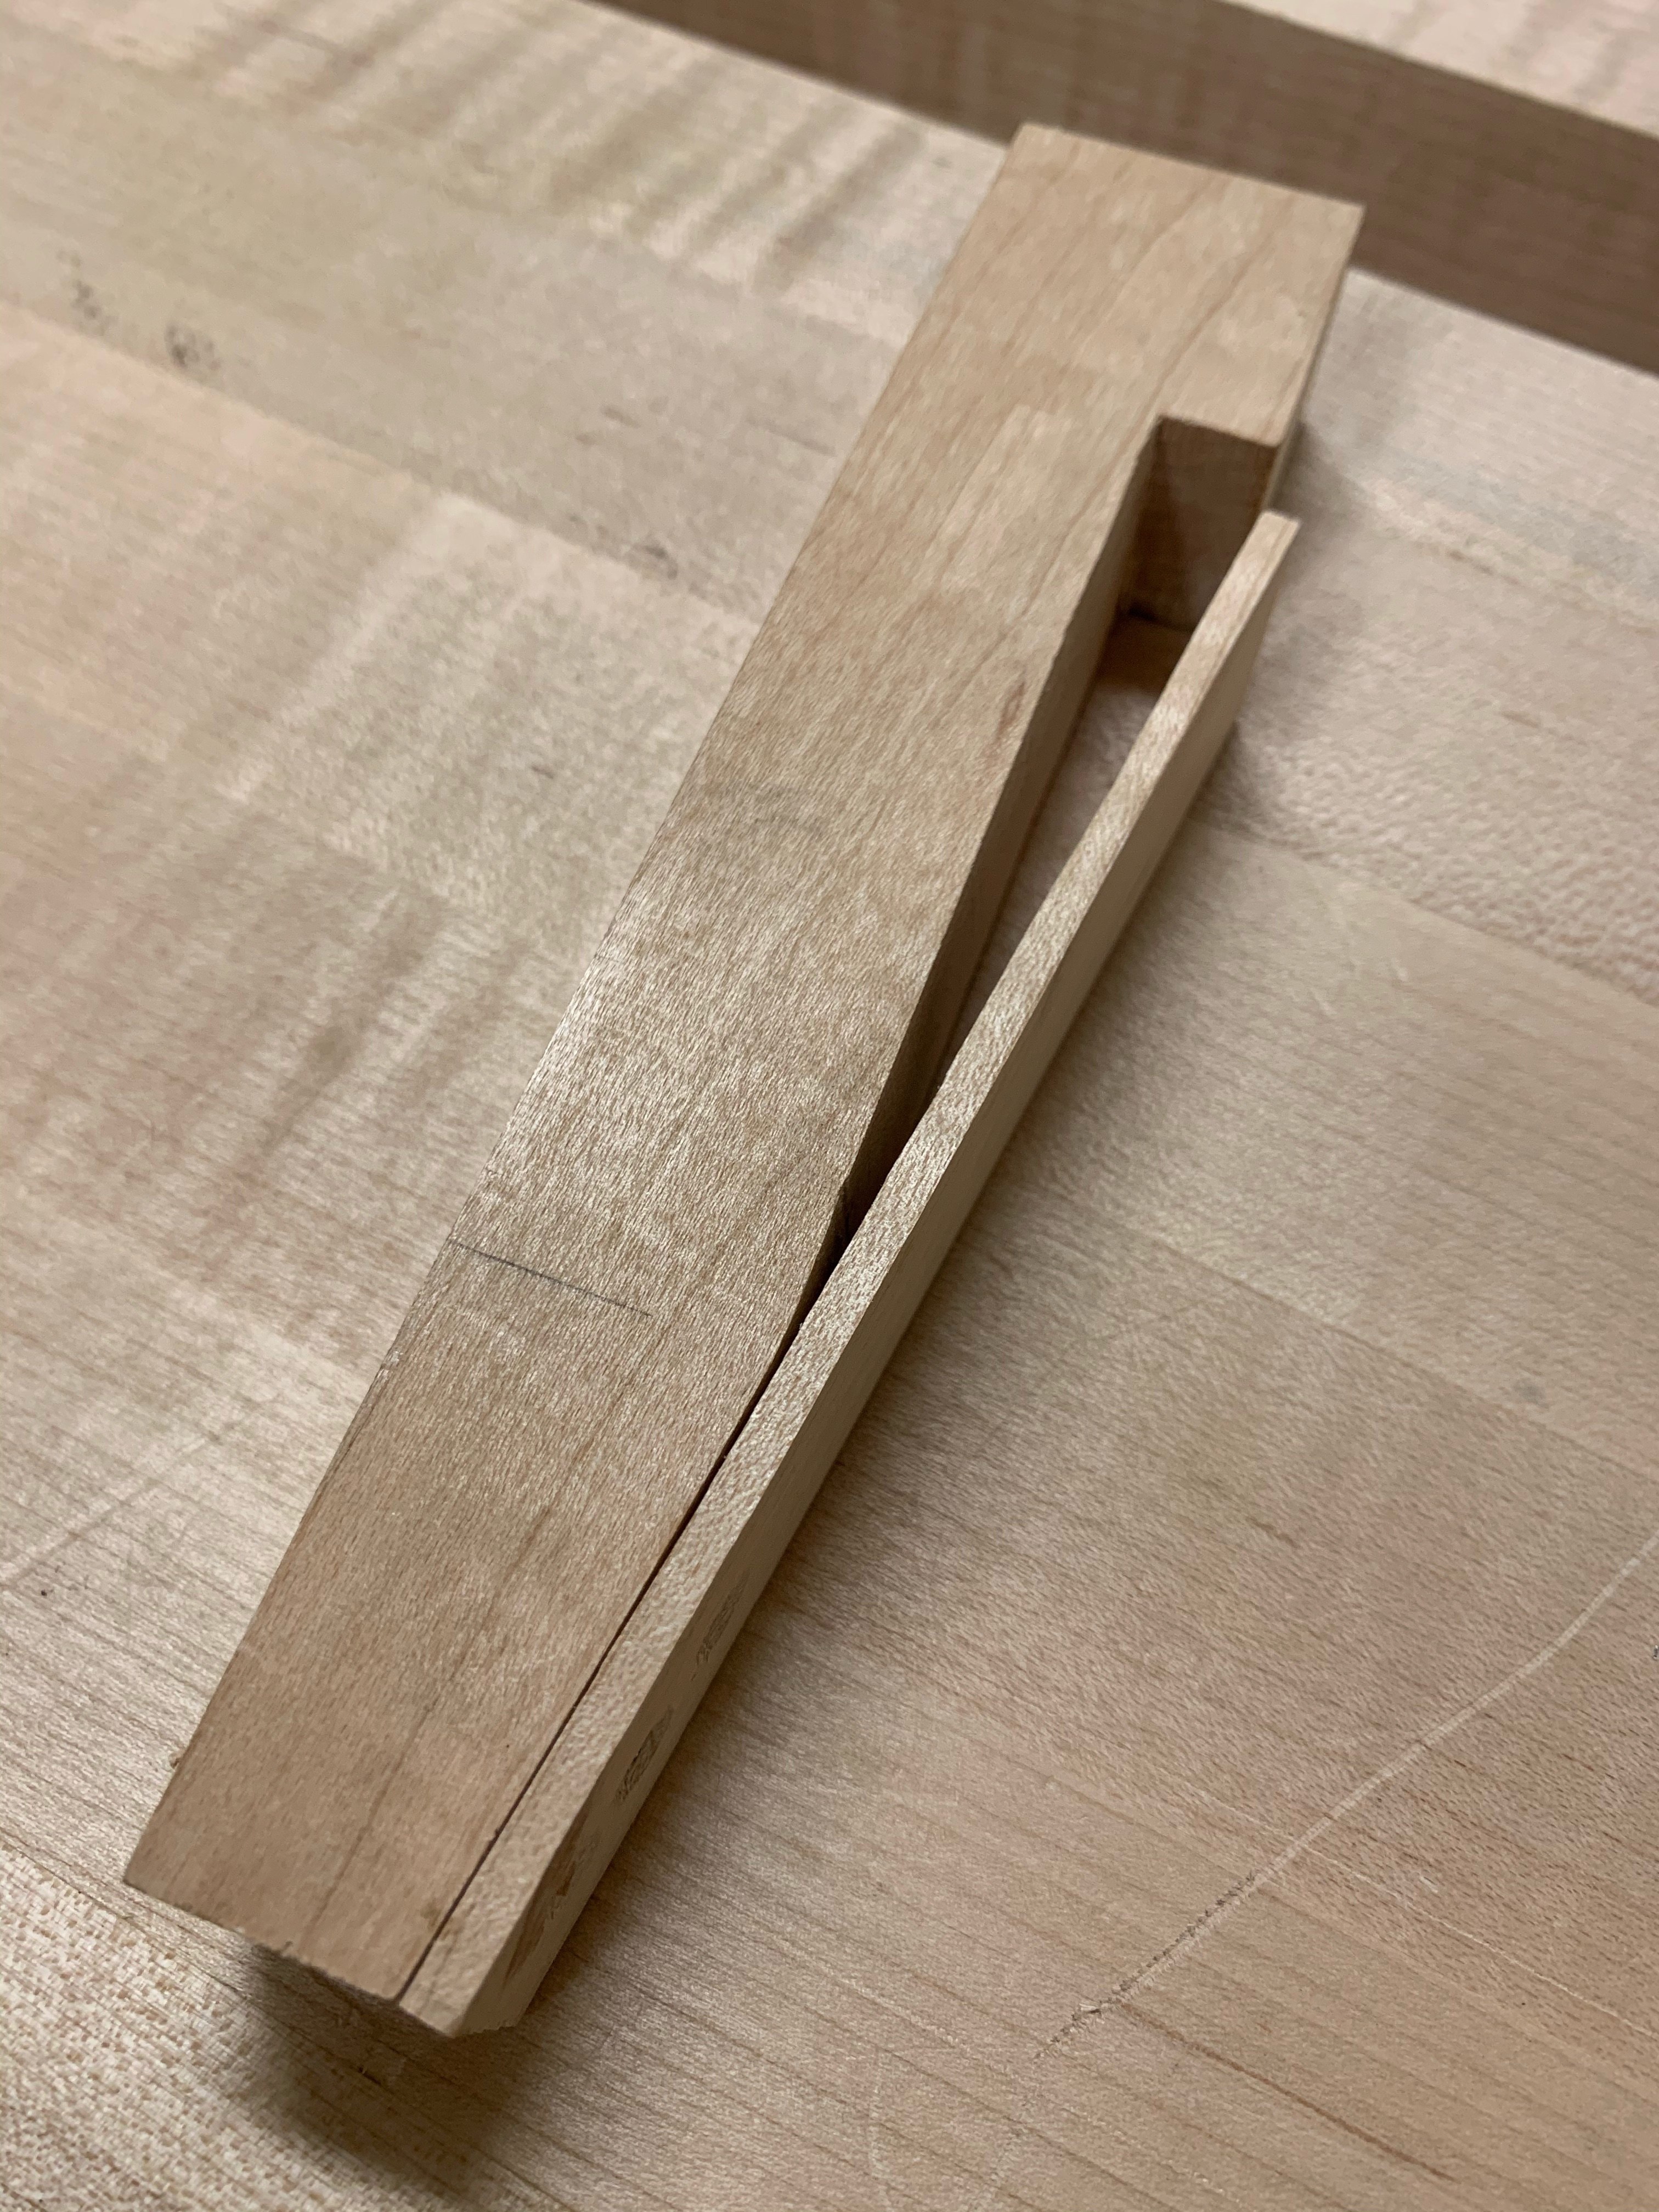
I cut the two outer boards and all of the spacers that would be needed. The two outer boards twisted magnificently and required a lot of work to get them close to flat. Then I checked my measurements and realized it was a little wider then I intended. Not to worry I planned to run it through through my planer. Next I check the actual gap between the two parts of the bench and realized that they were also a little wider then planned. So being In a hurry I clamped the boards to the table to prevent twist and glued everything up. Next morning I had a slightly twisted gap stop that wouldn’t fit in the gap. So I ran the gap stop through the planer. It only took two passes to begin showing a very strange variation in thickness.
Standing and staring at the stop for a minute I realized that the stop was flexing in the planer under the pressure from the guide rollers. I set them on the bench and hand planed them to fit.
A couple of thoughts that may help someone in the future. Make sure your boards have no twist, add a couple of additional spacers. Secure your work piece before planing, Be familiar with your tools and how they operate. Don’t assume the small stuff is easy! Enjoy the puppy picture!

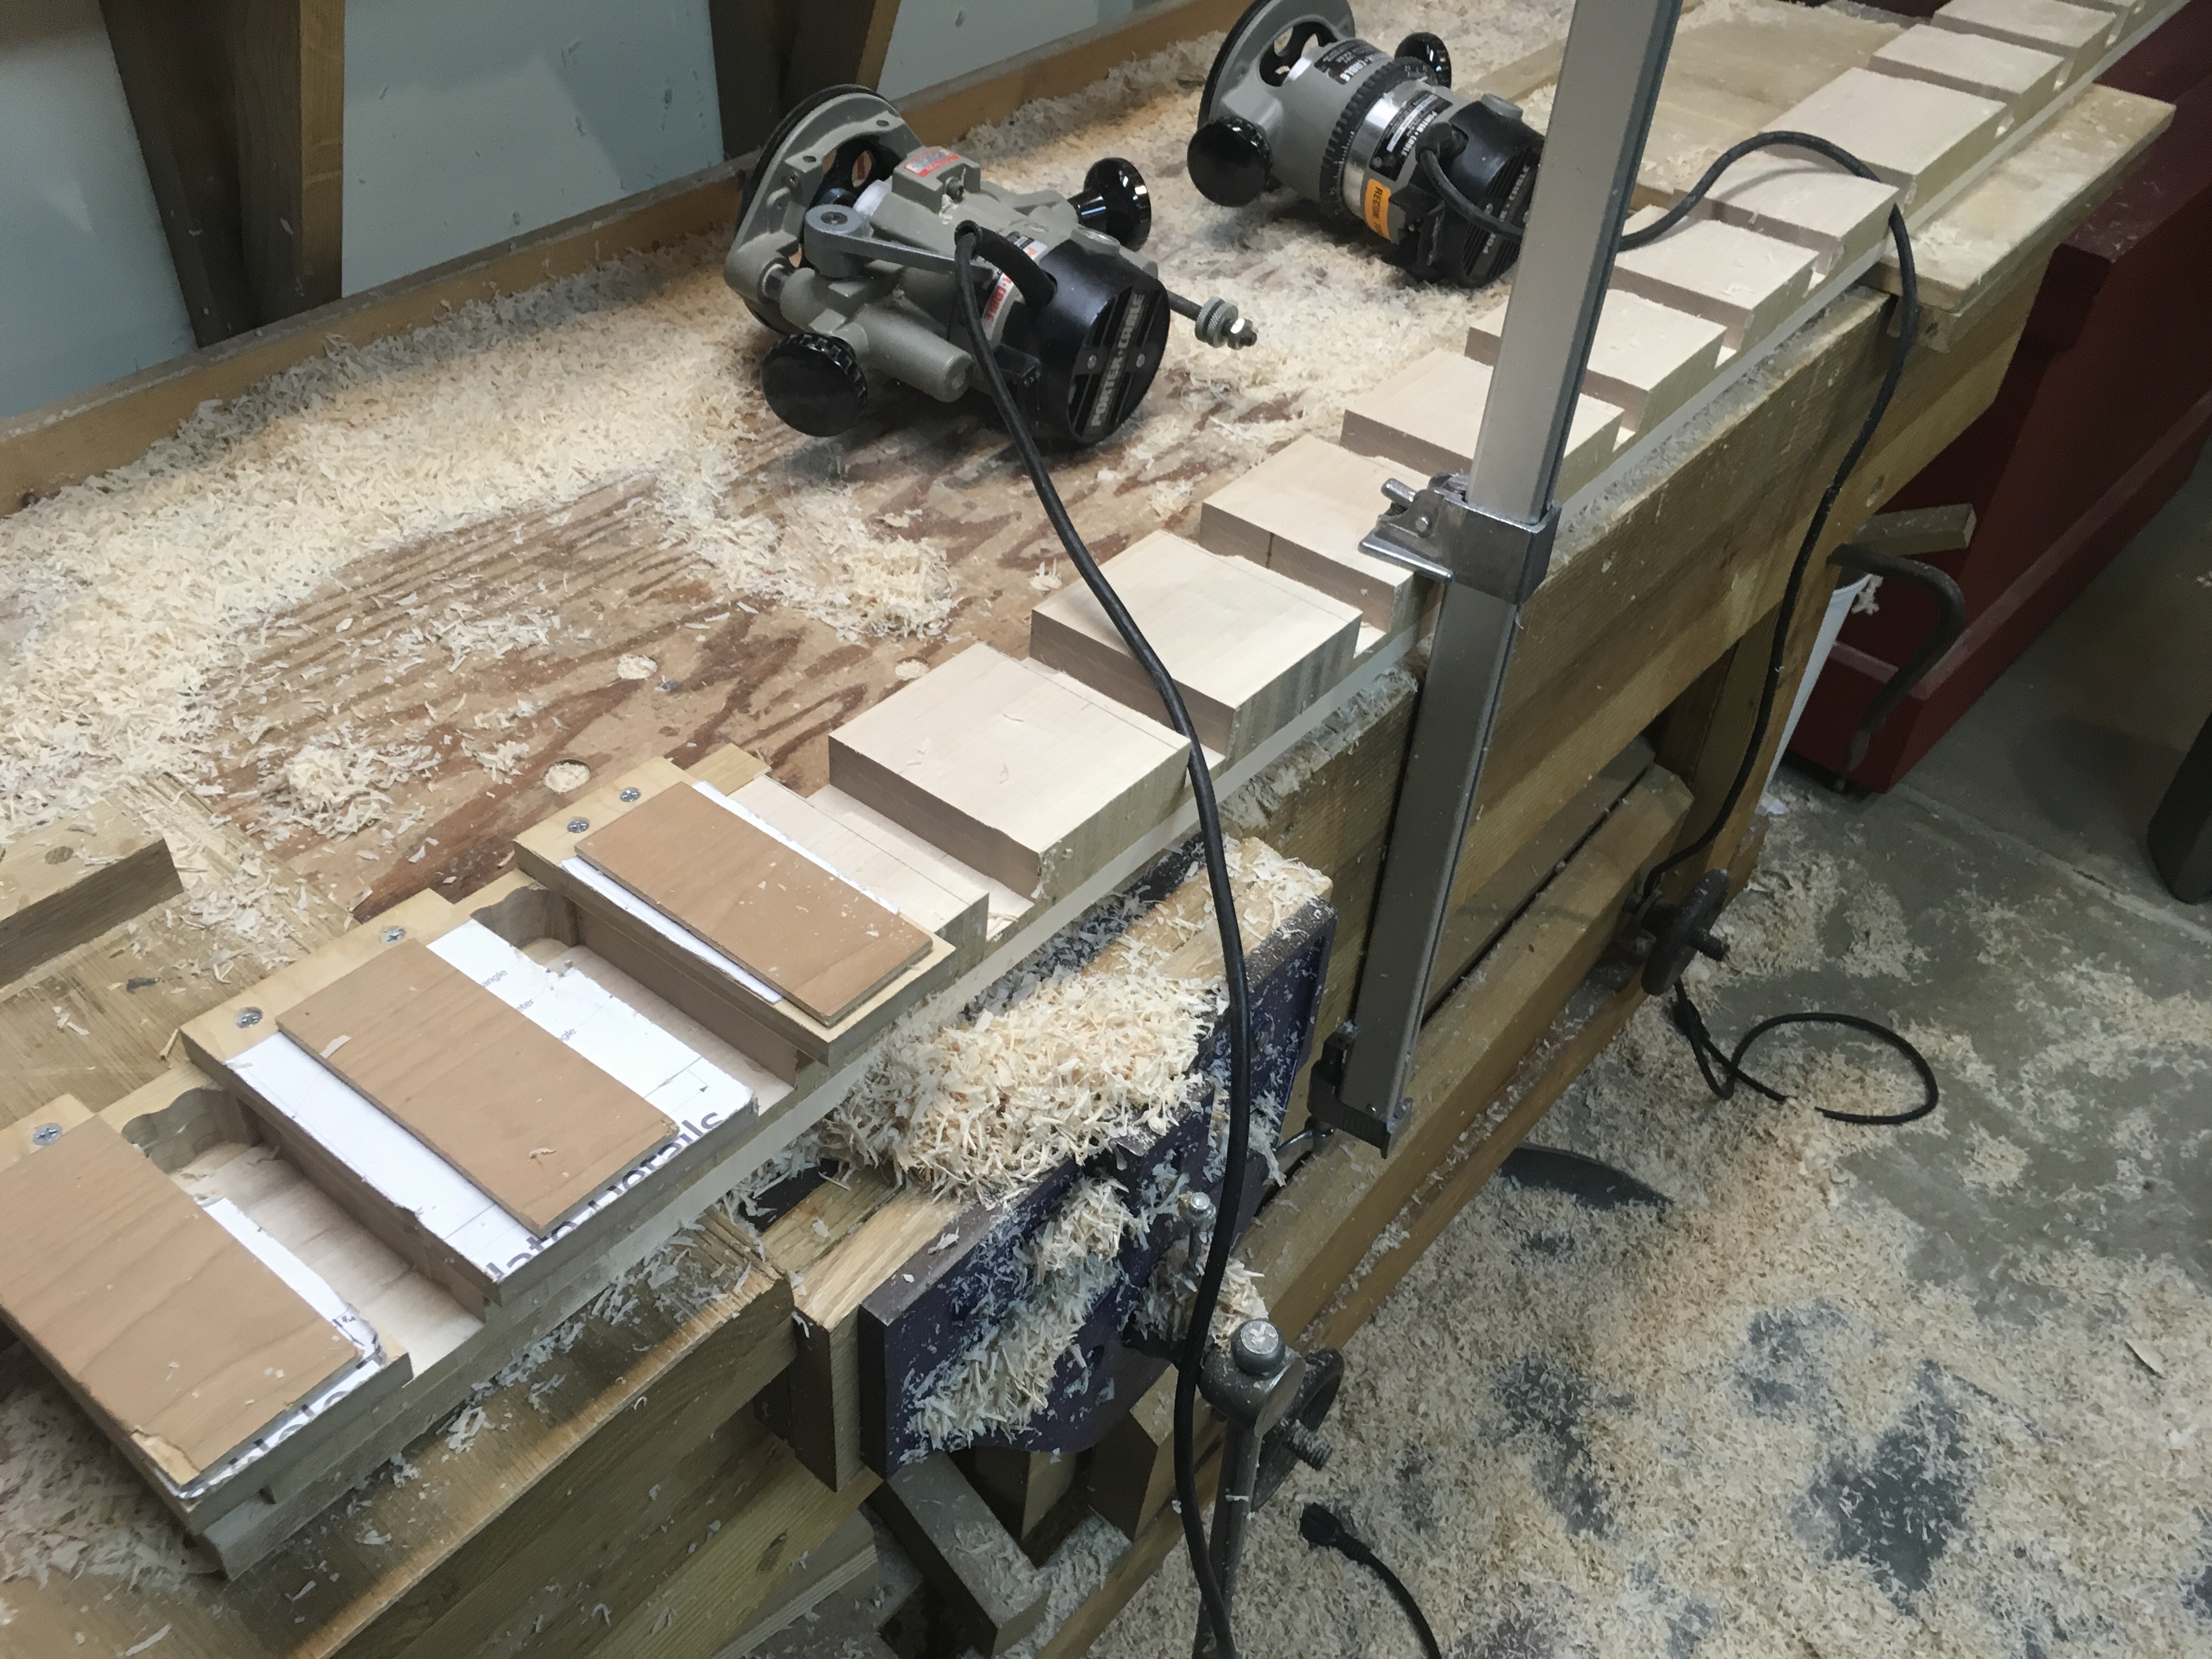
Roubo Workbench – Bench Dogs
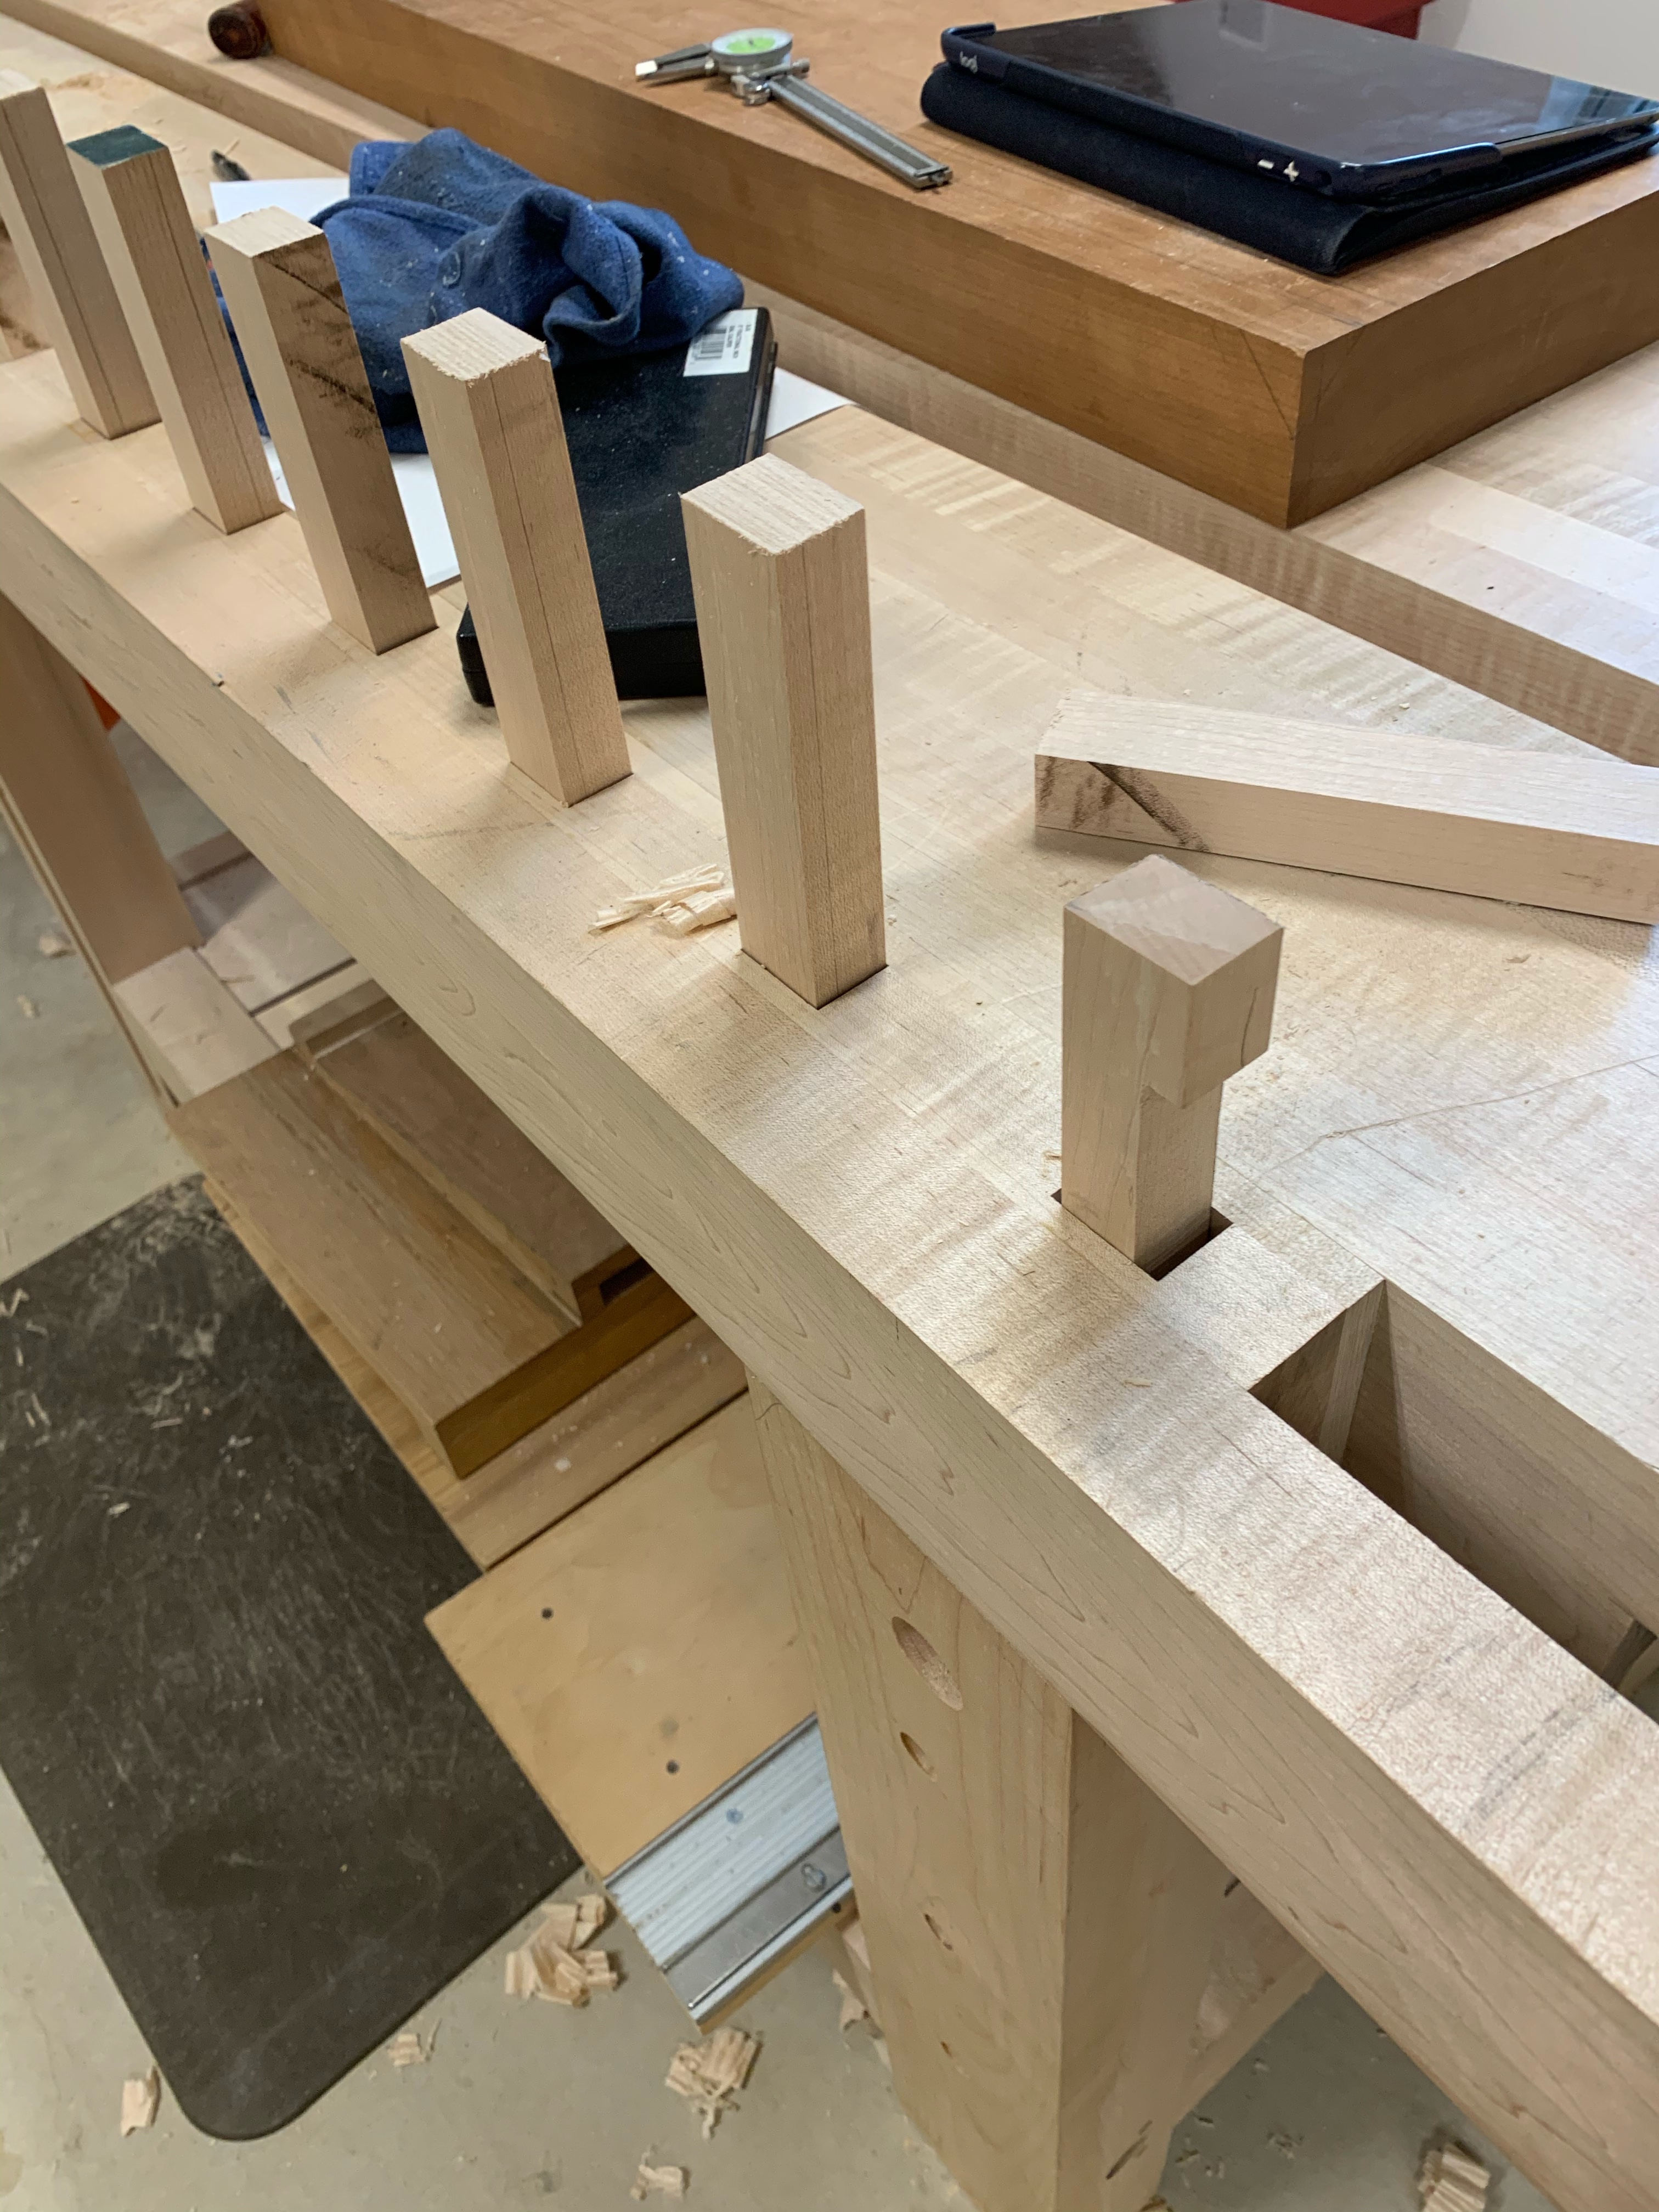
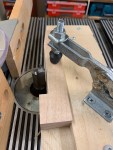
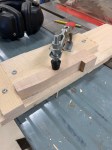
Beginning with hand tools, I made the first dog to get the correct size and shape. Most of you know that the majority of my time is spent using hand tools, however I do have the option of power tools when it makes sense and with 14 pieces exactly the same making a jig and mass producing them is a better use of the little free time I have. I’ve probably used a router more on this bench project then the last 10 years in total and although it’s far from my most favorite tool, it handles this job well. Beginning with hand tools, I made the first dog to get the correct size and shape. It took a bit of time assembling my router table, mostly spent looking for the assembly manual (hidden carefully in the box with my routers.) Next I assembled a jig using pallet wood from the construction dumpster next door. The design is from the WoodWhisperer, and it took an hour to put the jig together and rout the final shape for all of the Bench Dogs. Notice that the router produces a rounded shape rather then the squared off shape I made by hand. No worries they work just fine.


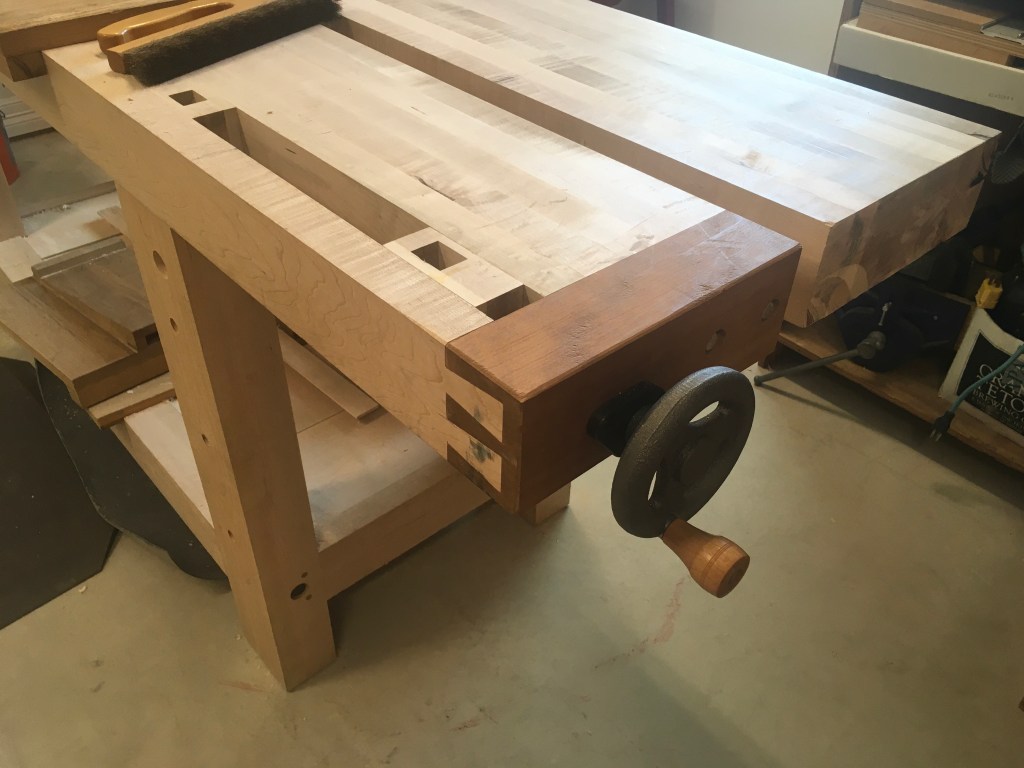
Roubo Bench Tail Vise
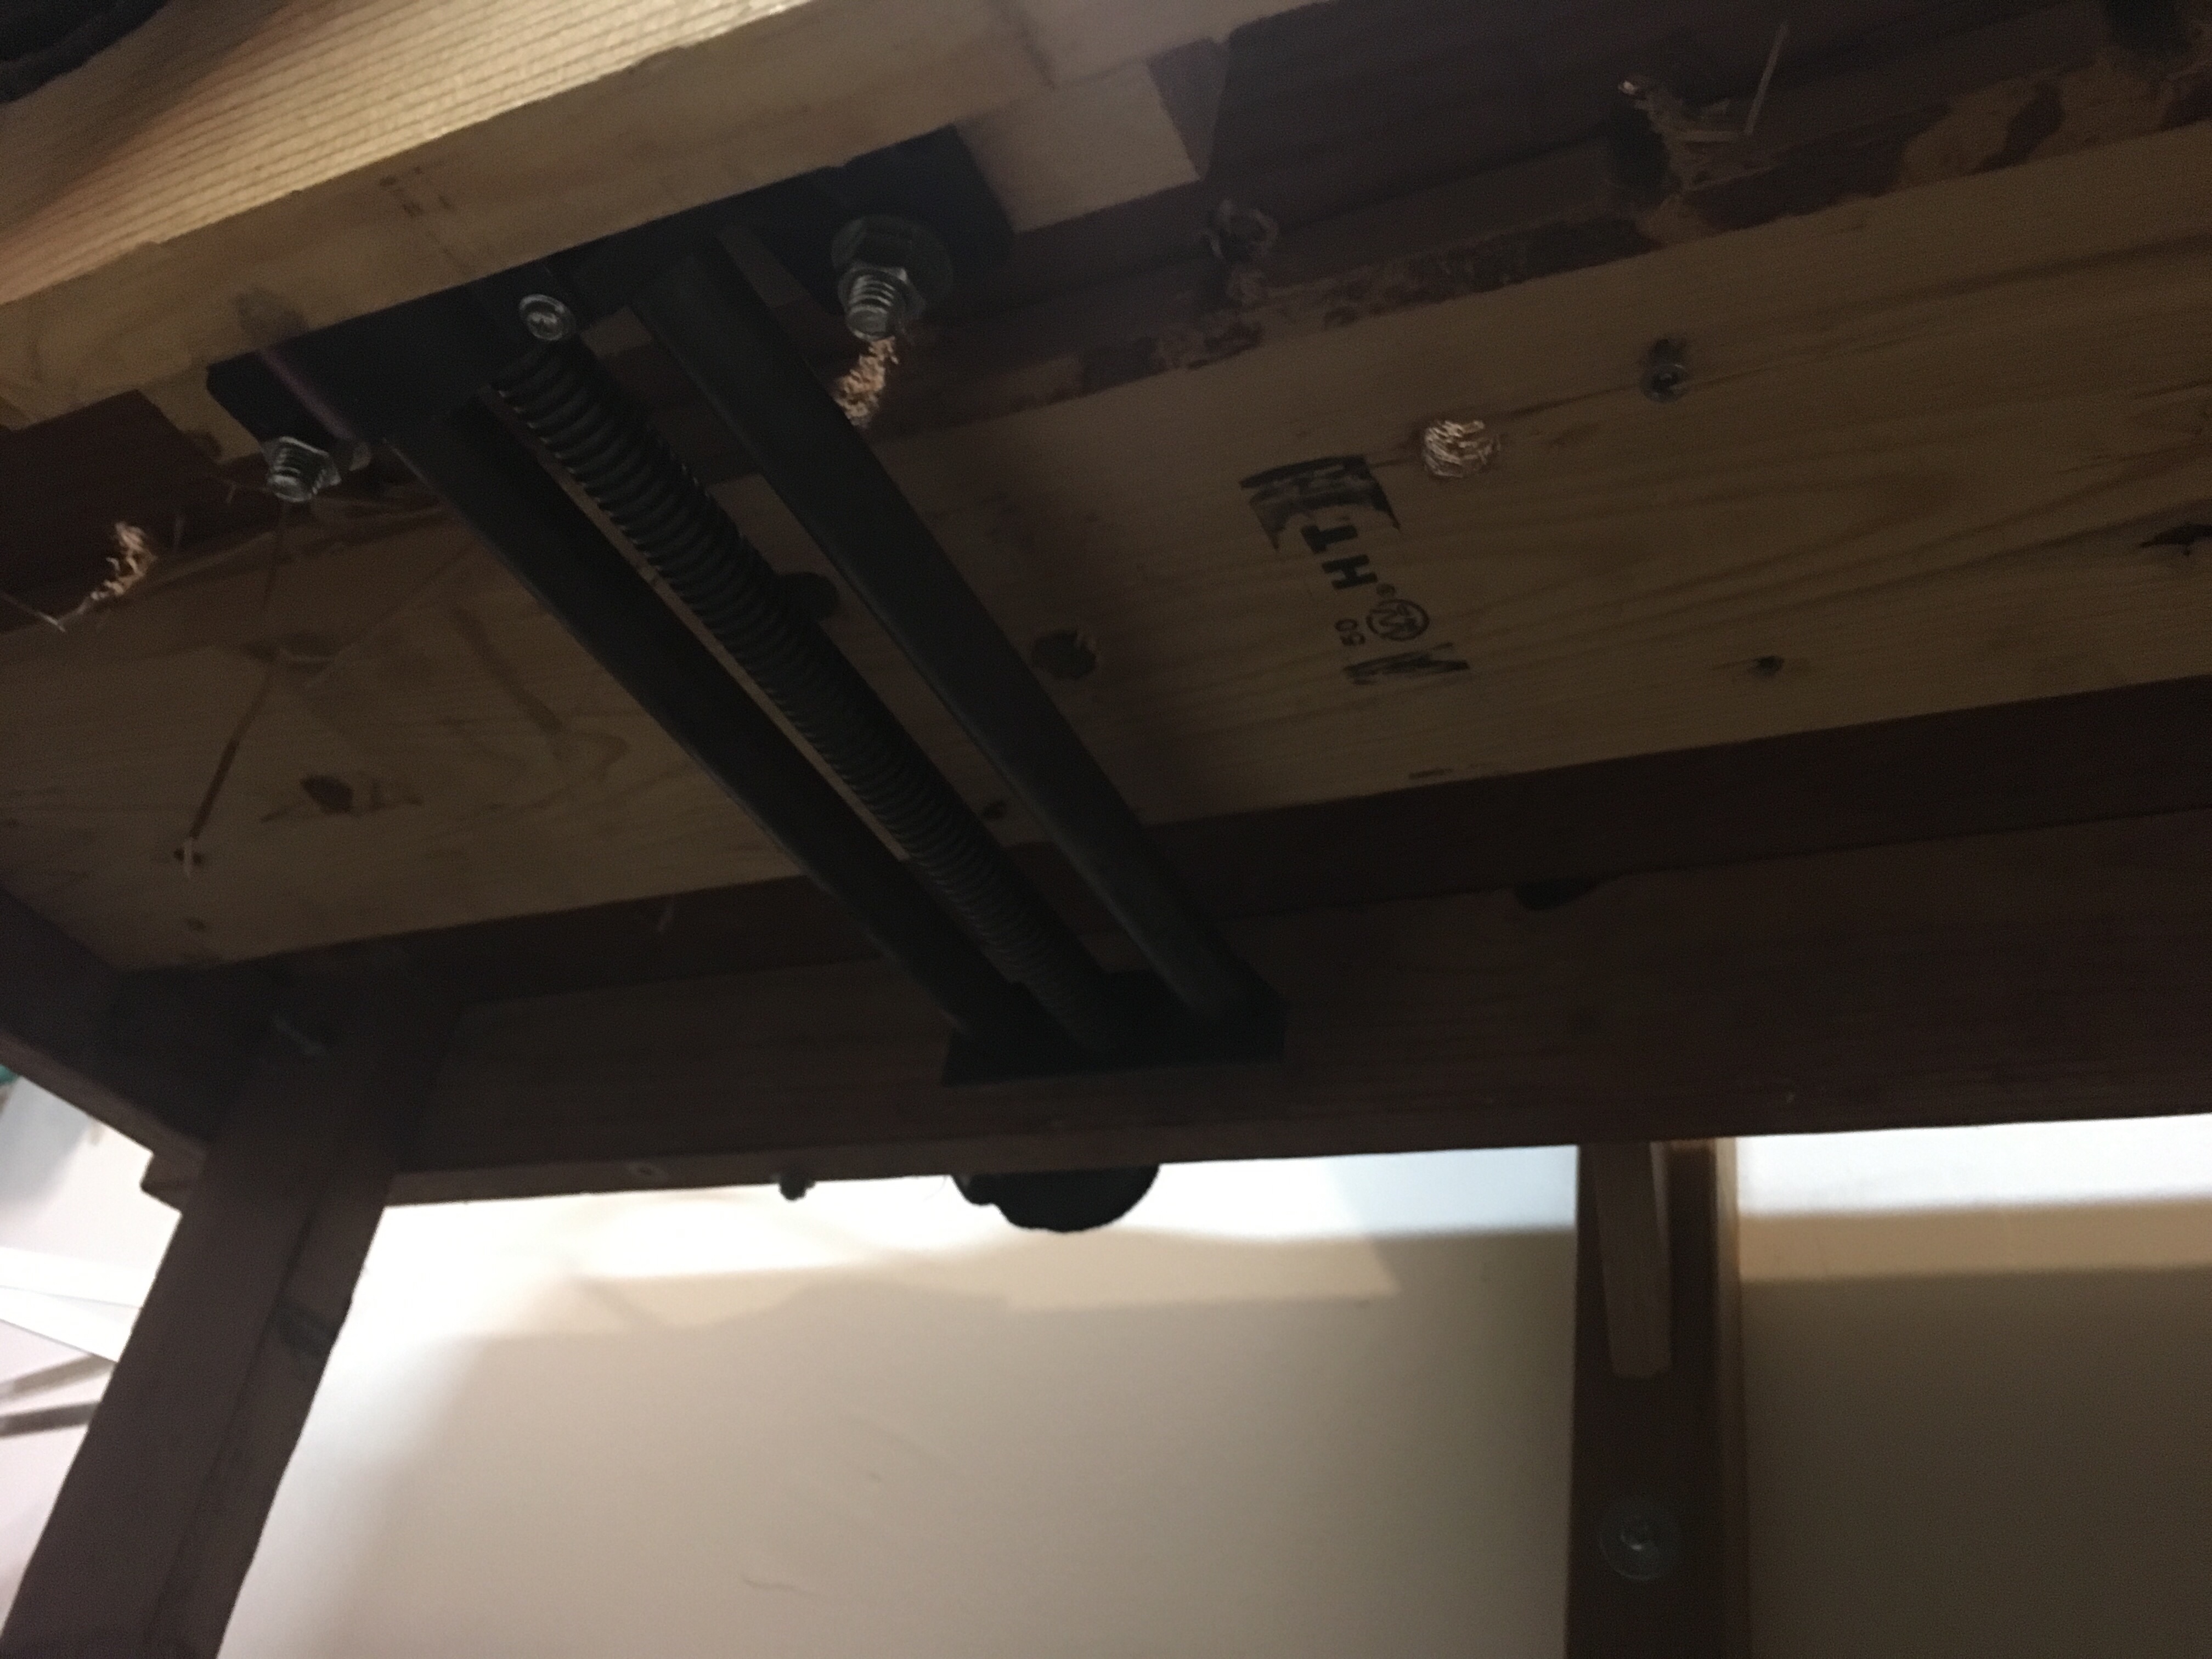
A year of waiting to woodwork has produced one lone thought, where the heck was I. Looking at the bench I recall a frantic weekend to put together as much as possible and carefully pack the benchcrafted parts. However remembering the step I was about to take is in a recess of my mind. One thing is clear, I need to complete the tail vise or Front vise before moving forward.

After some contemplation I set to work on the tail vise. It appeared to be a quicker installation and I’ve yet to determine the shape of the chop on the front vise. It took time and some final adjustment, but I inserted the rails into mortises, adjusted the bolt holes and screwed it together.
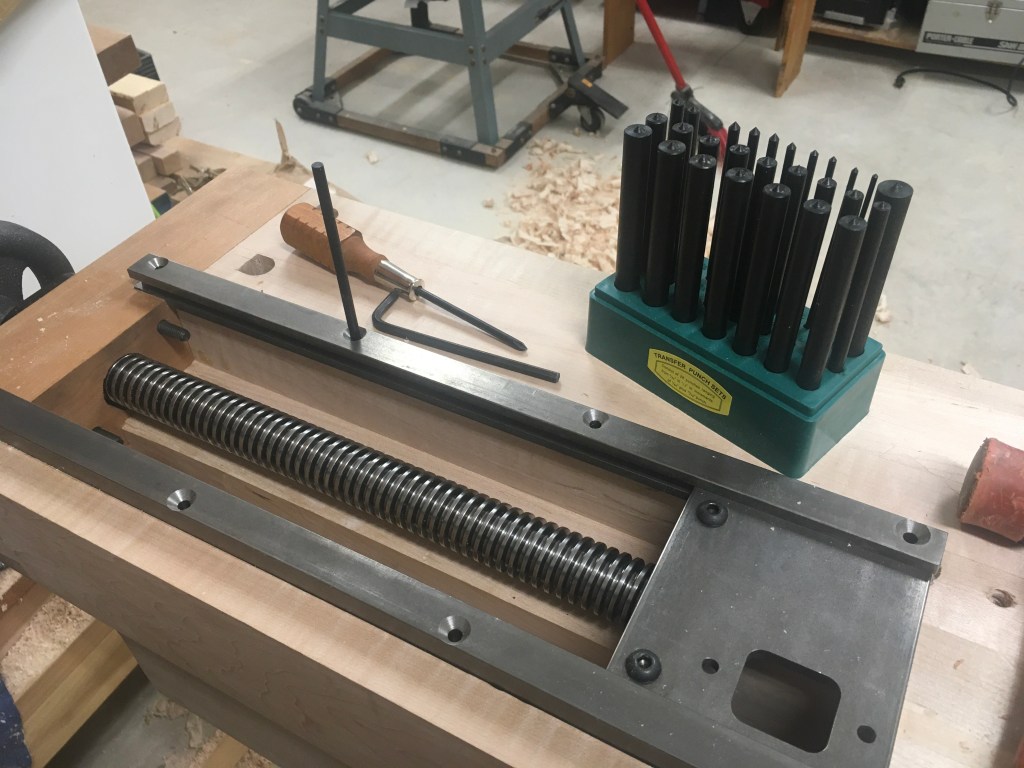
Really happy to have the center punches to mark the holes. It’s one of those tools that aren’t essential but make a difference. I picked mine up at Lee Valley but I think you can get them most woodworking stores.
Some work the plane and saw and it’s all together.
Bench Dog Design
Wandered through an antique shop today and noticed several benches and tool chests. Typically I prefer junk stores since their pricing is reasonable and people understand what you are looking for and how it’s used. During my wanderings there were several benches, but the dogs on this bench caufgt my eye.

Perhaps I should have looked at the price of the bench, but by the time I was in this part of the store sticker shock had worn off and I was in cruise mode. It’s a very nice bench with decent proportions and a couple of nice vises that worked well. I imagine this will ultimately end up in a kitchen somewhere.
The bench dogs were quite large and moved smoothly up and down. They were held in place by a thin piece of wire.


They did not appear to hve been used often but I can imagine the wire would eventually create a groove in the bench top. Don’t think I will change the design on my bench but always fun to look at options.
Roubo Bench Top Attached
Travel has gotten the best of me this year and projects that should take hours are taking weeks. I’ve put woodworking aside to spend time with family and my furry friends. Hobbes is sleeping now so I’m slipping out to attach the bench top.

With both sections of the top complete, I only have to cut the mortises to attach the top. A small task that took surprising little time. Again careful measurement was the key and handling the bench was a struggle. The weight of the bench is one of the reasons I gravitated towards it but it does present building challenges.
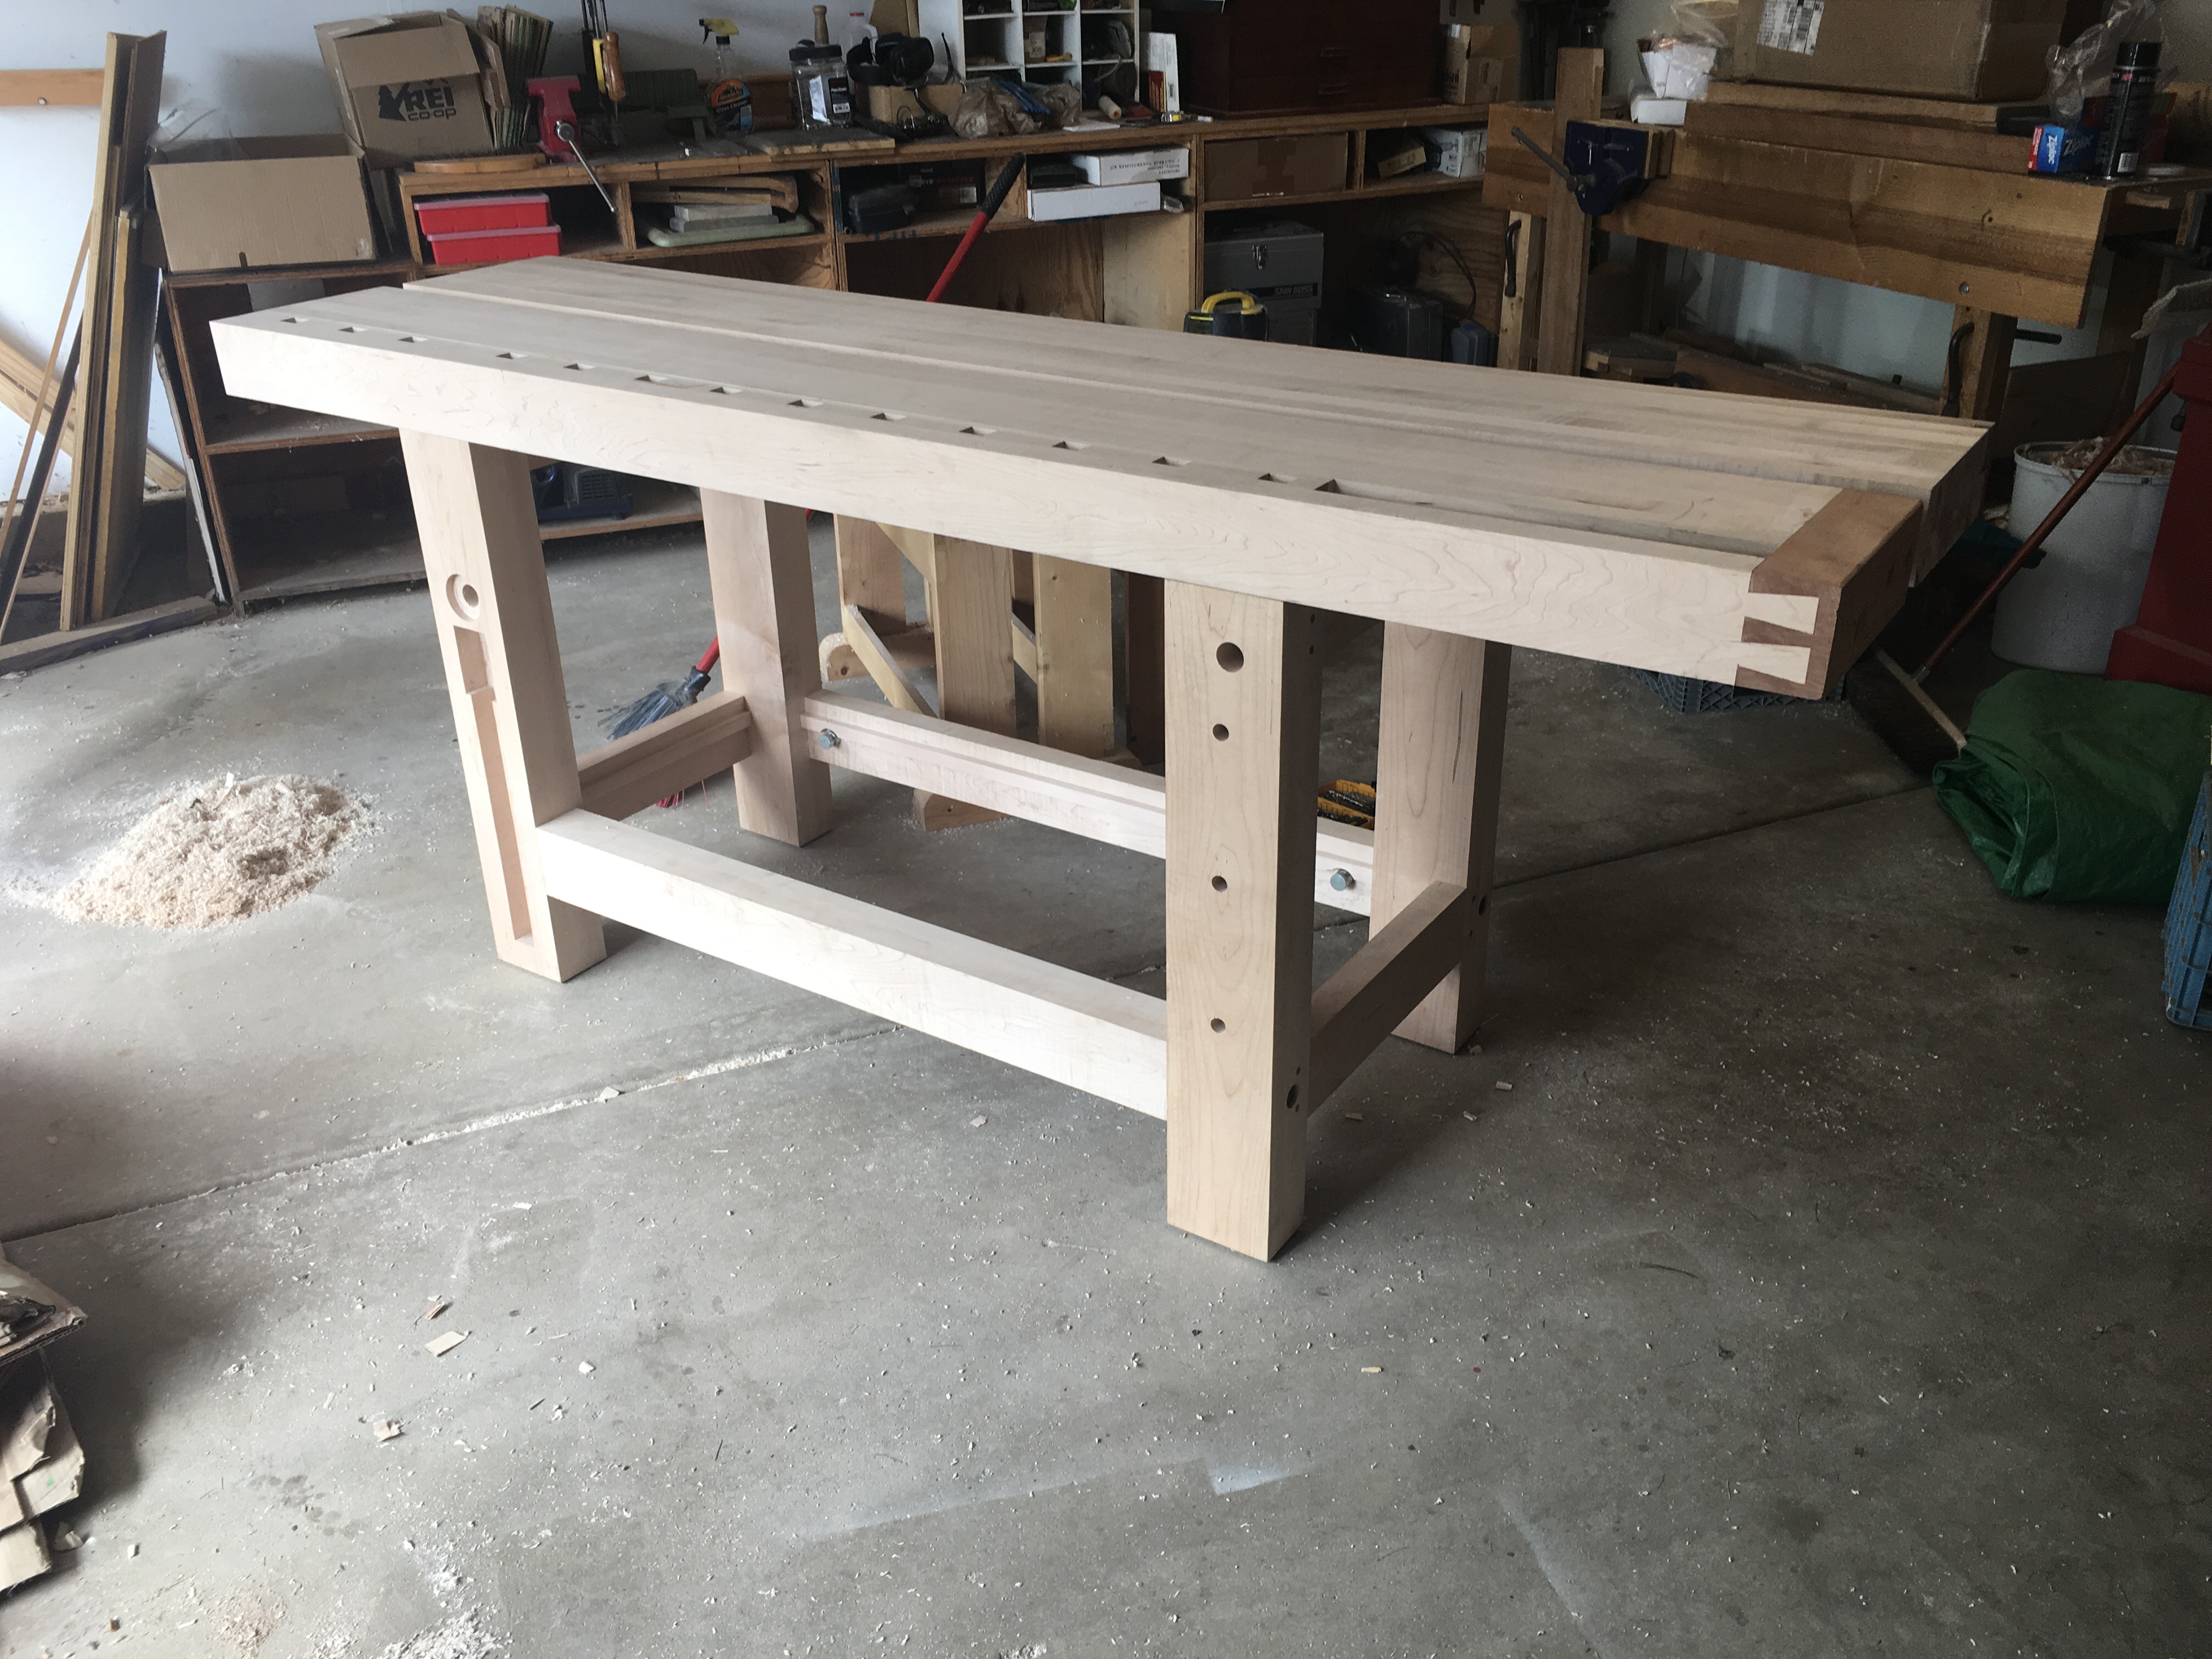
Roubo End Cap
The end cap on the Roubo Bench creates anxiety for most bench builders, I’m no different and procrastination built a simple dovetail into a crescendo. Although cherry is a soft wood, its beautiful color led me to using it for accent parts (chop, cap, pins, etc.) putting aside my fears I spent a long time marking out the various mortises, holes and finally the dovetail. No pictures for the blog, just pure focus. A couple of hours later and it was complete.

Many of you used hand drills to auger the holes. I used my drill press and was very thankful for the accuracy. Glad to have this behind me its time to place the top on the base.
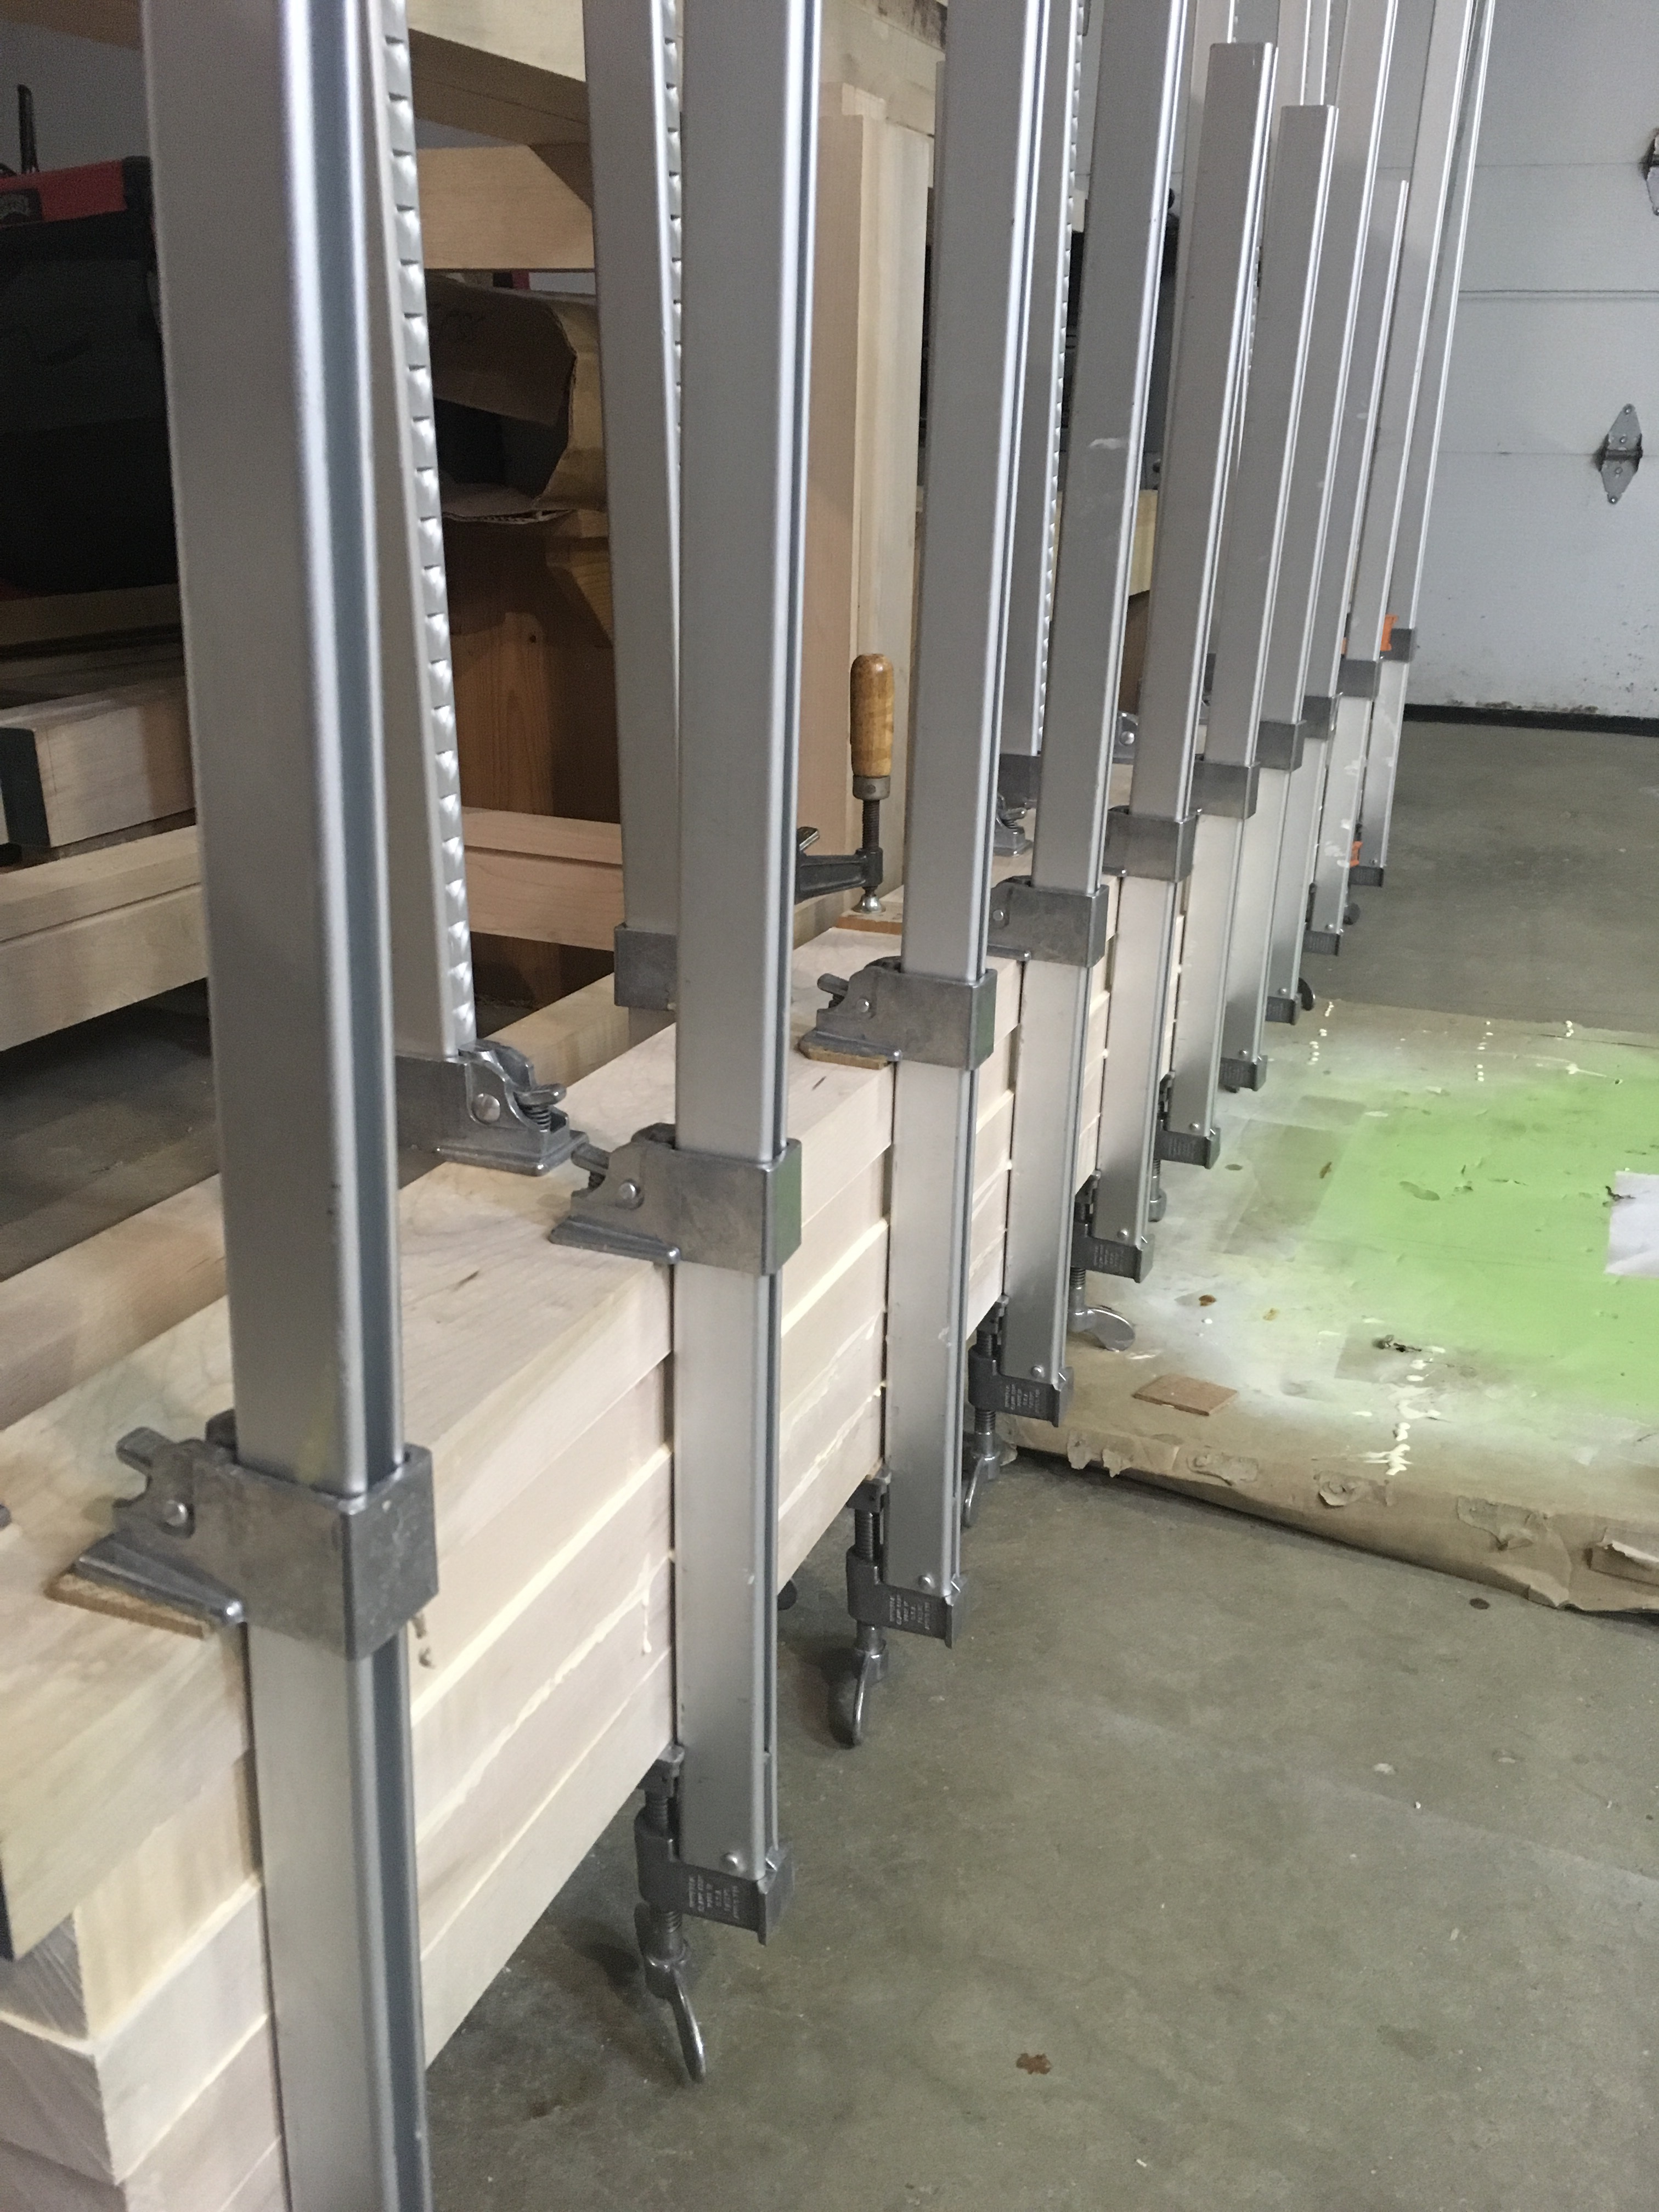
Bench Top
The hardest part about this bench is maneuvering the lumber. As more and more parts are pieced together it becomes heavier. I think the photos below tell the story.
Joint, plane glue, repeat.


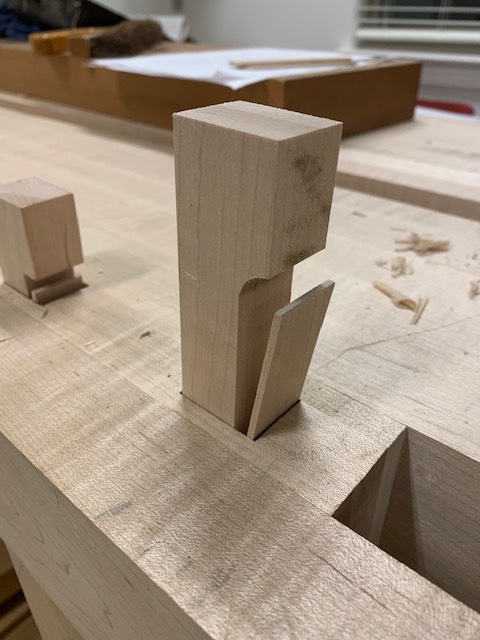
Dog Holes and Mistakes
When choosing a new bench design the dog holes and integral dogs drew me to the Roubo. Planing boards is a pleasure except when you don’t have a great method to hold them on your bench. Paul Sellers’ is adept at using his front vice, and I admit it has worked well for narrow boards. I’ve also used boards positioned across the end of the vice as a planing stop. However the ability to use a tail vice and adjust to any board length has great appeal.

Most of you will notice that a router and template was used in this process. Before hand tool woodworking I did most of my work by machine and I still have most of them. You can’t beat machines for repetitive processes. Except when you stop paying attention and oops.

A little plug will take care of that. I routed one dog hole too far.
Workbench History
Let’s be clear in the first sentence, if you want a complete guide to workbenches, find Chris Schwarz. If you want plans and a video on how to build a simple effective bench see Paul Sellers’ series (I’ve used his bench, it is excellent). This blog is about my brief workbench history and what has worked for many years as an essential tool in my shop. It confirms that a workbench can be cheap, simple and very effective. There are no plans, but it’s simple enough that none are needed and it’s a little embarrassing how sloppy I’ve been with upgrades. It’s also a story of why I want to move on to a new bench.

The bench is built from a single sheet of 3/4 plywood and 2×4 pine. Lag bolts hold it together and screws keep the top and cross members in place. My father helped me build it when I was in my early teens. The top is a single sheet of plywood, doubled over and glued. It is screwed to a 2×4 frame with cross members. The legs are single 2×4 and attach inside the top and bottom frames.
When Shannon Rogers began his Hand Tool School I quickly moved most of my Joinery to Hand Tools and recognized that the bench needed to be stiffened, grabbing some scrap I cut it to size a hammered it into place to stiffen the ends. I added a 2×4 to the legs at front which fit in between the upper and lower rails.
The small vise on the side was originally on front of the bench but now sits on the side and is perfect to hold my leather strop close by my work area. It also works as a planing clamp. Next I added a 2×4 under the bench to provide added depth for hold fasts. It’s a simple solution for a bench without the necessary thickness for them to work.

After attending Paul Sellers’ fundamentals of woodworking class I recognized the value of a larger vice so set about making modifications to the bench. This consisted of a board at the front, a couple of cross members and the vise became part of my tool set.


Many years later I admit that there is little that my current bench does not provide. The desire for a new work bench is purely for the challenge of the bench. So I began a journey to build a new bench and you will see it in the next several blogs.
