Archive
Cabinet Shelf Supports
One of the things that I find most fascinating about being a woodworker is the many differing techniques for accomplishing a task. As usual this Cabinet has a method for installing adjustable table shelves that I have not come across.


It consists of four saw toothed supports. You could make the supports from a couple of boards and then rip them to the correct width. I had parts from an old cabinet so I cut each support to the correct height and width than bolted pairs together. This allowed me to lay out saw and chop the saw tooth and end up with an exact pair. Once laid out it was a surprisingly quick process. I then drilled holes for the screws and attached them to the cabinet sides. I did have to remove the handle from my drill to get the hole placed correctly. The next job is to make the crosspieces which hold the shelves. You can see the one in the picture needed a little more care in measurement but it was a quick job and the adjustment works great.


Until I came across Paul Seller’s hanging Tool Cabinet I had not seen his method for installing adjustable shelves. If you have different methods that are unique for shelf installation let me know.
Tool Cabinet Hinges
Purchasing Hinges is something I put off until the last minute. I want to purchase them locally so I can feel their heft and think about how they will fit into my project. Typically I end up on line after being very dissatisfied with what available. The tool Cabinet deserved some quality Brusso Hinges. They are more expensive than the local stores but I appreciate the quality. I’ve chosen stainless steel Hinges for the cabinet, the contrast to the cherry catches my eye.


Installing hinges is one of the tasks that gives you instant feedback if you do it poorly. Carefully chiseling, than routing out the waste I make mortises for each hinge.


Focusing on one door I carefully install the hinges and make adjustments to center the door. Once both doors are in I carefully plane the center rail until the doors close without binding. The door on the right is carefully chamfered so the two will pass each other. Anyone else have some good hinge sources?


New Apron
A couple of years ago while wandering around Hand Works I had the opportunity to meet Jason and his family from Texas Heritage Woodworks. I know from my instagram and blog friends that many of you have also spent time with Jason. I enjoyed the brief time we talked and was struck with the quality of his workmanship. If you are looking for an apron, tool rolls, stickers or other items you can’t go wrong.
Fortunately when my birthday came around a couple of months ago, Jason took time out of a very busy schedule to add a logo designed by my wife to one of his awesome aprons. I couldn’t be happier. There is something special about knowing the people who make the products you use. Jason, consider yourselves back door neighbors!


Tool Cabinet Door Install
Now that the cabinet doors are assembled and glued, the center stiles are a great addition. I would not hesitate to add them in another project. Next up door fitting…this is one of those parts of woodworking that you enjoy or become frustrating. Fortunately my cabinet is fairly square with only a slight bow along the side. After cutting the rails to length I sharpen up my plane and begin shaving the sides down to fit. After the first door is snug I move onto the second. It’s a slow patient process, but within an hour it’s close to completion.


At this point I want a very snug fit and will plane the doors again when I fit the hinges. The tight fit allows me to mark both the doors and cabinet sides without fear of movement. I also realize that when the hinges are attached that the doors will no longer meet in the center and I’ll be able to plane them to meet.
Tool Cabinet Door Panels
Since deciding to have double paneled doors it seems that I have been fighting the two stiles that I made. The cherry decided to split after completing the grooves. In an act of defiance I used them anyway and moved on. Nothing fancy about the panels just planed down the sides to fit the grooves and put them all together. The center stile was no problem and I’ll use it in other projects since it seems to really add to the appearance.

Tool Cabinet Door Joinery
With all of my stock dimensioned, the first step is plowing the grooves for the panels. As I have shown in the past I used a clamp to steady each board and used a Veritas plow plane to make the grooves. It only took a couple of hours to get them all done and I had very little trouble. I do like the upgraded plow plane and if you haven’t let Veritas make the change I’d go ahead. Although I had little trouble with loosening set, it’s nice to have some extremely reassurance.


Cabinet Door Joinery 2
After a couple of days with intermittent rain I noticed a little twist in a couple of the rails so I did my best to plane them straight. That’s one of the problems of spreading your project out over many weeks. The doors are held together with mortise and tenon joints and thanks to previous practice on the back my process has improved.


For little extra to the doors I added a stile in the center so tehe doors have divided panels.
Hanging Tool Cabinet Doors
Long weekends are made for woodworking projects, there’s time for the family, kayaking and woodwork. Beginning work on the cabinet doors brought to mind the need to carefully dimension all of the parts, removing any twist. Hand planing one side and both edges I turned to the planer to make sure everything is parallel and consistent. Then a final hand planing to remove any machine marks and eliminate as much sanding as possible.


Ideas – mortise jig
After posting about the mortise jig there were a couple of great comments. In particular the caution about ensuring that the jig is square to the board being mortised. This can be a frequent problem if your vise does not close evenly.

Posting the picture you can quickly see what can happen and imagine the effect.
In the comments Matt quickly pointed out the potential problem. Here’s a solution I tried over the weekend that worked extremely well. The picture shows the clamps used in my moxon vise, but I also put it to work in my regular vise.
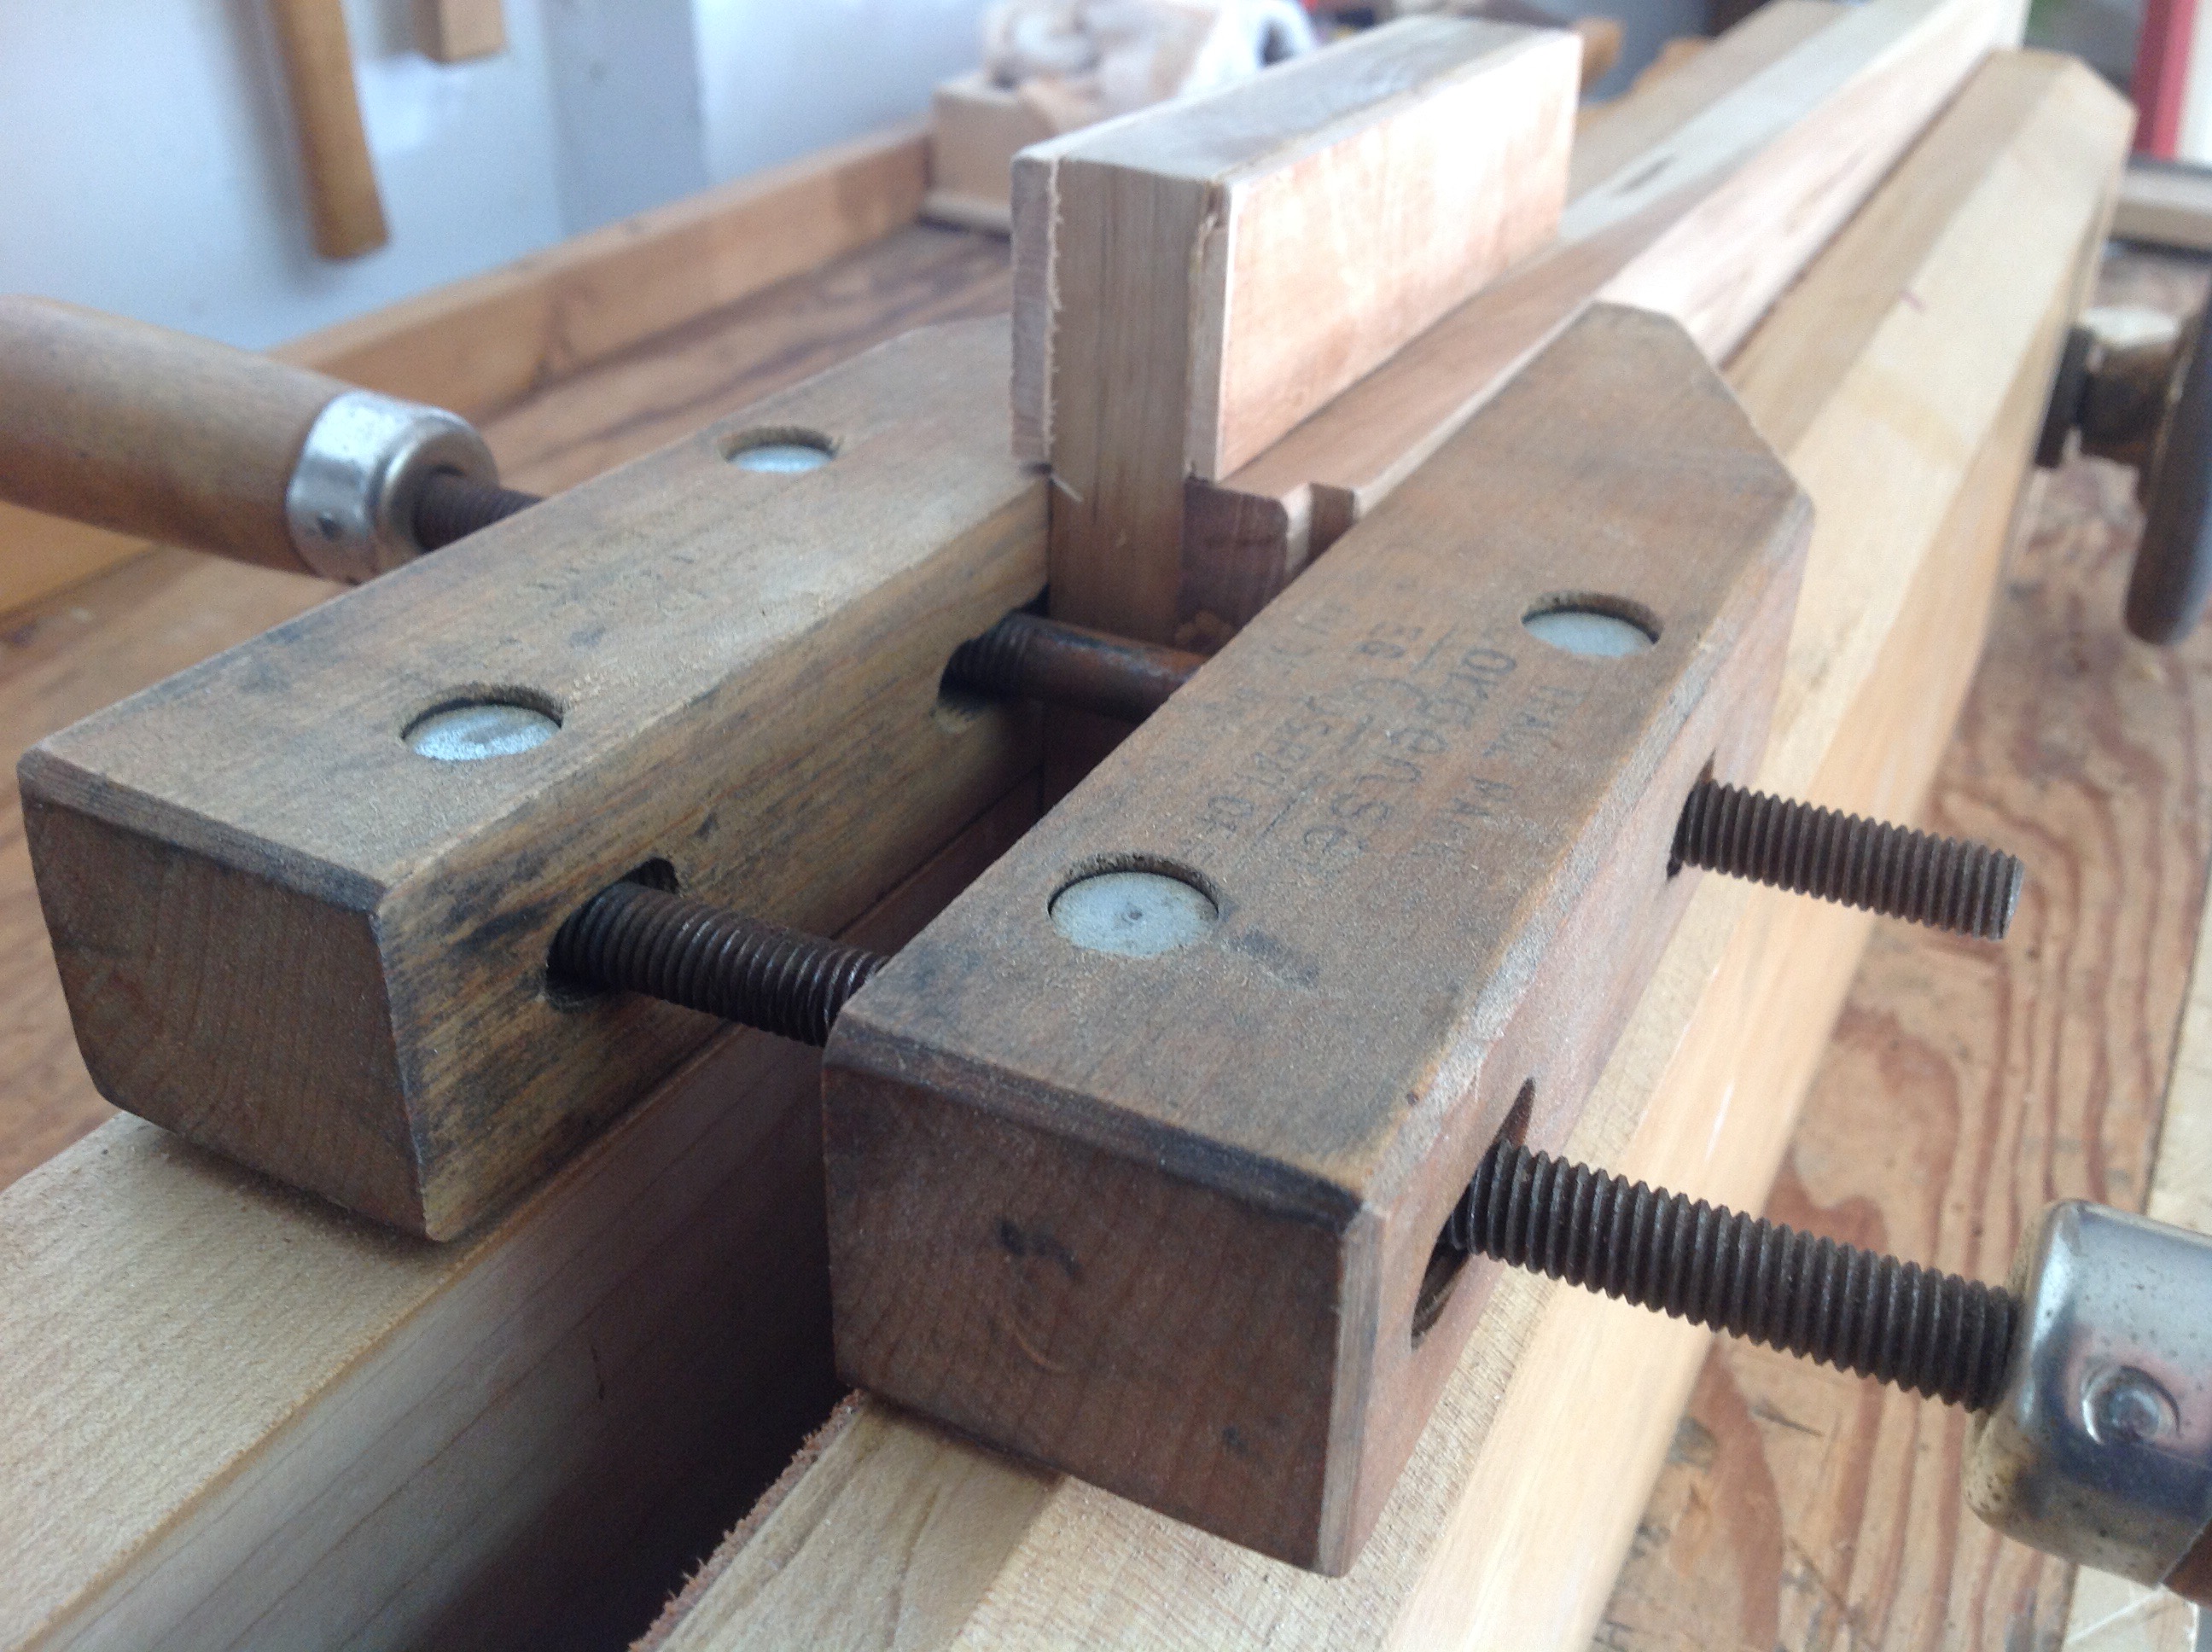

Along with this solution I also will take a close look at my bench vise and see if I can make some adjustments.
Thanks for all the comments!
Mortises-Tools Cabinet Back
With my mortise jig complete, the process of measuring and marking begins. I’ve repeated enough steps on this project and take extra care to make sure everything goes right the first time. The first time of course did not include the two additional mortises and tenons I chopped because I put two in the wrong spot. The extra cross member didn’t hurt though and everything went well.


The care certainly paid off and everything fits snugly.


I still have to plane the carcass sides and tidy up before attaching the back. Hope everyone had a good Father’s Day.
