Archive
Bottom Boards and Cut Nails
I mentioned in an earlier blog that I put tongue and groove joints onto the bottom boards to be used in the tool chest. The glue up of the tool chest carcass yesterday will finally let me trim them to a finished dimension and attach them to the bottom. Last week I began looking for cut nails. They are used in The Anarchist’s Tool Chest and in The Hand Tool School. These will be a new experience for me, firstly because I rarely use nails in my woodworking and secondly because I have not seen a cut nail except in my grandfathers tin of nails. I went to the web today hoping to find a source for cut nails and ended up driving to a local woodworking store to pick up 6d nails which are two inches long. Cut nails seem very expensive compared regular nails so I hope they are worth it.

The bag that the nails came in was pinned closed with one of the nails which is pretty neat and I commented upon it to my wife who is always amazed when I notice some design element. The nails were packaged by Brooklyn Tool and Craft which is part of Tools for Working Wood. Kudos to them for the unique design.
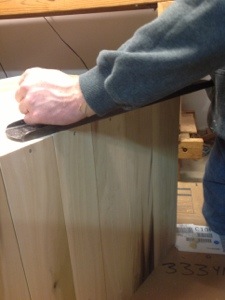
After carefully laying the bottom boards on the chest so they over lap the edge slightly I drilled a hole through the board and into the edge of the chest. Not sure if there is a way to sharpen the drill bits but they seem to be dull. I will have to research it later. Installing the nails was no different then a regular nail with the exception that I had to carefully align the nails so that I did not wedge the end grain apart. All went well except for the one nail that I placed too close to the edge, but that will be easily repaired with a plane. I used dimes to insure an even separation between the boards. Hopefully that will allow for any movement. Over time I will watch this to see if something thicker like a nickel or quarter would work better.


Many woodworkers listen to music or the radio in the shop.It is always interesting what I listen to; for preparing stock it is always music, cutting grooves such asthe tongue and groove in this project a podcast such as car talk or wood talk, and for dovetailing and new methods I listen to RadioLab, Freakanomics or This American Life. I was focusing pretty hard on getting the boards correct so it was a RadioLab night.
Once the nails are in an set a quick chalk line along the edge and I took out my handsaw and trimmed the boards as close to the edge as possible. Next turning the chest on its side I planed the edges flush. Several things came to light as I worked. I planed the sides with the chest standing on end but the sides I had to kneel on the floor. Since I have an aversion to kneeling on concrete I placed some cardboard on the floor which of course helped the chest slide across the floor as I planed. Once it ended up resting against the bench I stopped chasing it around. Next time…. i’ll probably place it against the bench to begin with. In the second photograph you can see the damage I did to the tongues by planing from the wrong direction. When I planed form the groove to the tongue I had no problems. Pretty happy with the result!

Tool Chest Glue-UP
Its cool with rain today, not the hard downpours that you get in the summer but the gentle rain that if it were a couple of degrees colder would turn to snow. With the temperature hovering in the high 30’s I’ll have to glue up the tool chest indoors. I move the tool chest parts into the dining room along with a large piece of cardboard a dozen clamps, square and rubber hammer. They sit quietly for a couple of hours basking in the warmth of the house and then I begin to test the clamping plan making sure that I have everything close at hand.
Not long ago I would wipe glue on the parts pound the joints together then scramble for clamps, cauls, paper towels and anything else required. It certainly is easier to lay everything out test clamp and then begin glue up.
 </a
</aSmoothing Tool Chest
Now that all of my dovetails are cut and fitted and before glueing the carcass I want to make sure I have smoothed all of the surfaces. Like most of you it took me a while to realize that the time to smooth a project is before it is glued together. Many of my earlier projects have machine marks and plane tracks where I could not reach after glue up or simply could not see. As the days have shortened and the temperatures are colder I have less light to work with and am reluctant to open the garage door. By using a small raking light I have a better chance of spotting all of tracks and marks.The best part is I didn’t have to buy the light just dig it out of a box in the basement, pop a bulb in it and It was good to go.
The picture of the inside of the chest doesn’t show the real ugliness. I made quite a mess on on e side and quickly realized that I had used a different smoothing plane that had no camber on the blade. A couple of months ago Shannon at The Hand Tool School helped me out quite a bit by demonstrating how to camber a plane blade. While sharpening I press down one side a a time for five swipes across the stone and I rarely have tracks like this. Well except when I pick up a plane that hasn’t been cambered.
An hour with the old # 4 plane and a card scraper and things begin to look much better. I do not have a #80 scraper and although this doesn’t take long to finish up I am wondering if it would be easier to smooth with one. Obviously it would be even better to get it right the first time. The interior on this project is much more important than the exterior. I will stare at the interior every time I reach for a tool. I plan on painting the exterior when i am finished and leaving the interior alone. Glue Up tomorrow.
;
Glue up Tomorrow!
Chisel Attacks!
I have investigated many accidents over my career and inevitably if you do a true root cause analysis sometimes you are surprised by the result.
Last week I continued working on my tool chest cutting dovetails and adjusting to fit. On the previous evening I had carefully marked out my tails, placing xxx’s on the waste and proceeded to cut off all of the parts that remained un-marked. We have all done that at some point, made every step to cut off the correct piece and then left our brain in the tool chest and cut to the wrong line. Realizing it was late and that I would not only have to recut the tails but also shorten the length of the opposite side and recut those as well, I called it a night. The next evening I trimmed the sides to match and set up to cut a new joint. This one would be pins first since I had already cut this joint and would be recutting to a shorter length. I have no fight as to whether you cut pins or tails first, that’s your choice; this was the first time I had cut pins first. It all went well until…..I had to trim one pin. I had the tail board laying on the bench and after trying to drive the pin board into its mate realized that at the bottom of the pin I had not cut to the line. Instead of removing the pin board and placing it into my moxon vice I attempted to pare away the material in place. Needless to say the chisel slipped off the wood and cut a nice gash in my left wrist. 3 hours later I returned with nine stitches and fortunately, full movement in my hand.
In 30 years of woodworking I have had no injury with the exception of a few splinters, why did this happen now? I spent a lot of time reflecting while waiting in the emergency room. The most obvious answer is that my left hand was in front of my chisel when it slipped, but I don’t think this fully answers the question.
Tongue and Groove
The bottom of the tool chest has been a bit of a conundrum. Should we go with a quick and dirty ship lap or a tongue and groove joint for the bottom boards. Initially the lapped joints appeared to be simpler and within the range of my plow plane. I purchased a veritas plow plane earlier this year and was eager to put it to work. However the tongue and groove is a more solid joint and a little more challenge than the lap joint. If I wanted tongue and groove I saw no option except to use my dado cutter in the table saw. Not  wanting to use power equipment on the project I began looking around the web for options and quickly realized that Veritas had a conversion kit and blades for making tongue and groove. There is a video at the link that gives all of the details.
 A quick email to Lee Valley and a few days and I am the proud owner of new blades, I then attached a cherry fence to ensure the plane rides securely along the board and Bob’s your uncle…..

The plane worked wonders and within 30 minutes I had placed tongue and grooves in all eight of the bottom boards. Every once in a while you find a tool that is such a pleasure to use and has such great results that you want to keep using it. So I put tongue and grooves on the back of my saw till. Then I began looking at some other projects….
Needless to say If you have not got a Veritas plow plane with the conversion kit for making tongue and grooves it’s a must have.
Why hand tools?
Woodworkers can be solitary creatures and often for very good reason….pounding hammers, screaming routers and endless dust from a planer is not inviting. We often look for the solitude but we also have a need to share our experience and gain knowledge from others. In the beginning of this year I began a process of moving into hand tool work. Thanks to Shannon Rogers and his Hand Tool School I am getting in touch with my tools and have a better feel for the wood that I am working. The greatest benefit though is the occasional visitor to my shop.
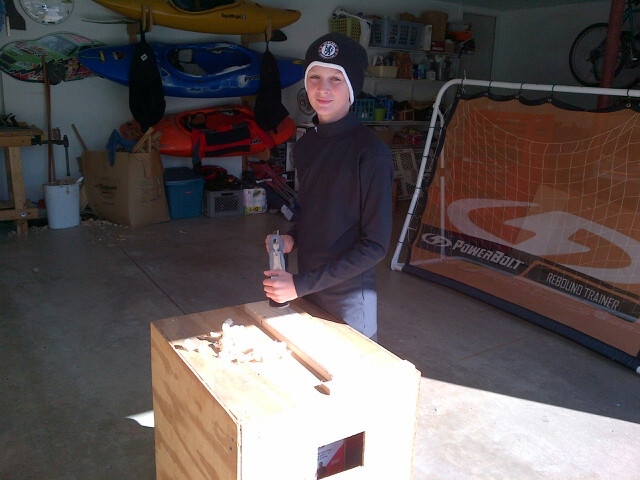
My 11 year old daughter takes the time to sit near me while I square a board and talk about her day at school, often helping me find a tool and commenting on my progress. My 13 year old son has even taken time out from soccer and computer games to plane a board and measure progress by the pile of shavings. I converted a cabinet for him to hold wood and he even has his own 5 1/4 plane.
So for all of my power tool friends, have at it, enjoy the fast progress, conquer the tree, but for myself, except for the most arduous tasks,I prefer the sound of little voices and the swish of a 5 1/4 plane next to me.
Tools, Tools, and More Tools
Just when I had all of the woodworking tools required, I realized that the only way to increase my skills was to take a step back. As I was building a desk for my daughter, I had to cut a 14″ piece of oak into 6″ pieces to fit it through my planer. It dawned on me later that if I had the tools and skills it, could have been done in one piece and that beautiful piece of wood would be complete. It didn’t take me long to find web pages that led to a blog called “The Renaissance Woodworker”. In the corner was an icon called the Hand Tool School, alas a web based school specializing in the use of Hand Tools. Please go and visit the site you may become as enthralled as I have.
After studying the list of tools needed for the class I recognized how far I had strayed into the world of power tools. Clearly this was a crisis and required immediate intervention….. Ebay! Well not quite yet, fisrt I had to visit the web and learn about the tools that would be essential.

Semester 1: Tools
