Archive
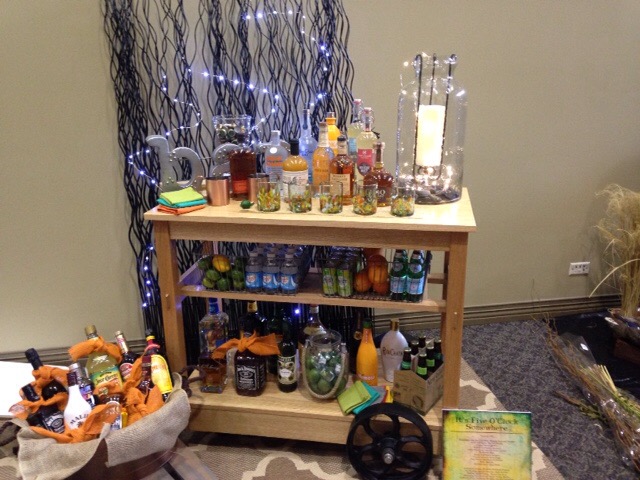
Hospice Cart Auction
Finishing the cart took a couple of days. The rails and legs were finished with Shelac and wax and the top and shelves finished with polyurethane. Not knowing what someone would do with the cart the poly seems like the best solution. Most importantly the cart plus othe items in the final photo raised about $3,500 dollars for the hospice.


Hospice Cart Wheel install
There are no dates on the wheels but I assume they came from an old factory cart. Working with a friend to determine the best method of attachment it became clear that some machining would be necessary. I’m sure that you have used one of the showing carts that have a bad wheel that goes thump thump thump as it turns. Neither of these wheels was centered on the shaft. Imagine the sound as I thumped down a dark cement corridor in a factory. 
With a new shaft, bronze bushings and bronze thrust washers the wheels are attached with an adjustable taper bearing that works great.
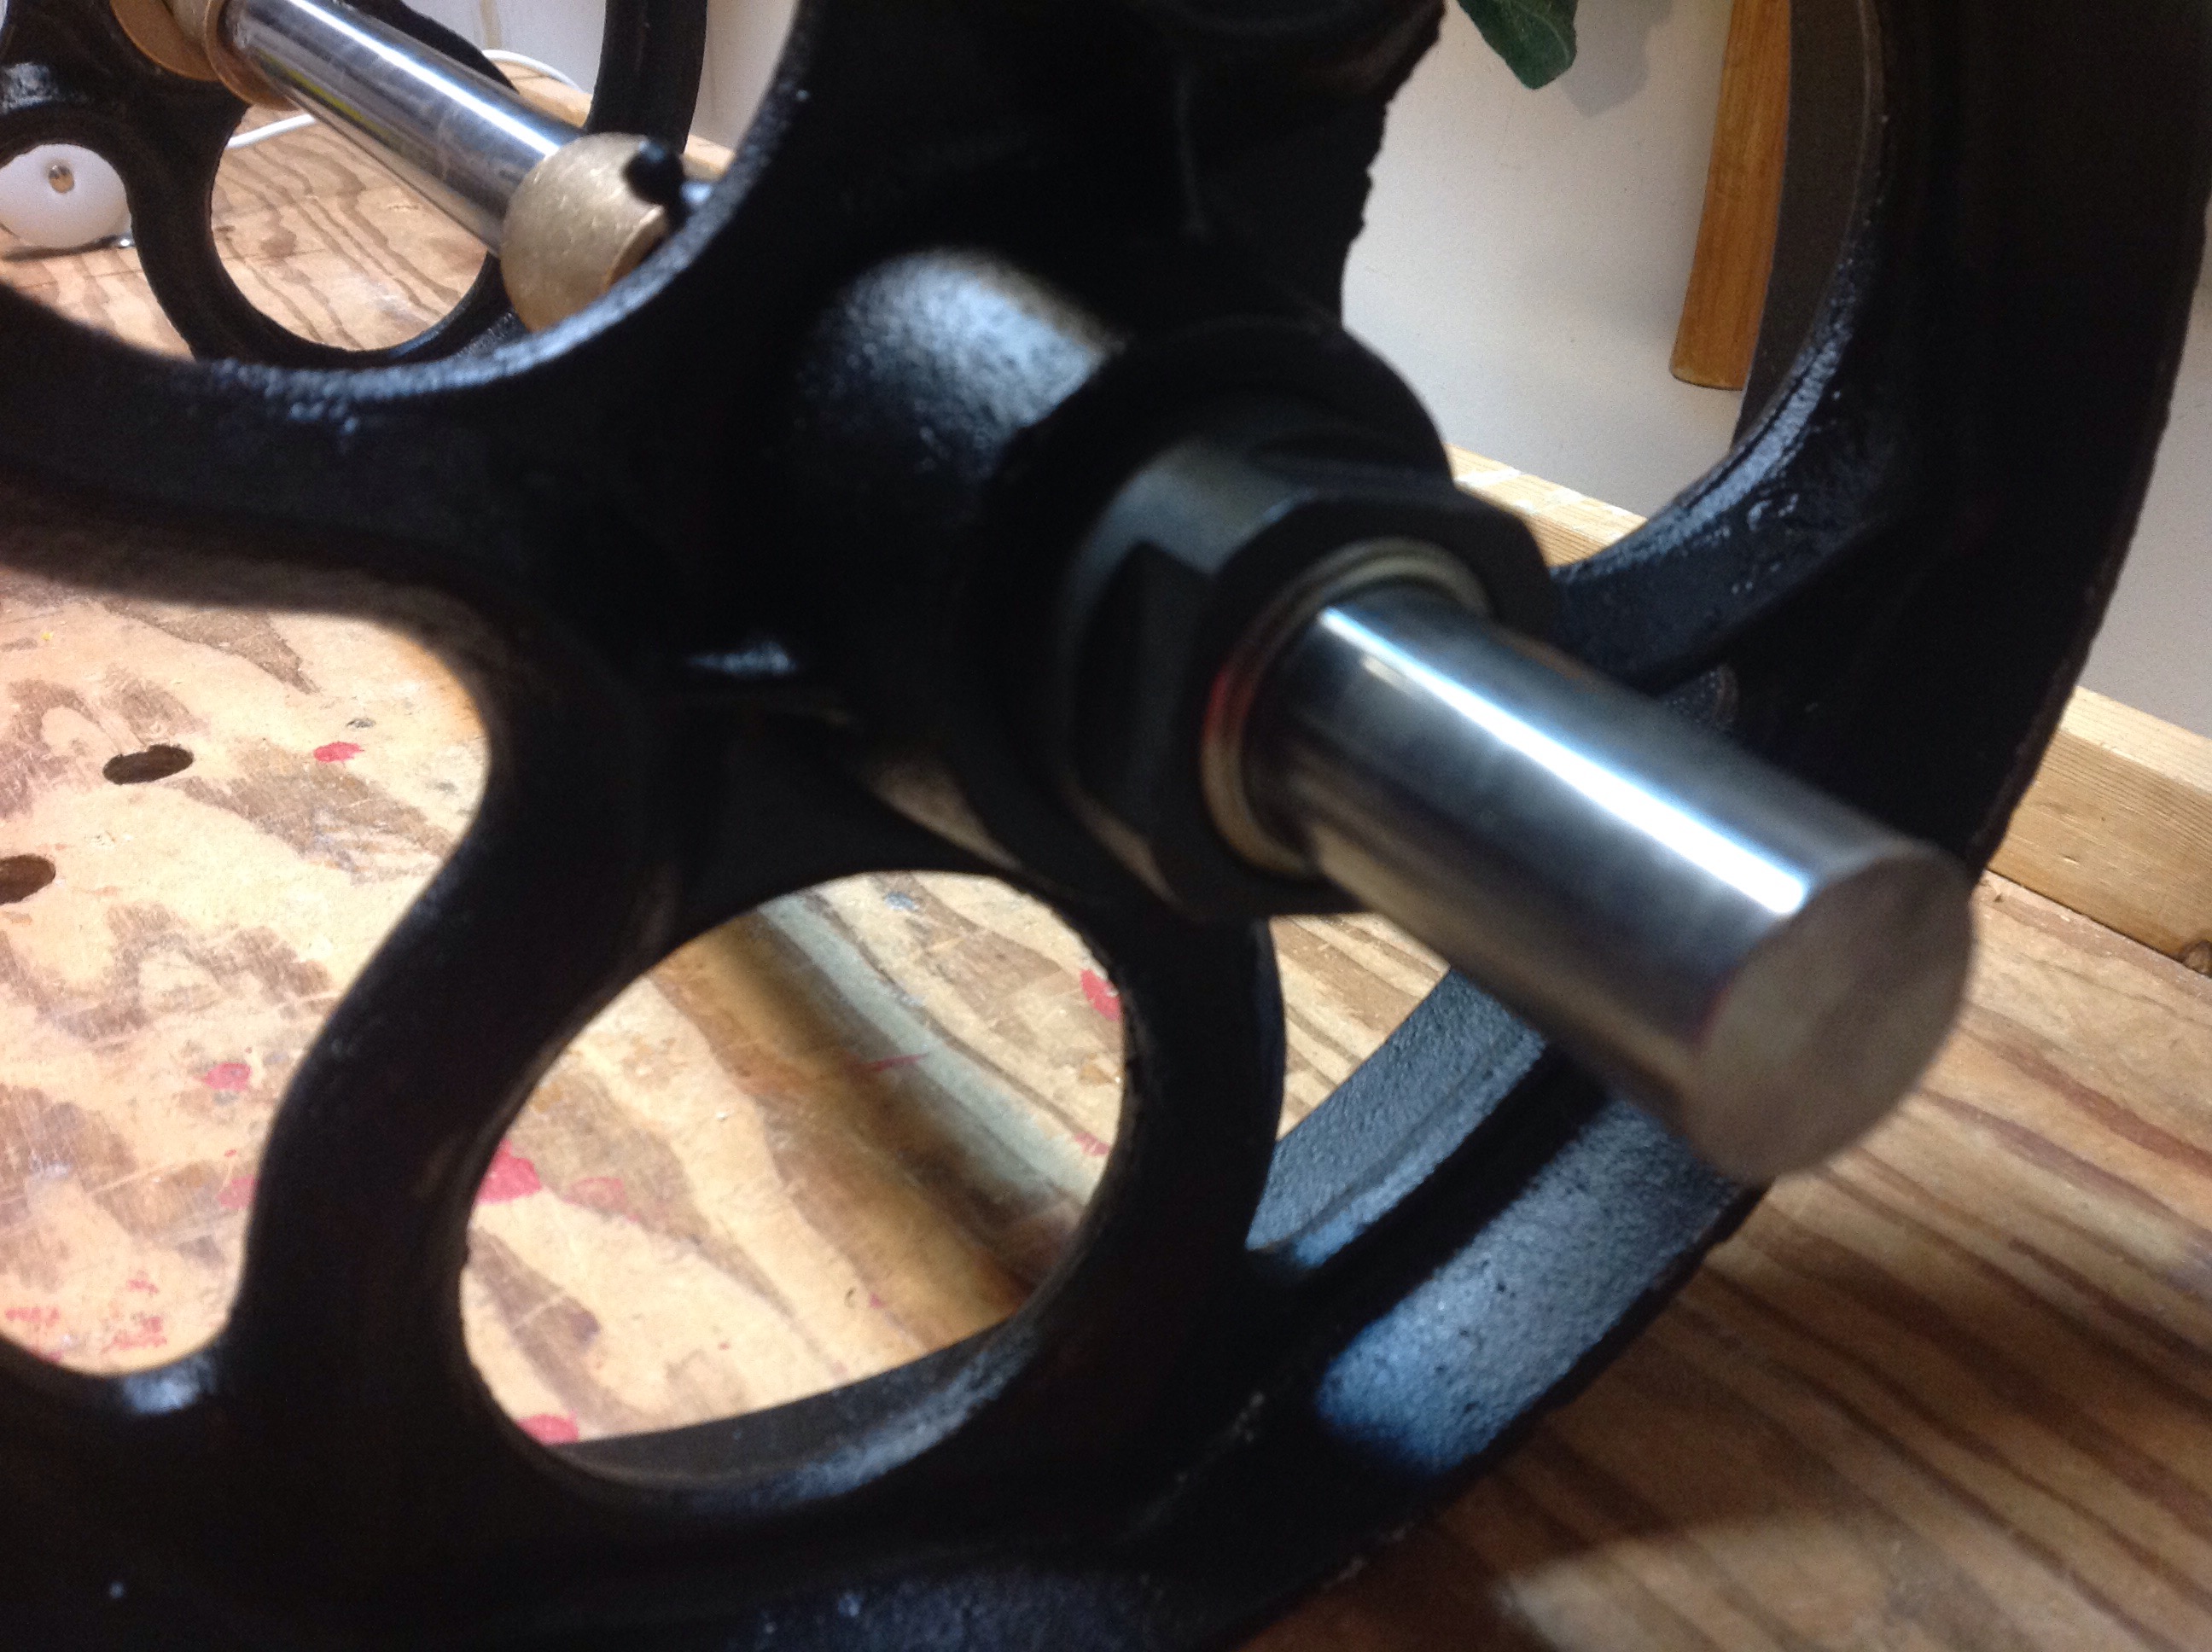
Each of the lower rails was 7/8 inch thick. I glued on an additional piece to provide strength where the axel passed through . Then I used a hole saw to make the holes. Yes I could have used an auger and bit but to keep tolerances tight it seemed to be easier to keep the hole perpendicular to the rail with the saw. That done I could attach the large wheels. The smaller wheels required a couple of mortise and tenons to place a board between the rails, than they were bolted on. Almost done.
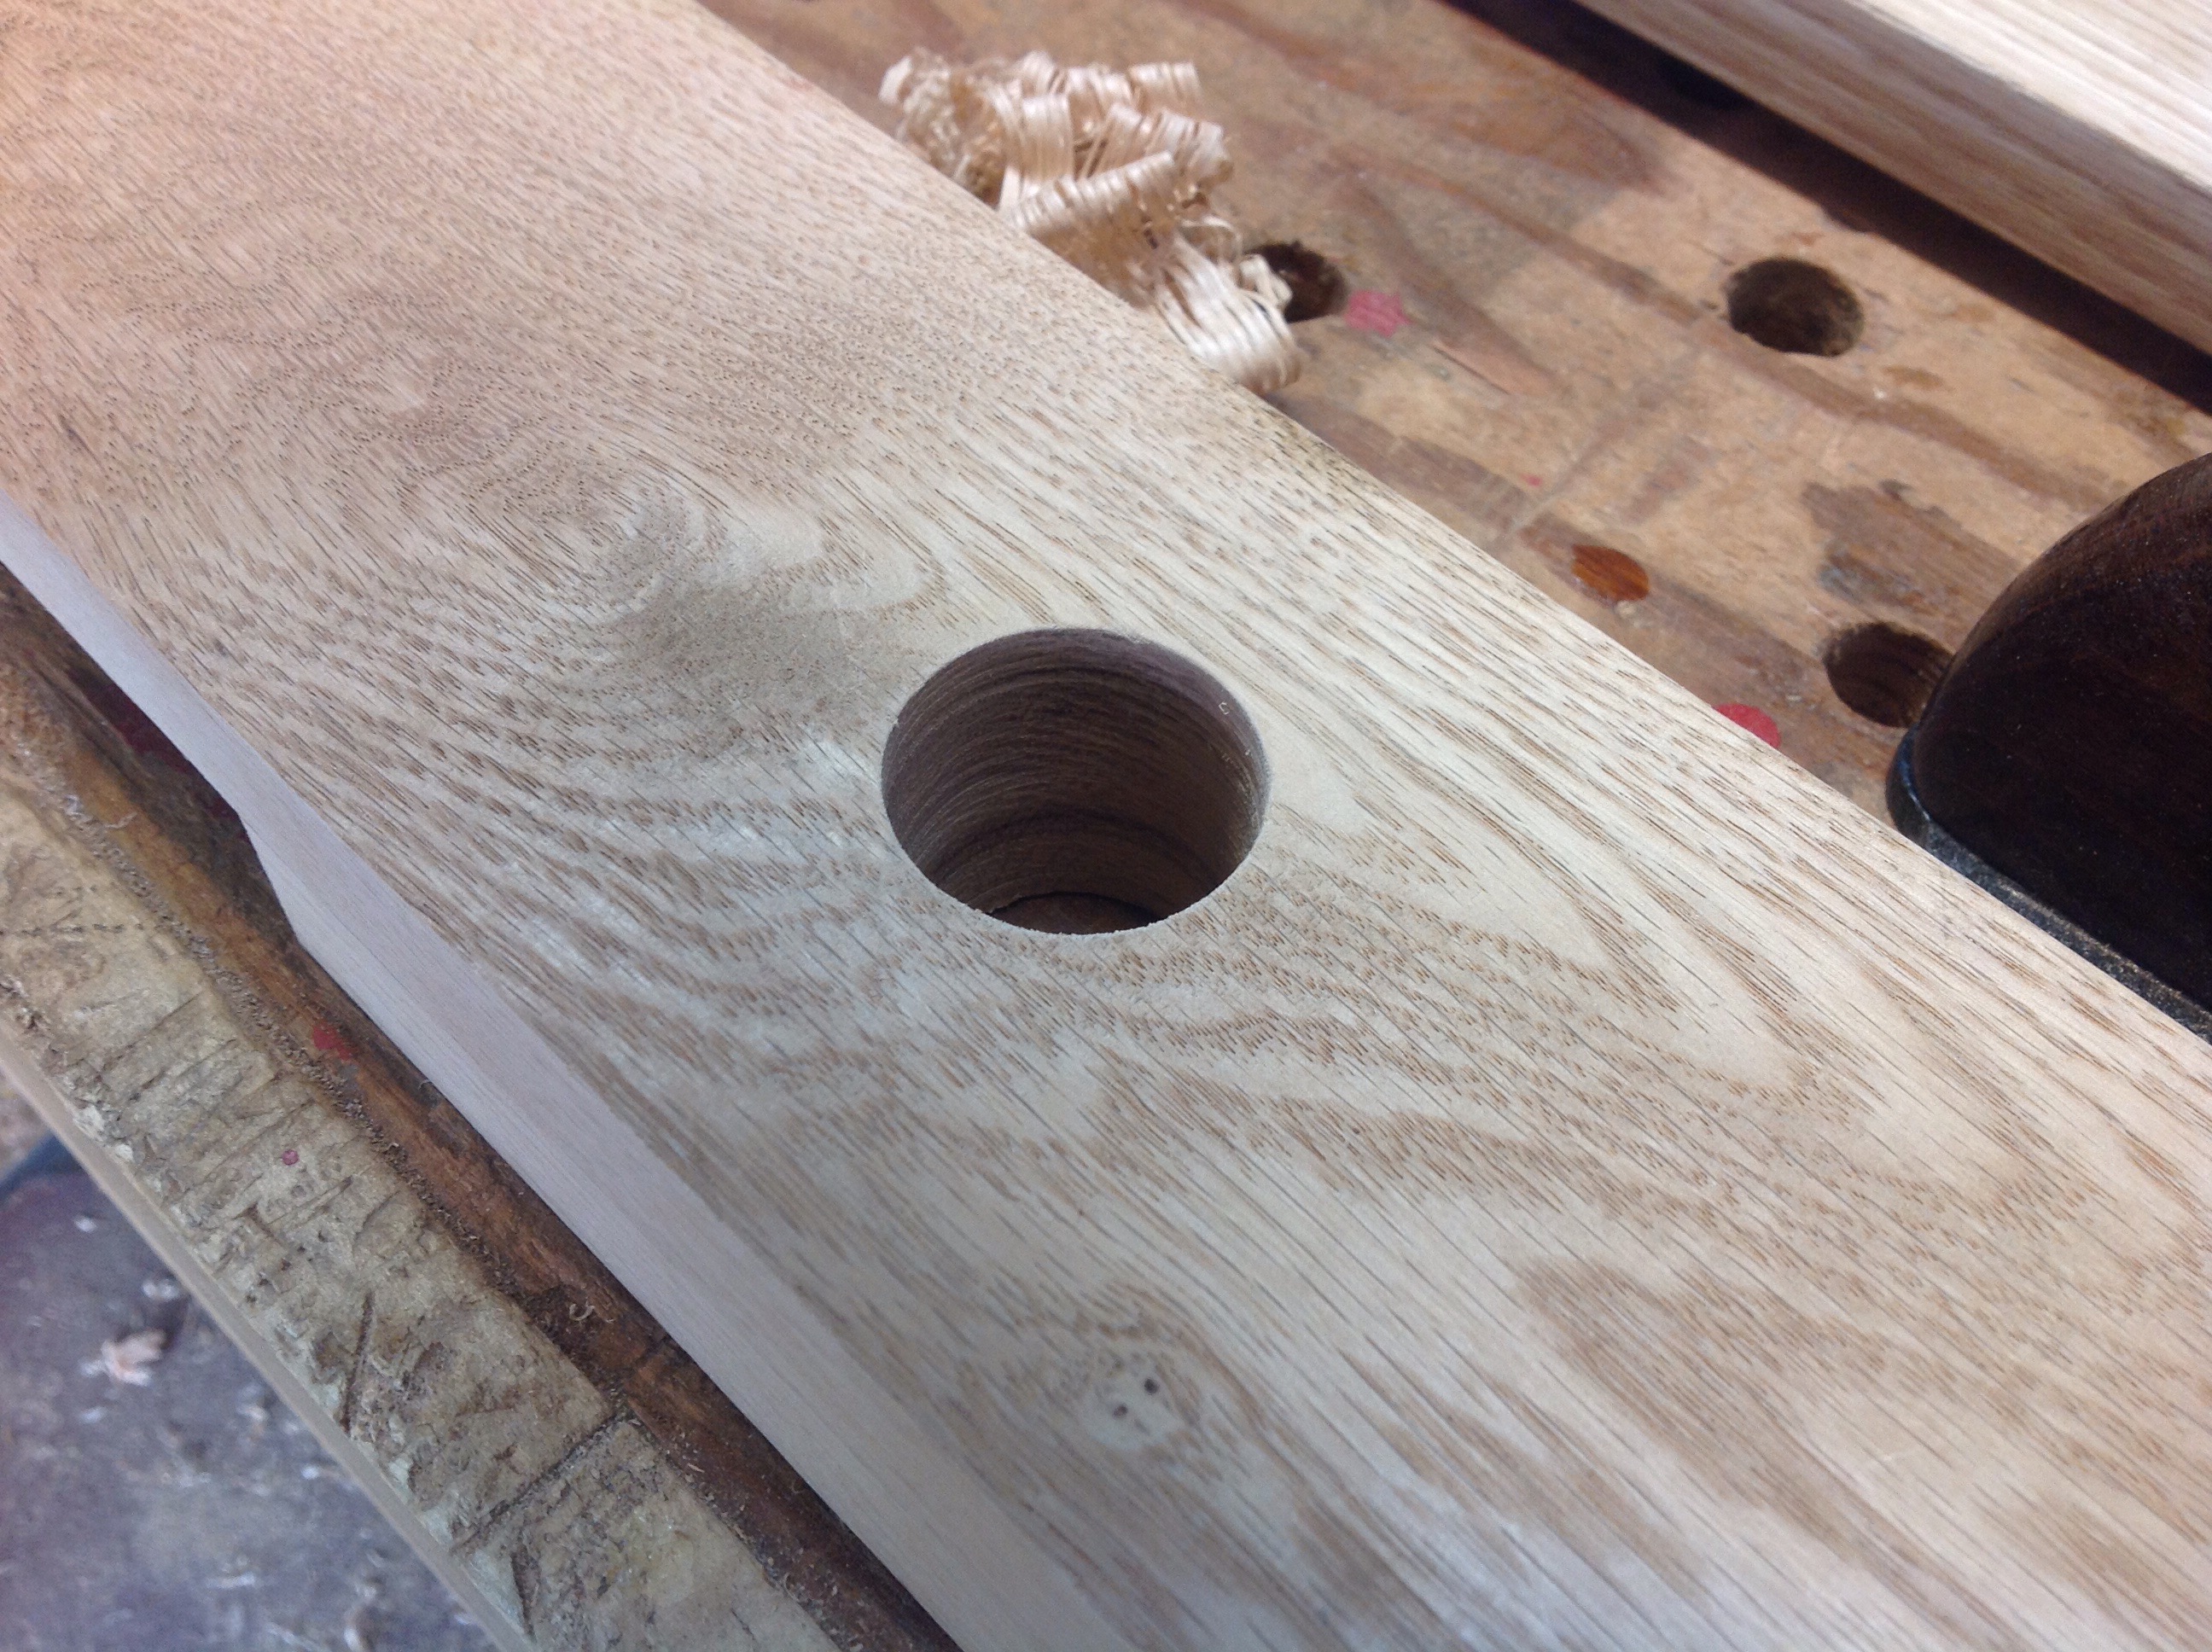

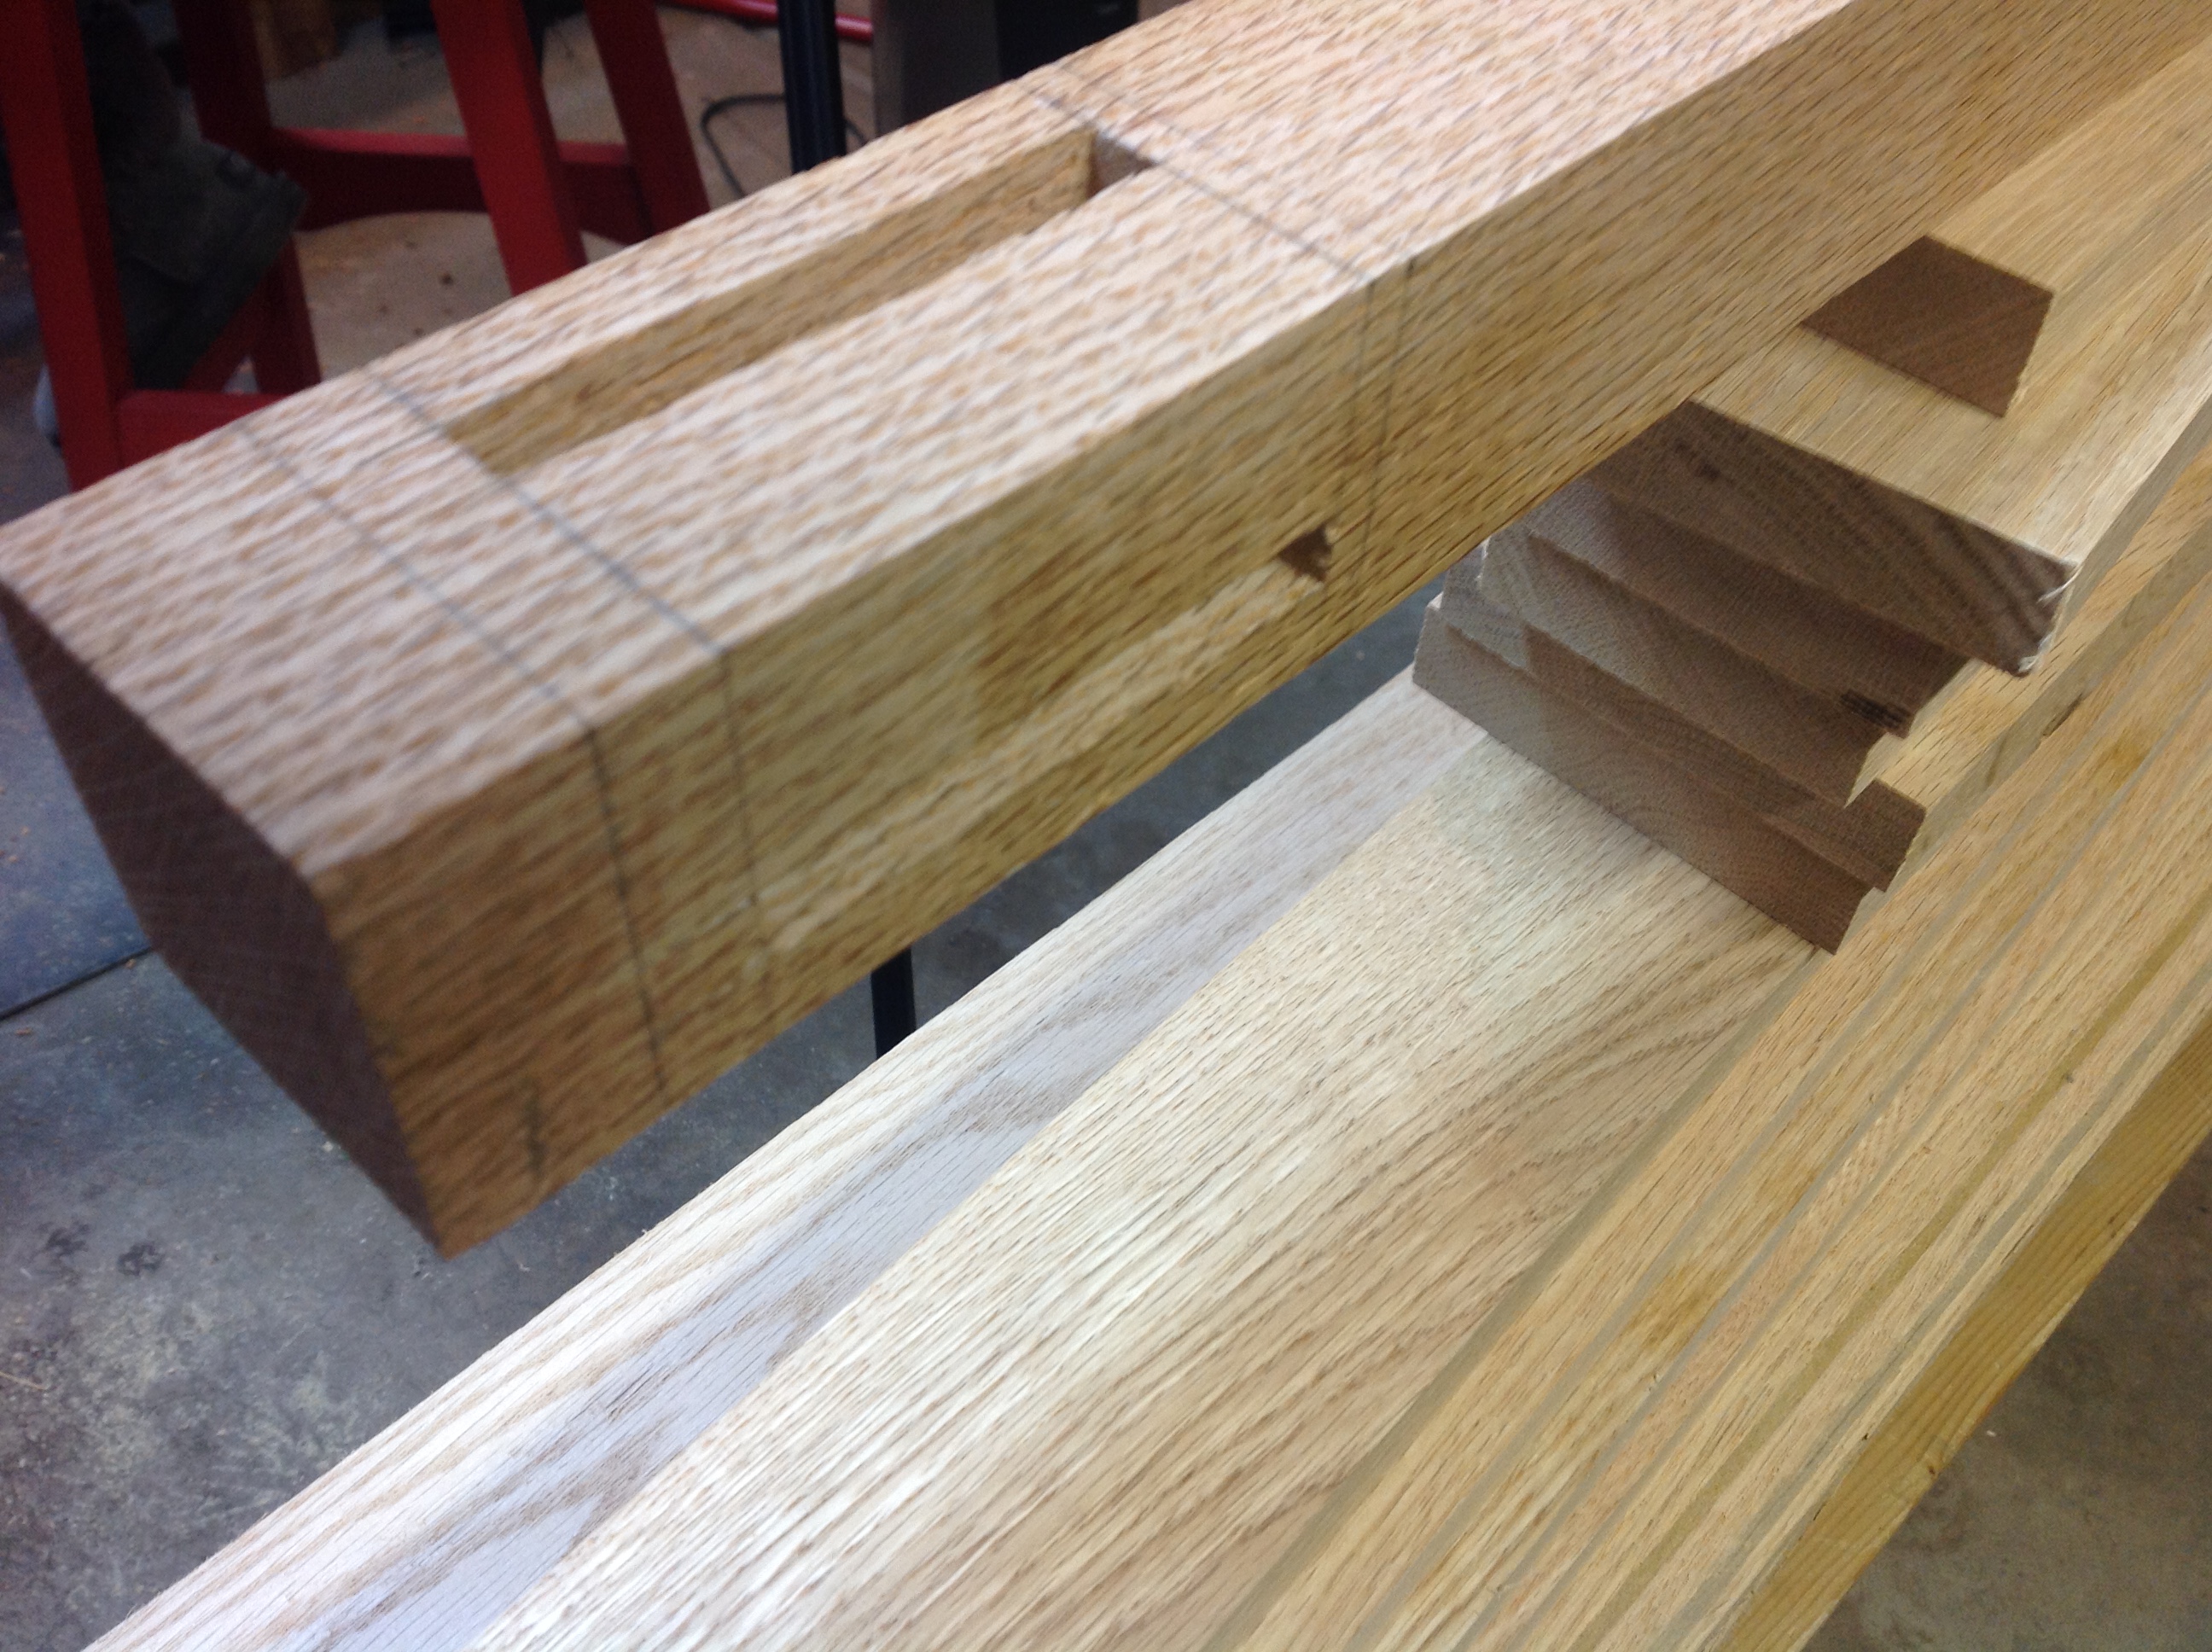
Middle Shelf Through Mortises
The middle shelf is attached the the ends of the cart with fourthrough mortises. Laying out each mortise carefully I use a chisel to cut 3/4 of the way through from one side, reverse the board and finish up from the other. With a little care you have a nice design element.
The key word is “care”. Although it would be more expedient to take “care”, for the sake of the community I found it imperative to make several key mistakes.

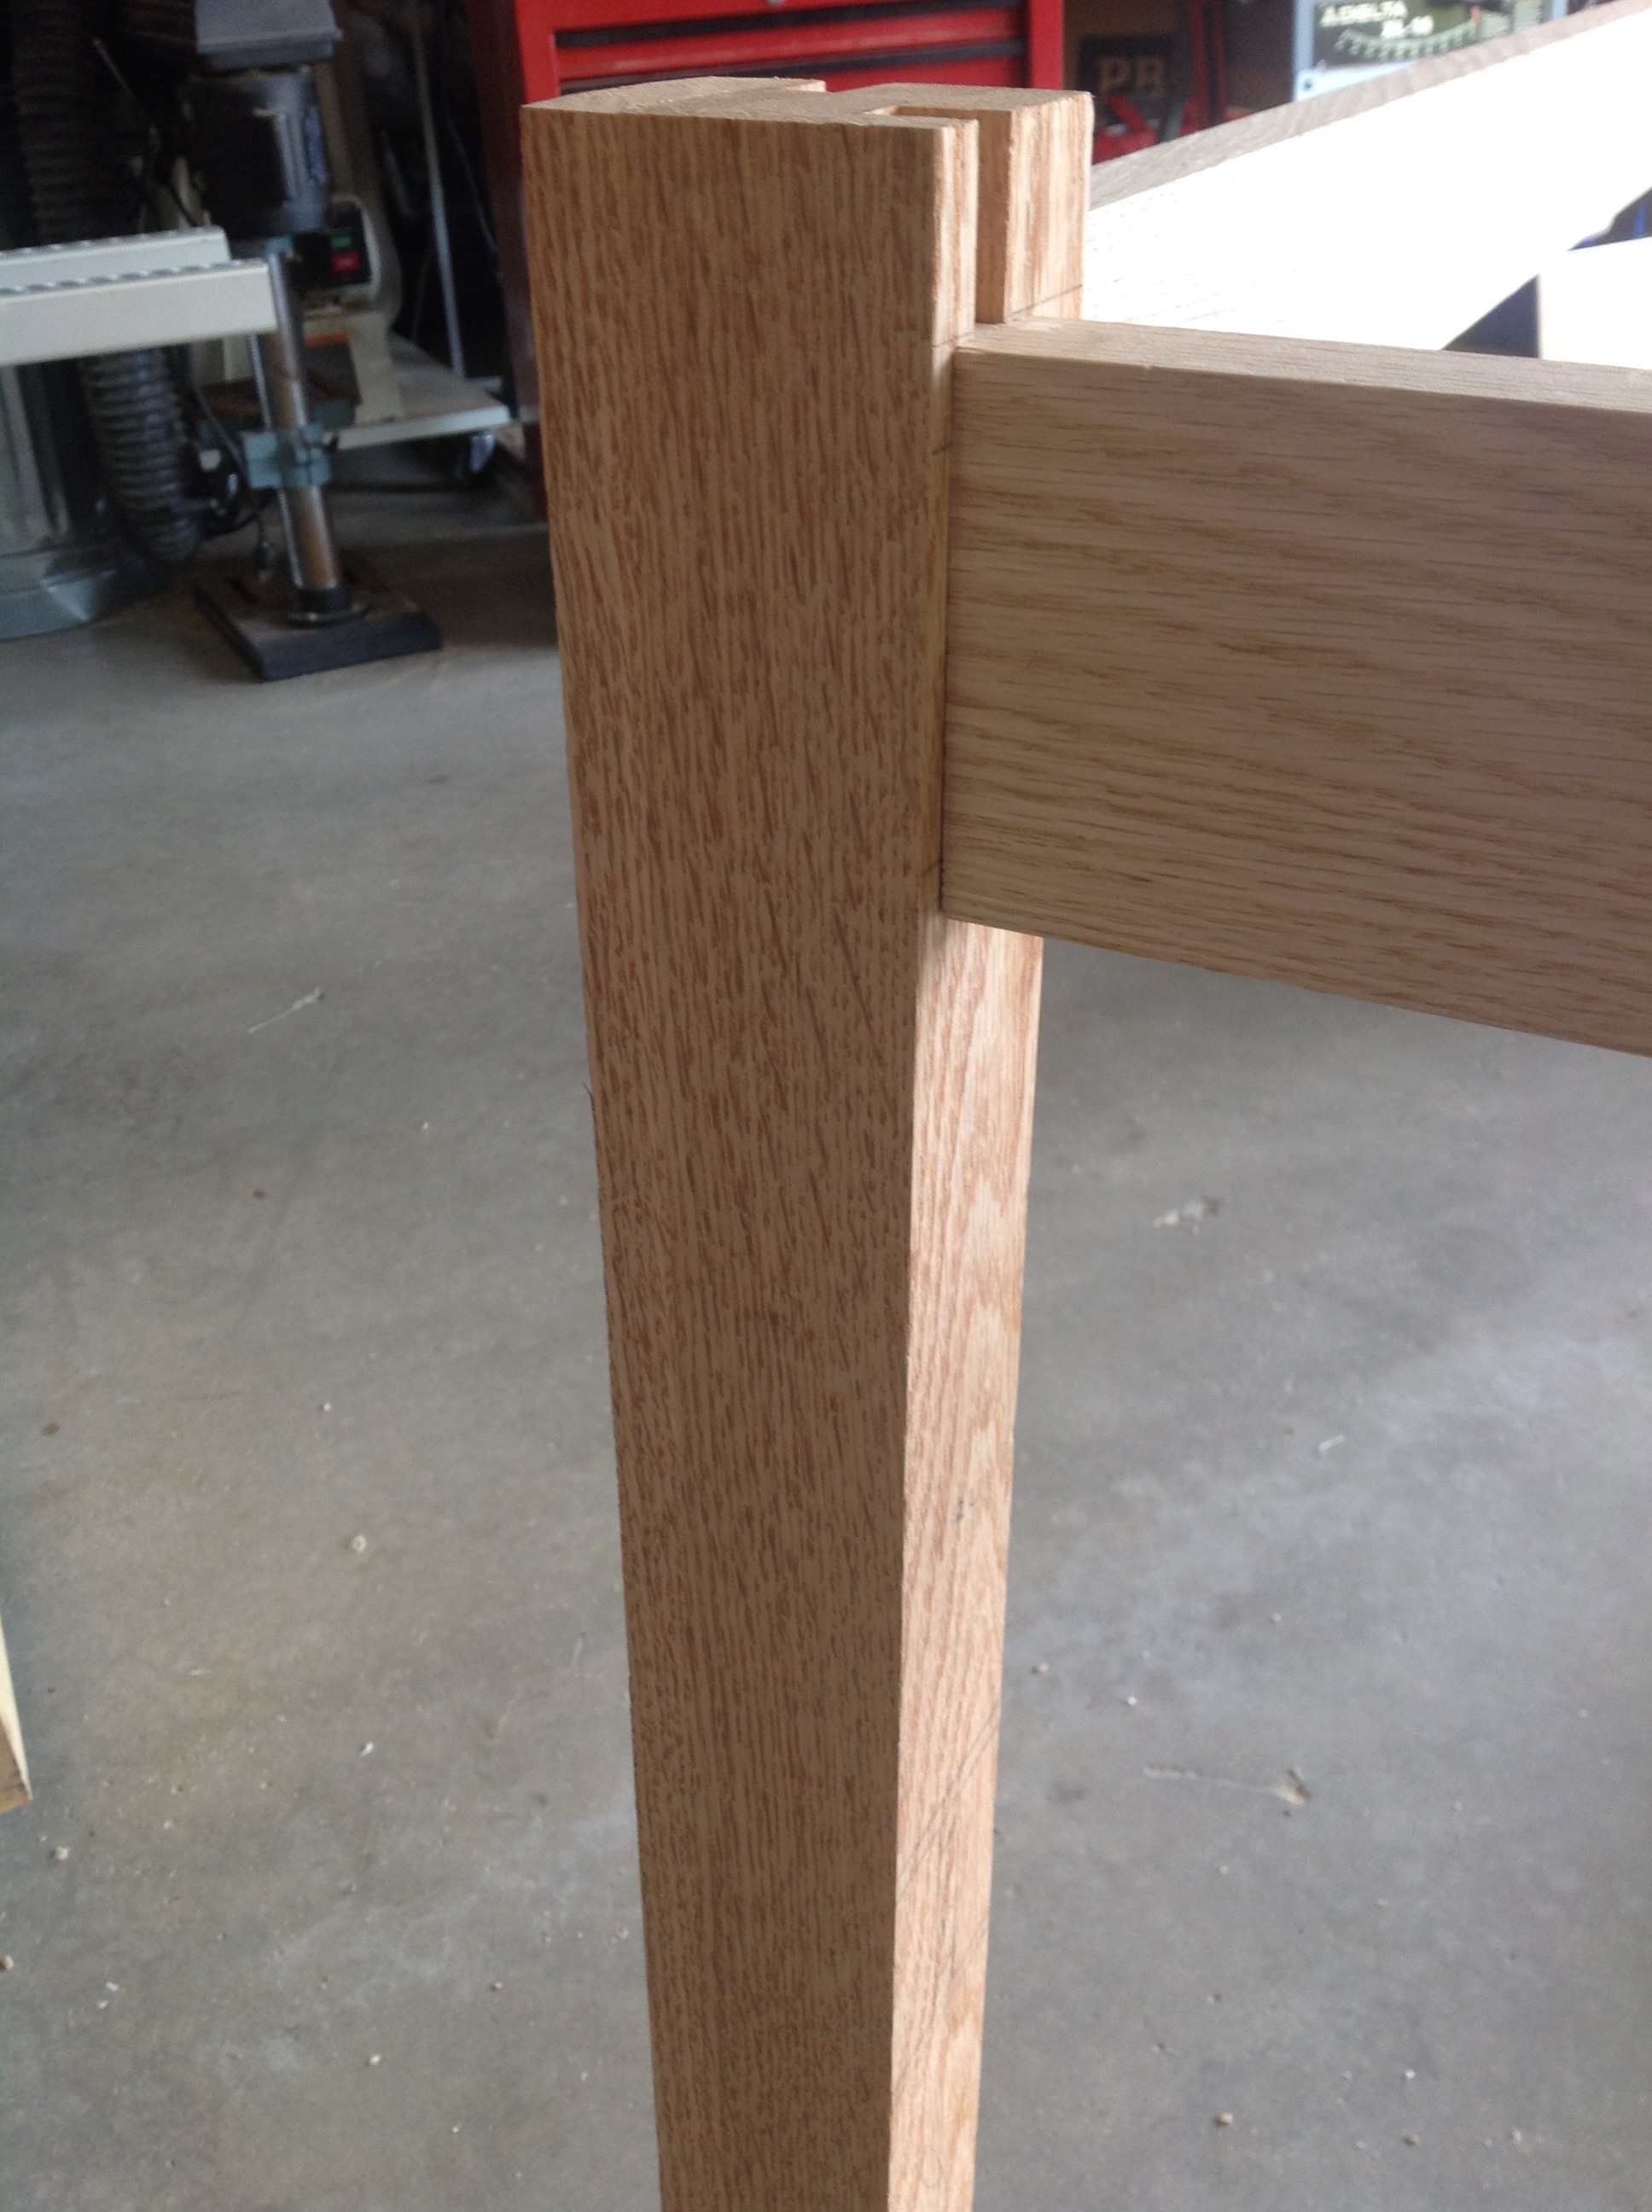
Mistake Number 1:Notice in the photograph that the tenons extend far beyond the cross rail. The picture doesn’t give me credit for the full 2.5 inches that will allow much greater forces to placed into the tenon when fitting the pieces together. If the length had been trimmed to a reasonable amount there would be no demonstration of the human domino machine (see festool domino) for reattaching the tenon..

 Mistake number 2: maybe I should call this trial number 2…. The long rail decided to twist and cup severely. No picture but there are definitely some stresses in this wood. It’s now in my scrap collection. Enjoyed the additional mortise training.
Mistake number 3: After two mistakes it would be wise to go for a long run where you could carefully review options and format a plan for carefully taking the next steps. However to ensure that the reader gets a full plate of mistakes I continued forward assembling the cart. The weather has been variable and over a couple of days joints have swollen. Possibly the weather is to blame, but more likely a hard hammer blow rather than a gentle squeeze with a clamp resulted in the sound of a crack. Yes another leg to practice veneering! The excitement almost brought me to tears. The resulting 5 mile run was one of my fastest ever. You have to take the good with the bad.
Hospice Cart Middle Shelf
Wanting to add to the cart design, I used the middle shelf from my coffee table project as a guide. Once all the pieces were cut, eight mortises and their machining tenons needed to be chopped.
 In previous posts I’ve shown several of the ways I use for cutting tenons. If the wood grain will allow, my favorite is to use a chisel. After marking the tenon with a knife and marking gage, I use a saw to cross cut the bottom of the tenon, than several test chops need to be made to evaluate the grain direction.
The test cuts allow me to look at the grain direction If the grain is straight or moving aware from the marked tenon lines I can proceed. Anything else and I am relegated to the saw. In the picture you can see that all is well and the tenon cheek is easily revealed. If I’m lucky the majority of my tenons can be chopped an fitted with a little bit of paring.


Hospice Cart Top and Shelf
Most of the day was spent with a plane in my hand. Started out removing the bottom shelf from the clamps that have held it tight sice last night.
 Gluing up panels is not one of my favorite tasks. There is nothing particularly difficult, I just don’t seem to get the same satisfaction as making joints with a chisel in my hand. The glue up of the top (shown in the picture and the shelf were made more difficult by a fight with some of the lumber. After finding the crack in the leg I noticed a couple that some of my stock was struggling to stay in character. fortunately I just cut out the pieces but it added to a more intense glue up.
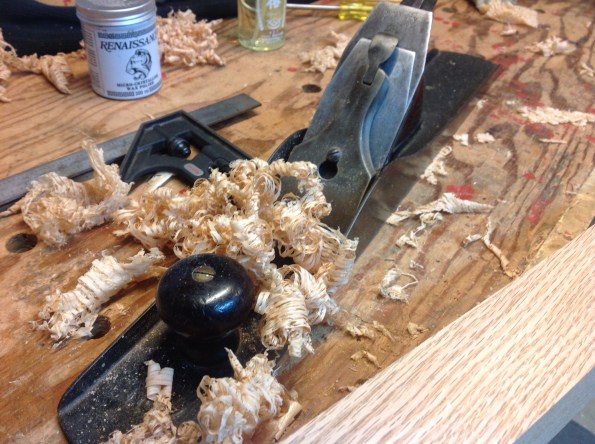
With everything out of the clamps I made sure that my planes were sharp and set to work.

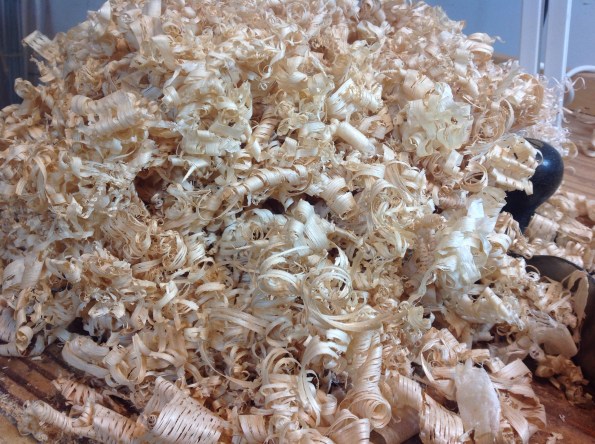
As the shavings rolled off the plane a pattern of work began to emerge and my mind emptied to focus on the task at hand. Before I new it a series of three planes stood next to my bench and shavings covered the floor.
Feeling the plane slow, I touched the soul of the plane and felt its warmth. Adding wax would ease the friction and I again felt the plane glide across the surface. With the top and lower shelf smooth they will be set aside for final trimming when the base is complete.


Craaaaack Oopppps!
Finally it seems that I’m making progress. All of the mortises are complete and all but the side Tenons fitted when suddenly I notice a line where none should be, in fact much worse than a line a crack has appeared on one of the legs.

Sitting quietly with a mug of tea, I contemplate the crack considering its similarity to the Grand Canyon or perhaps the San Andreas Fault. Fortunately it is on the outside of one of the legs, why fortunately you ask? Because there are no mortises here and I can laminate a piece down the entire side without having to cut mortises.

At times I believe the real skill of woodworking is repairing the mistakes or covering up the natural flaws. Using my table saw ( yes I do have one) a quarter inch is trimmed off the leg and I plane the new surface smooth. Then I cut a piece to laminate over the crack which will be planed to match the other legs.
 The repair is on the left side of the leg, after planing to size and finish it should blend into the rest of the piece.
Hospice Cart Mortises
Each leg of the hospice cart has four regular mortises and one through mortise. I takes between 45 minutes to and hour for me to complete each leg.
 When chopping deep mortises like these I typically use a guide to ensure that I am vertical. If I’m angled incorrectly then it will make a big difference when the rail meets the other leg 38 inches away. The guide that I am using is adapted from Paul Sellers, it’s explained in an earlier blog.
Using a 3/8″ bench and mortise chisel I finished up on the mortises with little fanfare. Chopping mortises is like meditating, find a rhythm and chop away let your mind wander and enjoy the afternoon.

Hospice Cart Dimensioning
When planning to make an epic mistake on a project there are several areas that can go un-noticed until you are quite far into a project. Poor plans can lead to a missed cut usually in the latter portions of a project when the only option is to head back to the lumber yard for a new piece of wood. Bad measurements can have the same results and usually occurs when when you forget to add an inch to your measurement due to the damaged tape you refuse to throw away. Typically I prefer to layout a project incorrectly and then proceed to chop out several mortises before realizing they are on the wrong side of a leg. Not today, well not yet anyway.
Laying out the locations of mortises is something that I take very slowly checking and double checking to insure they are in the correct place. Fortunately today when I checked I found the problem immediately and was able to make a correction before chopping began. I’m sure I will make another mistake further along.

The rest of the day was spent dimensioning lumber and planing to the correct thickness. By the end of the day most of the parts were ready for joinery. I’m hoping over the next week to get the mortises chopped out so that next weekend can be spent fitting the tenons and gluing up the top and bottom shelf.
My mistake of the day was forgetting to publish the blog. Fixed today!
Hospice Cart Squaring the legs
After work I took an hour to do some final work on the cart legs. Started out by doing a little spring cleaning to my #7 plane. After a long winter each tool will get a good cleaning and wax to make sure there is no rust begining to form. I also took the time to sharpen an add a little oil to the frog.
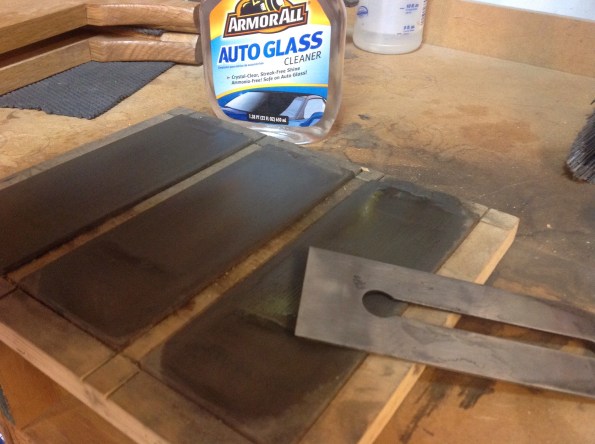 While I was sharpening I thought it worth pointing out the use of auto glass cleaner to lubricate the diamond stone. Someone along the way mentioned that since it contains very little water rust doesn’t form. Compare auto glass cleaner with regular glass cleaner and see for yourself.
 The sound of a freshly sharpened plane is very distinct from one that needs sharpening. It only took a few minutes per leg to get all of the sides square. Next up layout of the mortises. Four per leg plus a through tenon. Looking forward to a massive mortise session this weekend.
Hospice Cart
The Bar Cart will be donated to the local hospice for a fund raising event in a couple of months. I certainly have put some pressure on myself to make sure that I deliver the absolute best product possible. With the wheels completed I spent several hours yesterday drawing up plans and reaching decisions for the final dimensions. Over the next week the drawings will be cleaned up and placed on this site, although there will certainly be changes along the way.
With a cut list in hand I set out to my lumber dealer in search of White Oak Two hours later I was headed home with Red Oak. Why the change? There was a better selection of Red Oak, it was cheaper and most importantly they had some 10/4 for the legs. It will save me having to glue together boards to get my 2 1/4 in legs.
 First cut of the day, trimming the 10/4 down to make the legs. It was nice to get the Disston crosscut saw out and it took less then a minute to have a manageable size piece. I waxed it up before using it to ease the cut and give it a little protection. After a couple of hours I had four legs roughly dimensioned and read for final planing and cutting to length. The picture doesn’t show it, but a couple of pieces had some really nice medullary Rays.
 Hopefully I will get the would to final dimensions and layout all of the mortises so that I can have a mortise party next weekend. It’s nice to be moving ahead on a project. For a very rough diagram of the Bar Cart go back to my prior post on the wheels.
