Archive
Enhanced Dovetail – Small Tool Chest

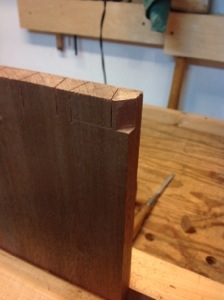
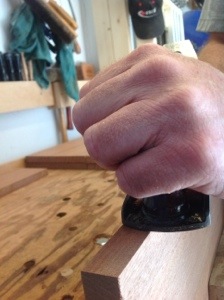
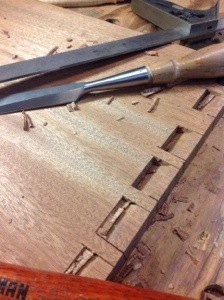
The center rail between the drawers is a combination of mortise and dovetail. Not a particularly difficult joint but since it is at the front of the chest very visible. The basics steps for the joint are to lay out the mortise using the center rail for size. Then I carefully chopped out the edges of the mortise, finishing up with my hand router to ensure a smooth and even mortise. The tail is marked onto the rail with my marking knife and using a hand saw and chisel cut to size. Carefully fitting the rail into the mortise on the one end, I then repeated the process on the other side.
After planing the joint smooth I’m content with the result. A little more practice and this will add a unique feature to other projects.
A Quick Repair

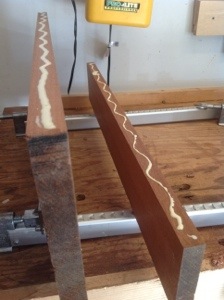
While taking one of the small tool chest sides out of the vise it slipped from my hands and hit the floor. Of course it landed on a corner, and as always it was the corner that would be most exposed. Looking at the damage to the corner I considered if it could be left or needed to be repaired. Replacement of the board is not an option because it is a tool chest for myself, the wood is expensive and repairing the damage would be a fun challenge.
I’ve made a few repairs over several years some successful and some looking worse than the original damage. I am a repair amateur but willing to learn. This corner looked like the perfect opportunity to trim the damage off and insert another piece planing to fit. Searching through my scraps I found a piece of wood that appeared to have similar grain. Next I cut and chiseled off the piece that I wish to replace and cut a replacement piece.Trimming carefully with a chisel I attempted to match up the replacement piece to the wood. I the glued it in place and used tape to hold it while the glue dried.


A little work with my smoothing plane and the repair is in place. Not a perfect match but when the lid is glued on top I don’t think it will be noticeable. Now if I can avoid dropping anything else………
Small Tool Chest
Uncut boards stacked on a bench, notes jotted on a page of paper, and tools freshly sharpened ready for work, bring a sense of anticipation into the shop. Taking a few moments I run my hand down the rough boards and think about the trip they have taken and the sights they have seen. One of the gifts of working wood by hand is a sense of respect for the lumber and an intimate knowledge of the way it has grown and the life it has seen. Not to say that working wood with machines doesn’t bring this respect for others, just that it was missing when I used them. I rarely took the time to feel the grain, study the best way to plane a board and listen to the planes and chisels for messages on how to proceed.
Today I’m starting on a new project that I am very excited about, it’s a smaller tool chest designed by Paul Sellers and is part of his masterclasses series. There are many unique features and as I build I’ll share what I can. I went to a new lumber yard and spent some time looking a several options for the tool chest. Many of you may disagree with the choice, but I chose to build in Sapele. Yes expensive; however I hope to be looking at this chest for a very long time.
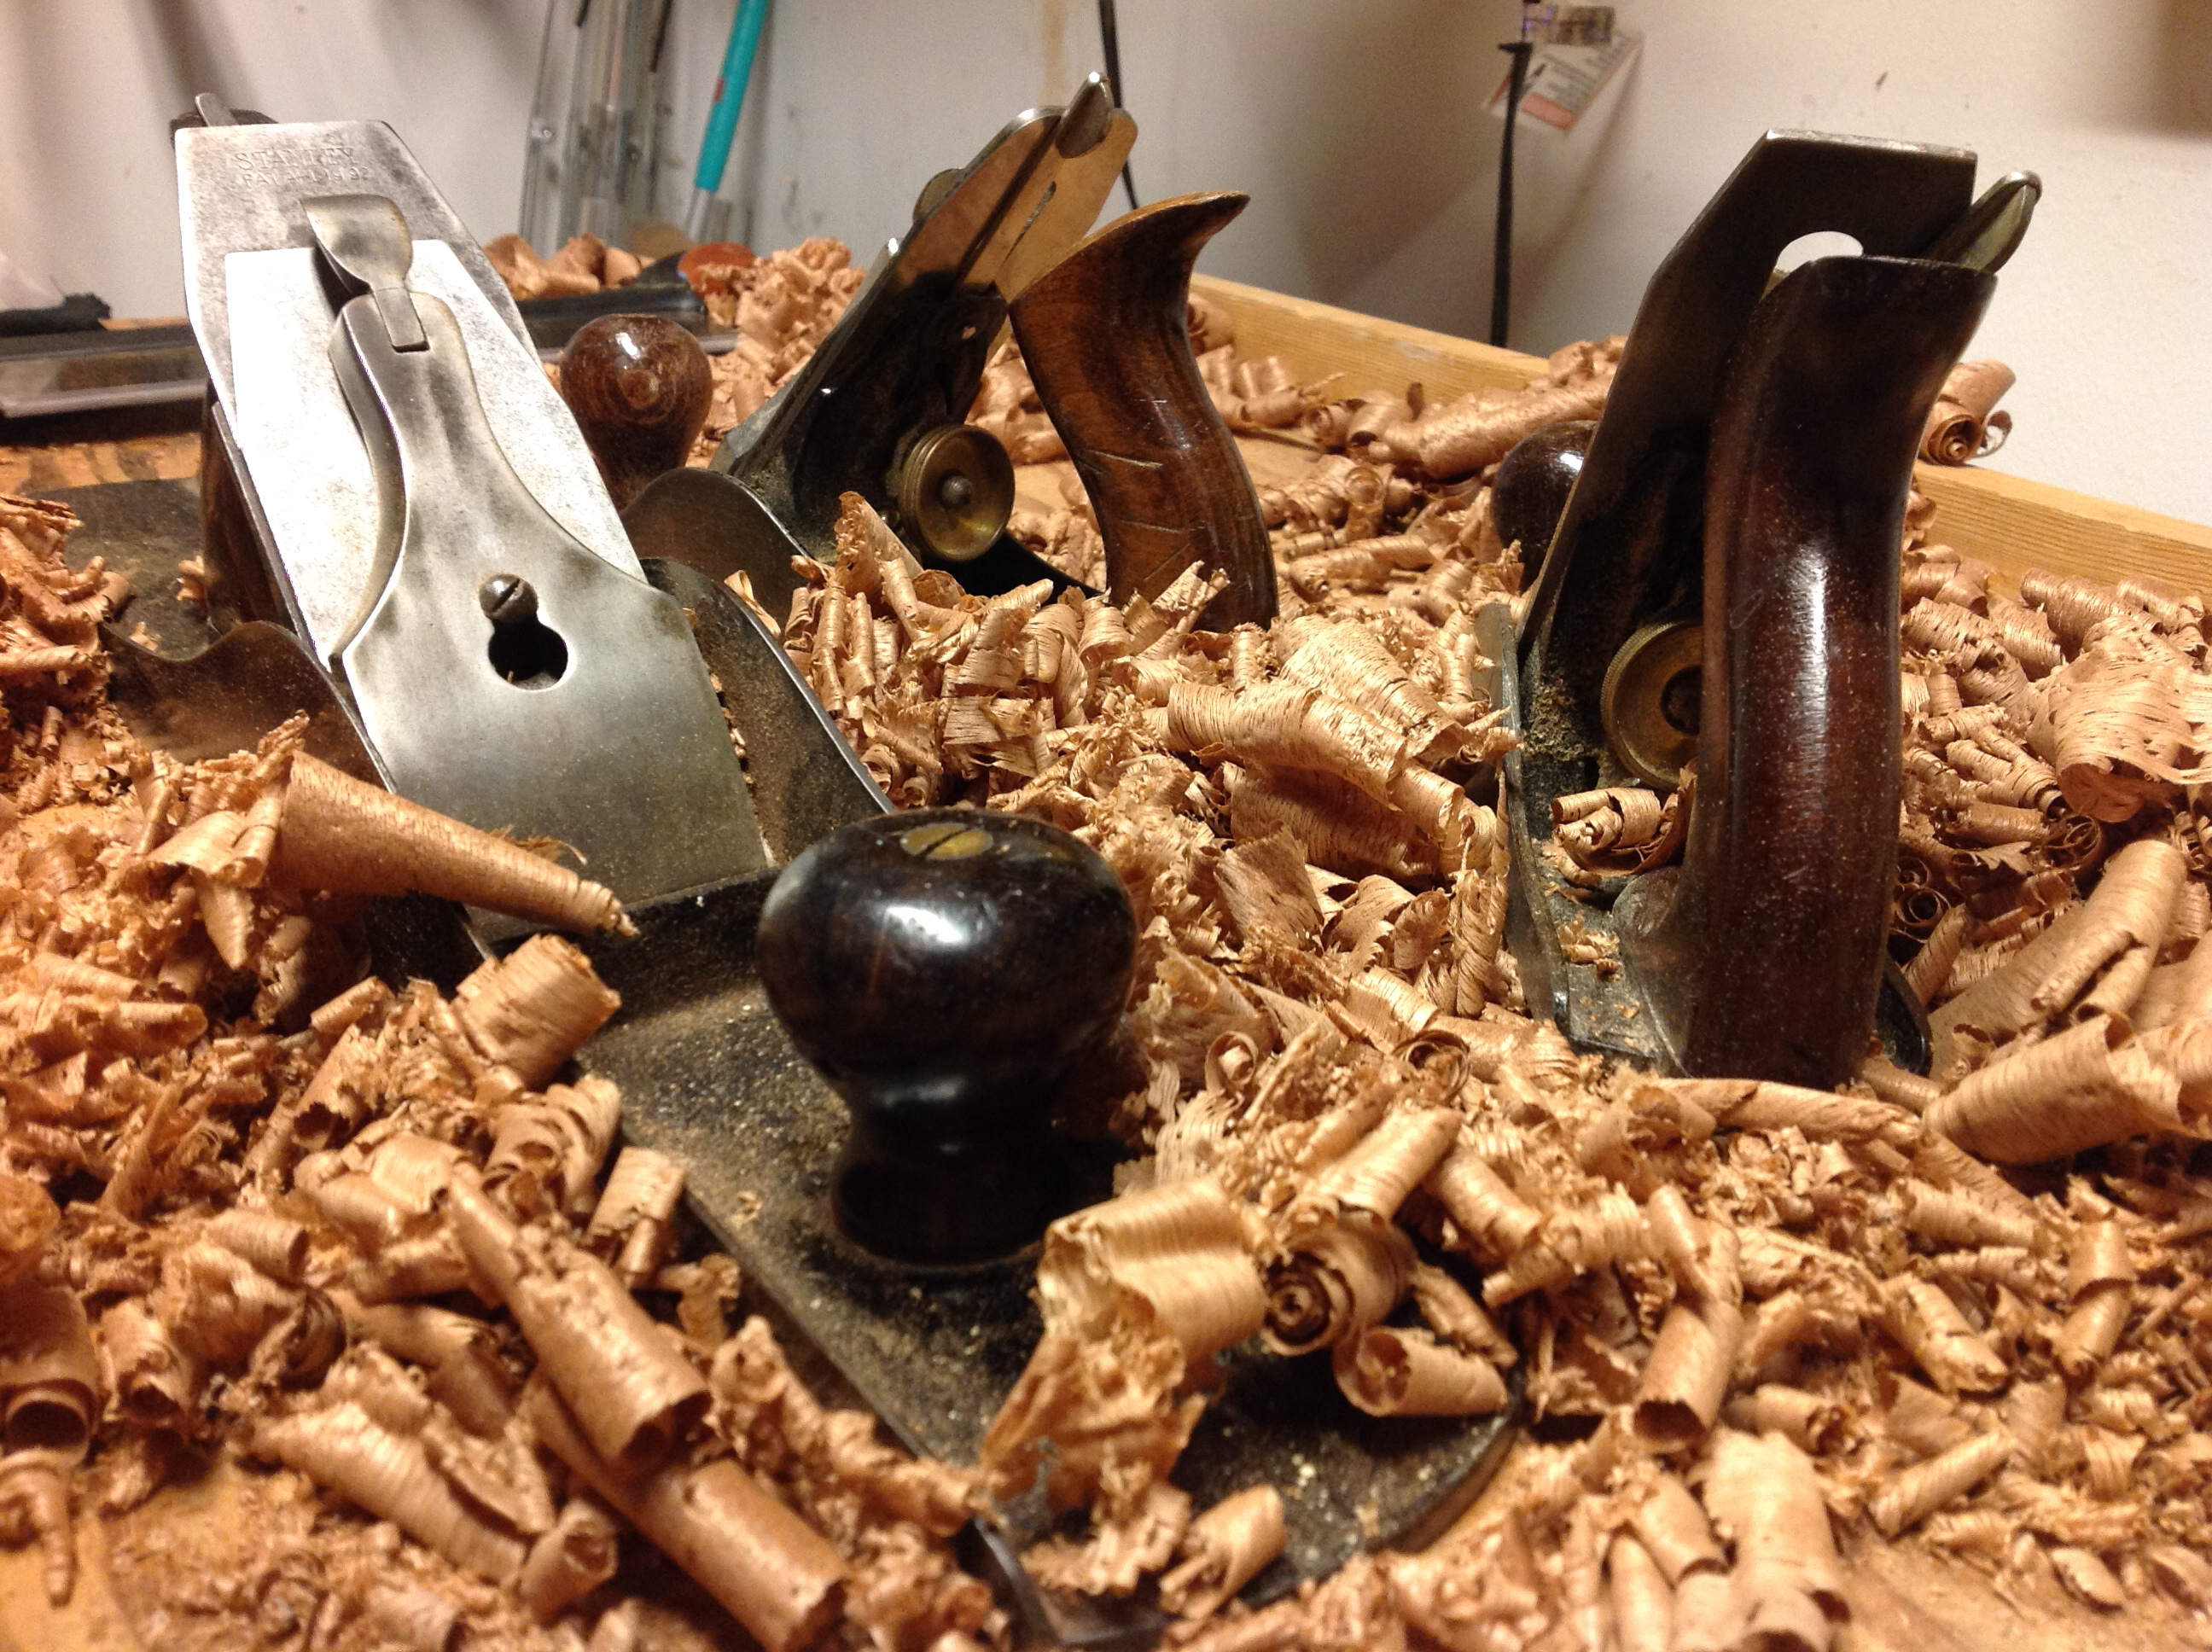
I cut the boards to rough length, planed one side by hand and the other by machine and set out to glue up the panels for the sides. For the last couple of projects I have been planing one side by hand to remove any twist or cup. I do have a jointer, but I find it easier to flatten one side by hand. It’s also a lot more pleasant than listening to the roar of the jointer. Flattening one side of the board could easily be done with one plane, but if you have a jointer and smoother why not use them. In this case I used a Stanley #7 and Stanley #4 and because I like the little guy, the #3 for the edges. No, I did not stage the picture. This is just where they ended up when I was done.
I enjoy working different woods and learning how they react to the tools. Sapele planes beautifully and although the grain is very complex I had little tear out. I do anticipate some later on. The smell of the lumber has caused me to founder for a memory. It is very distinct and hopefully sooner or later I will find the lost memory.
I glued up three panels for the two sides and the back of the chest. They are 11 3/4 inches high and in a short time I was able to plane the edges square and glue the boards together. I am really enjoying my new clamps. in particular I like the handle used for tightening them. I have never like the design with the through pin that slides back and forth on my previous clamps.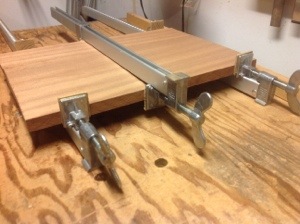
Small Toolchest Dovetails
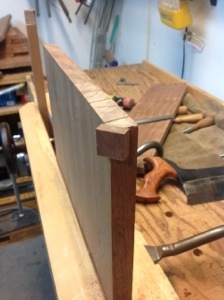
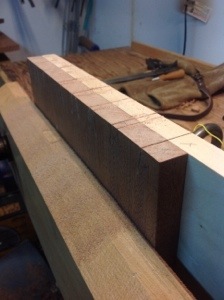
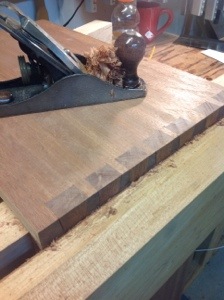
The carcass of the small tool chest is held together with dovetail joints. Nothing very unique but a chance for me to remember some of the subtleties of ensuring tight joints. Square boards, planed end grain, careful marking and sawing. When I prepared to cut my first dovetail (tails first in my case), I placed a board behind to use as a guide for the opposite end of the board and the face board. This allows me to index my saw to the already cut tails on the board.


I enjoy watching the many methods that people use to cut dovetails, there is the obvious tail and pin debate, the coping saw vs chisel debate, marking with a knife vs a pencil and so forth. I’ve developed a style that I use on most occasions with subtle differences to add variety. Today I think that I will use a chisel rather than a coping saw for removing the waste material.
Communication with my coping saw is a little strained at the moment and I enjoy the rhythm of using a hammer and chisel. After marking the tails with a pencil, I used my marking knife to mark the bottom of the waste and a knife edge. I then chiseled into the board approximately midway and repeated until all of the tails were complete. Marking the pins, I used the same process, saw to the line and remove the waste, fitting each board. Planing the finished product smooth I am very happy with the final product.

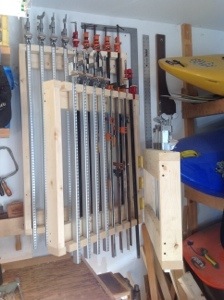
Clamp Rack
I spent the day cleaning my work area and getting ready for my next project. Part of the effort was building a rack to store my clamps and move them out of the way. I blogged during the week some of my thoughts and had some nice comments and ideas.
I had visions of wall mounts, carts, clamps vertical, clamps horizontal and then I stumbled across a couple of images on the web for the rack that I chose. Seems that there were several people with the same rack so I’m not sure who to credit but I built a rack that houses 27 clamps in three racks joined together with hinges.
No fancy woodwork here, I just screwed it together mounted it on the wall and inserted clamps. Back to hand tools tomorrow.

A New Lumber Dealer
Walking into a lumber yard used to be fun. It is like opening a treasure chest. Walking between rows of boards I look at the many species, some I have never heard of, some that are very familiar. The smell of the wood is clean and honest reminding me of places and projects. Working through a stack of lumber one of the owners would often come over and chat, asking about projects helping find just the right pieces.
As I said it used to be fun, after moving a few years ago, my previous store is a few hours away. I have a store approximately half an hour away which I have stopped by several times. Their selection is decent, but the pricing is outrageous . I also often feel like I have intruded into the store. They are helpful, but I get the feeling there are other things to be done. A couple of weeks ago I stopped in to pick up one board. The board I had planned to use had a check right where I didn’t need it. As I worked through the quarter sawn oak I could find no boards with medullary rays. My project was almost complete and I was trying to match my existing wood. Asking if there were other boards the assistant pointed out that all of the boards with rays had been sorted and in another spot for $1.50 more per board ft. I then looked at the price of the regular qtr sawn oak and saw that it was $1.50 higher then my previous store! That’s $3.00 higher totaling $9.50 per board ft!!
Needless to say I didn’t purchase the lumber. While I was there I asked if they had any 10/4 boards. The answer was you don’t always get what you want…. I’m wondering if I was having a bad day or perhaps the assistant. What I really needed to hear was we don’t usually carry it, but could get it for you. Anyway I’m lookin for a new store.
What’s Next?
The end of every project is a great time to take a look around the bench and spend some time cleaning, sharpening and reflecting. since I am not earning a living from woodworking I have the luxury of time. Sweeping up, it’s amazing where all of the shavings and dust accumulate. I have three projects in mind and they follow from the coffee table just completed.
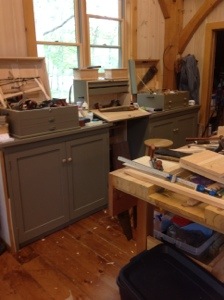 The tool box is the next project in Paul Sellers Masterclass series. It sits upon the cabinet in the photo. It includes panel construction, dovetails and as in all of Pauls’s projects, great skill building. I work out of a tool chest based upon The Anarchist Tool Chest and I love it. The design works well for storage and accessibility.
However, I want to make more of an effort to get tools off of my bench as I work. When I was at woodworking class we had benches with a tool tray in the center. This was brilliant and it kept tools below the table top and within easy reach. If I ever build a new bench there will be a center tool tray. Many people have criticized the use of a tool tray as a collector of dust. It is a great safety feature that allowed me to keep tools at hand, but below working level where I could accidentally catch a sharp edge. The bench I am currently using is adequate and until I have a shop worthy of a new bench, I will not have a tool tray.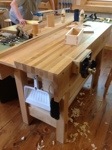
Since there will be no tool tray in the near future I’m also remembering a small apron on the bench that allowed us to keep the tools off to the side. I really liked this and was teased by my fellow classmates for how clean it was kept. (Yes gentlemen, I have not forgotten) If they had really been paying attention, it would be clear that I was storing tools in use in the center tray
 and upon completion of a part, sharpening and returning tools to the side tray. The tray worked well in the classroom, however I would like to utilize the small tool chest to keep tools accessible. I think setting it adjacent to my bench will serve as tool tray. Paul Seller’s Tool Chest definitely in the future!
Clamp Storage is a topic that comes up for all woodworkers. There are many articles in the magazines and blogs that throw out many great plans. Clamps have always been stored under the shelves above my bench. This has been effective. There are a couple of problems…..sometimes I end up pulling out all of the clamps to get to the one on the bottom which is usually the one I want. My fingers are tired of being pinched between the many clamps jumbled up. With the additional clamps I purchased for the coffee table project I need a new system. Anyone have thoughts on what works well or what to avoid?
The last project that I have in mind is a matching side table to the coffee table. There are many lessons that I learned during the project and I would like to put them to good use. I think a smaller table that is square and matches the coffee table would look nice.
As if these three are not enough there is a blanket chest to be made, another desk and so forth. No I’m not ignoring these at all, I think in my skill development the tool chest will give me the panel skills that these projects require.
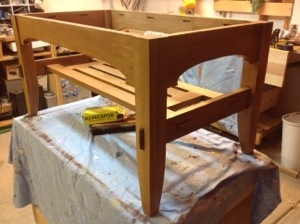
It’s Finished!!
 With the finish on the table and the wax complete I can attach the tabletop to the base. This is an exciting time for this project, it seems like it has taken a long time to reach this point and I look at the table and see the many lessons that I have learned. I spent a few minutes making some turn buttons then used some screws to attach the table top to the base. I tried out a new countersink that my father in law picked up and it work brilliantly.
As I stood there and looked at the finished product I am very pleased. It turned out well, but that’s not really what makes me happy, it’s the hours of careful hand work, the lessons in patience and challenge of a mistake. I’m also very happy and thankful for all of you that have posted comments, made suggestions and come along for the ride. It’s been a lot of fun.

Coffee Table Finish
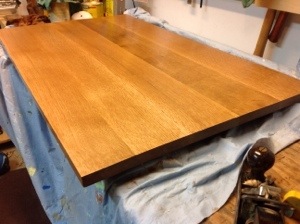
 Fortunately I have planed, scraped and sanded all of the parts during assembly so all I have to do is touch up a couple of spots and remove a pencil mark or two and apply finish. Over the last couple of weeks I have thought about the best way to finish off the coffee table. Initially I apply a coat of clear de-waxed shellac to seal the sanded surface. Next I applied two coats of a mahogany gel stain . The red color of the stain will find the grain of the oak and add little bit of color without moving too far away from its natural color. On the lower portion of the table I finish with 3 more coats of shellac. sanding in between. Then I use steel wool and wax to provide a very smooth protective finish. Since I applied the de-waxed shellac I am able to use water based stain and a water based polyurethane for the top. I realize that as a coffee table it will receive quite a bit of abuse so I want to protect it as best I can. You can see the slightly darker board in the picture of the top. At this point I think it adds character and does not detract from the table. two more coats of Poly and I’m done.
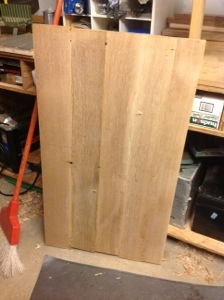
What was I thinking? Coffee table top.
There is a certain amount of skill required to produce a high quality mistake. Over several years I have continue to practice these skills and have developed a healthy resume:
Shelf installed upside down, mortise hole in wrong place, cut board on wrong line , marked line on wrong board, cut wrong board, installed table top upside down, there are more mistakes too numerous to mention. There are also the mistakes that only I can see…you know the ones that you have to point out to people and they always say, “I would have never known”. Finally after years of research there is a new mistake that I can add to my resume:
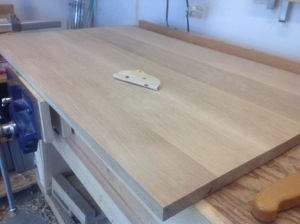
Glue the wrong board into the table top! In the photograph the second board is much darker than the rest (photo does not do it justice at all.) This is really not the type of mistake you should try at home, please leave it to the professional mistake makers….the board that was supposed to go here is still sitting on the bench ready to go………now where’s that saw!
1 hour later…..On second thought that board doesn’t look so bad
2 hours later…. Maybe if I begin to plane it I’ll get a better look at it.
4 hours later… Now that I have all this time into it, why cut it up?
Smoothing the table top was really fairly easy. Most of the work was done with my Stanley # 4. Once I had isolated some of the problem areas on the board I grabbed my cabinet scraper and card scraper and cleaned up all of the areas of funky grain and areas that I had tear out. The cabinet scraper that I used came from Veritas and once I figured out how to effectively sharpen the blade and turn an edge, I had some beautiful shavings. In fact when I completed planing and scraping, sanding was done with the one piece of paper shown in the picture.
I sawed the top to size and then grabbed a hand plane to smooth the edges. With a very sharp blade it always amazes me how well a hand plane cuts across the grain on the edges of the board.


