Archive
Paul Sellers – day 2
Day two arrived with a chill in the air, but the sun came out and the many flowers and leaves looked brilliant on the hill sides. I arrived at the class a little area and wandered up the road to peak at the sheep and new lambs. It’s a joy to watch them leaping and running in the grass.
People were more talkative today as we gained knowledge of each other, we watched each other work, sought help and freely spoke. Tensions began to lift as everyone focused on their tasks. There was laughter and story telling as we worked.
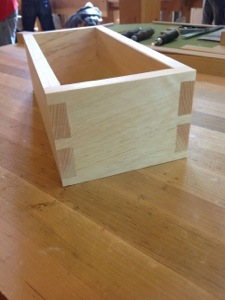
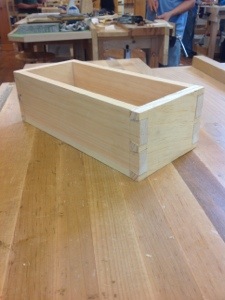
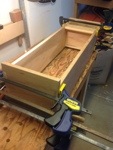
 Paul began the day by demonstrating glue up of the box. One thing to note is his extensive use of his vise for everything. I’ll talk more later but the vise was his third hand for holding parts while spreading glue, and clamping the piece together. Paul has been building boxes along with us so that he is demonstrating as we go. Next he showed how to chisel the nubs (pins) that protruded and plane all of the edges and faces leaving a very smooth finish.
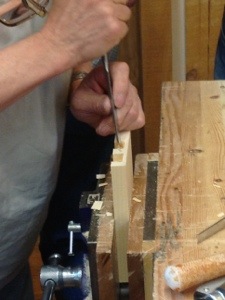
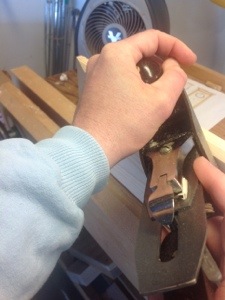
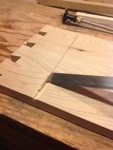
The pictures below are of the edge planing which is done without removing the heal of the plane from one side to the next and the planing of the sides which was done in the vise with a board raising the center. My fellow classmates range in age and experience and it is fun watching people complete their first dovetails and improve on their previous experiences. It was also fascinating watching Paul and his very talented assistant Logan demonstrate how to repair mistakes, many which became very difficult to spot. I bet on most of the museum pieces in the world there are many patches that go unnoticed.


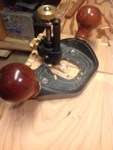
The dovetailed “shells” were set aside while the glue dried to prepare the top and bottom of the box. I missed photographing the the top and bottom of the boxes, but all of the edge rounding was done with a Stanley #4 and a tiny piece of sand paper. You can look at my weather station blog if you want a few more pictures. I’m finding less and less use for my router.
Paul misses few opportunities to pass on knowledge and when a couple of us finished ahead of the group he called us up to the bench and demonstrated how to make blind dovetails. Hs explanation was clear and concise and the results excellent. He works and teaches with such passion that you sit in awe until he cracks a friendly joke and banters back and forth with the students. This is how woodworking should be taught from someone that has worked the trade, has the passion to teach and the knowledge to throw in all of the extra tidbits that the books and videos miss.
I’m noticing that Paul is very humble in his work, this may be contrary to some. His confidence and experience could be mistaken for slight arrogance, but sitting and talking with him reveals his true nature. There is so much more to tell and I have a notebook full of lessons and thoughts, but I think to fully appreciate what is happening in this class you must be here. One thing I discovered not through Paul but through other participants is the books and videos that Paul has written. The book which I saw on a bench is amazingly detailed and well written, if you can’t make the class this and perhaps the videos would have to suffice. By the way these were not mentioned or harped on by Paul making a sales pitch in any way, rather by others in the class. I’m looking forward to tomorrow and all that it will bring.


Paul Sellers – day 1
Awoke this morning the the sound of gentle rain amongst the leaves. It was very calming and a great start to the first day of Paul Sellers 9 Day Foundations class. Classes are held at the Maplewood Center for Common Craft located between Schuylerville and Greenwich, NY which is a beautiful part of the country.
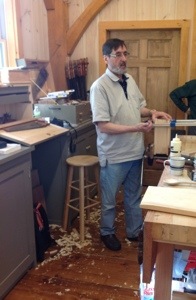
The first step is to prove that I am actually at the school, so here is a photo of Paul, who’s bench is right behind me.
We spent some time breaking the ice, talking philosophy and seeking common ground, after all spending 9 days with a group of 18 people that you have never met will take effort. Then Paul got to work. Introducing sharpening, tools and techniques. If you have ever watched his videos, read his blog, participated in his masterclasses or seen him on Facebook he is absolutely genuine. He practices what he teaches and his good humor, experience and total passion for woodworking was present throughout the day.
I’ll take more pictures of the workshop over the week but it is a beautiful timber framed building with great light and a nice open feeling.
The class grabs stools and huddles around Paul’s work bench listening, taking notes and asking questions. He explains, demonstrates and then sends us back to our own benches to practice the lesson.
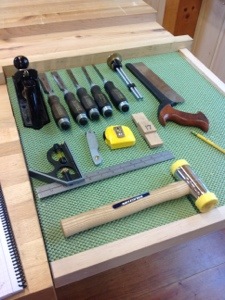
The basic tools that we have for the first day were set out neatly at each bench. As you can see there is a total of fourteen including a pencil. These are the same or similar to the tools Paul uses in his blog and the online Woodworking masterclass series. I noted some more tools in a box stored under the bench, which I am sure will be used later in the class.
Looking at the photograph you can see a Stanley #4 Plane, set of Narex chisels, Veritas dovetail saw, Veritas marking gage, combination square, Thorex hammer, Stanley 10-049 knife, tape measure, shop made marking gage and if you must know a Dixon Ticonderoga pencil. At this point I am sure that is the secret to all of Paul’s skill so I snuck out and ordered 10 cases. (Just kidding!)
The tools are incredibly sharp and ready for use. Tomorrow I will take a picture of the bench which is the same design as Paul describes in his blog with a quick adjustment vice.


Lesson one began with making a dovetail, yes the joint that makes woodworkers tremble in fear. Paul’s simple instruction and process was concise and when put into practice produced some very nice results. This was not my first time cutting this joint, but it was the first time I began to really understand how to effectively cut it. I struggled with the saw initially, but made my way through the joint. Paul next took time working with the class on sawing technique, in particular only using the weight of the saw to make the cut. After watching, and listening (a critical part of understanding the performance of the tool) we made many test cuts. Brilliant, this was one of those moments that I came to the class to grasp. Once I truly unloaded the saw, it was poetry in motion. The second item that Paul passed on concerned correcting a mis-aligned saw cut. If the saw begins to wander from the line it does not help to apply pressure to the saw plate to force it back to the line, this in fact makes the mis-alignment worse because the curve of the plate against the side of the cut forces the teeth in the opposite direction. Instead lift the saw up to the point where the problem began and use the teeth to cut down your planned line. It seemed obvious when he explained it to the class, but it was another piece of information to tuck away.
After spending time listening to Paul’s teachings around his bench and watching his demonstration we began the first of three projects (many of these are shown in Paul’s book) a dovetailed box. The class worked along and with the wonderful sounds of saws and chisels we spent a relaxing and informative afternoon. In fact I entered “the zone” my eyes were focused, my ears tuned into the sound of the saw and chisel and and my focus was purely on working with wood.
How long I worked like that I am unsure, but when I looked up complete with the lesson I was a little ahead of others. This gave me the opportunity to do a little extra project and make my own dovetail guide with a little help from Paul. It’s simple and very effective and since I have been using one belonging to the school all day. I now have my own to take home. I’m looking forward to the rest of the week.

Time to learn
The last few weeks have been very hectic at home and work. My wonderful wife has graciously let me travel east for 9 days of wood working school. ( She’s the best in the world). So if you have’t guessed by now I am in NY state getting ready to attend the 9 day foundations class with Paul Sellers.
I am extremely excited to take a step back and actually have someone watch over and critique my work especially in the basics. So stay tuned over the next week and I’ll share the experience.
Weather Station Finishing Touches
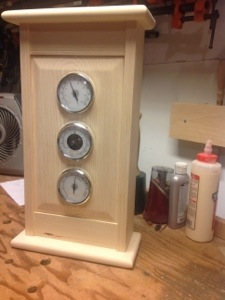
 A few finishing touches and the weather station should be complete. First is to cut the holes for the instruments. Using a compass I drew three circles on the panels and then using my hand drill put a hole in each one to allow me to pass the blade from my saw. I then cut each circle out. I left the holes rough since they will be covered by the instruments.
The top and bottom have curved edges, These are done with a smoothing plane and are very quick. A little sandpaper to smooth the edges and they are complete. A few hours after glue up and clamping and the project is all but done. A nice little project with many lessons. This like my last two projects will have to wait for warmer weather so that i can put a finish on them. Now what’s next on the list????
Weather Station Decisions
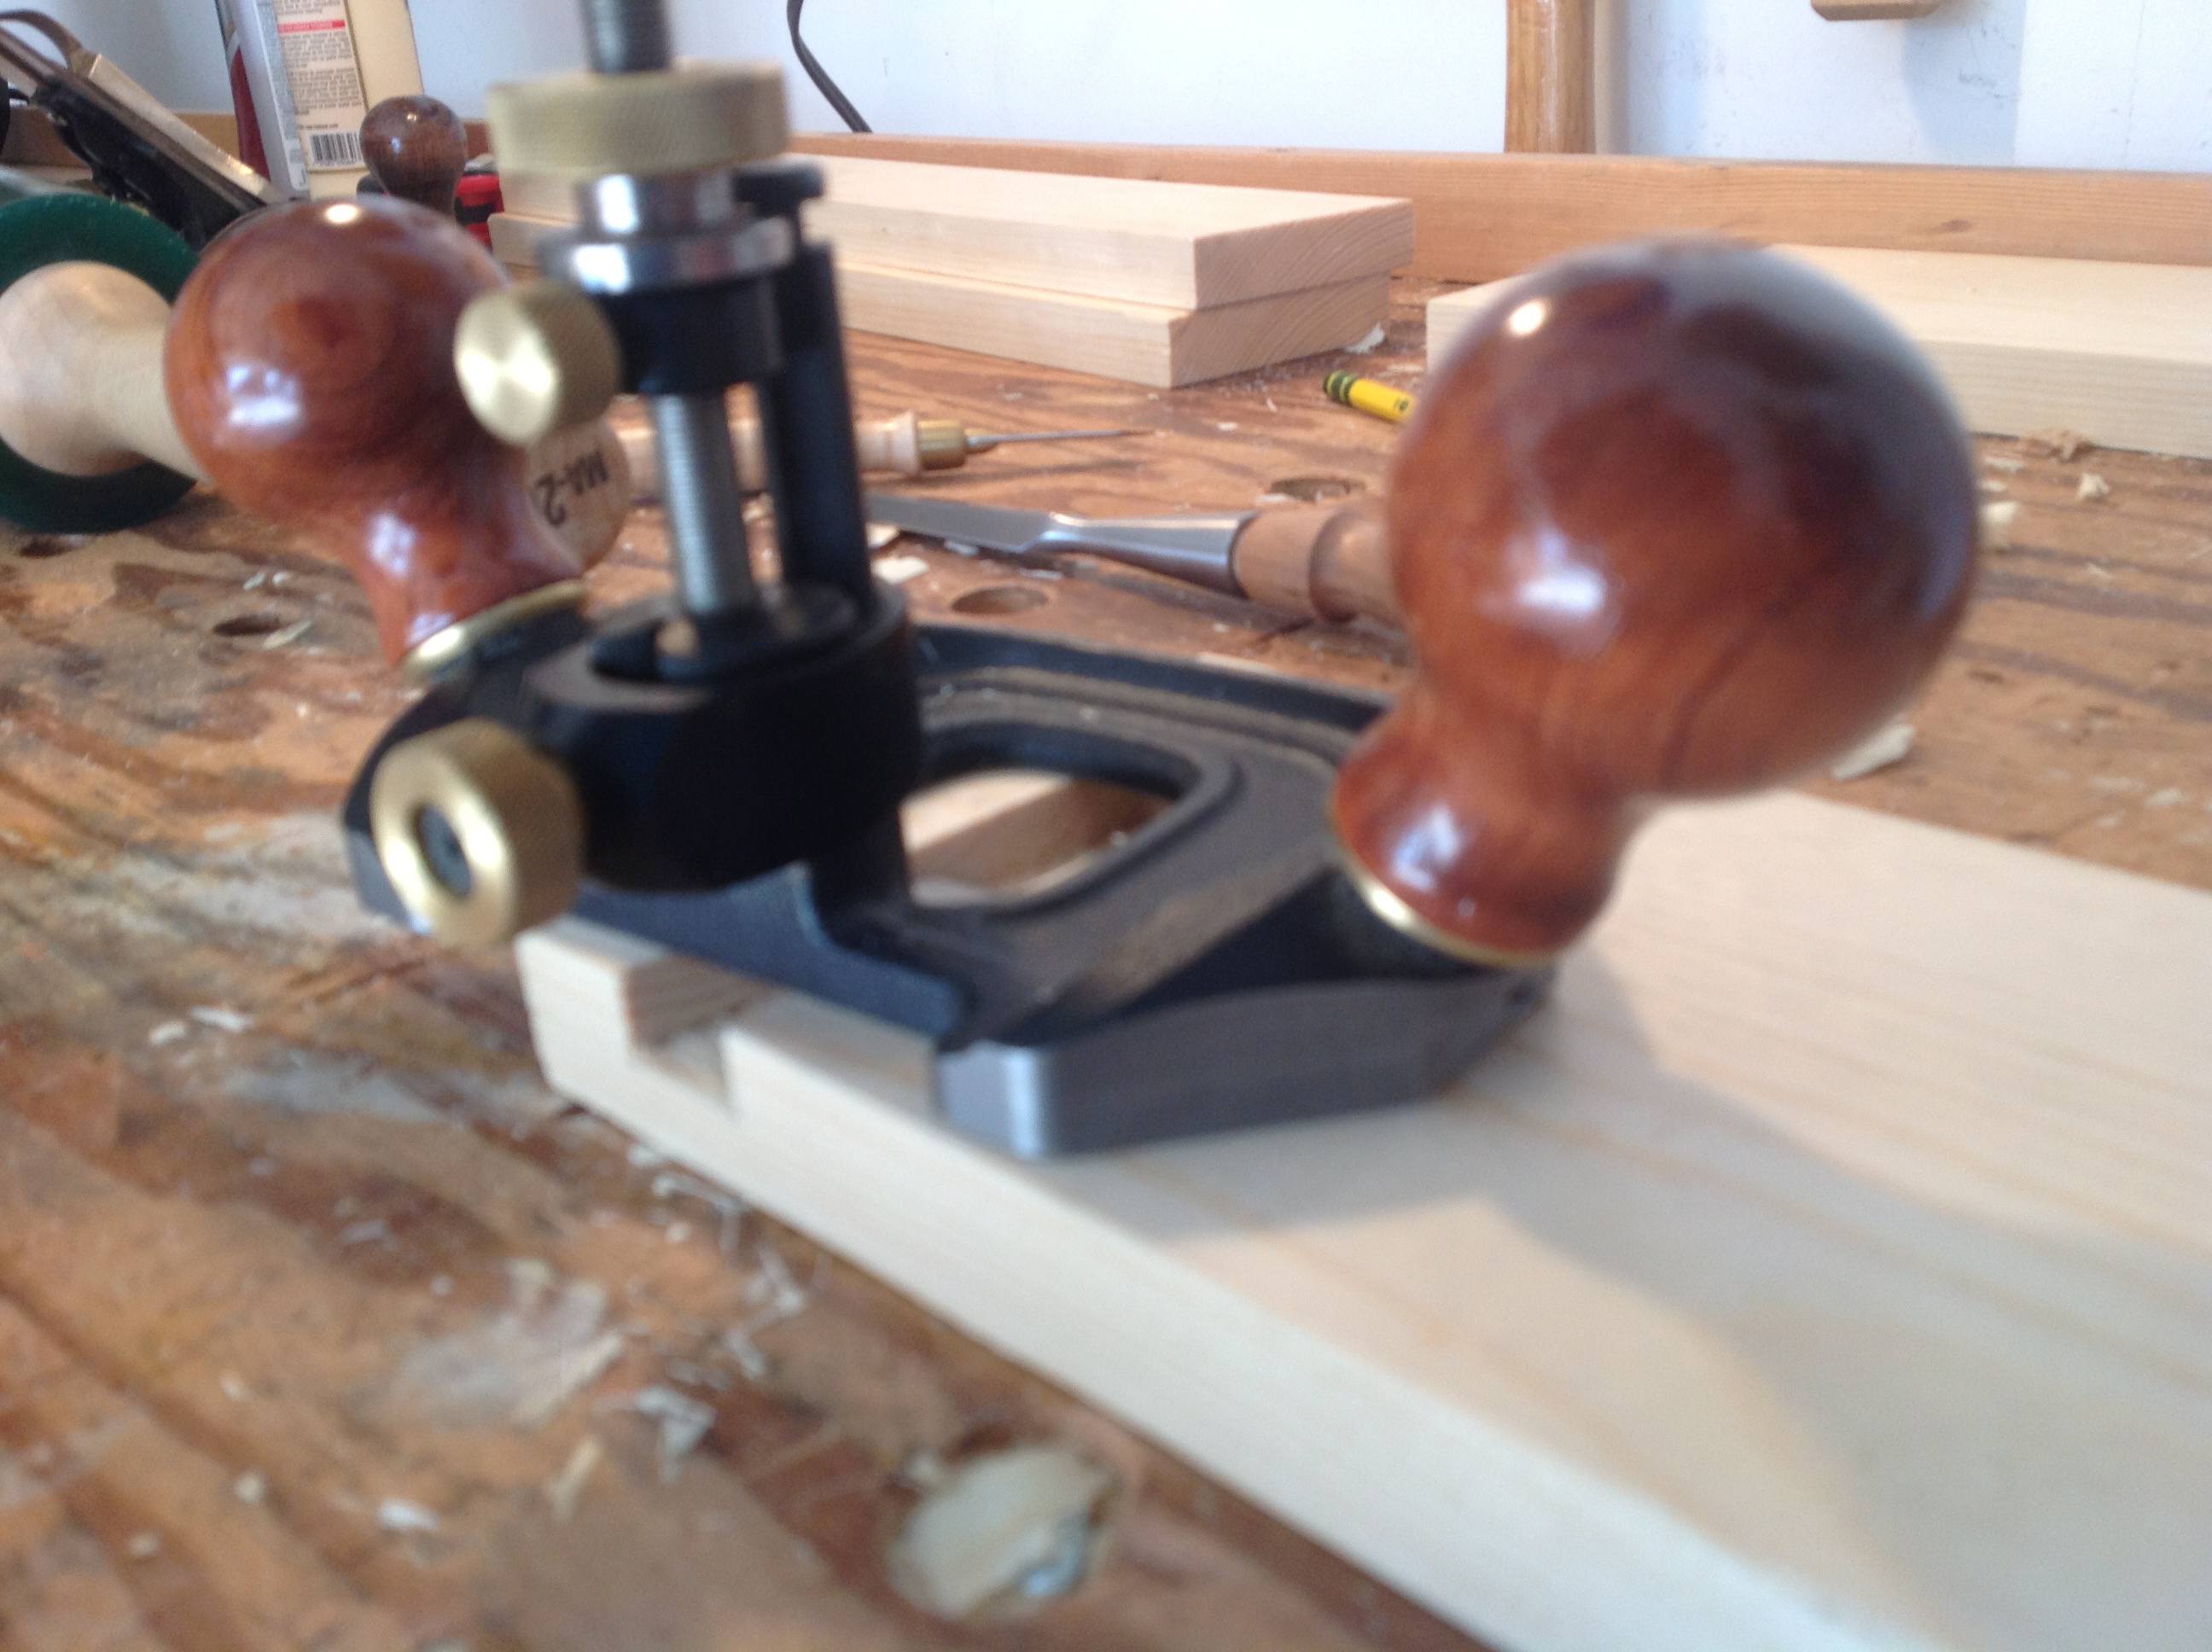
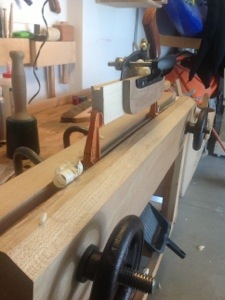 Cutting the grooves for the front panel in each side and in the top and bottom rails required a little engineering. Several months ago I added a guide to my Veritas plow plane. It really helped me guide the plane and improved performance. The only downside is that it is rather large. When I have a narrow board to groove, I am unable to use my bench dogs for support or my Moxon vise since the guide will not clear the vise. My solution which I have shown once before is to insert a bar clamp in a vise and use it to clamp the work. This provides the clearance I need.
Once the grooves are cut I begin making tenons on the rails that will slide into the grooves. I use a mortise gage to mark the end pieces and then use my dovetail saw to cut them out. The nice thing about having a two pin gage is that it is very easy to lay out mortises on several pieces once you have it set up. I cleaned up with a chisel and rails are complete.

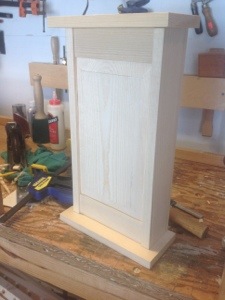
The front panel for the piece is designed as a raised panel. This is all done with a hand plane, in this instance I used a Stanley number 3. Marking off the edges of the panel 3/8″ and the panel at 1″. I placed the panel in my vise and working the ends first began shaving off the material. The picture is very poor so let me describe the process. I angle the plane and begin shaving material from the edge of the board working back and forth until I have cut the reached the lines, I then repeat on the other edge and the sides. This order is important since It allows you to plane off any spelching when you plane the end grain.
Weather Station
A few months ago I began watching videos from Paul Seller’s Masterclass. The first project is a wall clock. Now that I have completed the tool chest and saw till I wanted to to work through some of these basic classes and continue to improve my hand skills. Looking at the project I decided that turning it into a weather station was of more use to me and the face looked more balanced. Going to Lee Valley hardware I was able to pick up three instruments, barometer, thermometer, and humidity.
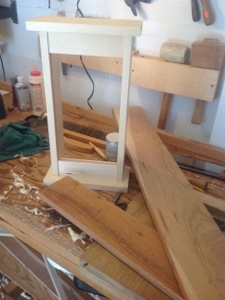
Considering all of the possible woods for the project I decided to stick with pine because it was easy to access and it followed along with the lessons. If I decide at a later time to use different wood I can pop out the gages and change. I picked up a couple of 1″ x”8″ an cut them to size. Practicing my chisel skills I cut stopped dados in the top and bottom pieces of the weather station. This involved creating a knife wall and then chiseling out the waster from the inside wall. i then used the side that will fit into the slot to mark the other edge and repeated.


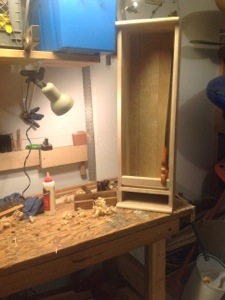
Once I had chiseled out the waste from both sides I grabbed my router plane and cleaned up the bottoms. This allowed me to ensure that the bottom was clean and at the same depth on each side, top and bottom. The dados are slightly shorter than the sides which will allow me to make a step and hopefully leave a clean joint.
Notice in the photo of the assembled top, bottom and sides that the sides hang off the back by 3/8″ this is the amount that I will notch from the front to get a nice fit. In order to get this step correct I install the sides and using clamps force them into place. A marking knife its then used to mark the sides. I cut the notch with a saw and chisel and reinserted the sides. With enough time I will hopefully get this completed next week.


Saw Till French Cleats
 After searching for my stud finder for a couple of days “literally” I located where I want to hang my saw till and found some scrap poplar to make the cleats. It’s roughly 1″ x 6″ x 24″ but I’m not measuring. I grabbed a straight edge and pencil and marked off the position of the saw cut. the angle across the end is 45 degrees.
Next I used my marking knife to define the lines. looking around the garage I thought that the best way to make this cut may be using my table saw with the blade angled. Realizing that it still has a dado blade installed, pushed up against the wall and has a whole pile of “crafty stuff” piled around it, perhaps I could do this with a hand saw.
The term “crafty stuff” refers to the many projects that my wife gets involved in that is above my comprehension. There are some rules about “crafty stuff” the most important being…If I move it-it will break, if it breaks it will be my fault…..etc. Suffice to say sometimes it is best to leave crafty stuff alone.
I have not used power tools on this project to this point and why start now!

Clamping the wood into my vice I grab my dovetail saw to make an initial cut. My thought is that if I begin with this saw I can get a good start and switch to my handsaw which doesn’t have the back. I progress down the cut switching to my hand saw when the back is touching the wood.
My handsaw is a Disston D8 that I picked up on Ebay about a year ago. It is filed rip at 5 1/2 TPI. I really like this saw and looked for a few months before finding it. The handle fits my hand very well. I sent it to Bob Rozaieski at Logan Cabinet Shoppe to have it sharpened and was amazed at how quickly it saws. Additionally Bob answered many questions and since, I have had him sharpen other saws.
I progressed down the board moving it up in the vice a few times until I reached the last couple of inches. At this point instead of turning the board over and starting from the opposite end, I flipped the saw over and completed the cut. Seemed logical to me and worked, although I haven’t seen anyone else do this. The cut generally followed the line and I only had a few passes with a plane to clean it up. This was quicker than using the table saw! I think it has taken longer to write about it and correct all of the mis-spellings.


Next I grabbed a few screws and attached one side to the wall and the other to the saw till. When the weather stays above fifty I will add a couple of coats of shellac.
The other piece I added was a small divider to keep my saws separated, which is in the back of the till. I just glued it to the two outermost boards of the back to allow for movement. Finally I have all of my tools off the bench and safely stored away and if you notice a couple of empty slots for some different saws!

Saw Till Shelf
The sun is out and the thermometer is hovering near 50 degrees. Opening the garage door the light has flooded into my corner of the garage and I can hear the birds chirping outside. I feel like a prairie dog cautiously lifting its head above the burrow and looking around. Woodworking in natural light is a great improvement and I’m looking forward to a long list of spring projects.
Today before I begin something new, I plan on tackling one of those projects that has lingered long enough. The tool chest is complete and I have cleared my bench of tools, but there remains 5 saws that have cluttered up the top of my cabinets for months. Dusting off the carcass of my saw till I struggle to recall what I have to do to finish it up and make room for new projects.
Glueing together two boards I prepare to make a shelf to divide the saws from a future drawer. Then after planing it square and to the correct thickness, I cut dados across the till sides. First I mark the bottom of each dado with my square and marking knife. Using a chisel; a knife wall is created and I cut the side of the mortise with a saw using the wall as a guide. Placing the shelf in the slot, the marking knife is used to mark the other side and a second knife wall cut. Eventually I use my router plane to complete the slot. This is repeated on the opposite side. Final fitting of the shelf is done with my plane.
I now need to decide on a piece to support the saw handles and hold the saw in place. Shannon Rogers in the Hand Tool School mortised a piece across the front of the till covering the shelf joint. I have decided to go a different route and create a mortise and tennon joint and inserting a cross piece to hold the saws. The crosspiece is cut to size and to add a little change in the till I decide to round over the top. I have one pair of hollows and rounds and this seems to be an ideal time to try them out. The wooden planes make short work of the cross piece and I went ahead and rounded the top and bottom of the till to match. I use Paul Sellers mortising method to cut mortises on each side

After test fitting the cross piece and mortises I glued up the case using hide glue. All went together well and I now have most of the components for the saw till. Remaining on the project is to install the back, make french cleats to hang the till onto the wall and come up with some means to separate the saw blades on the back of the till. Another day and I should be done. I am very excited to get my saws off of the bench and move onto other projects. Now if I can just figure out where the wall studs are…………..
Tool Chest Open for Business
 With the drawers in place and sliding freely, I began placing tools into the chest. Top drawer has marking and measuring tools along with my roll of chisels and block planes. The second drawer remains partially empty as I determine what I need at hand. The third holds my specialty planes and blades, router, fillister and rabbit.
I have had them this way for the past couple of weeks and am well satisfied. The chest is a good height and I have access to all that I need. Best of all is the casters that allow me to roll it out of the way or close at hand depending upon my project.
There are still several items to complete: knobs on the other tills, the lock and of course the finish. I intend to put finish on when the weather is consistently warmer and the other items as I get time.
This was a great project and my hand skills have moved forward very rapidly. The first hand cut dovetails are in this project along with many hours of planed boards.My confidence has soared and I have a finished project that is proving very useful.
Stanley # 3 Shows Up

The runners are glued into the chest. Clamping the drawers into my vice I reached for for my Stanley #4 Plane to begin fitting them. After a couple of passes across the dovetail pins I realized that the plane in my hand was in fact a #3. I acquired this plane several months ago and after flattening the sole and sharpening the blade it sat in my tool box.
As the plane glides across the ends and sides, I test its weight and balance. The tote fits securely in my hand and as I begin and end a pass it lifts with my hands. The balance is extraordinary and I appreciate the slightly smaller size on the ends of the drawers.
Admittedly I enjoy cleaning and working with different tools and I am fortunate to have a number of planes to use. Although differences can be subtle and planes can be used for a range of work, it is enjoyable when you find one that fits a task perfectly.
After finishing and fitting the first drawer I continue to work on the nex t two, until they glide across the runners. I still have to insert plugs in the bottom grooves , but I will do this at a later time.
I expect there to be more movement in the tool chest after I return it to the garage and will have to make some adjustments as the humidity rises in the summer.
