Archive
Shop Stool Mortises Repeat
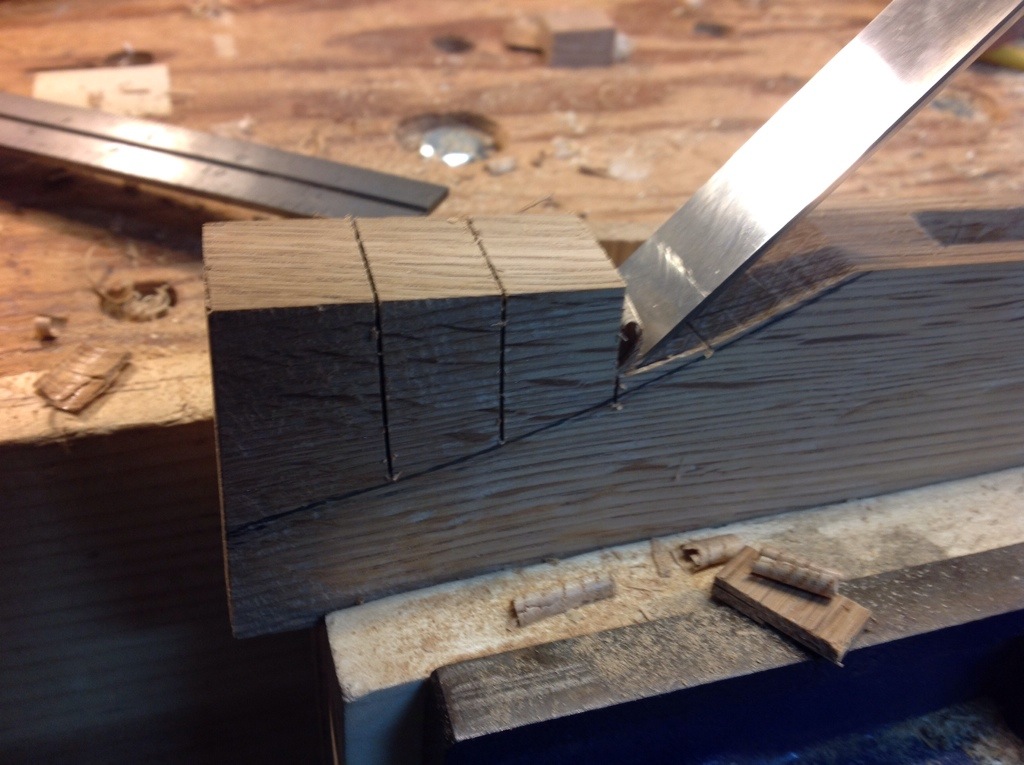
There were many good comments on my blog after the post showing the blow out in the leg while chiseling a mortise. Fortunately this occurred on the first leg, although the last mortise. While studying the problem I came to the realization that I needed to re-think where the mortises were placed.
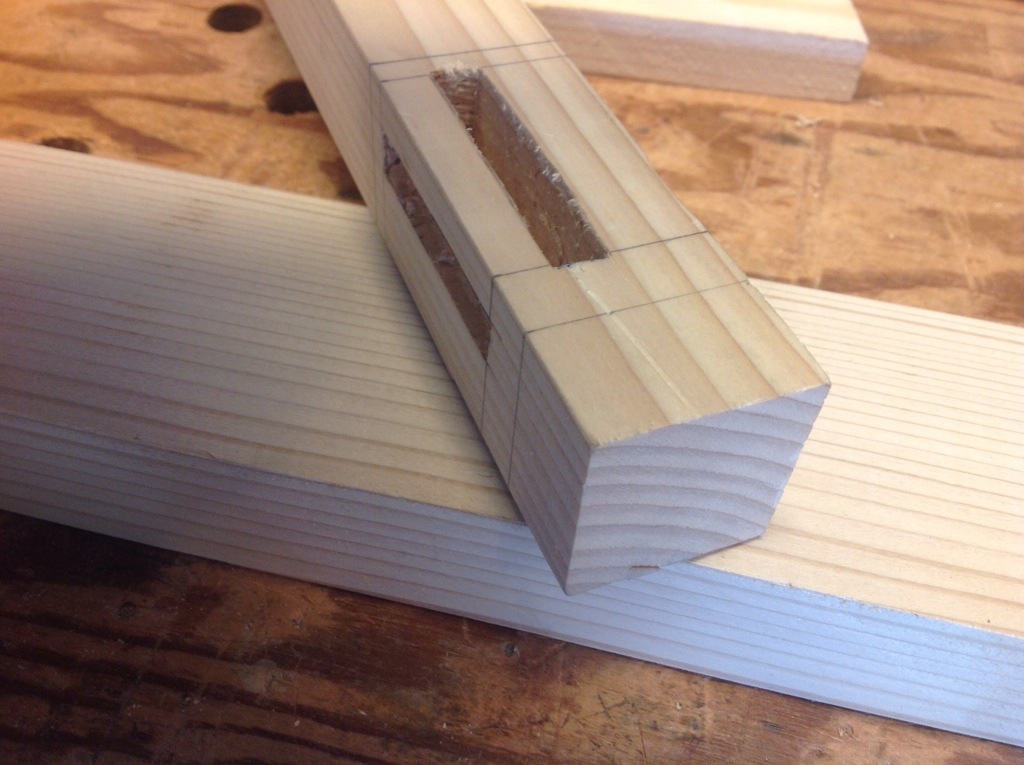
The first picture shows the original mortises. they are placed on the same corner and as such do not allow for a very long tenon. Since this is a shop stool it will be subject to lots of abuse and I don’t think it will last long with such a short tenon. The picture below shows the relocated mortises which has tripled the length of the tenons. Thank goodness for the mistake, I only ended up re-wroking one leg not all four and will have a much stronger stool.

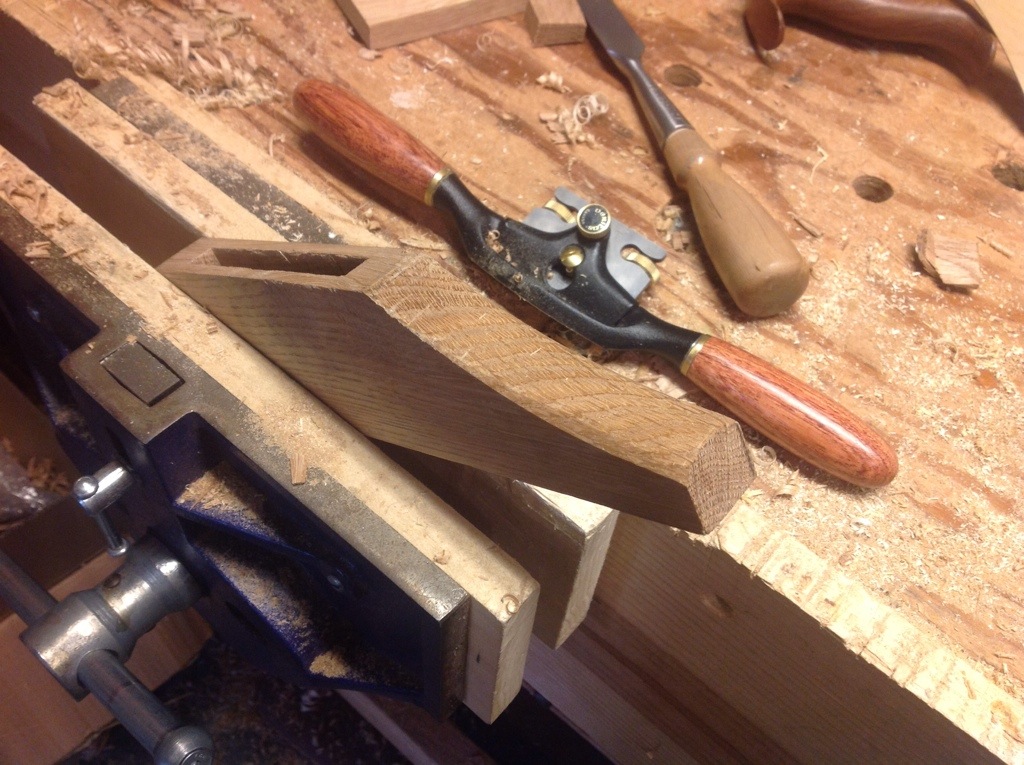
Shop Stool Mortises
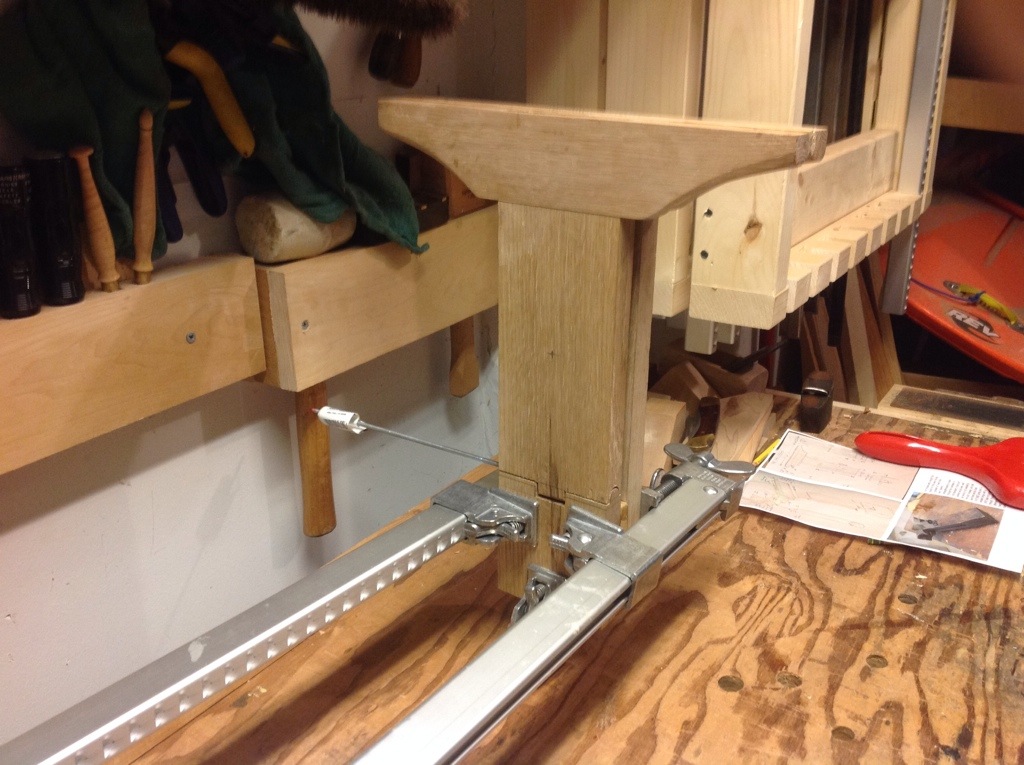
Finally I have the opportunity to make progress on the stool. Taking the time to carefully lay out the angle and mortises, I begin to chop out the joints. There are two jigs that I am using to hold the correct angles shown in the picture.
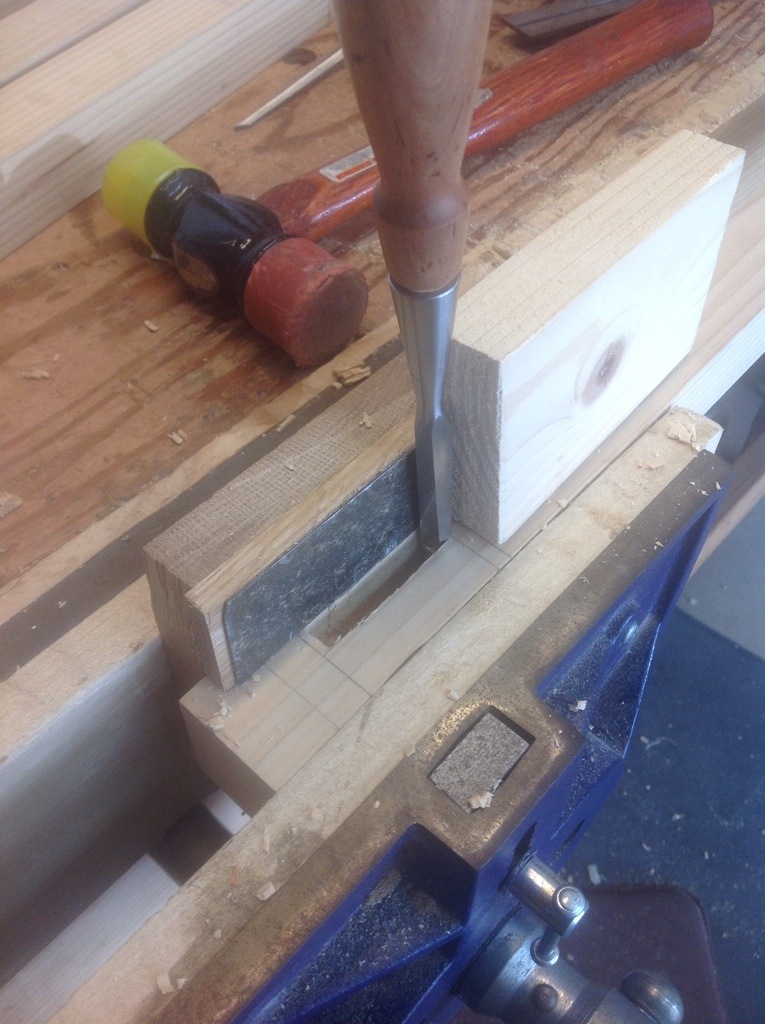
I almost finished the last mortise on the first leg when I heard a crunch and felt the chisel drop. A groan rose into my throat as I thought that I had chiseled through the leg. However the wood split along the grain, something that I can hopefully repair with a little glue and clamps at the end of the day.

Hairspray and Chisels
The chisels that I have used for a few years are socket chisels made by Lie Nielsen. Generally they have performed well and they appear frequently as tools used in the works of others. I have one frustration which is with the number of times the handles come loose from the chisel. It is generally related to humidity and occurs mostly over the winter months when I assume the humidity is at its lowest. After a couple of years I have experimented with methods to keep them together and been successful with the exception of the 3/8″ chisel. It defies my efforts. So today I reached for my secret weapon.. My daughters hairspray! In the past I have used my wife’s hairspray. But clearly I had to move to something stronger….
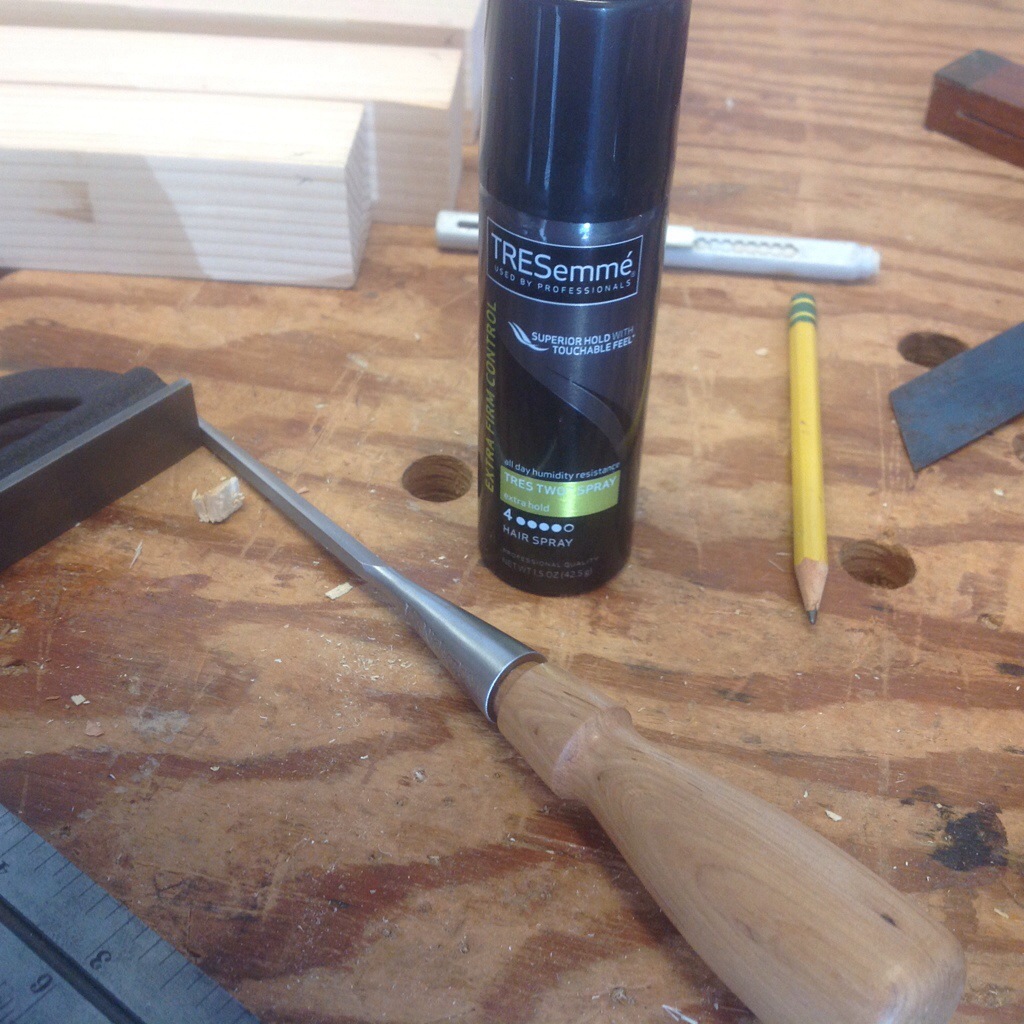
A couple of quick sprays into the socket and I go back to work.
Shop Stool –
Seems that over the last couple of months little has been accomplished, between soccer games, work and a large increase in my running mileage there has been not enough time left for woodworking. Fortunately soccer is over for the season so I can tackle some of the projects that continue to sit on my bench. First up the shop stool….. Today was dedicated to stock preparation.

Picking up a couple of boards from the local home improvement store I spent a couple of hours milling the boards and cutting to size. I enjoy milling wood by hand, however with the humidity in the high 70’s I opted for the power tools and spent as little time as possible on this part of the project.
I finished up the day by hand planing all of the edges. There’s nothing like the sound and feel of a blade slicing through wood. This week I hope to find enough time to lay out all of the joints and determine the leg angles, leaving the chopping of mortises for next weekend.
I want the stool to become an invitation for visitors to stop by and spend a little time learning about hand tools. Oh and I was just reminded that summer league soccer starts mid week…..
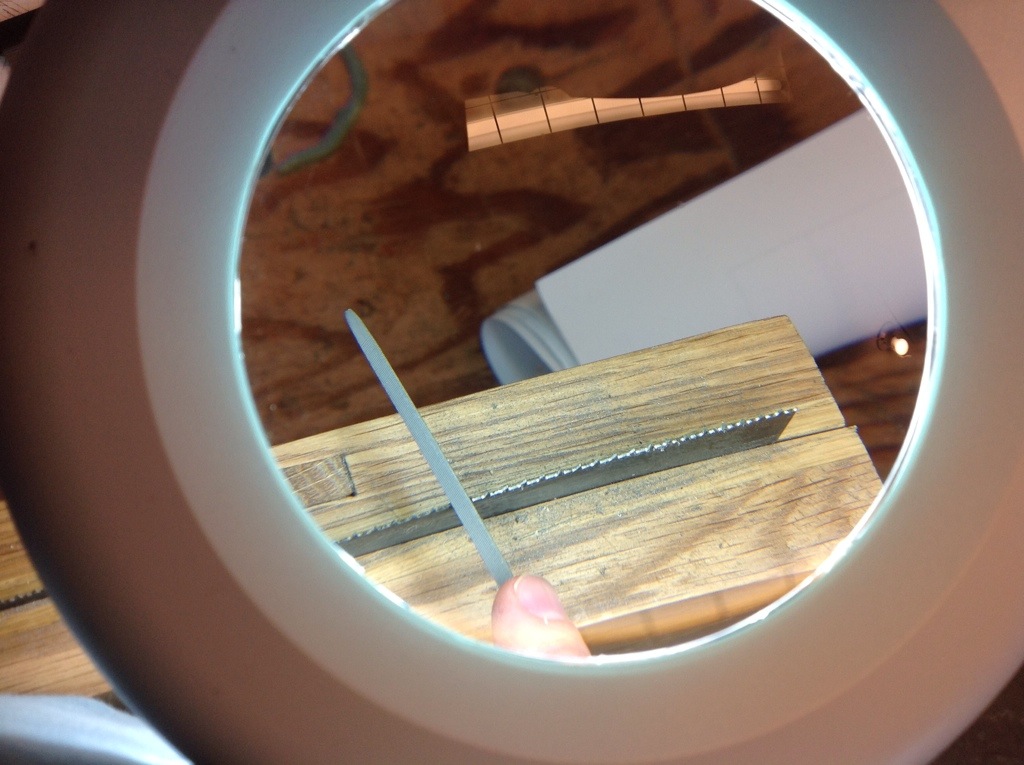
Magnifying light
While sharpening a saw several days ago I found myself struggling to place the file correctly and managed to skip some teeth and resharpen others. Not sure if it is because of incorrect lighting or need to upgrade my glasses prescription. Looking around the local stores I found some magnifying lights that looked promising, what did not appeal to me was the price tag, generally they ranged from 80 to $150.
Sitting in front of my computer I found the same light at Lee Valley for considerably less, they even sold a bushing so I could mount it right to my bench. Sharpening my next saw took considerably less time with much better results.

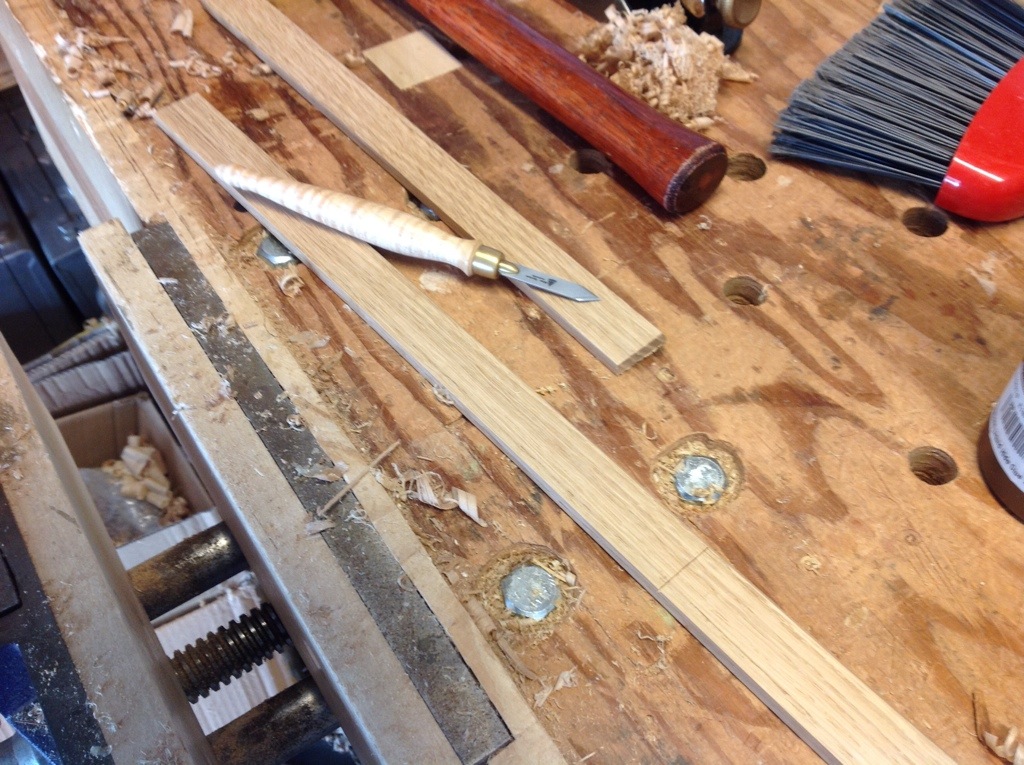
Split Nut Driver
A couple of months ago I picked up a couple of saws from Hackney Tools. These were two R. Groves saws made in the late 1700s to early 1800s.
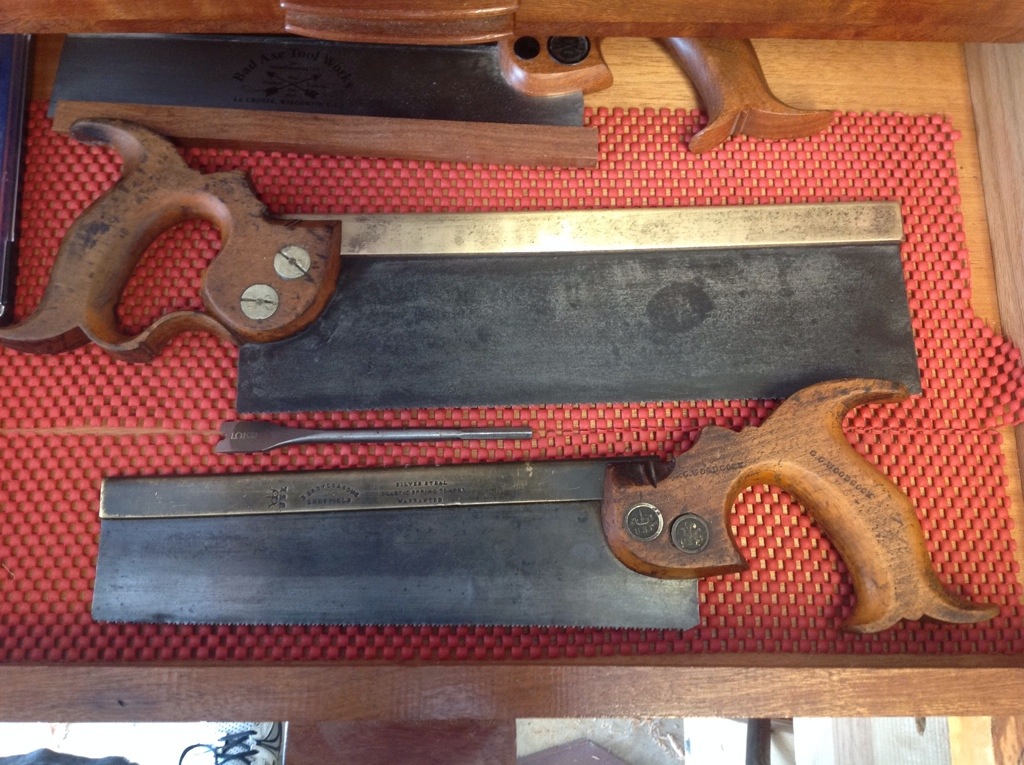
Through others posts I knew these saws had a good reputation, but until I had them in hand no idea of the wonderful balance and heft of the saws. The weight from the brass back is exactly correct to enable the saw to glide through the wood. Needing to tighten the handles on one of the saws I soon realized that they were held together by traditional split nuts.

A little research and it became clear that several people make split nut drivers. however it was also clear that making your own would not be difficult. Digging through my boxes of “soon to be useful” material,
I stumbled upon several old drill bits that were wide enough to make the driver. Several minutes with a file and there it is….a split nut driver!
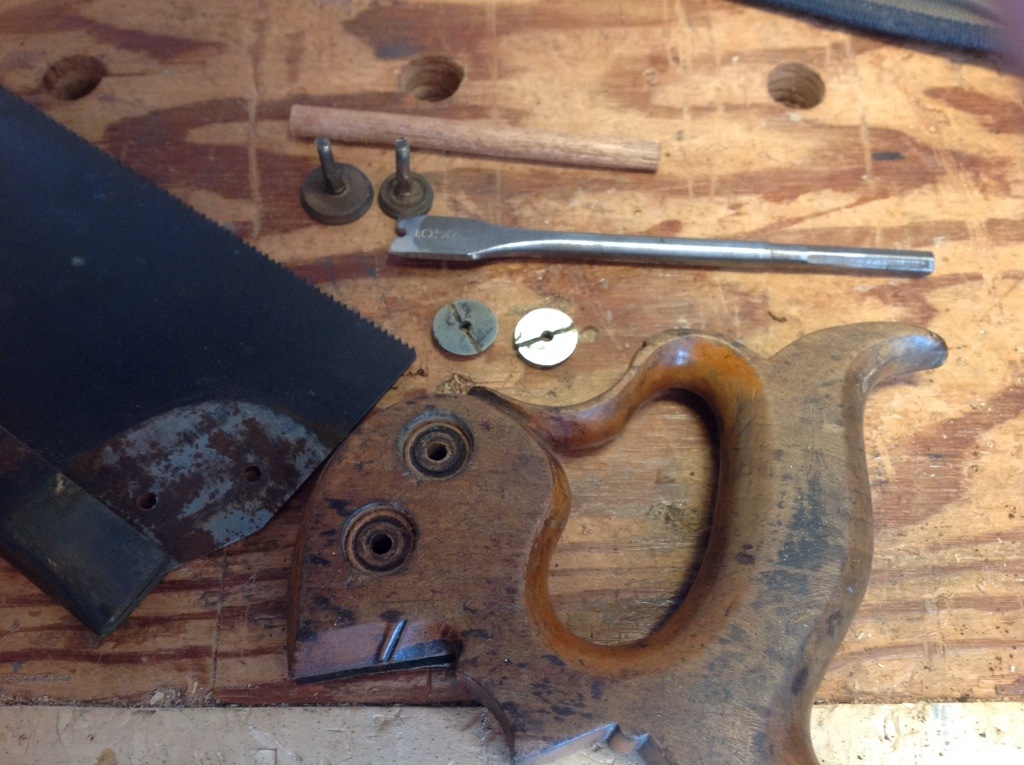
The saw handle came off easily and after some light cleaning it was reattached and is now tight. I’m thinking a handle would go well on the driver but I have yet to figure out how to stop it from spinning in a handle. Thoughts for another day…..
Saw Vise goes to Work
A few hours and the problems with the vise have been corrected, shellac added and it’s off to work.
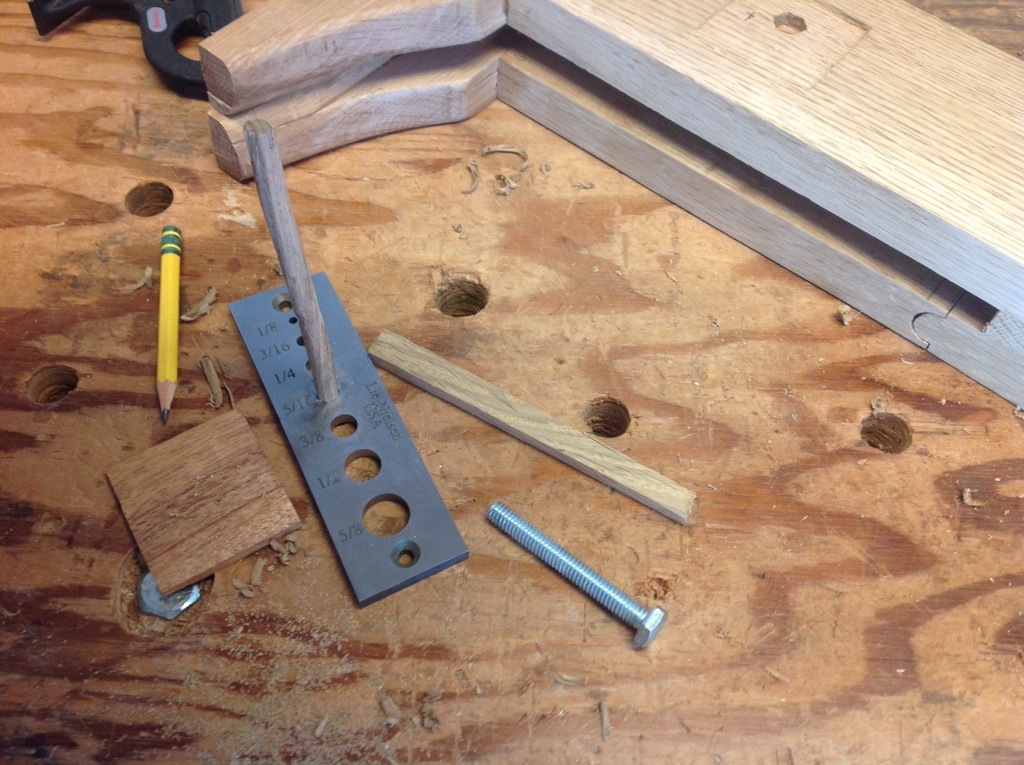
Taking some oak scraps I made plugs to take care of my mis-drilled holes. After the glue dried I pull out my drill press and carefully drilled a hole for the clamping bolt. While things were set up I re-drilled the hole for the hinge pin making it large enough for a 5/16 wooden pin.

Finally I finish sanded the vise and added a couple of coats of shellac and went for a test drive.

Saw Vise Difficulties
Looking down the file I can clearly see each tooth as I work to sharpen. The height is correct. However, I have come across a couple of problems that are probably related.

I did a poor job drilling the hole for the bolt that tightens the clamp. The cant does not allow the full force of the nut to tighten the vise. As I sharpened the saw slipped slightly. I will plug the bolt hole and re-drill to fix this and consider a small piece of Leather the hold the saw. The second item is the hinge is not as tight as I would like. It does not affect the clamp but bothers me. I may replug that hole and redrill as well. Seems that a little more patience in the drilling department is in order.

Saw Vise Glue Up
If you don’t plan wisely you end up with missed opportunities. Today was supposed to involve a ride to visit friends and attend graduation parties. Since everyone in the house with the exception of me is under the weather with a cold, it seemed best to stay close to home. Thus a free day that should have involved much woodworking. Except each step I needed to complete involved a glue up and the inevitable wait while things dry. By the end of the day I made and installed vise inserts that hold the saw, then glued the two pieces together. Tomorrow I hope to grab a few minutes and square everything up, install the hardware and put a touch of finish on the vise.
By Monday I will be filing saws and preparing for my next project. Which will be the stool I began over the winter and set aside when the temperatures plummeted.
Saw vise curves
Taking a few minutes to add artistic flair to the saw vise. I cut curves onto each end of the cross piece. I did this using a saw and chisel finishing up with a spokeshave. A couple of people have asked me why I do it this way rather than use a coping or bow saw. The answer…I enjoy it. I don’t think it is any slower and it is fun popping out the wood with the chisel and attempting to follow the curve before finishing with a spokeshave.
All done with the curves, not bad for an hour. Perhaps I can finish up this weekend amongst a soccer tournament, 11 mile run, yard work, planting potatoes and all the other things that need to be done.