Archive
Weather Station Finishing Touches
 A few finishing touches and the weather station should be complete. First is to cut the holes for the instruments. Using a compass I drew three circles on the panels and then using my hand drill put a hole in each one to allow me to pass the blade from my saw. I then cut each circle out. I left the holes rough since they will be covered by the instruments.
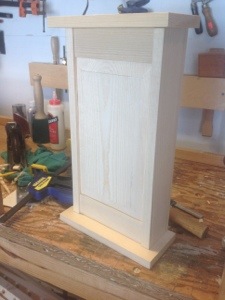
The top and bottom have curved edges, These are done with a smoothing plane and are very quick. A little sandpaper to smooth the edges and they are complete. A few hours after glue up and clamping and the project is all but done. A nice little project with many lessons. This like my last two projects will have to wait for warmer weather so that i can put a finish on them. Now what’s next on the list????
Weather Station Decisions
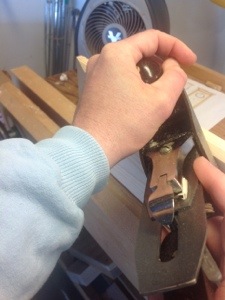
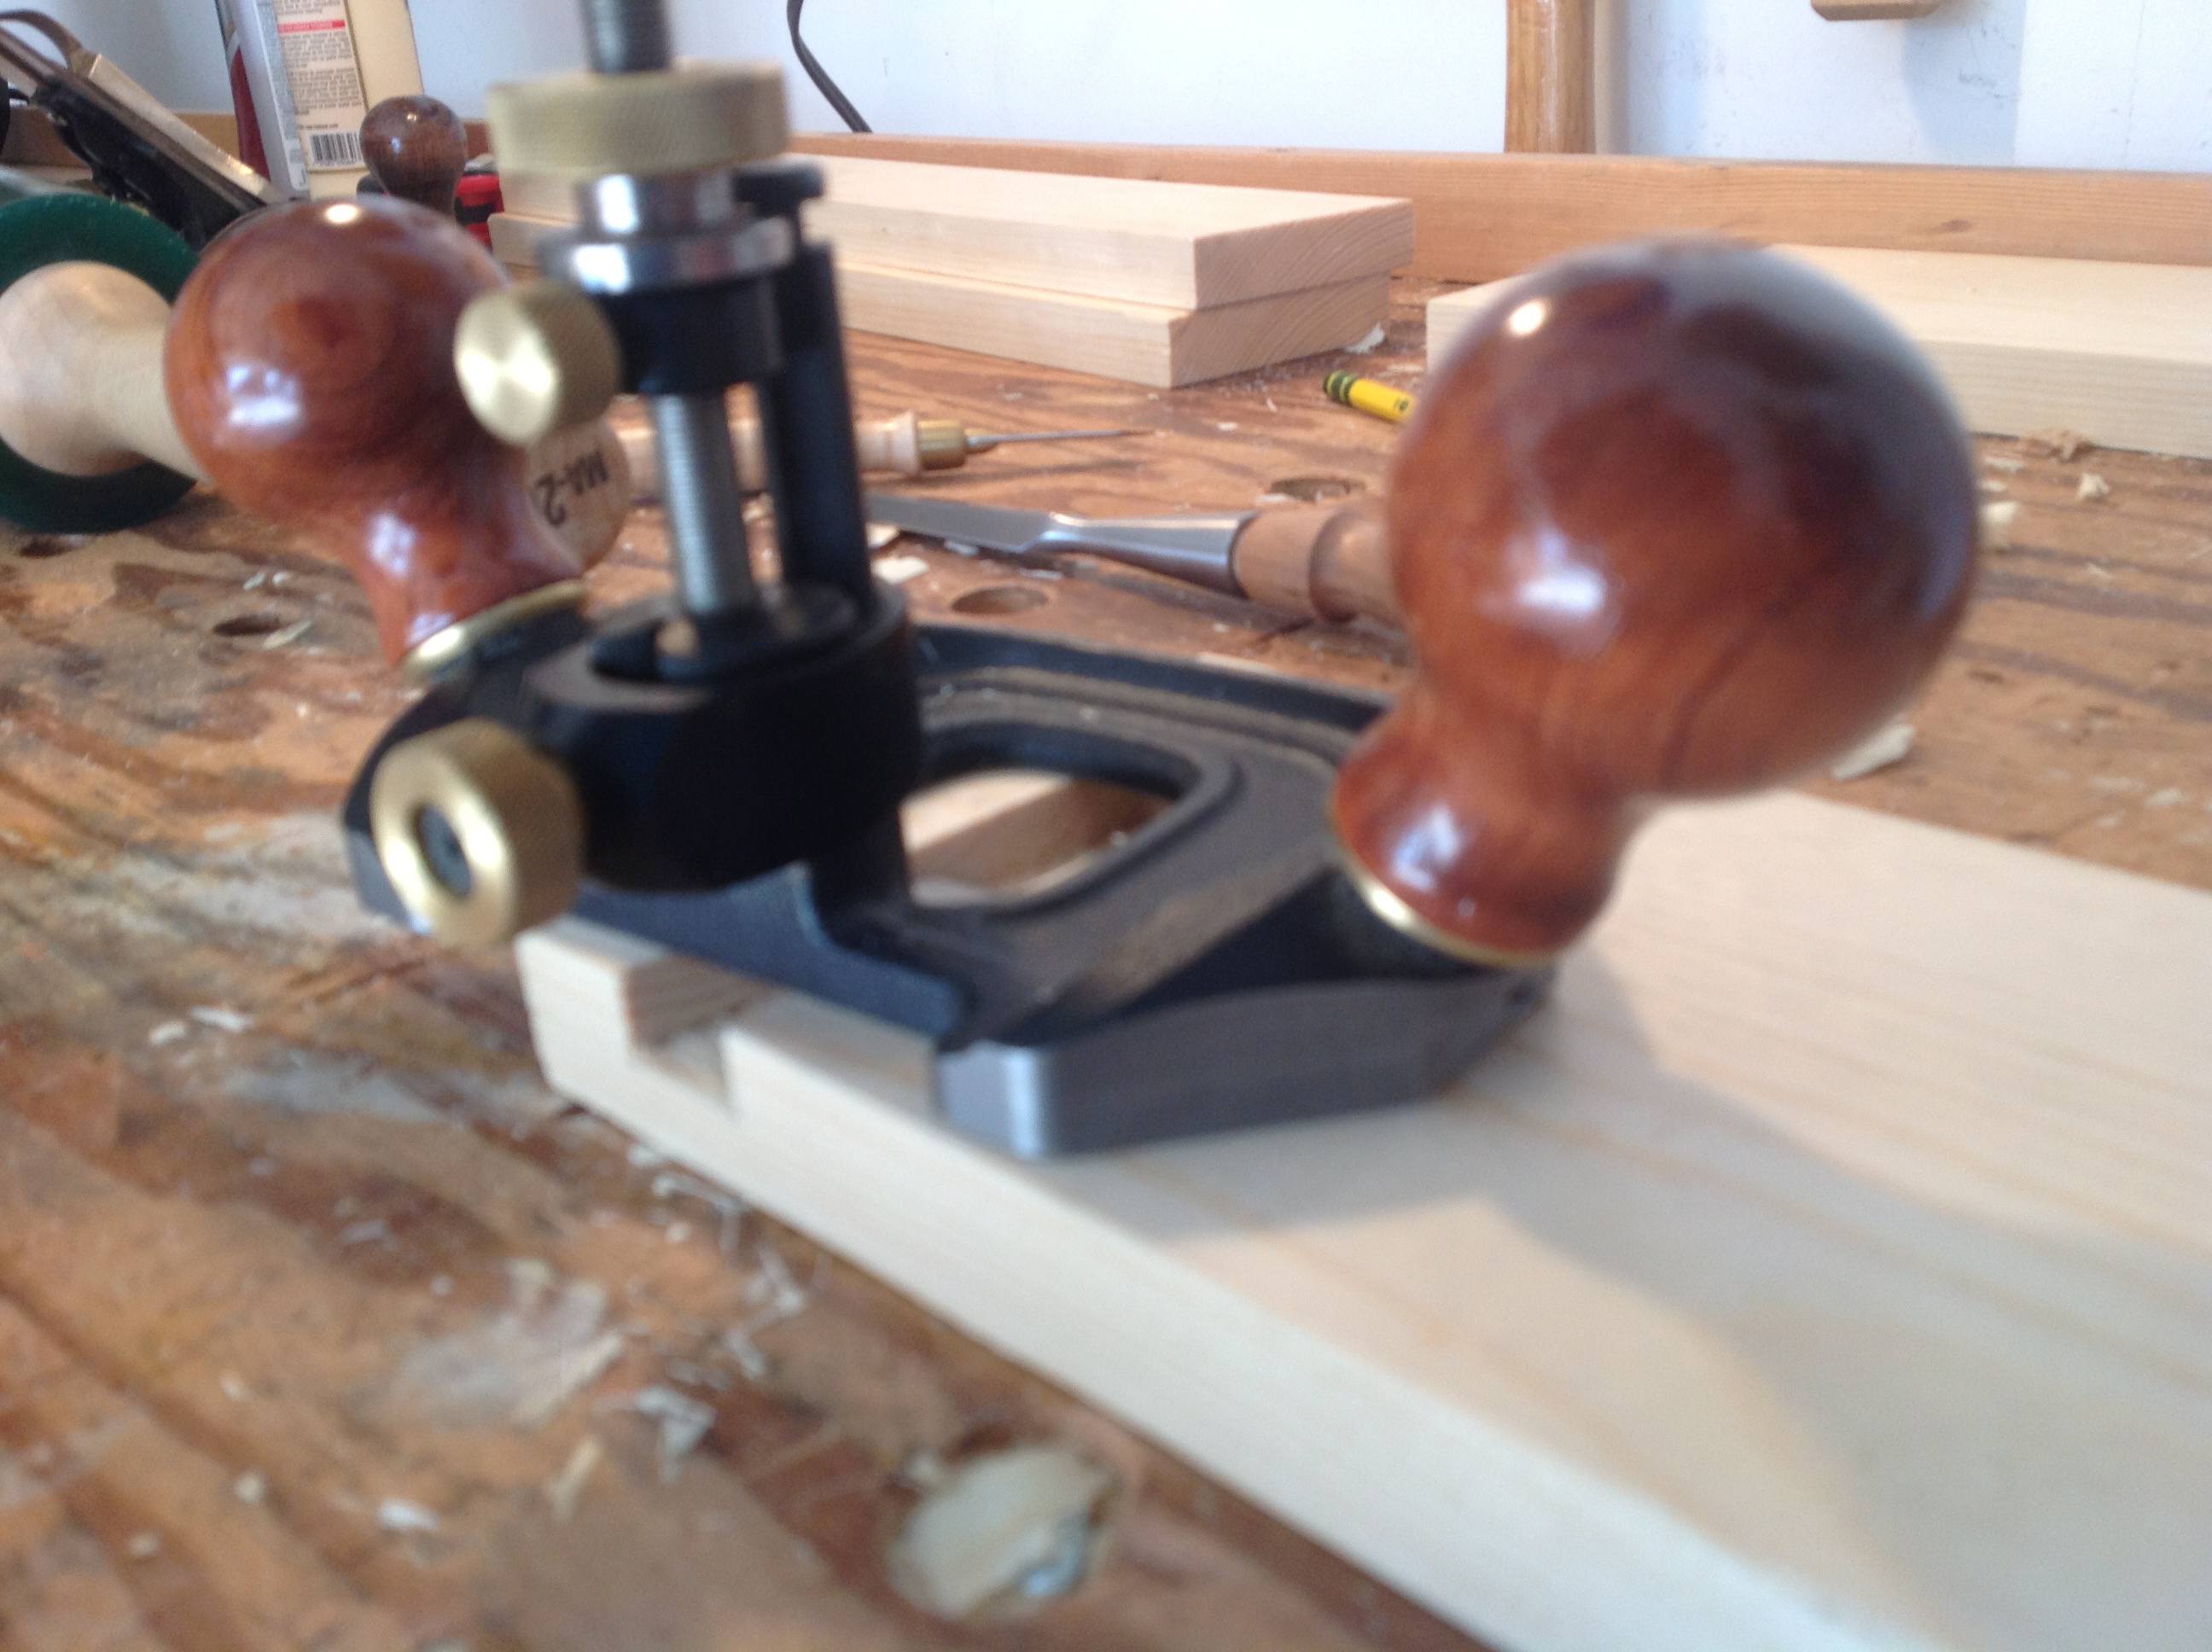
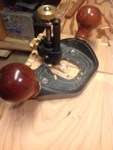
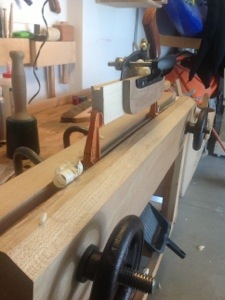 Cutting the grooves for the front panel in each side and in the top and bottom rails required a little engineering. Several months ago I added a guide to my Veritas plow plane. It really helped me guide the plane and improved performance. The only downside is that it is rather large. When I have a narrow board to groove, I am unable to use my bench dogs for support or my Moxon vise since the guide will not clear the vise. My solution which I have shown once before is to insert a bar clamp in a vise and use it to clamp the work. This provides the clearance I need.
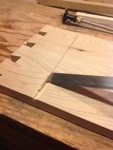
Once the grooves are cut I begin making tenons on the rails that will slide into the grooves. I use a mortise gage to mark the end pieces and then use my dovetail saw to cut them out. The nice thing about having a two pin gage is that it is very easy to lay out mortises on several pieces once you have it set up. I cleaned up with a chisel and rails are complete.

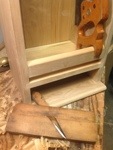
The front panel for the piece is designed as a raised panel. This is all done with a hand plane, in this instance I used a Stanley number 3. Marking off the edges of the panel 3/8″ and the panel at 1″. I placed the panel in my vise and working the ends first began shaving off the material. The picture is very poor so let me describe the process. I angle the plane and begin shaving material from the edge of the board working back and forth until I have cut the reached the lines, I then repeat on the other edge and the sides. This order is important since It allows you to plane off any spelching when you plane the end grain.
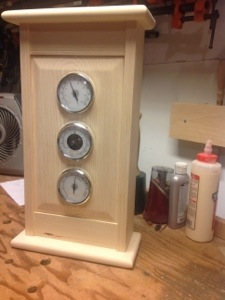
Weather Station
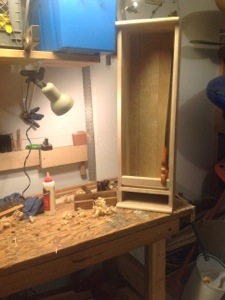
A few months ago I began watching videos from Paul Seller’s Masterclass. The first project is a wall clock. Now that I have completed the tool chest and saw till I wanted to to work through some of these basic classes and continue to improve my hand skills. Looking at the project I decided that turning it into a weather station was of more use to me and the face looked more balanced. Going to Lee Valley hardware I was able to pick up three instruments, barometer, thermometer, and humidity.
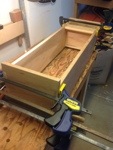
Considering all of the possible woods for the project I decided to stick with pine because it was easy to access and it followed along with the lessons. If I decide at a later time to use different wood I can pop out the gages and change. I picked up a couple of 1″ x”8″ an cut them to size. Practicing my chisel skills I cut stopped dados in the top and bottom pieces of the weather station. This involved creating a knife wall and then chiseling out the waster from the inside wall. i then used the side that will fit into the slot to mark the other edge and repeated.


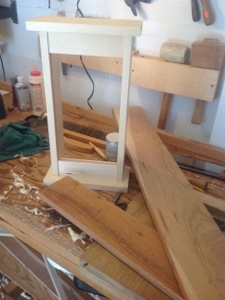
Once I had chiseled out the waste from both sides I grabbed my router plane and cleaned up the bottoms. This allowed me to ensure that the bottom was clean and at the same depth on each side, top and bottom. The dados are slightly shorter than the sides which will allow me to make a step and hopefully leave a clean joint.
Notice in the photo of the assembled top, bottom and sides that the sides hang off the back by 3/8″ this is the amount that I will notch from the front to get a nice fit. In order to get this step correct I install the sides and using clamps force them into place. A marking knife its then used to mark the sides. I cut the notch with a saw and chisel and reinserted the sides. With enough time I will hopefully get this completed next week.


Saw Till French Cleats
 After searching for my stud finder for a couple of days “literally” I located where I want to hang my saw till and found some scrap poplar to make the cleats. It’s roughly 1″ x 6″ x 24″ but I’m not measuring. I grabbed a straight edge and pencil and marked off the position of the saw cut. the angle across the end is 45 degrees.
Next I used my marking knife to define the lines. looking around the garage I thought that the best way to make this cut may be using my table saw with the blade angled. Realizing that it still has a dado blade installed, pushed up against the wall and has a whole pile of “crafty stuff” piled around it, perhaps I could do this with a hand saw.
The term “crafty stuff” refers to the many projects that my wife gets involved in that is above my comprehension. There are some rules about “crafty stuff” the most important being…If I move it-it will break, if it breaks it will be my fault…..etc. Suffice to say sometimes it is best to leave crafty stuff alone.
I have not used power tools on this project to this point and why start now!

Clamping the wood into my vice I grab my dovetail saw to make an initial cut. My thought is that if I begin with this saw I can get a good start and switch to my handsaw which doesn’t have the back. I progress down the cut switching to my hand saw when the back is touching the wood.
My handsaw is a Disston D8 that I picked up on Ebay about a year ago. It is filed rip at 5 1/2 TPI. I really like this saw and looked for a few months before finding it. The handle fits my hand very well. I sent it to Bob Rozaieski at Logan Cabinet Shoppe to have it sharpened and was amazed at how quickly it saws. Additionally Bob answered many questions and since, I have had him sharpen other saws.
I progressed down the board moving it up in the vice a few times until I reached the last couple of inches. At this point instead of turning the board over and starting from the opposite end, I flipped the saw over and completed the cut. Seemed logical to me and worked, although I haven’t seen anyone else do this. The cut generally followed the line and I only had a few passes with a plane to clean it up. This was quicker than using the table saw! I think it has taken longer to write about it and correct all of the mis-spellings.


Next I grabbed a few screws and attached one side to the wall and the other to the saw till. When the weather stays above fifty I will add a couple of coats of shellac.
The other piece I added was a small divider to keep my saws separated, which is in the back of the till. I just glued it to the two outermost boards of the back to allow for movement. Finally I have all of my tools off the bench and safely stored away and if you notice a couple of empty slots for some different saws!

Saw Till Shelf
The sun is out and the thermometer is hovering near 50 degrees. Opening the garage door the light has flooded into my corner of the garage and I can hear the birds chirping outside. I feel like a prairie dog cautiously lifting its head above the burrow and looking around. Woodworking in natural light is a great improvement and I’m looking forward to a long list of spring projects.
Today before I begin something new, I plan on tackling one of those projects that has lingered long enough. The tool chest is complete and I have cleared my bench of tools, but there remains 5 saws that have cluttered up the top of my cabinets for months. Dusting off the carcass of my saw till I struggle to recall what I have to do to finish it up and make room for new projects.
Glueing together two boards I prepare to make a shelf to divide the saws from a future drawer. Then after planing it square and to the correct thickness, I cut dados across the till sides. First I mark the bottom of each dado with my square and marking knife. Using a chisel; a knife wall is created and I cut the side of the mortise with a saw using the wall as a guide. Placing the shelf in the slot, the marking knife is used to mark the other side and a second knife wall cut. Eventually I use my router plane to complete the slot. This is repeated on the opposite side. Final fitting of the shelf is done with my plane.
I now need to decide on a piece to support the saw handles and hold the saw in place. Shannon Rogers in the Hand Tool School mortised a piece across the front of the till covering the shelf joint. I have decided to go a different route and create a mortise and tennon joint and inserting a cross piece to hold the saws. The crosspiece is cut to size and to add a little change in the till I decide to round over the top. I have one pair of hollows and rounds and this seems to be an ideal time to try them out. The wooden planes make short work of the cross piece and I went ahead and rounded the top and bottom of the till to match. I use Paul Sellers mortising method to cut mortises on each side

After test fitting the cross piece and mortises I glued up the case using hide glue. All went together well and I now have most of the components for the saw till. Remaining on the project is to install the back, make french cleats to hang the till onto the wall and come up with some means to separate the saw blades on the back of the till. Another day and I should be done. I am very excited to get my saws off of the bench and move onto other projects. Now if I can just figure out where the wall studs are…………..
Tool Chest Open for Business
 With the drawers in place and sliding freely, I began placing tools into the chest. Top drawer has marking and measuring tools along with my roll of chisels and block planes. The second drawer remains partially empty as I determine what I need at hand. The third holds my specialty planes and blades, router, fillister and rabbit.
I have had them this way for the past couple of weeks and am well satisfied. The chest is a good height and I have access to all that I need. Best of all is the casters that allow me to roll it out of the way or close at hand depending upon my project.
There are still several items to complete: knobs on the other tills, the lock and of course the finish. I intend to put finish on when the weather is consistently warmer and the other items as I get time.
This was a great project and my hand skills have moved forward very rapidly. The first hand cut dovetails are in this project along with many hours of planed boards.My confidence has soared and I have a finished project that is proving very useful.
Stanley # 3 Shows Up

The runners are glued into the chest. Clamping the drawers into my vice I reached for for my Stanley #4 Plane to begin fitting them. After a couple of passes across the dovetail pins I realized that the plane in my hand was in fact a #3. I acquired this plane several months ago and after flattening the sole and sharpening the blade it sat in my tool box.
As the plane glides across the ends and sides, I test its weight and balance. The tote fits securely in my hand and as I begin and end a pass it lifts with my hands. The balance is extraordinary and I appreciate the slightly smaller size on the ends of the drawers.
Admittedly I enjoy cleaning and working with different tools and I am fortunate to have a number of planes to use. Although differences can be subtle and planes can be used for a range of work, it is enjoyable when you find one that fits a task perfectly.
After finishing and fitting the first drawer I continue to work on the nex t two, until they glide across the runners. I still have to insert plugs in the bottom grooves , but I will do this at a later time.
I expect there to be more movement in the tool chest after I return it to the garage and will have to make some adjustments as the humidity rises in the summer.
Tool Chest Glue Up
 Finally all of the parts are made and I can begin assembling and gluing the interior of the chest.I don’t think the garage has been over 25 degrees for the past several weeks so there is little chance of glue being efffective. Therefore I moved the chest inside the house for a couple of days to allow it to warm and the lumber to move if it desires.
The first step is installing the saw till. You can find details of how I assembled this on a prior blog. I cut four pieces of oak that will fit on each side of the till which will slide in between the pieces. I attached these to the side of the chest using hide glue and screws. Drilling small holes like these really makes my Miller Falls drill shine.

I did have a minor problem when I sheared the drill bit attached to the countersink. The hand drill certainly did not provide enough force to cause this problem, and yes at only a couple of it’s a financial disaster just frustrating. I’ll have to start cruising the tool shows for some old countersinks that are of a better quality (anyone out there have success with other types or brands?)

In the back corner of the chest I installed an area to place the few moulding planes that I own. This was made fr two pieces of wood dovetailed together. Then I installed pieces of oak on each side of the ends to hold it in place.
I installed two more supports in the corners for the drawer runners. These were also glued and screwed into place. Next came the bottom drawer runner which rests on two of the drawer supports. I debated back and forth on how to attach this runner and the two above. I even got great insight from John at woodworksbyjohn.blogspot.com. If you haven’t been to his blog yet give it a try.
Based upon the thickness of the runners I decided that gluing them in would be best. A little hide glue and gentle persuasion with a rubber hammer and they fit into place. I set the drawers in temporarily, they will have to be planed to fit.

Divide and Conquer
After writing my last blog, I wandered out into the garage and began thinking about how to best utilize the

drawer space. It did not take long to begin placing planes and blades into the deepest of the drawers. The drawers are approximately 30″ in length and 8 inches wide. They are longest at the top and shorten by 1/4″ each step down. This allows space for the runners. (this will become clearer when I get the runners in place and get some photos onto the blog).
The first tools that need a new home are my rabbit plane, plow plane and router plane. I have quite a number of blades with these planes and wish to keep them together and close at hand. They are too tall to fit into the top two drawers, so I tried them in the third. They fit nicely but I quickly realized that adding dividers to this drawer would help keep the tools organized and the various blades with its tool. This is why I waited to glue up the drawers allowing me the option of making changes.

Looking around the garage I found pieces of 1/2″ poplar left over from the drawer sides. I set up my planer and planed them down to 1/4″. The plow plane has the most components so I decided to place a divider for each plane and make an area to store the plow plane accessories.
I disassembled the drawers and using my 1/4″ dado blade placed slots in in of the drawer sides. I reassembled the drawers dropped the dividers in place and ‘whammo’ nicely divided drawers.

Small Light – Big Help
When the weather is nice outside I open the door to my garage and soak in the natural light. During the winter I have to keep the doors closed to keep what little heat is available. This has the inevitable result of lower light conditions and shadows. A couple of years ago I received a Joby light as a gift. It has several great features:

Adjustable light allows you to add as much light as you want into your work area.
Legs that can be wrapped around an object or made into a tripod. This allows you to position the light exactly where you want it. Remember when you were under the sink fixing a pipe with your little helper holding the light. My Dad does, the light was shining everywhere except where he wanted it. Now your helper can hold the towel for the inevitable rush of water instead of the light.
Magnets located in the bottom of each leg. If you happen to be able to attach the Joby to a magnetic surface it will hold its position exactly where you place it. This is great for auto repairs or attaching to your power equipment.
