Archive
Dimensioning without a Jointer
Since moving a couple of years ago I never took the time to reassemble my jointer, perhaps not having the space, but in reality I have not needed it. For the last year I have reached for my Stanley #7 and flattened one side and then used my planer to finish the opposite side.
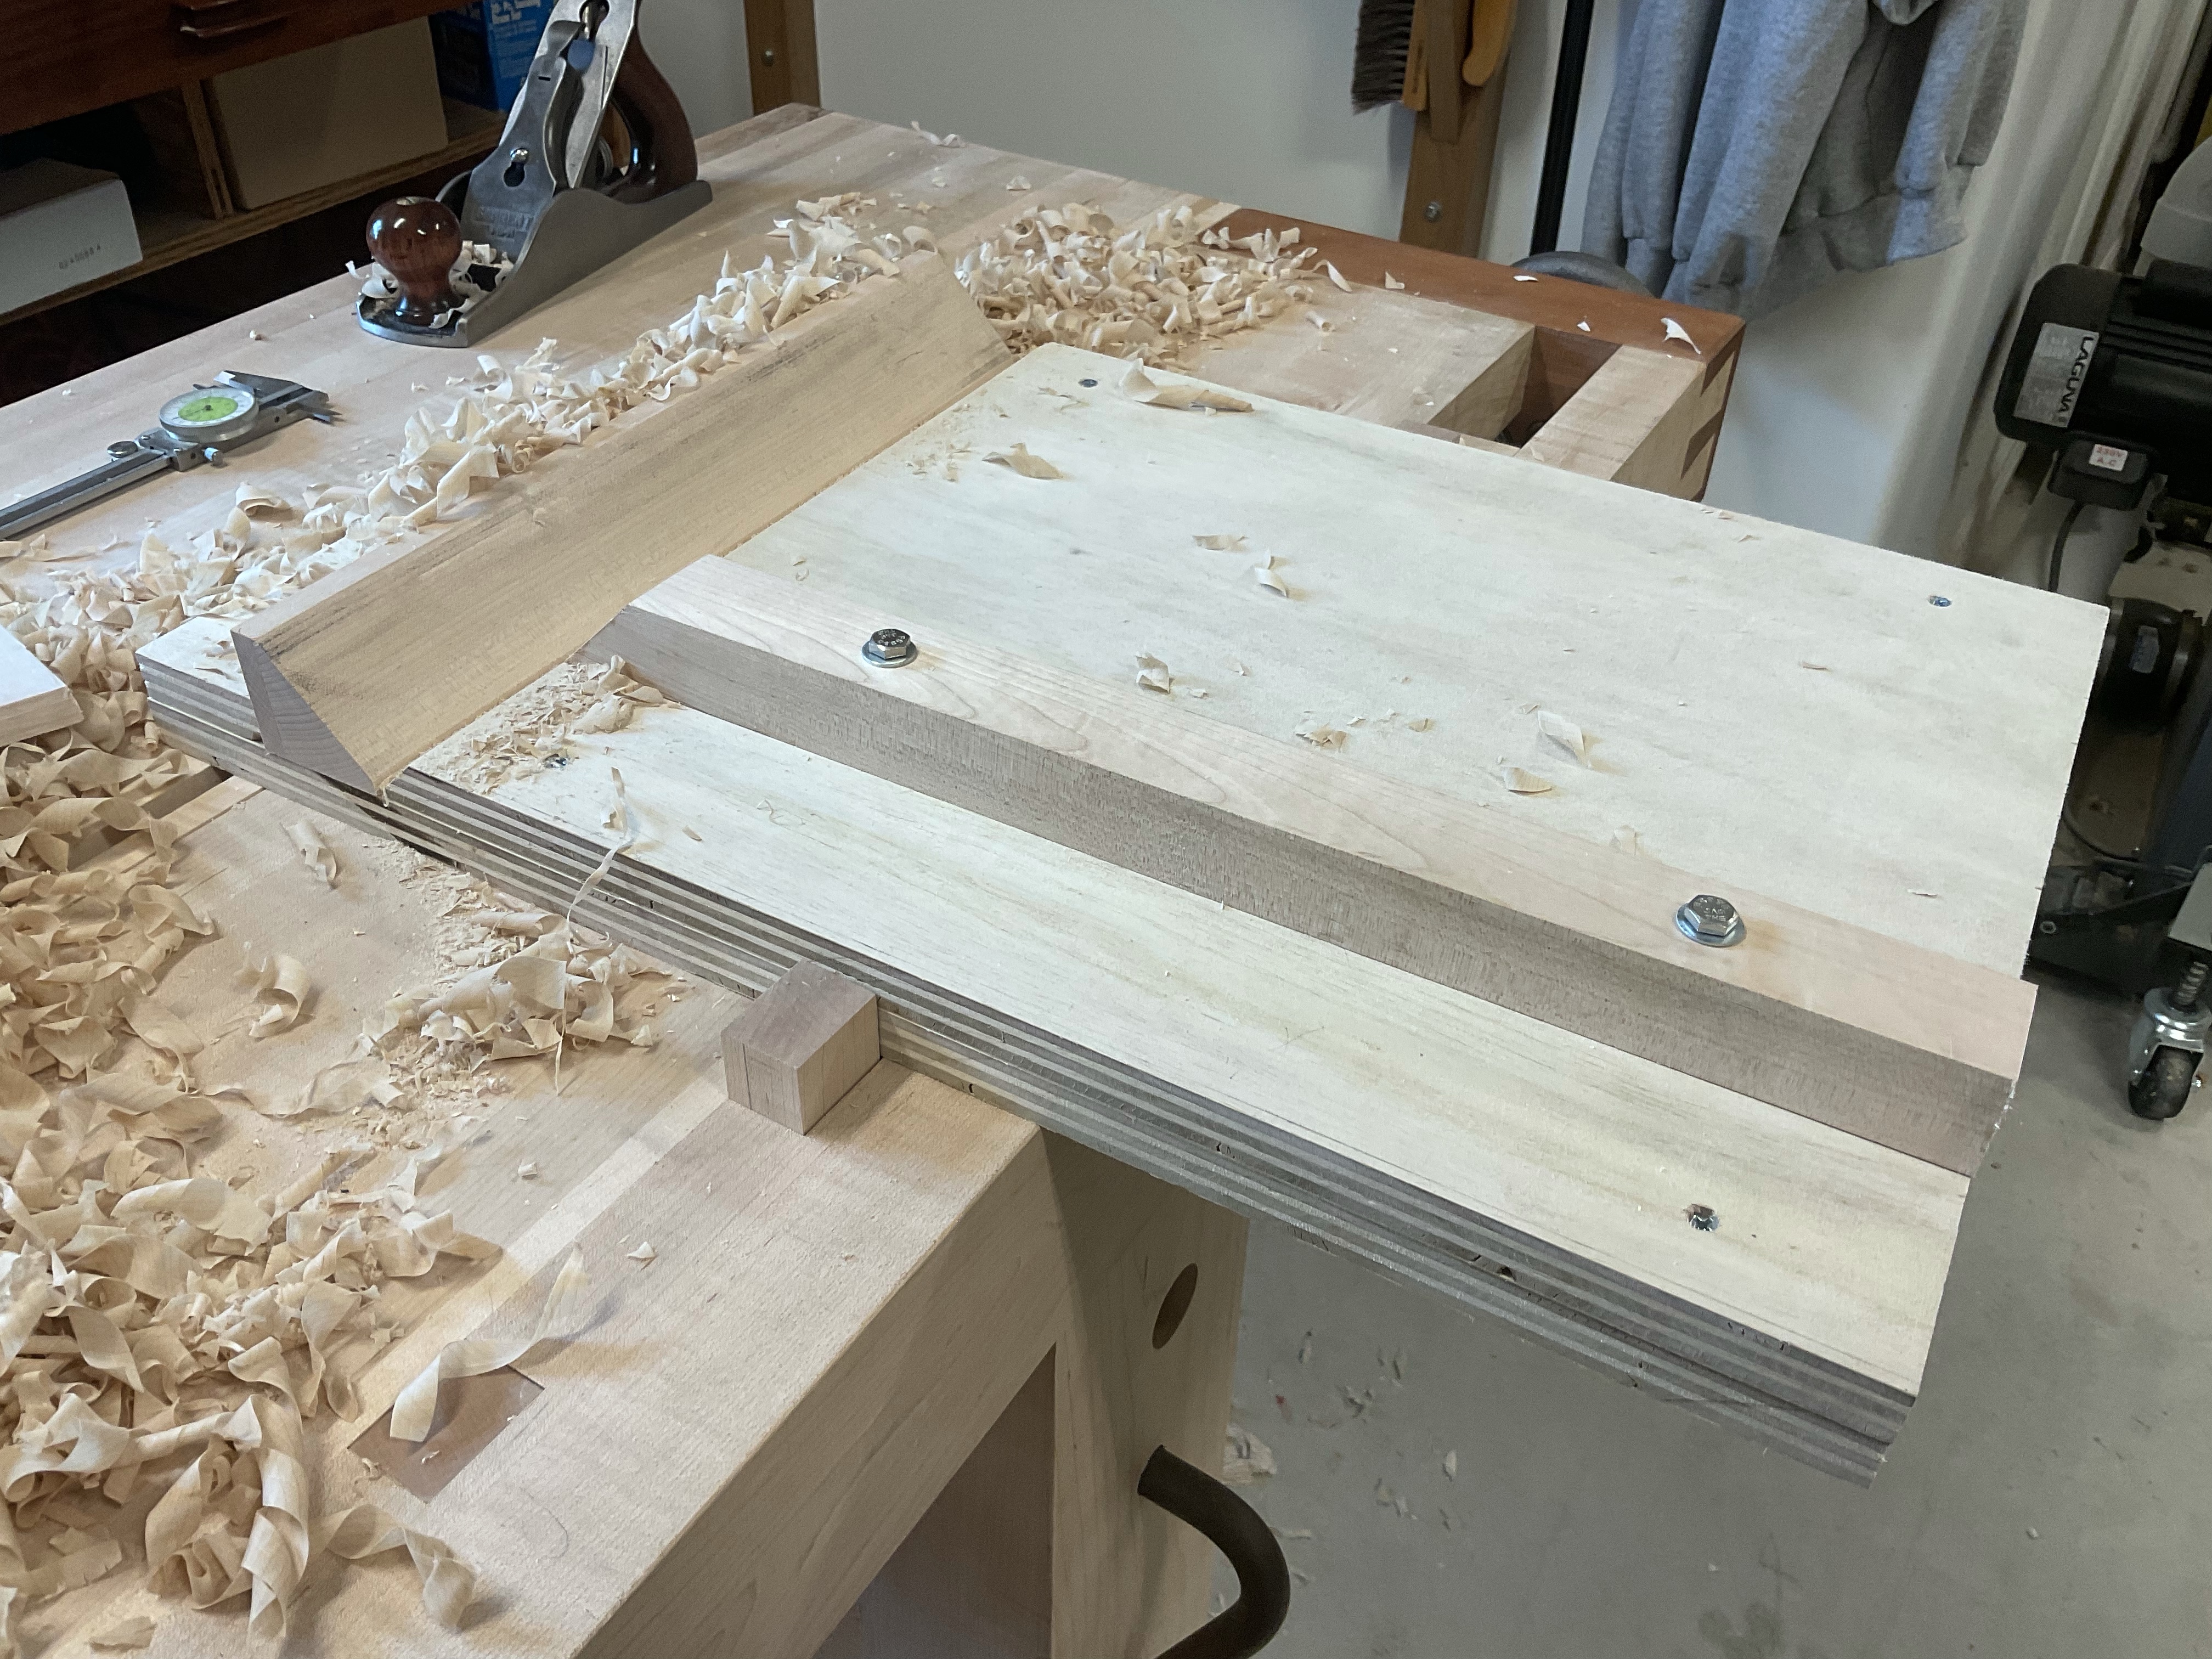
This month however I tried something totally different that I know several of you have done for wider boards. I built a Planer sled out of 3/4 plywood and a piece of scrap that was about 48” long and 11” wide. The lower board is made out of two pieces of plywood glued together to make it as rigid as possible. The smaller I assembled to handle shorter pieces.
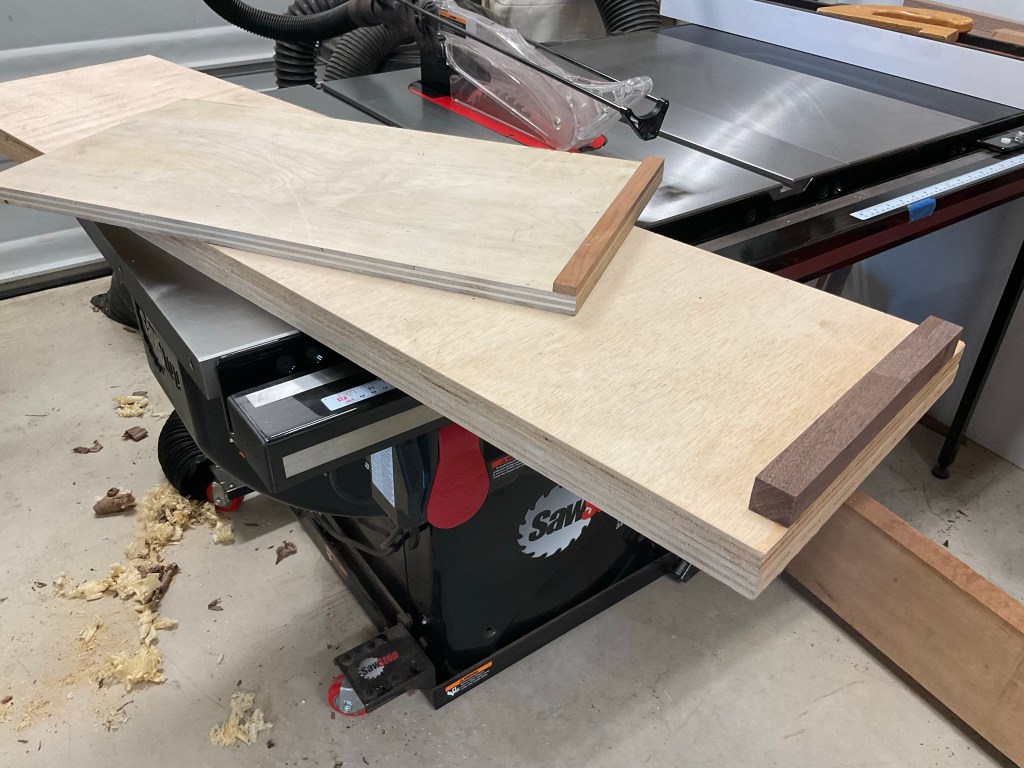
Next I cut several wedges and placed the board I wanted to Joint on the sled and used the wedges to level it. Next I send it through the planer to flatten one side, then flip it over and now I have both sides flat and parallel. Works like a charm!

Dust Collector Switch
Sometimes safety is all about making the right thing easy. Turning on my dust collector seems like an easy thing but when I have to walk around to the other side of my table saw in the middle of a project it often gets overlooked. There are a lot of expensive solutions, some that automatically start when a piece of equipment starts, some that even control ventilation gates. Perhaps the easiest solution is having a remote in your apron pocket that allows you to select what to turn on and at the press of a button you can turn the dust collector off and on.

A remote control and 5 plug in adapters, hopefully this is the cure fro my lazy streak!
Box Making – Every Dovetail deserves an adjustment
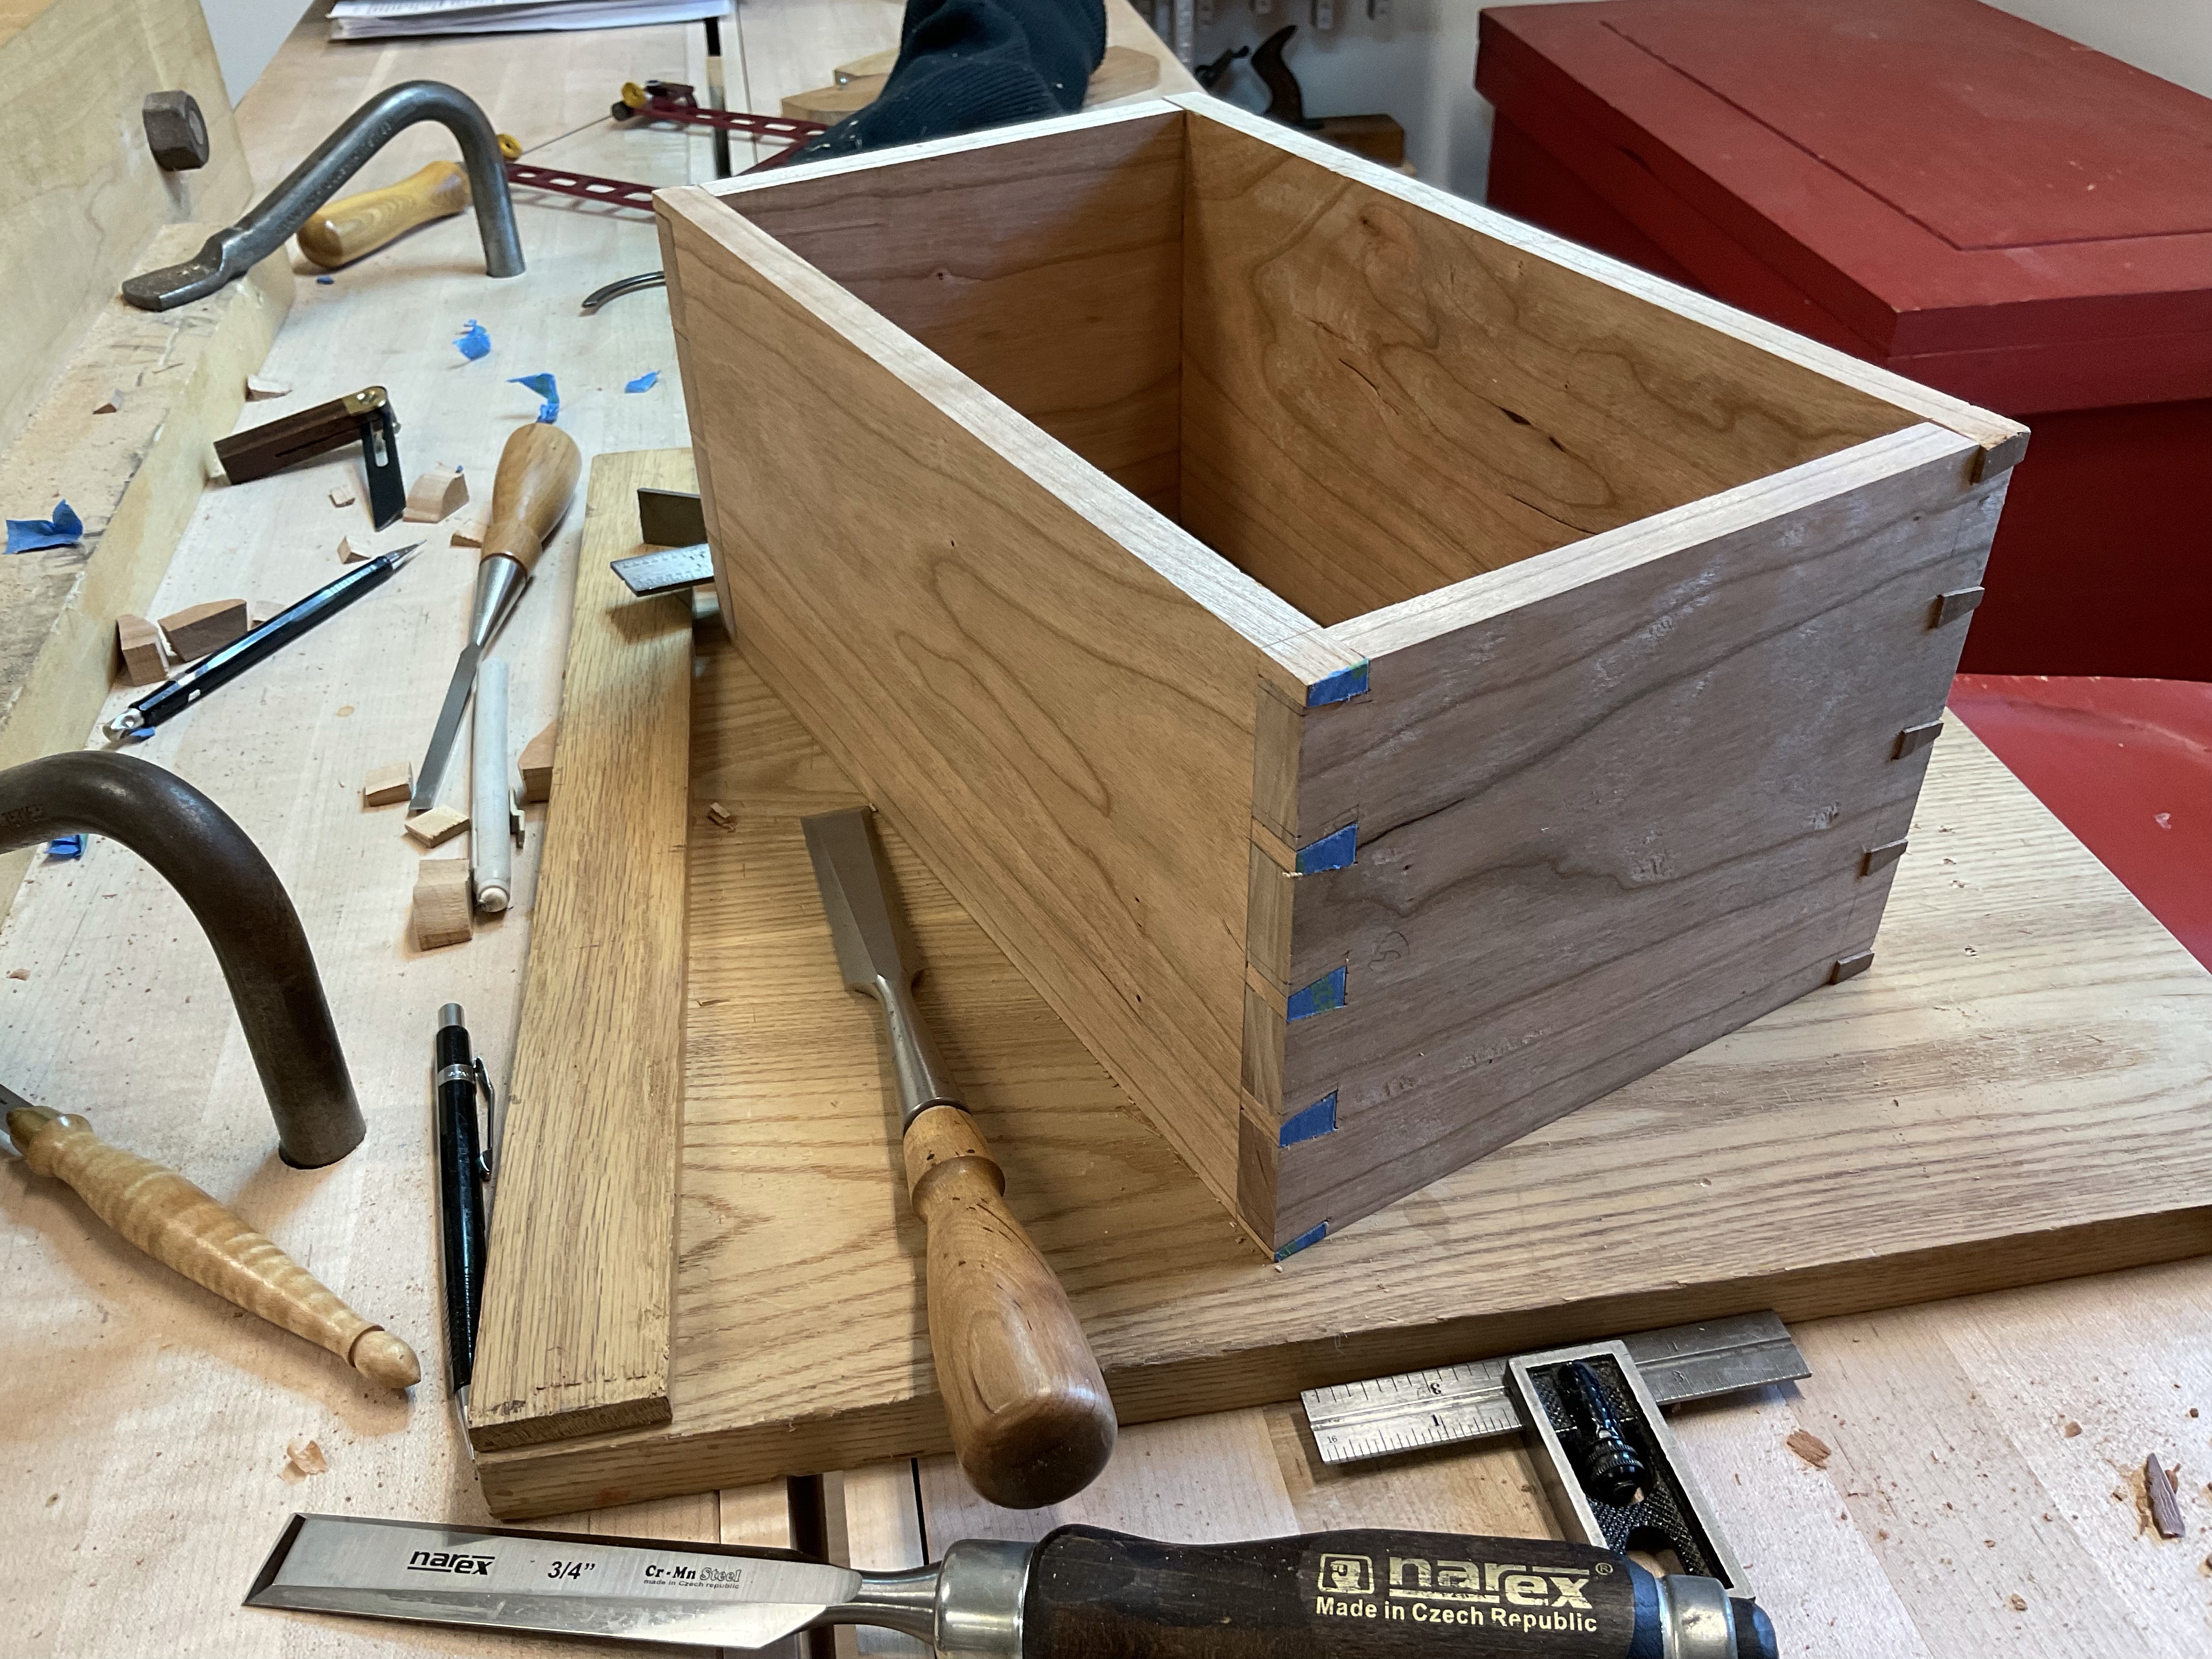
There are people that make perfectly fitting dovetails every time and I don’t envy their lack of opportunity to adjust the dovetails they make. Typically I will have at least one dovetail that needs some work along with a saw cut that went a little too far and perhaps somewhere the wood chipped. Frequently I can also pick out the dovetail that was cut first. Which suggests that I should make a practice dovetail to increase my focus before beginning on the real thing.
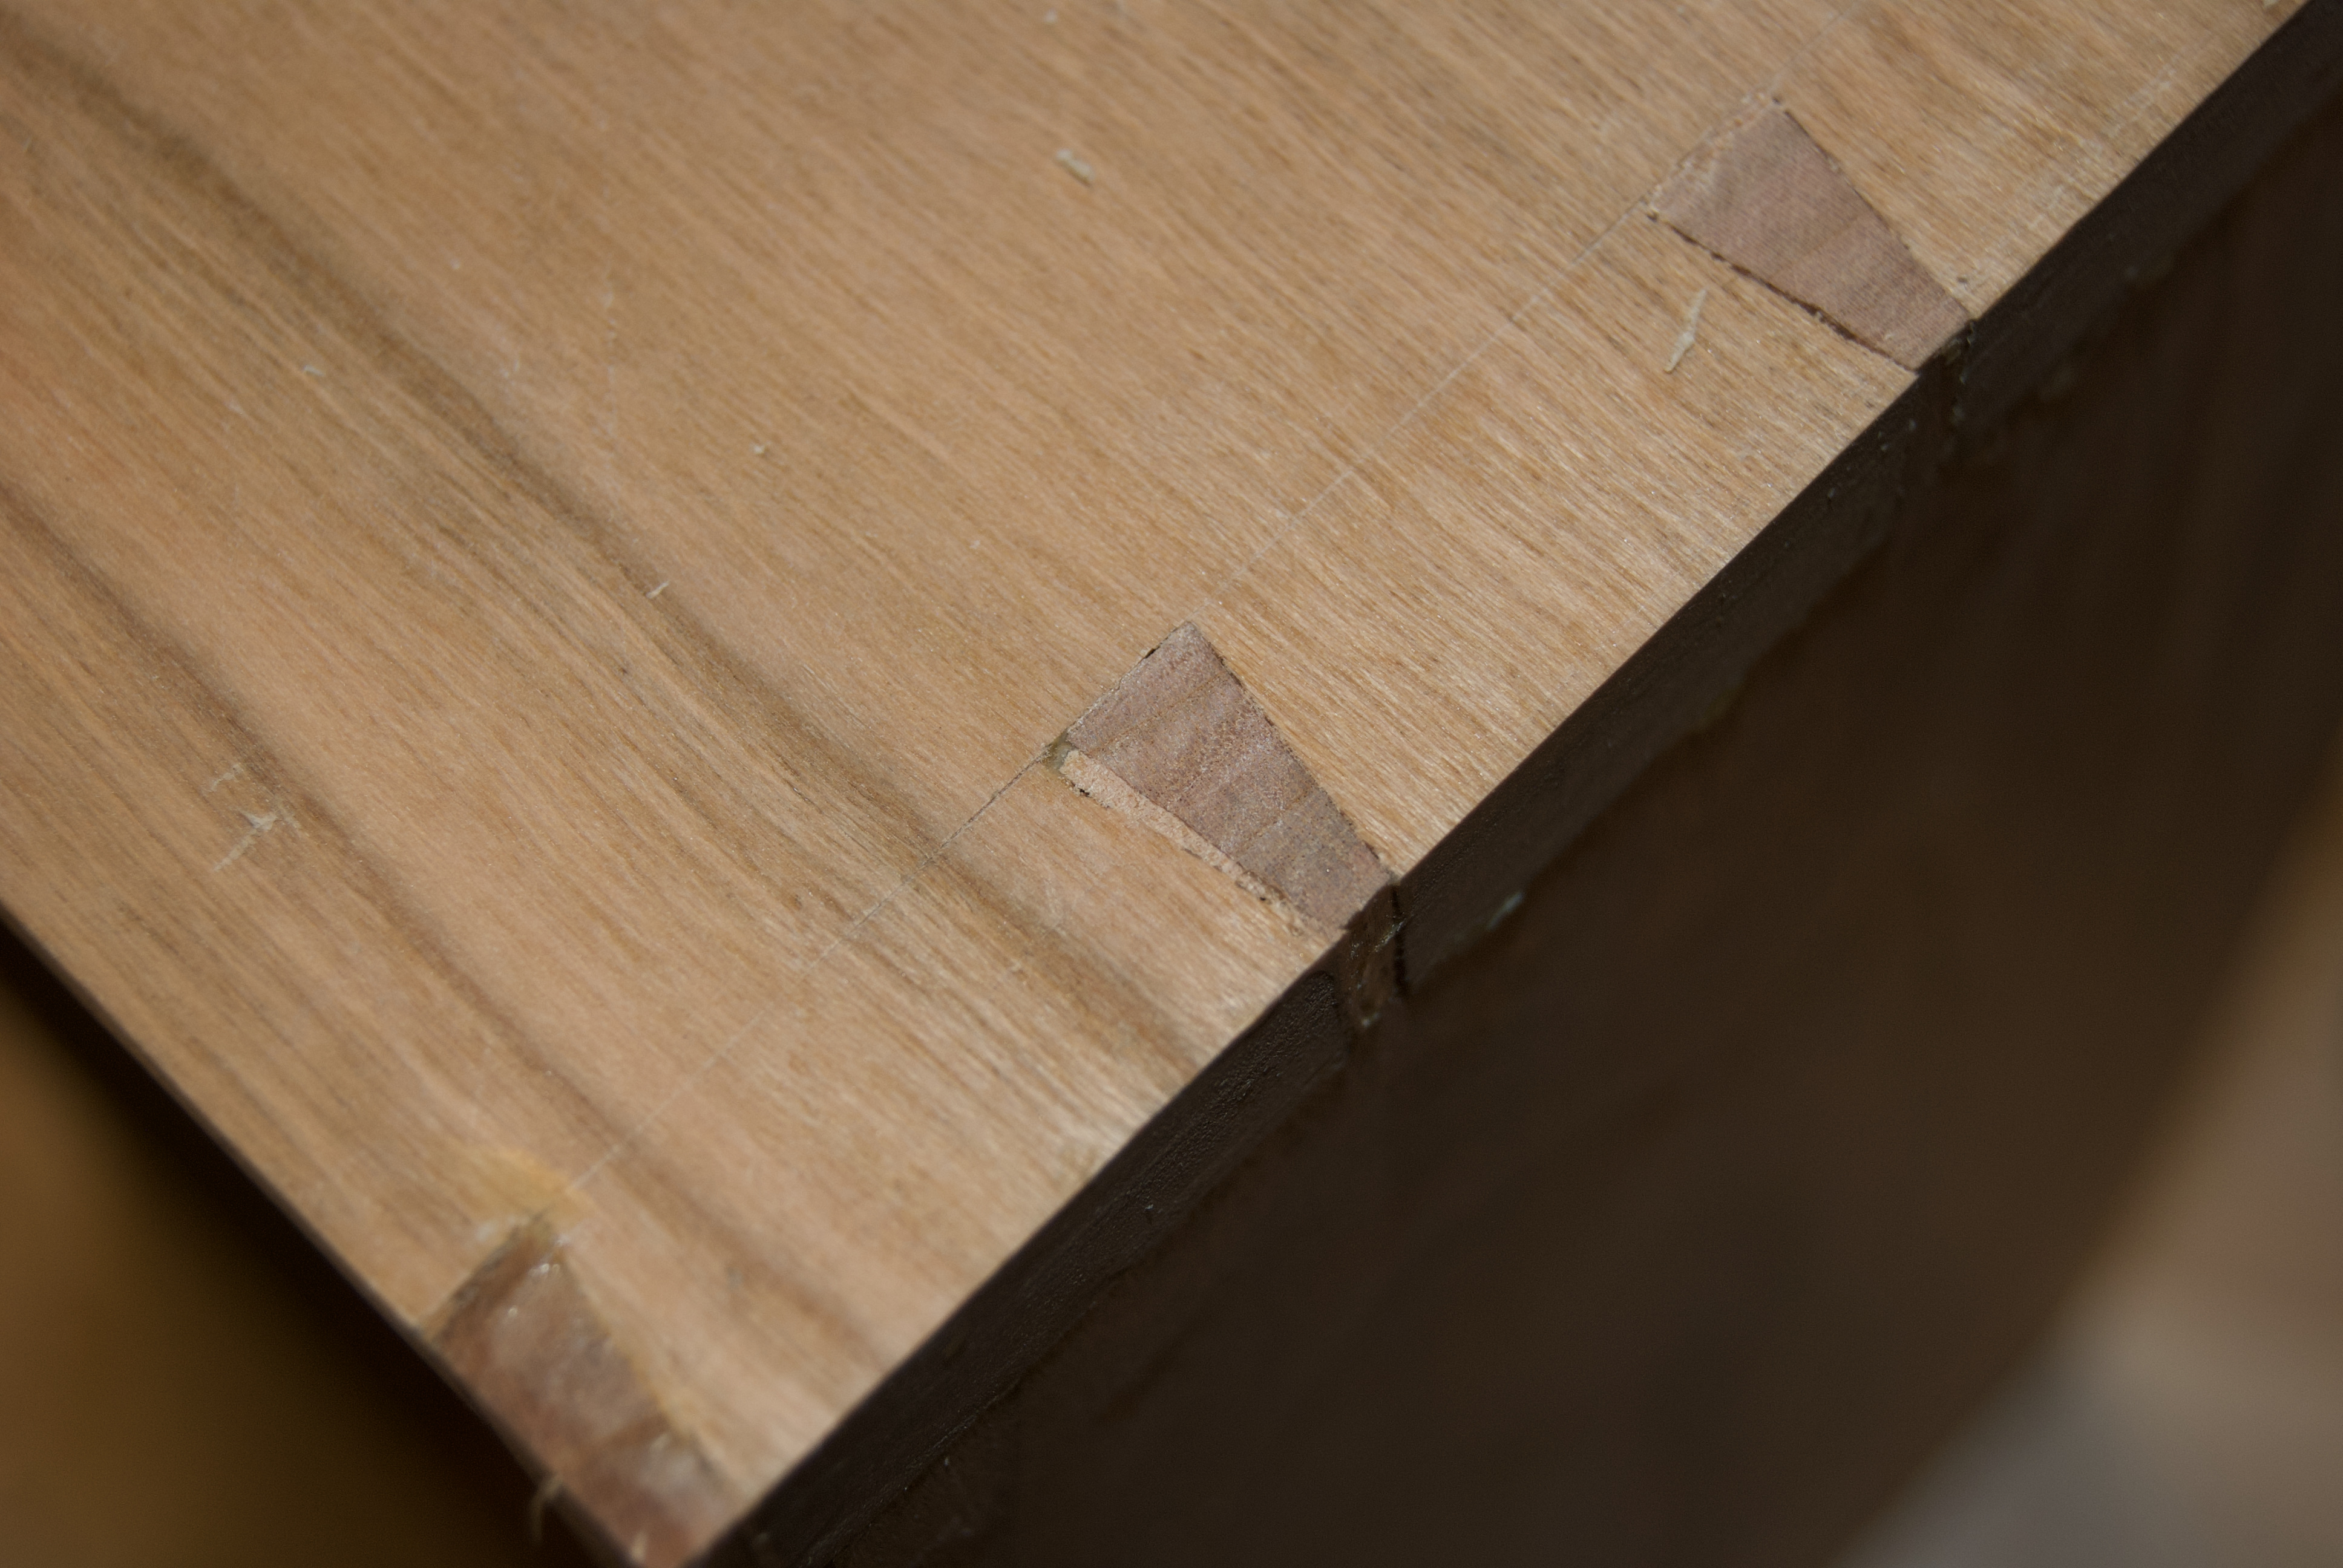
With this box I have three corners that look good with only a couple of minor changes required but the fourth corner needs a little work. Nothing major the joints are strong and fit well just a few cosmetic touches.

Filling in the minor gaps is simple, find wood that is similar in color ensure you match end grain to end grain and long grain to long grain and trim the wood to fit the gap and glue in place. Once the glue is dry trim with a chisel and plane it smooth. In most cases the gap disappears and will never be noticed. If needed you can fill in some fairly large gaps!
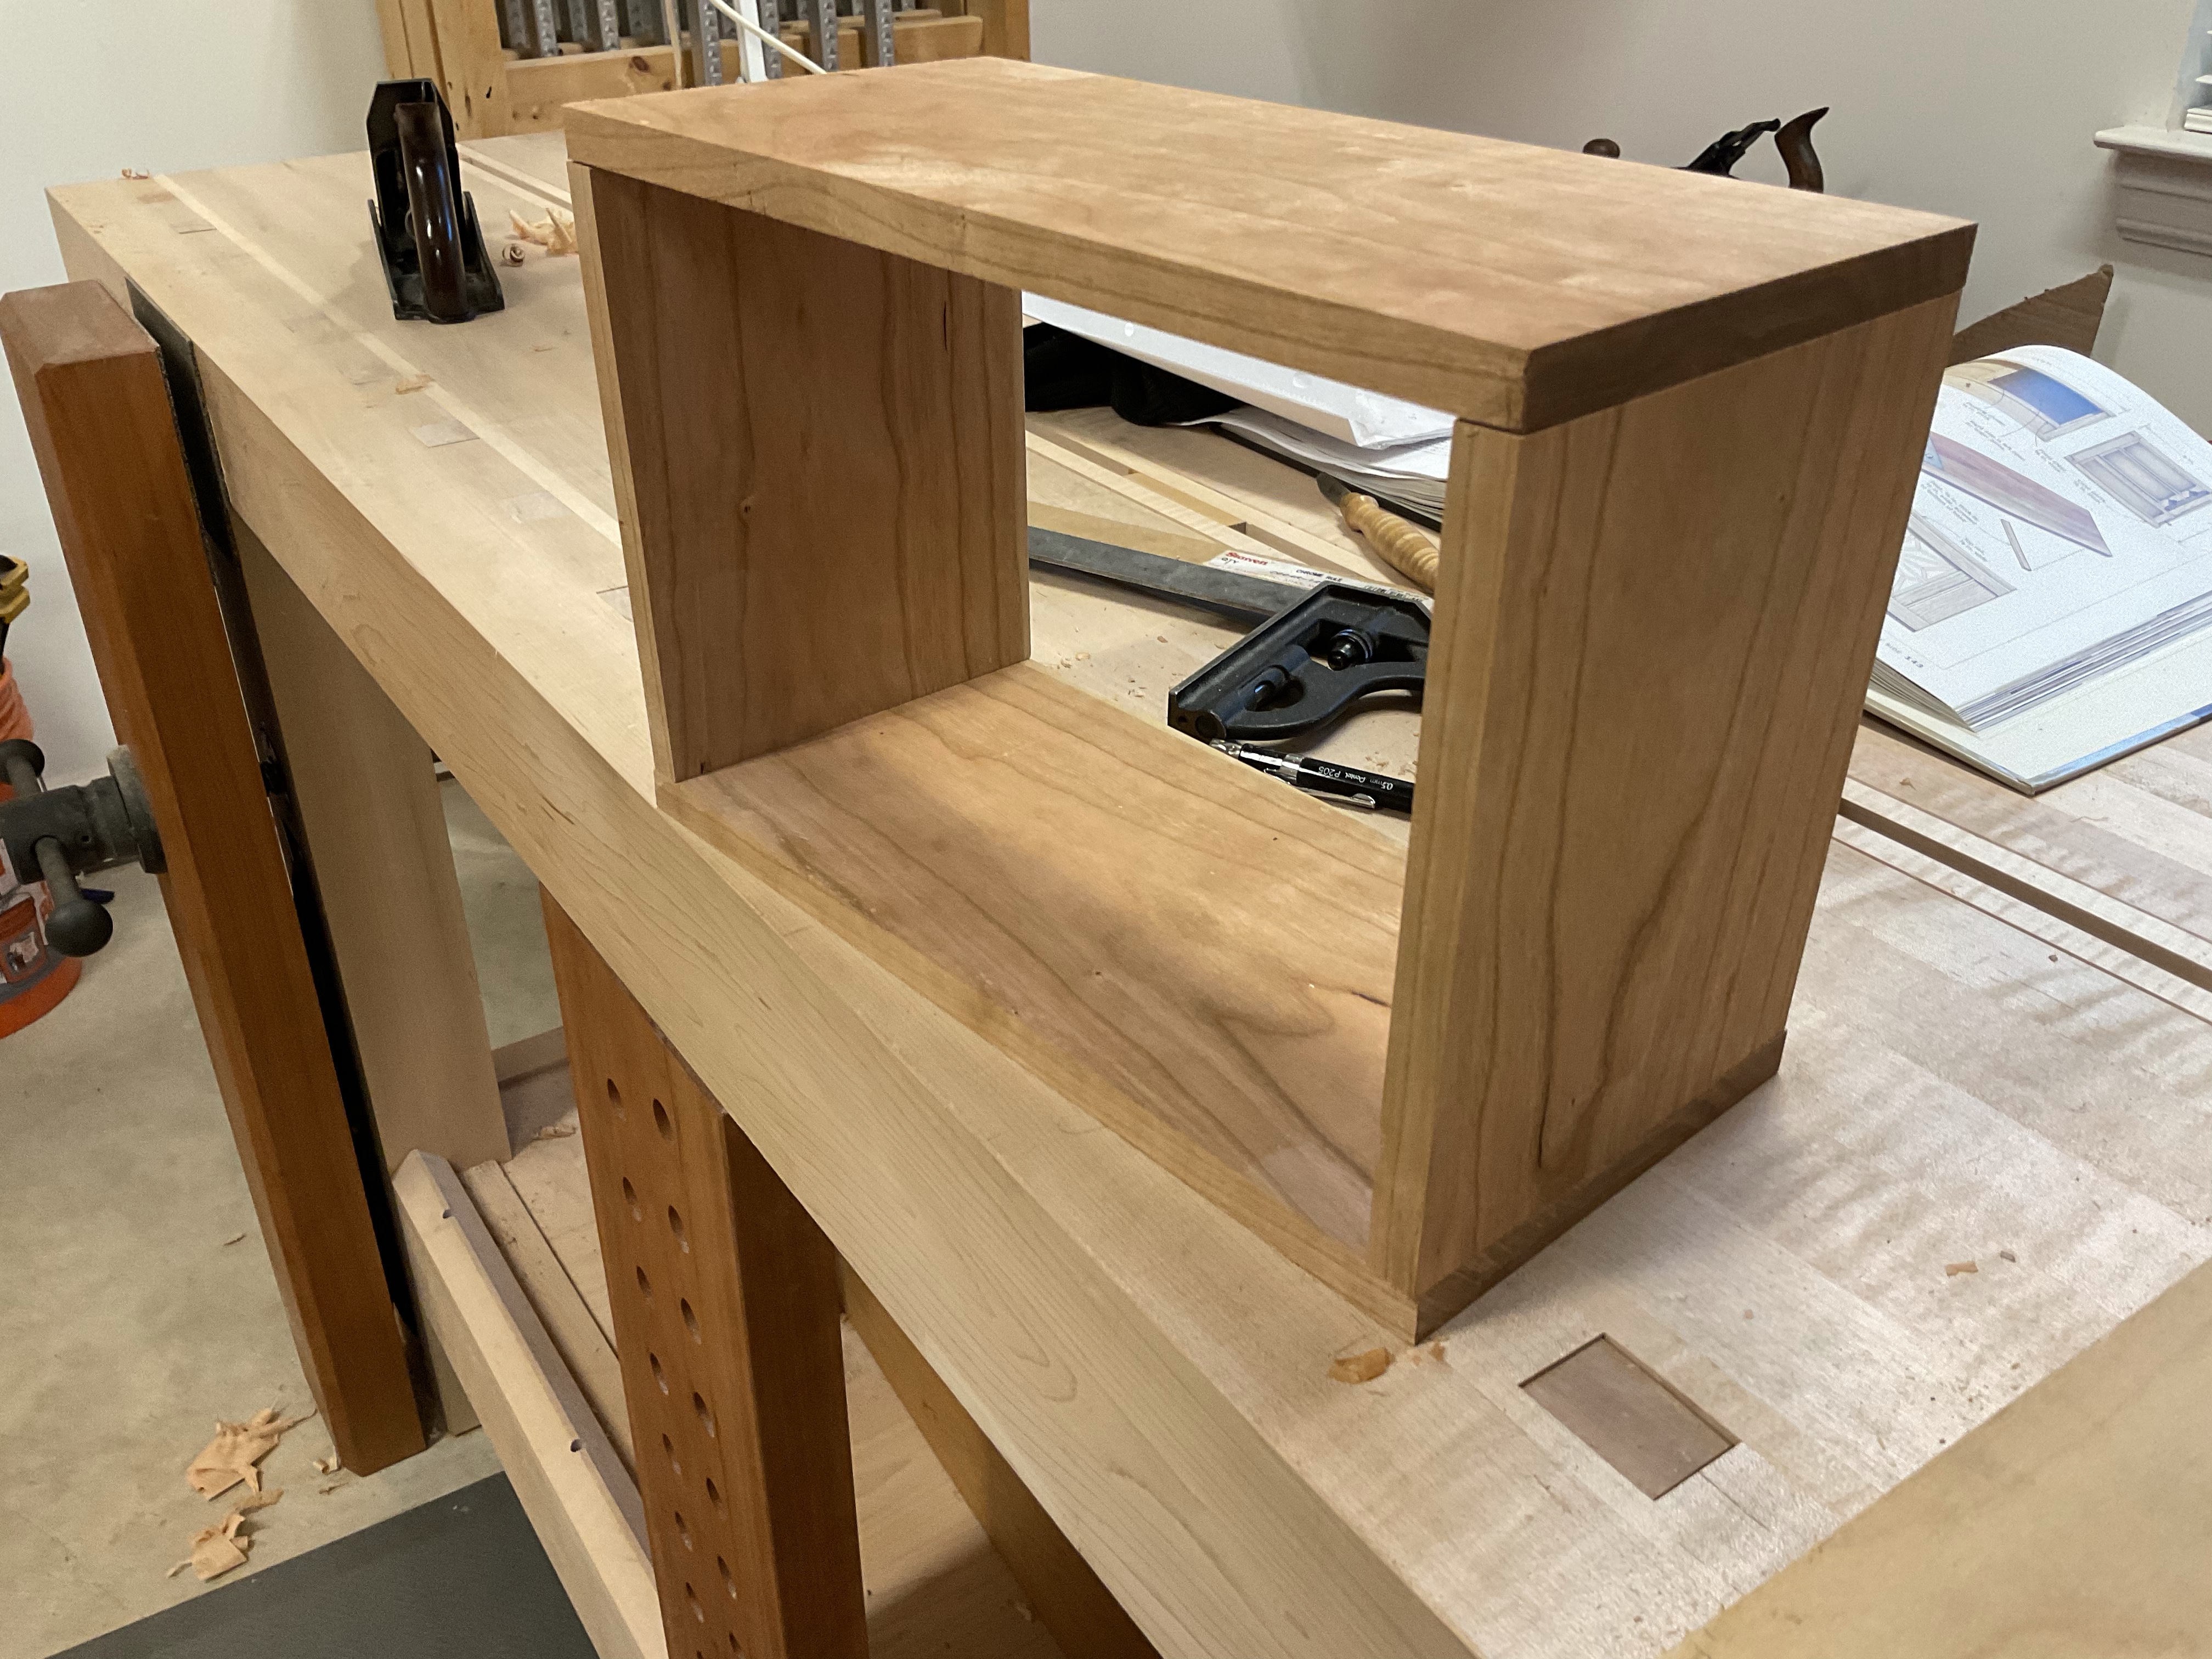
Box Making – Installing a shelf
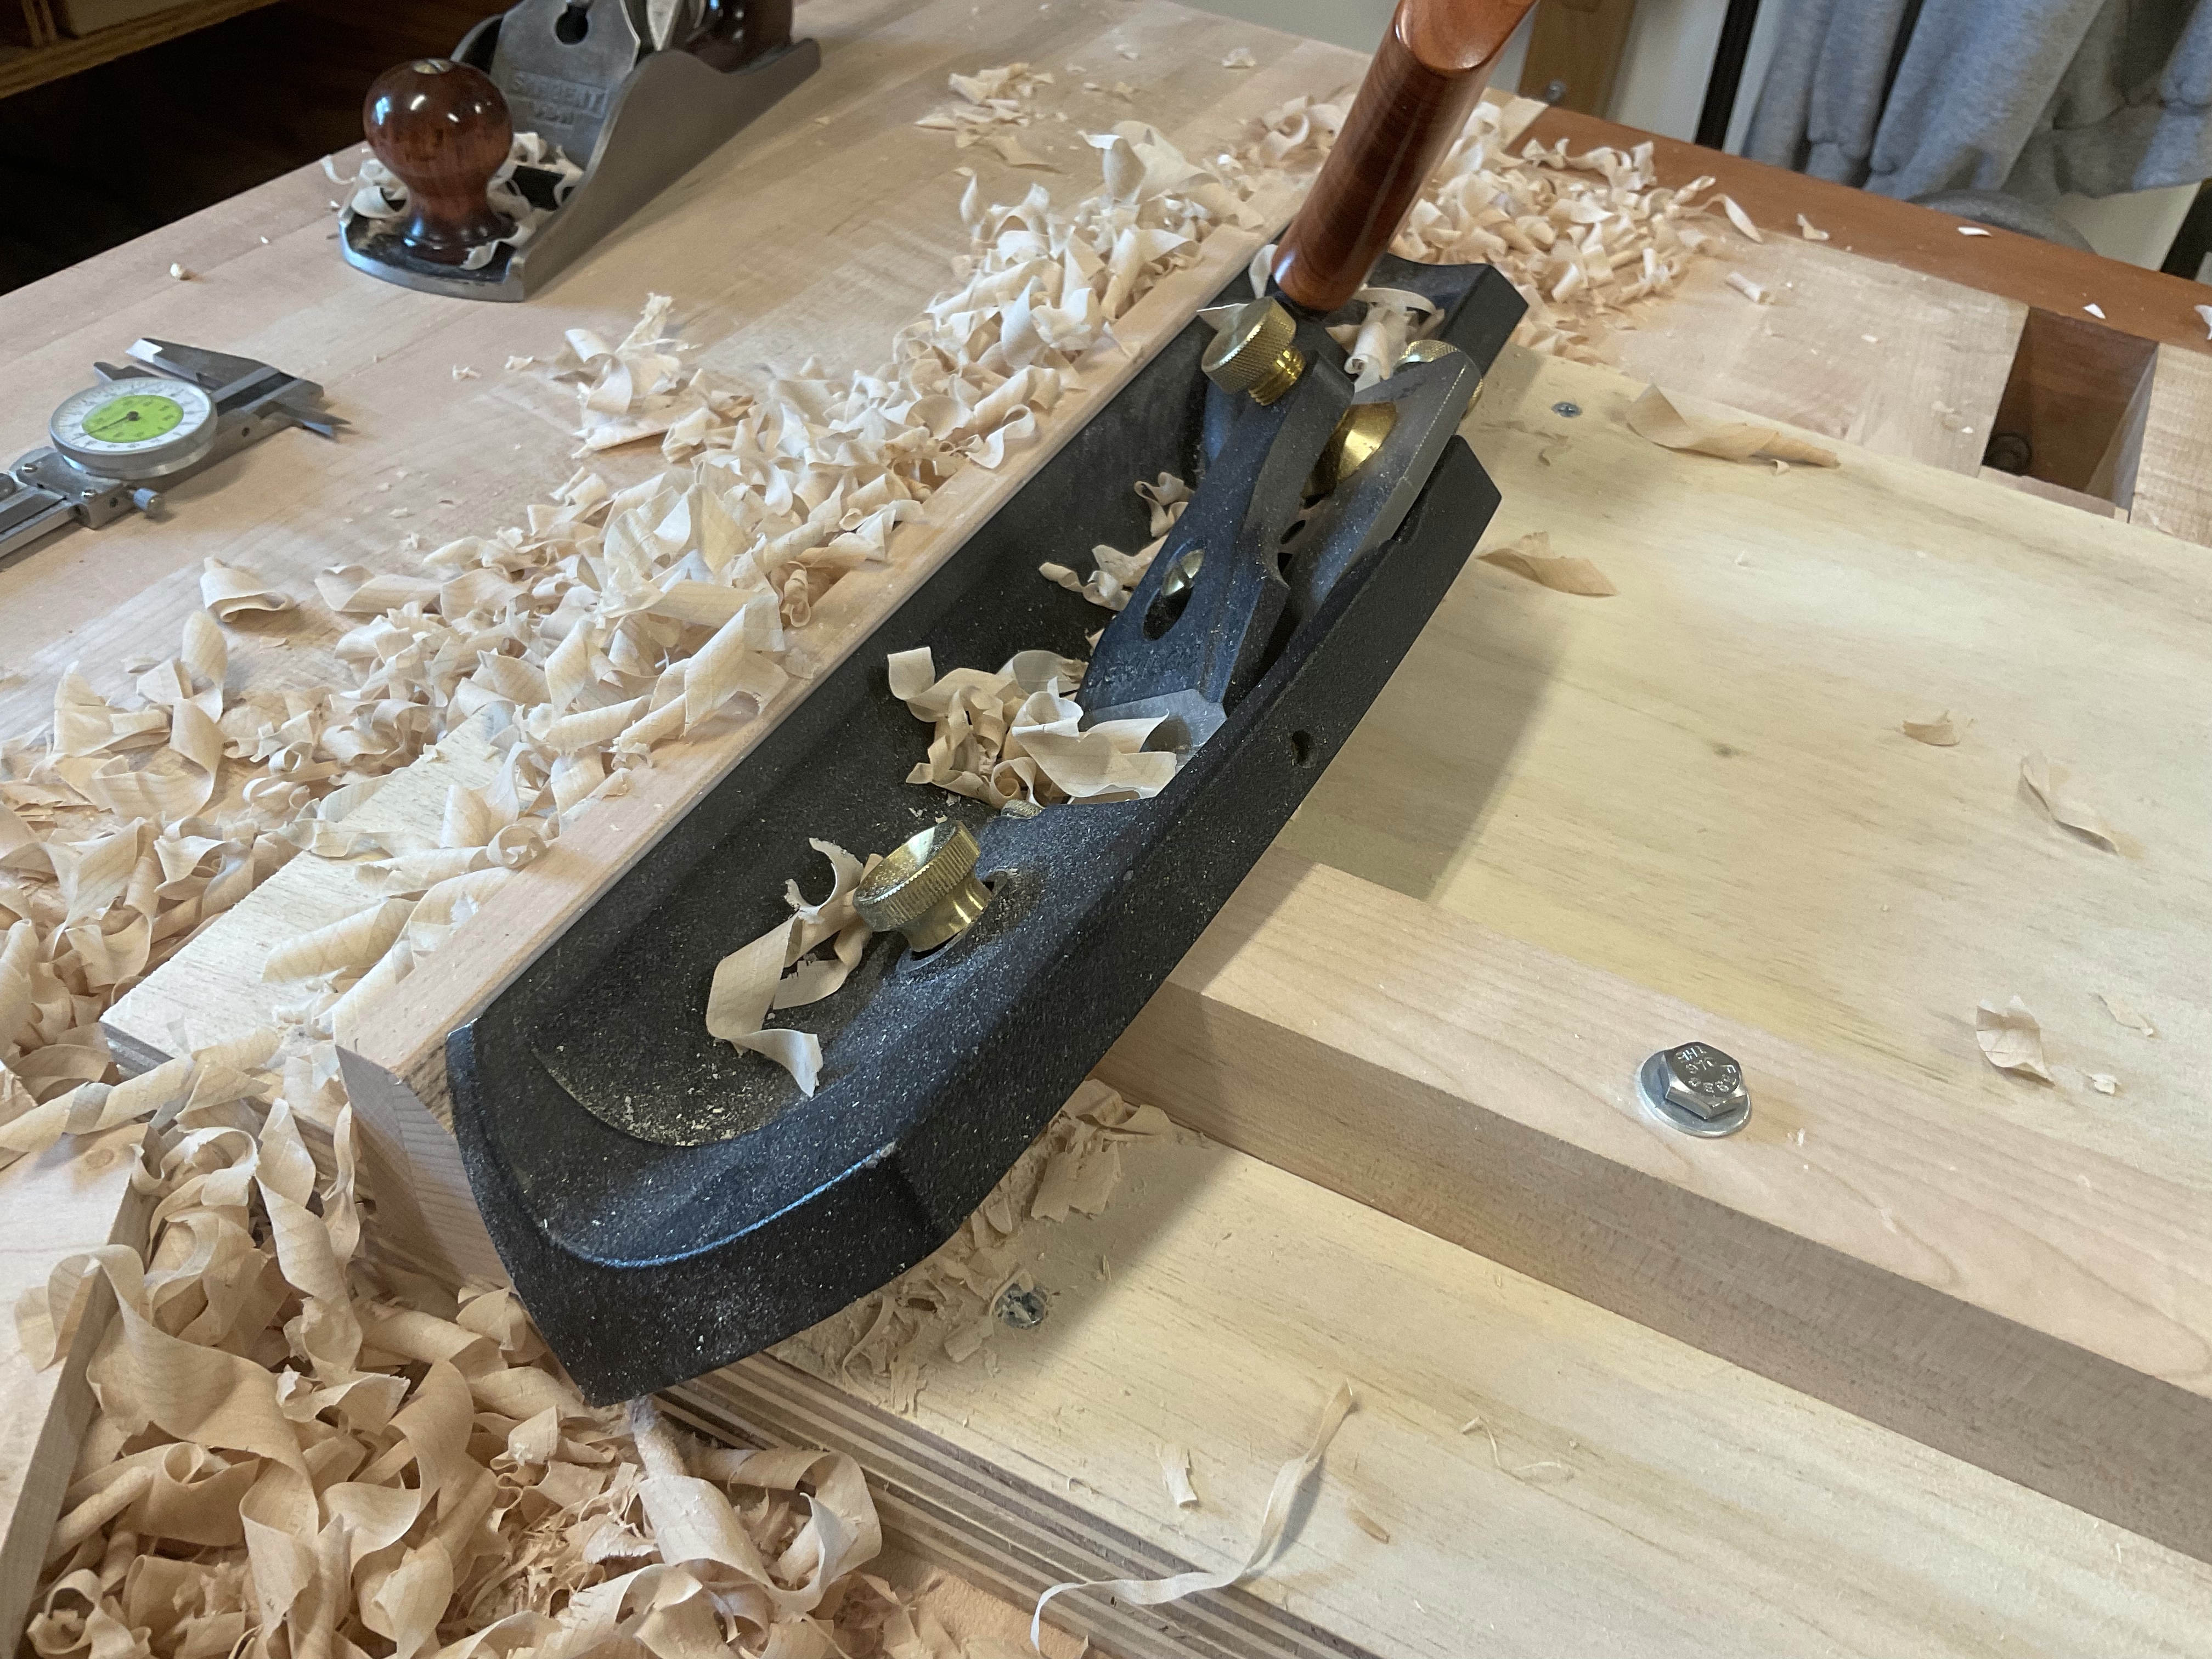
The box design has a shelf approximately 1/3 of the way up from the bottom. The shelf is installed with blind rabbets so all of the work must be done prior to glue up. There are many ways to make rabbits and after some thought I decided to use my router plane and a chisel to provide a stop for the blind end of the rabbet.
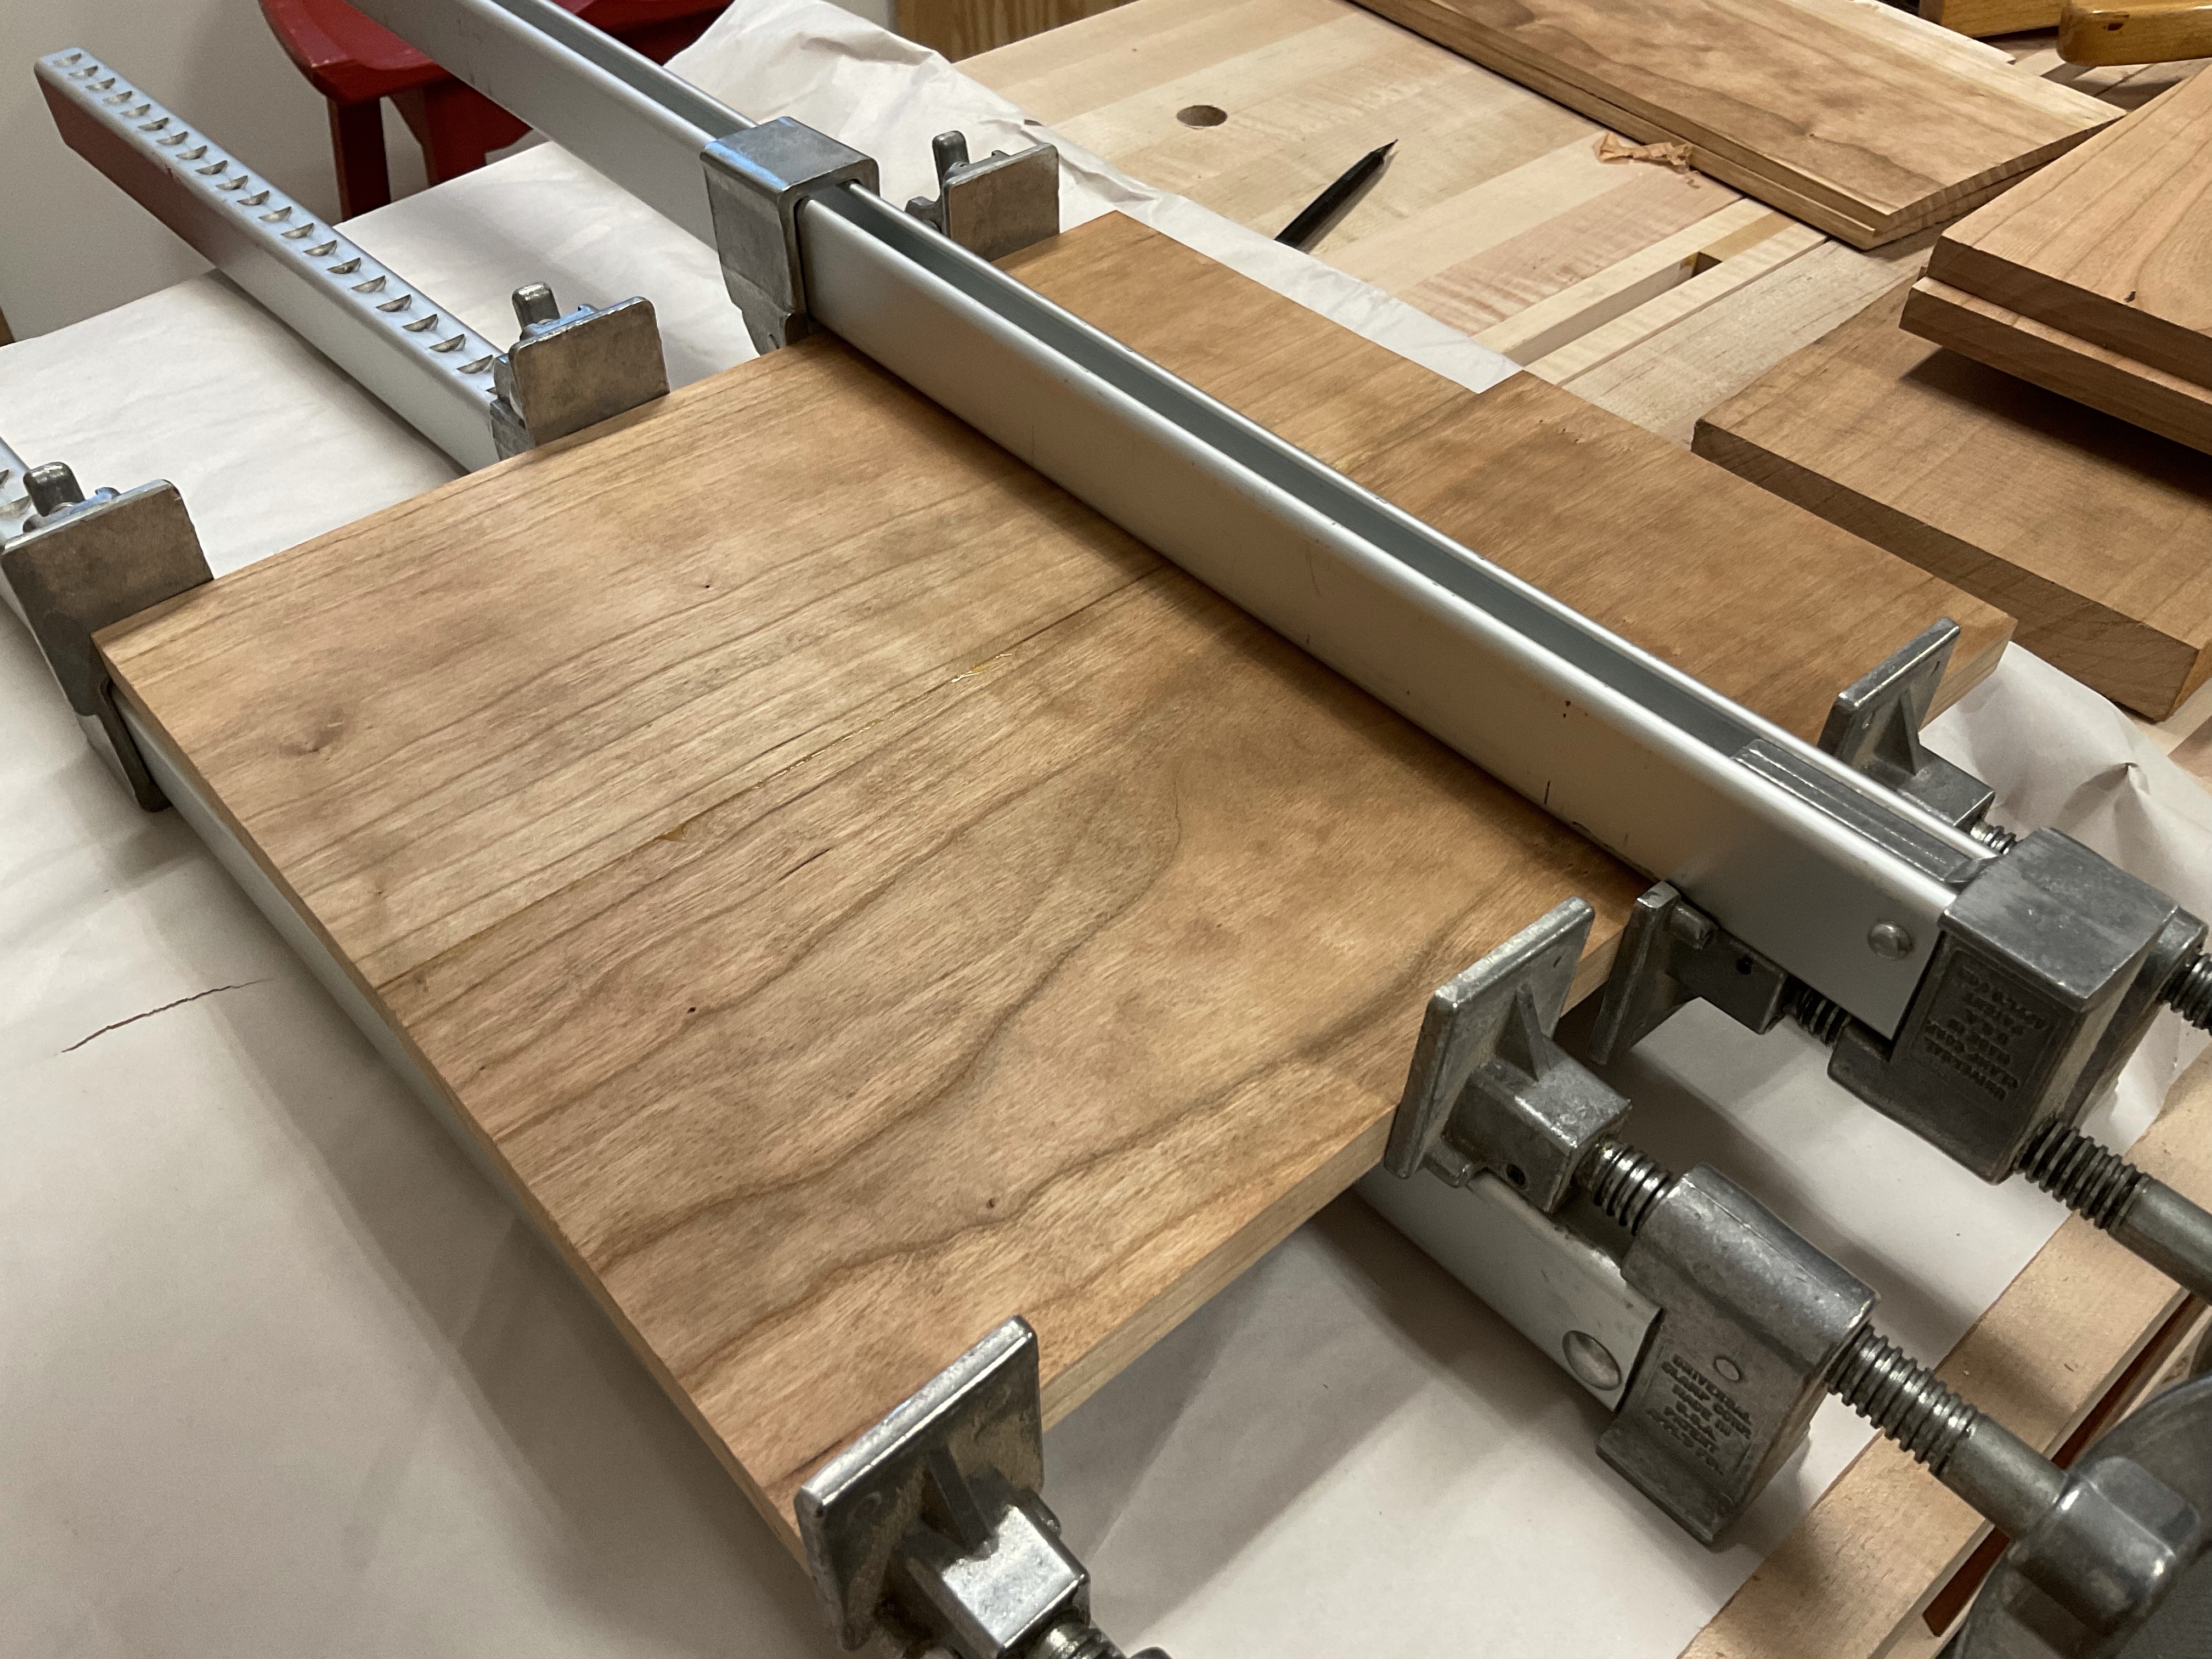
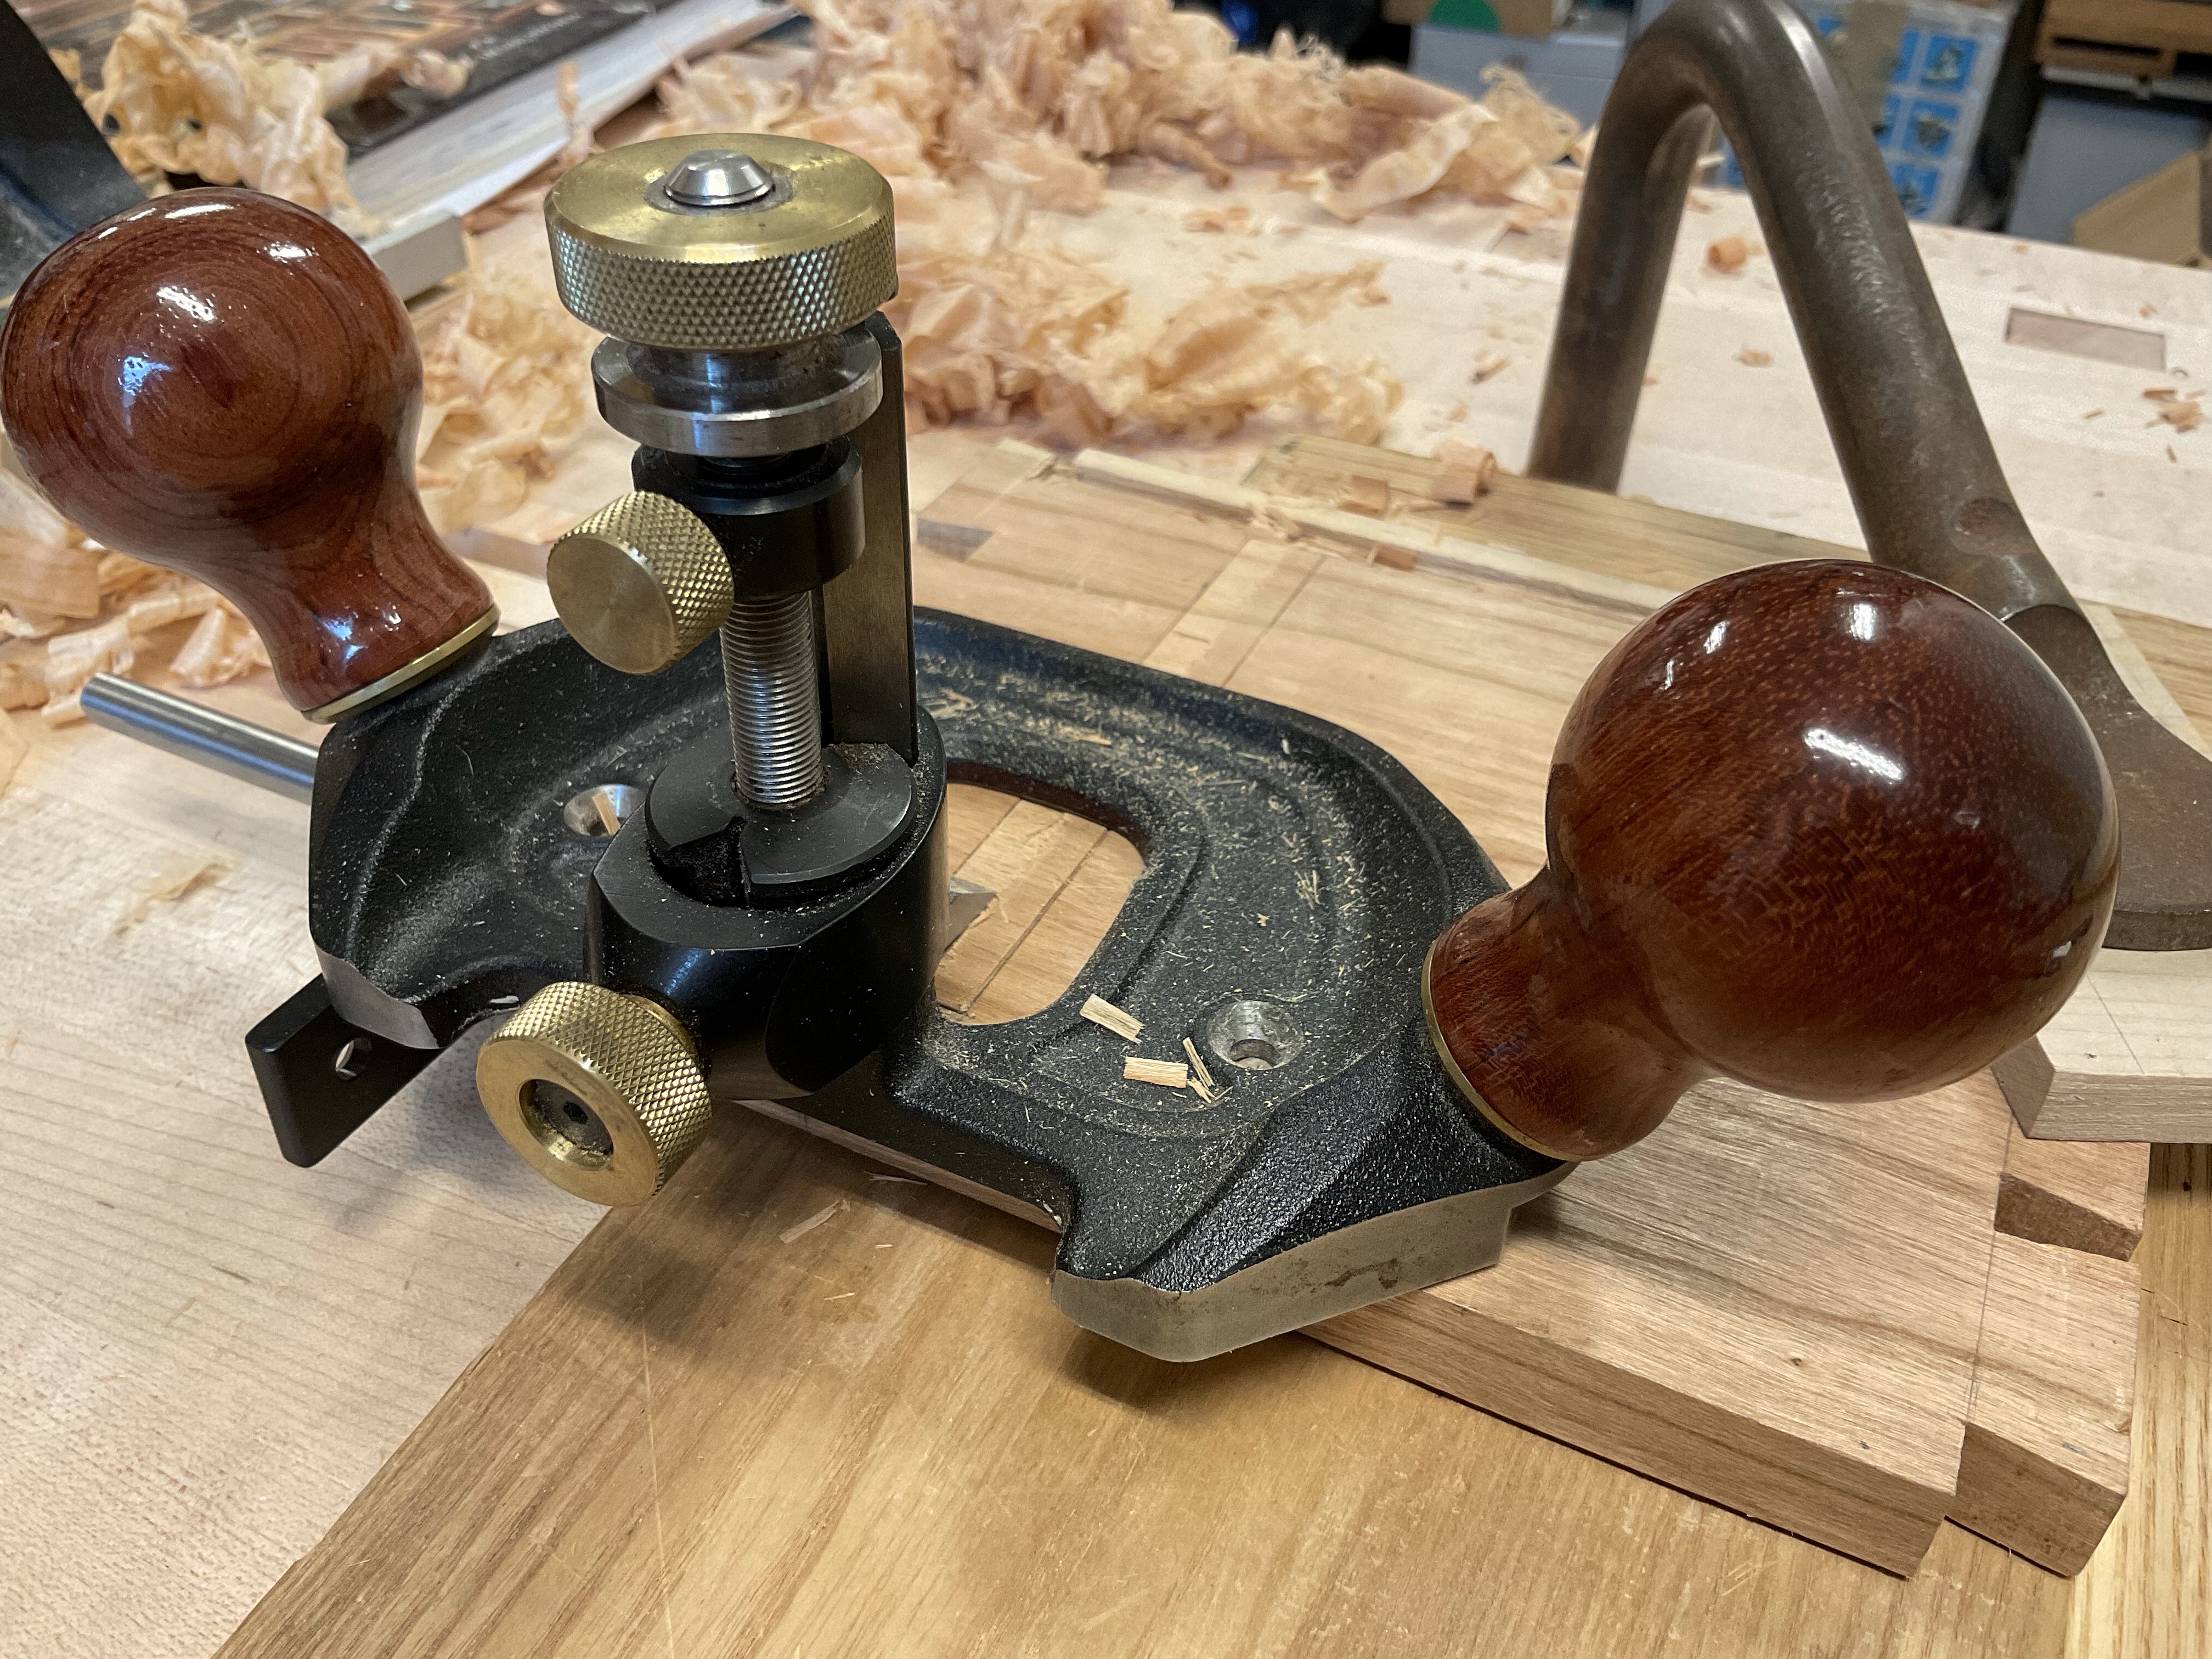
The shelf is wider than the boards that I have on hand so I did a quick glue up and planed it down to 1/2 inch. It’s been some time since I used the router plane and it is definitely one of the most useful specialty planes that I own. This one happens to be a Veritas since I had a very difficult time finding a used plane when I first began using hand tools. Needless to say I have been very happy with it. Since the rabbit was in a couple of inches from the edge I cut across the board with my marking knife and then used an edge guide. You can see a corner of the guide at the bottom of the plane in the photograph above.
It only took a few minutes to cut each rabbit and square up the blind end with a chisel.


Box Making – Marking up Dovetails
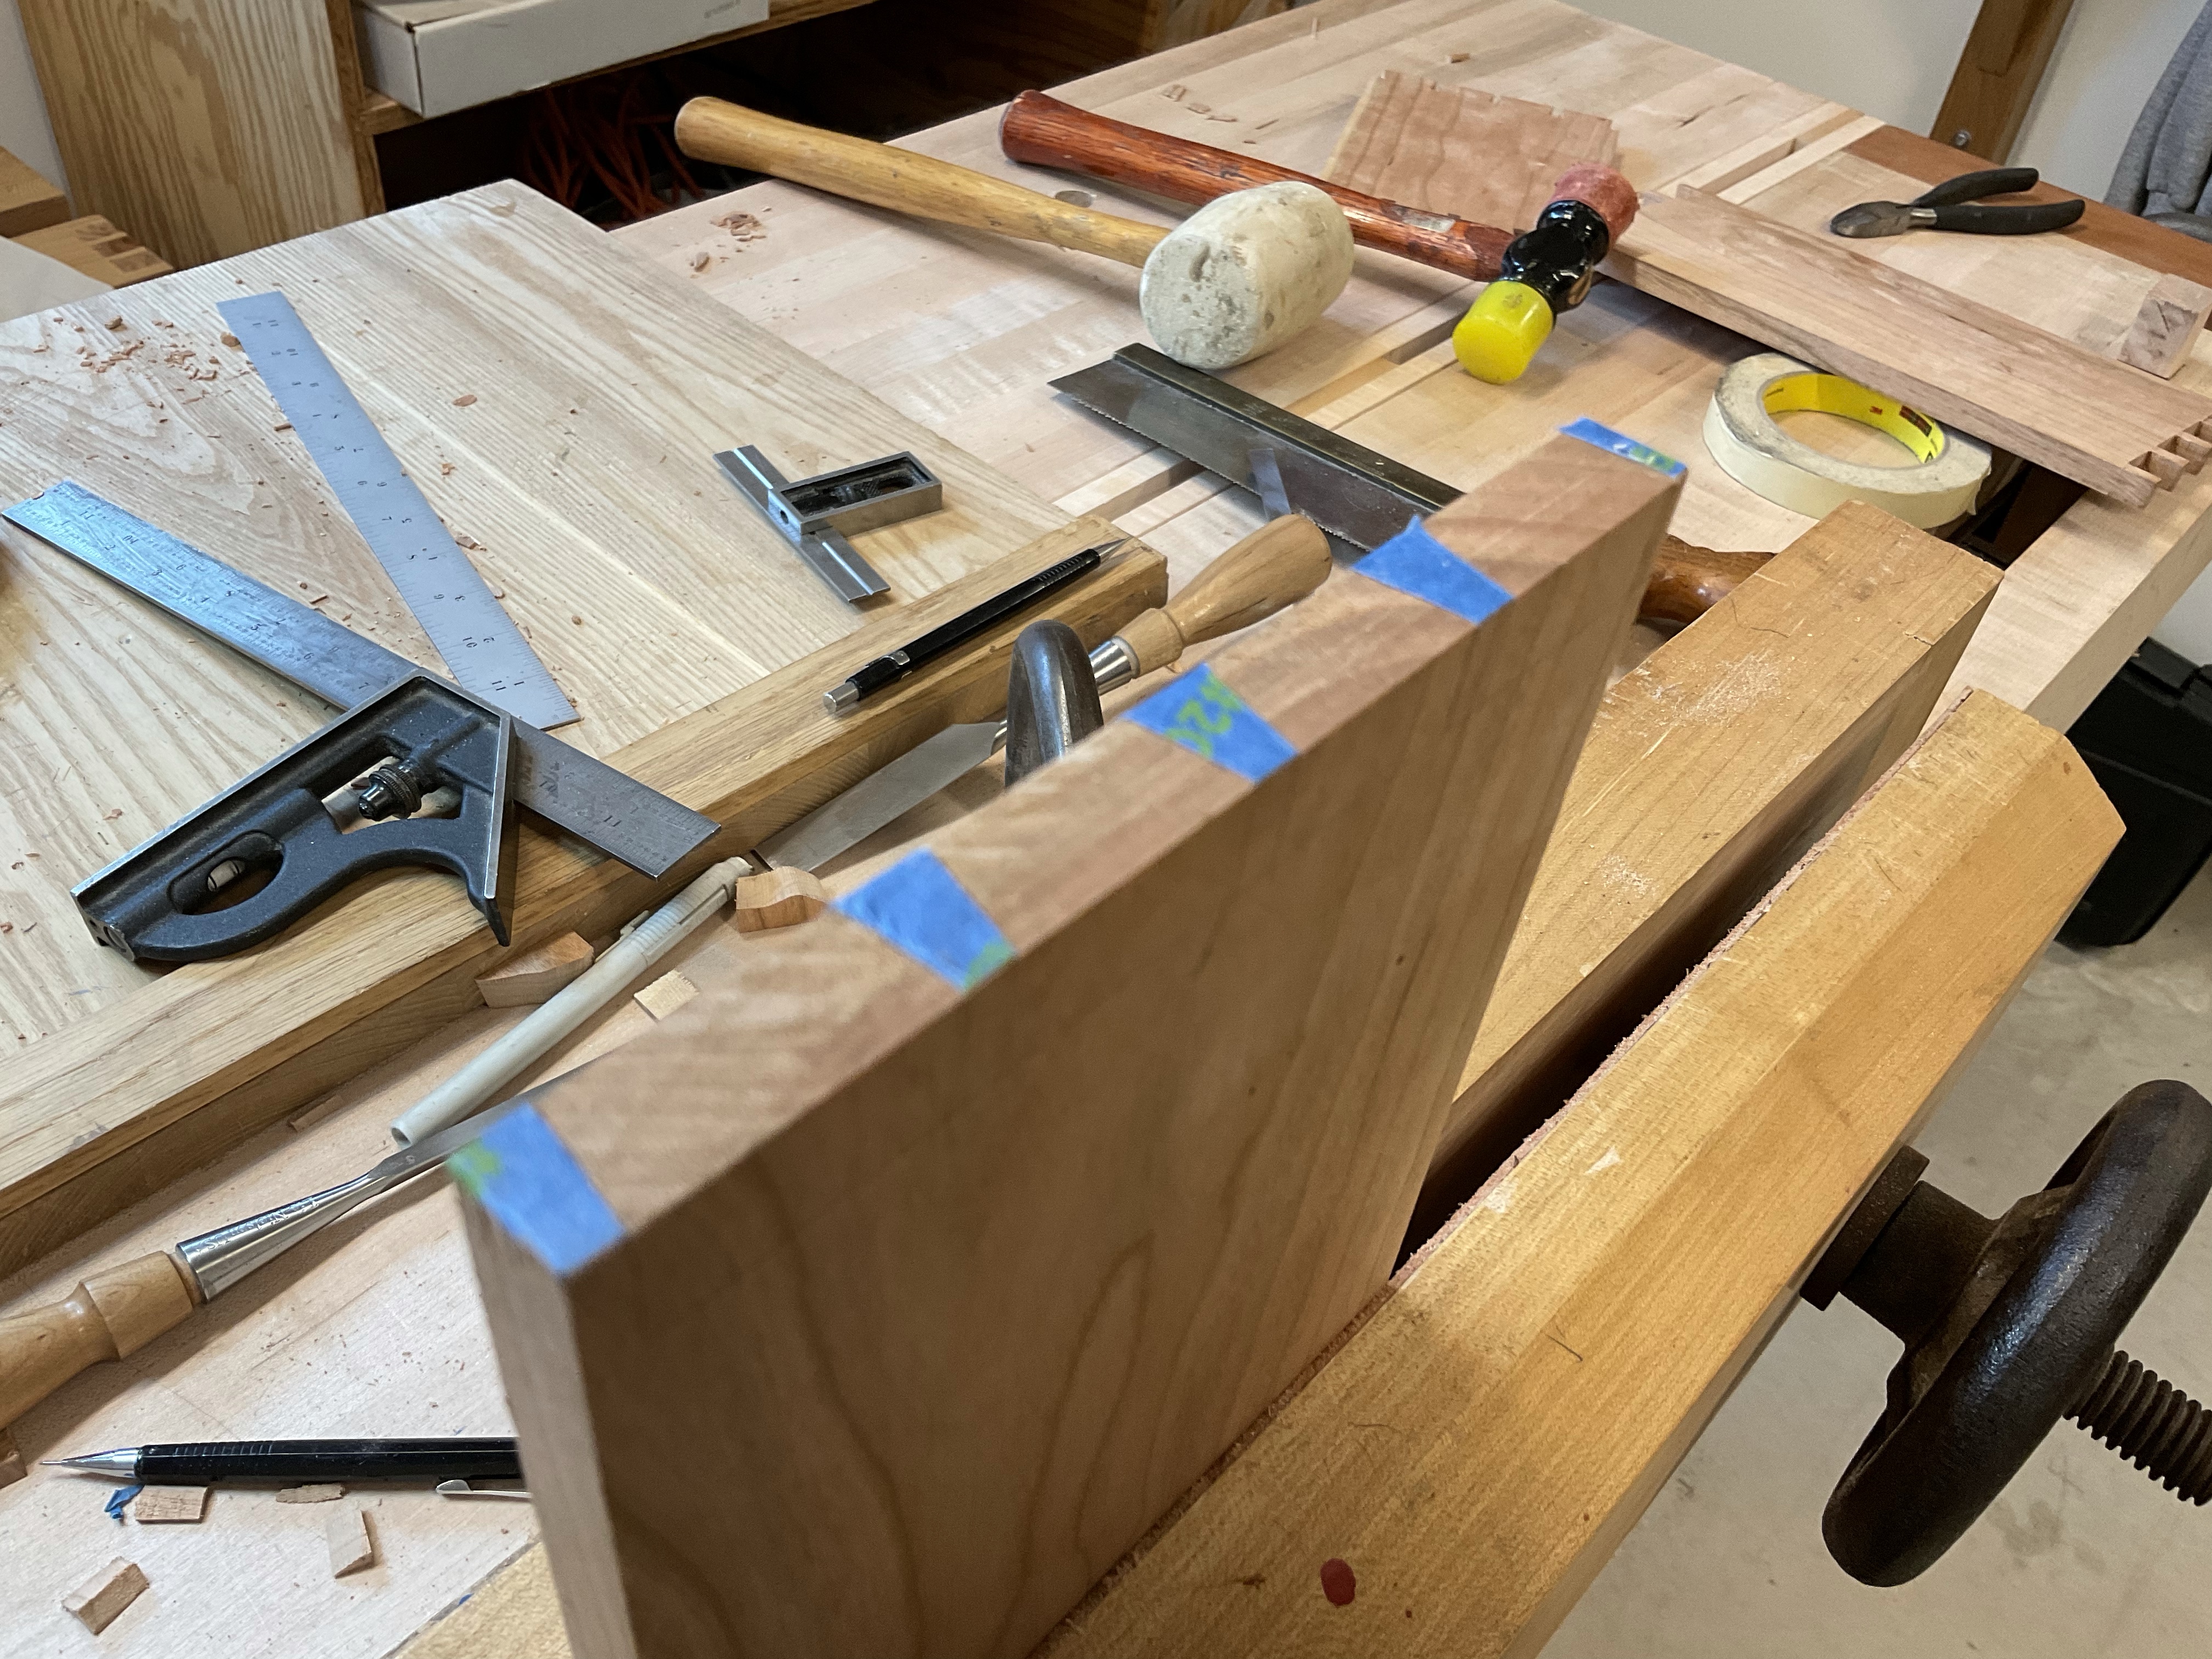
Looking through the posts on my site it’s been a while since I made a dovetail joint. The last appears to be the Roubo End Cap that I completed in 2019 and even longer ago since I made a box. Needless to say, I am rusty in my layout skills. Taking a few minutes to brush up on the use of dividers and dig out various tools I remembered the article that Mike Pekovich wrote about using blue tape and decided that this would be great time to give it a try.
Planing everthing smooth and square, I dug through the Fine WoodWorking articles until I found one that described the use of Blue tape. There are many articles, dig around and find the one that works for you.

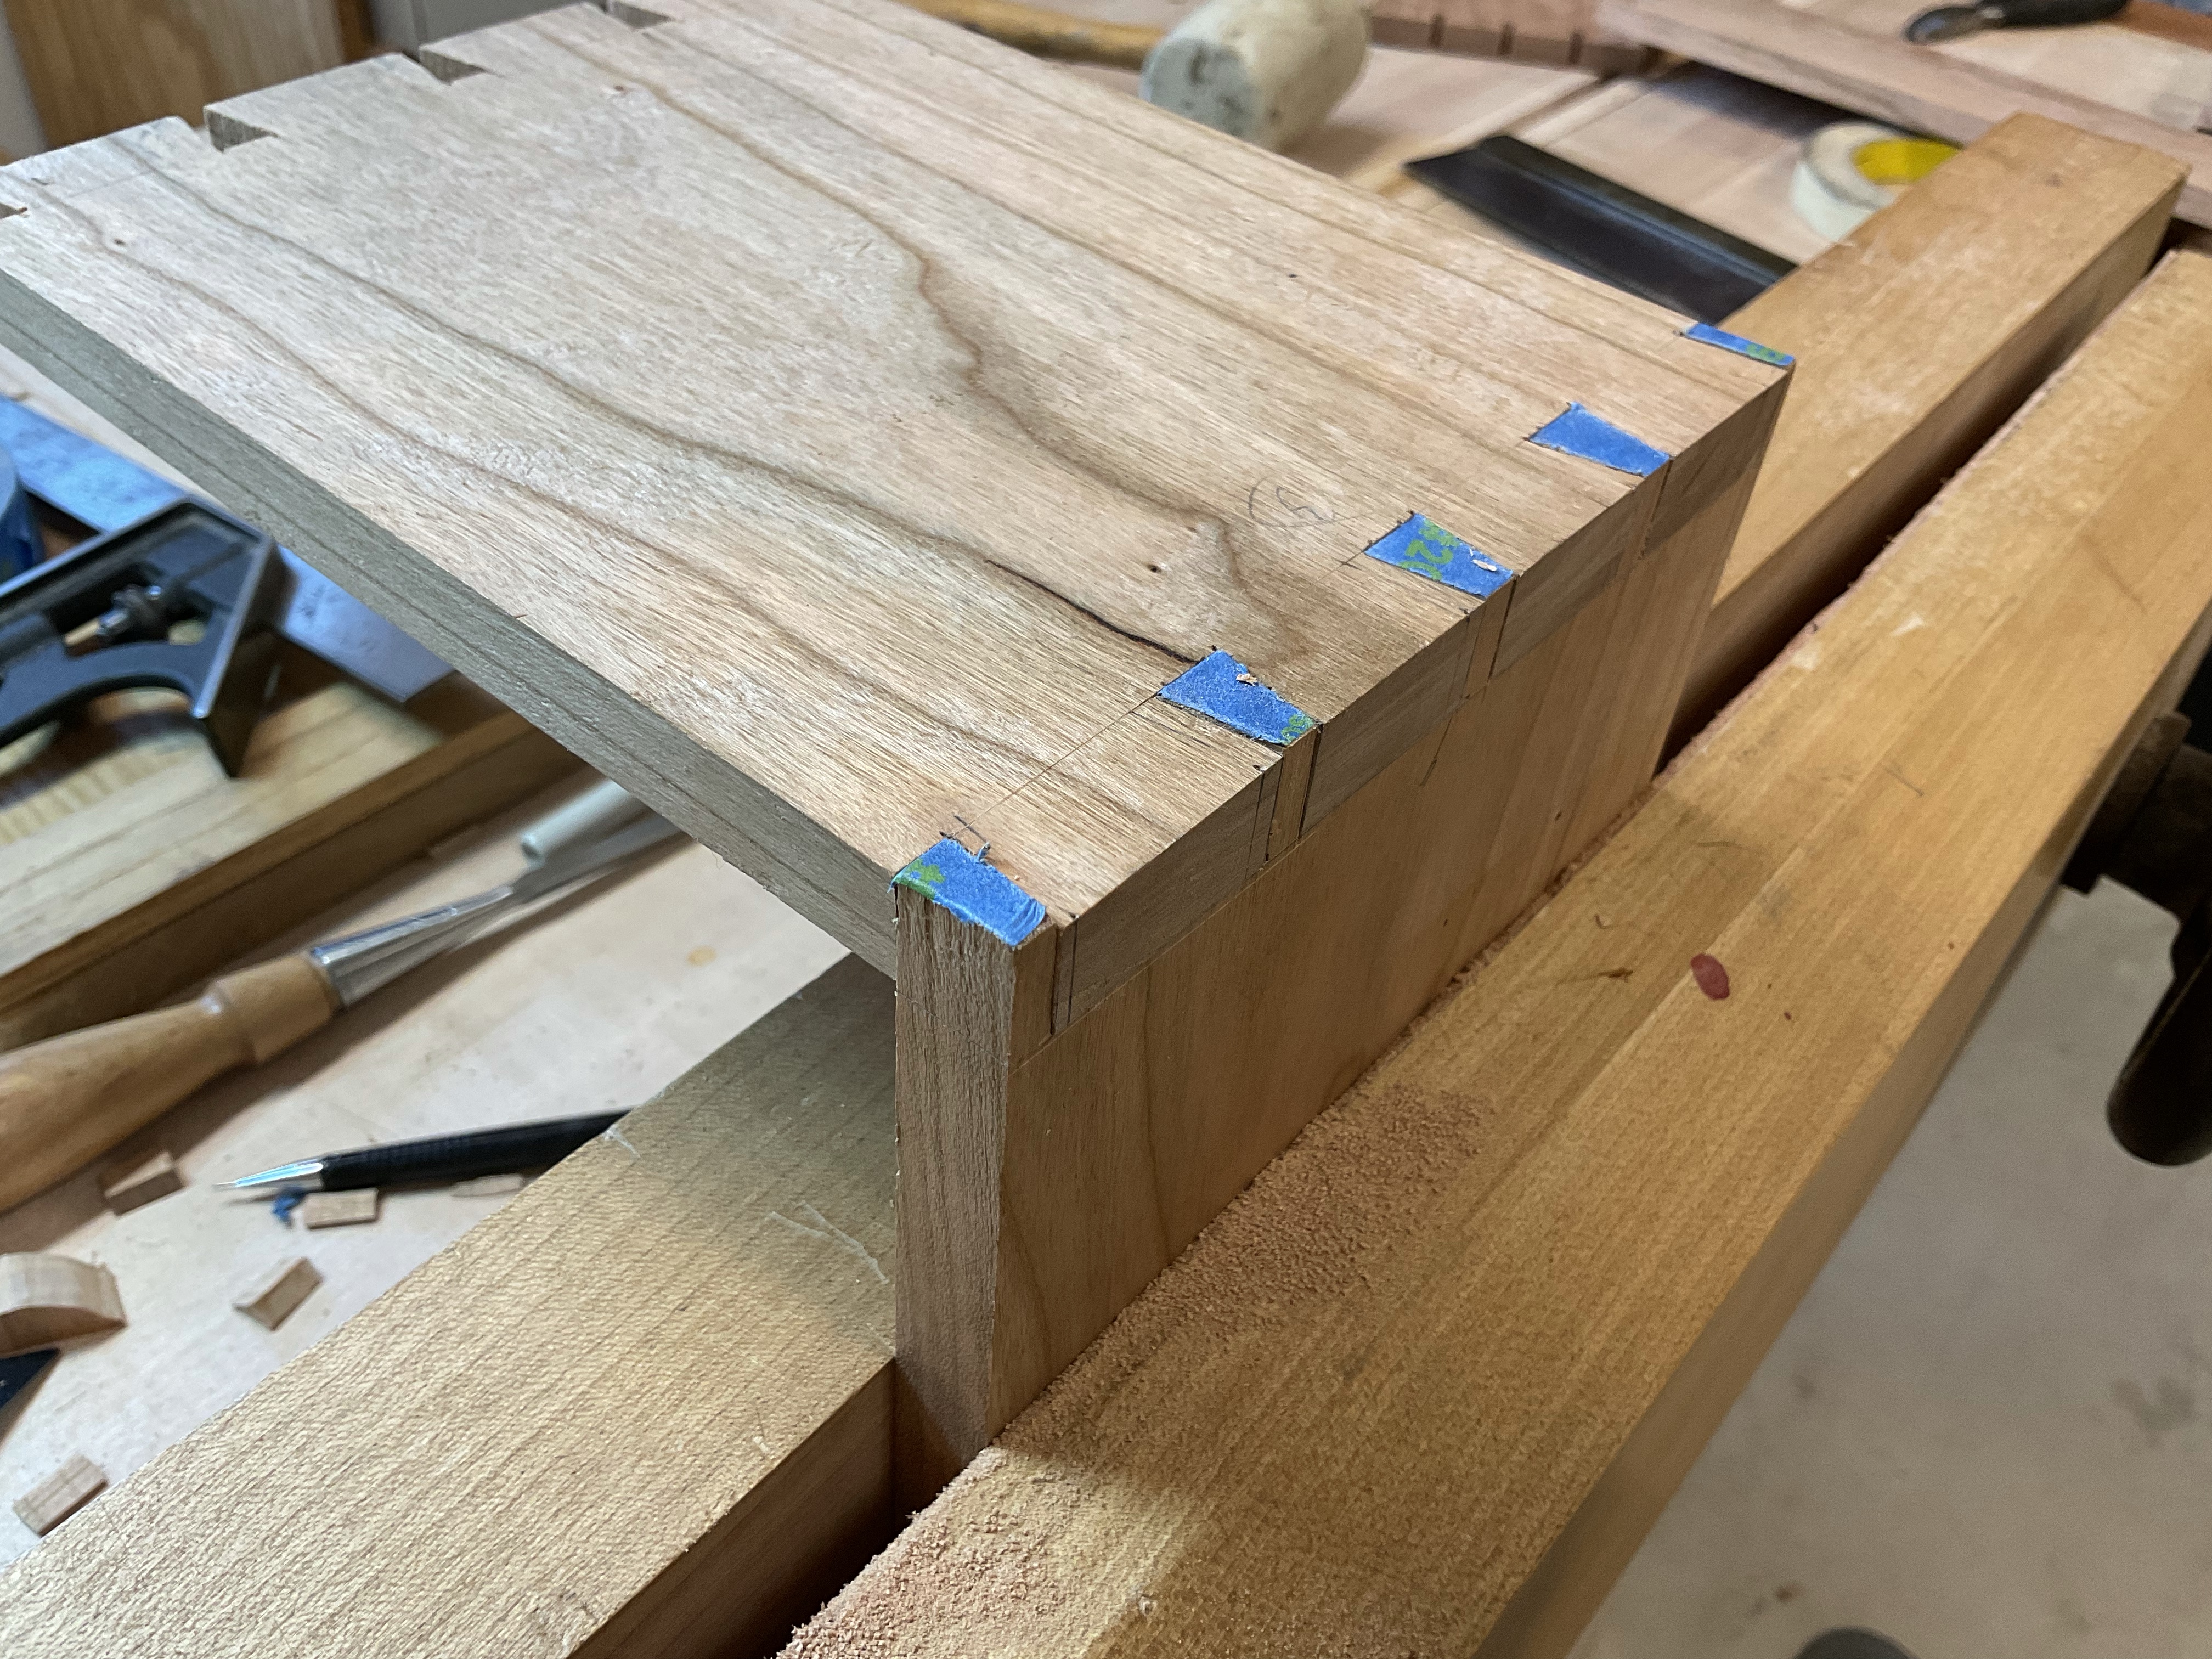
After grabbing the essential layout tools, I marked out the tails on one board and then placed blue tape on the board that will have the matching pins. After cutting out the tails I laid the tails board on top of the board to be marked out for the pins and using a sharp marking knife cut the tape. Then peelsd out the areas that need to be removed. Please read the article. I don’t intend this to be a blog on how to use the blue tape but the effectiveness of the method.

I then followed my method for sawing the doovetails and removing the waste. We have all seen the articles and comments about the blue tape method and indeed it work and extremely well. In fact I only had to adjust one pin which I actually over trimmed. Everything else fit right off the saw! The tape is easy to see and provides just enough edge to provide a guide for the saw. Definately an excellent technique.
Box Making – Wood Prep
Local hardware stores provide great service and often have greater service then the big box stores. The 4MM bolt that I needed to fix the planer took me to three stores before it was found. I realize that everyone needs to make a profit and that it is costly to keep inventory that has low turnover but three stores to find two screws?
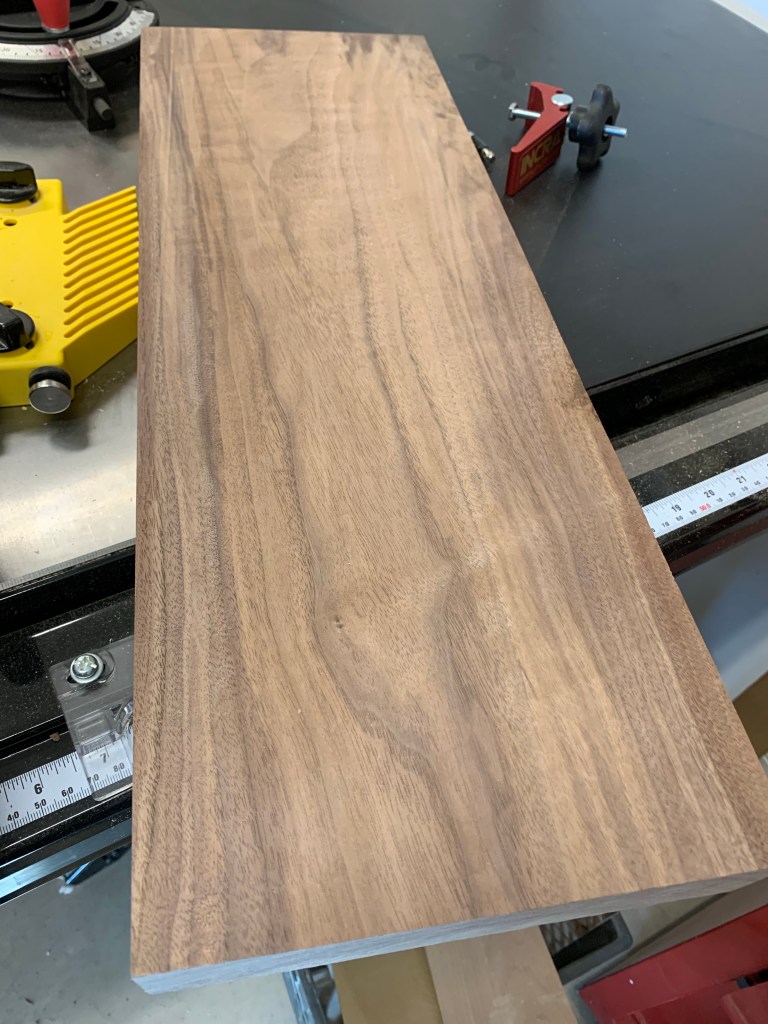
With he planer fixed and adjusted I proceeded to prepare the pieces for the walls of the box. The piece of lumber that I had was 25% pith so I ran it through the bandsaw and planer to get it down to the 1/2” thickness.
Careful with the order of the boards to maintain some congruity with the grain direction I could envision the dovetails and final look. Next I grabbed boards to glue up for the back and carefully laid them out to keep the grain looking similar.

After many years of woodworking its only in the last couple that I have made more effort to watch the grain and it certainly pays of in the finished project. Next dovetails and rabbits.
Case Miter Jig
The Dovetailed Box Project has mitered sides on the case inserts. I thought of several methods to do this but with the visibility of these mitered corners realized that I had to try something different, my sawing skills may not be up to the task. searching through Fine Woodworking magazine I came across an article from May/June of 2017 which built a simple jig to ‘shoot’ these miters with a plane.
I guess that a table saw could be another alternative but I think using a shooting board will provide me with he results that I want without all the noise and dust.

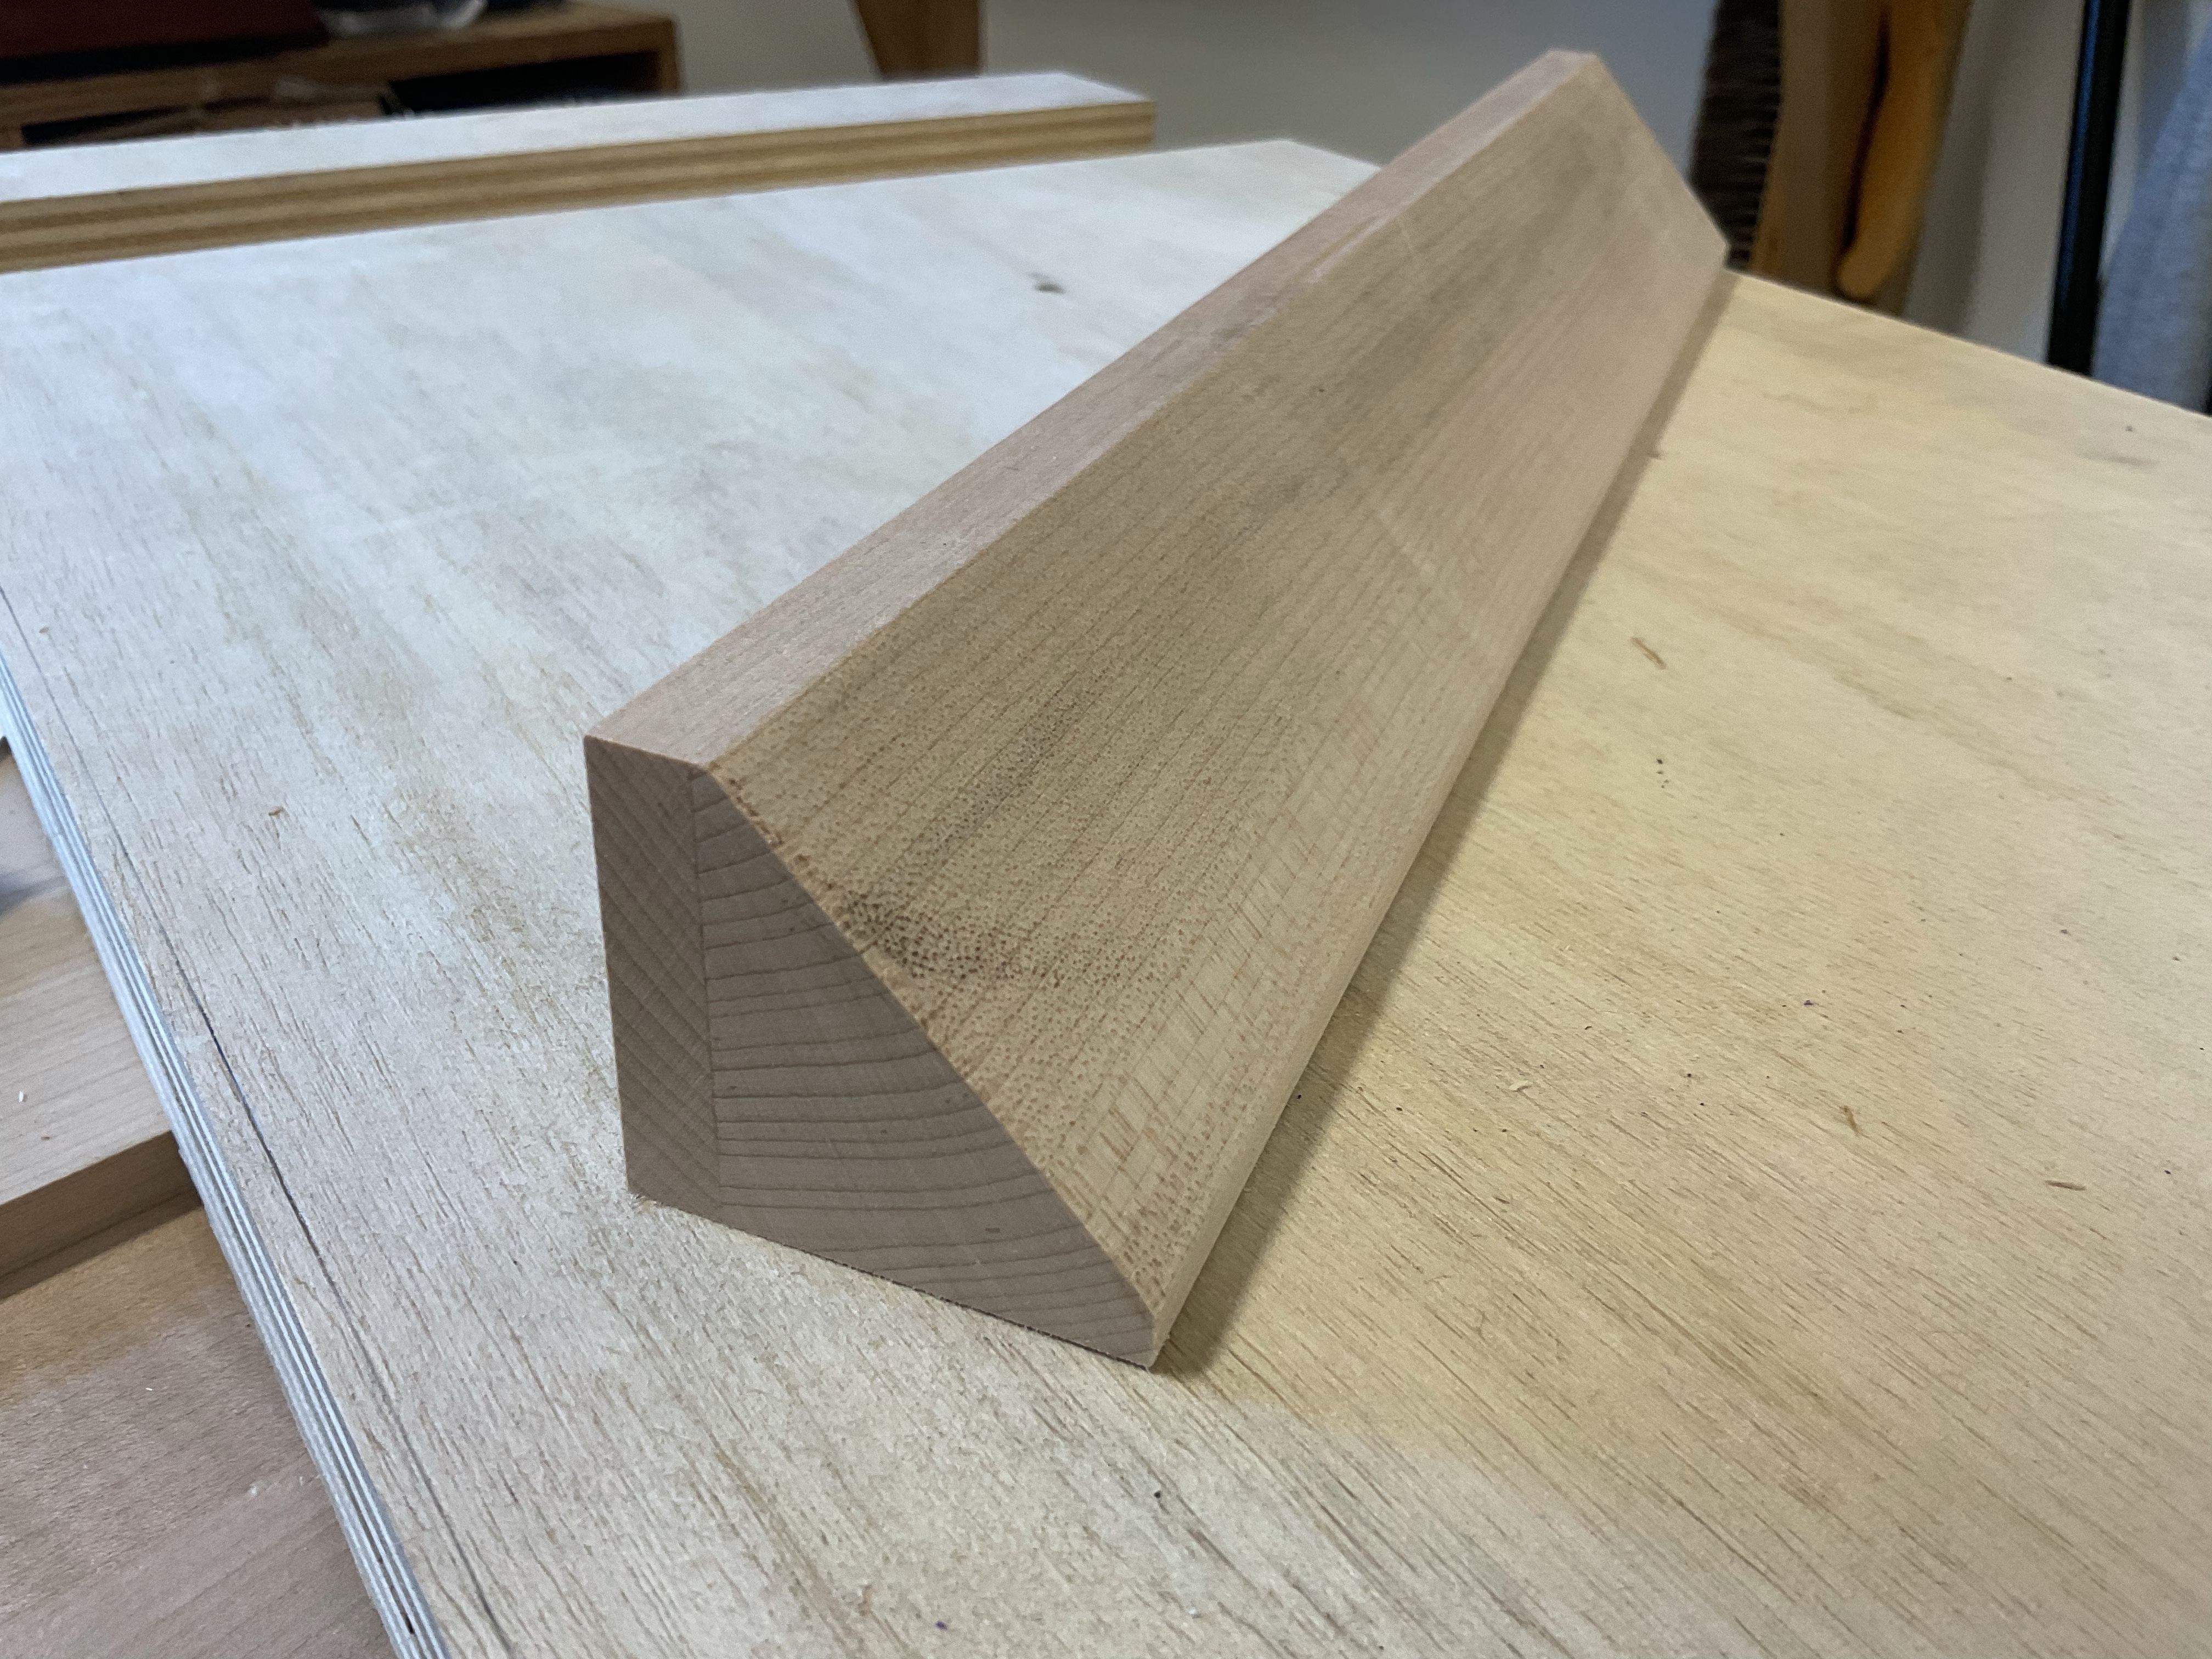
The jig is fairly simple and I managed to use mostly scrpas to make it. All good jigs are made from scraps!
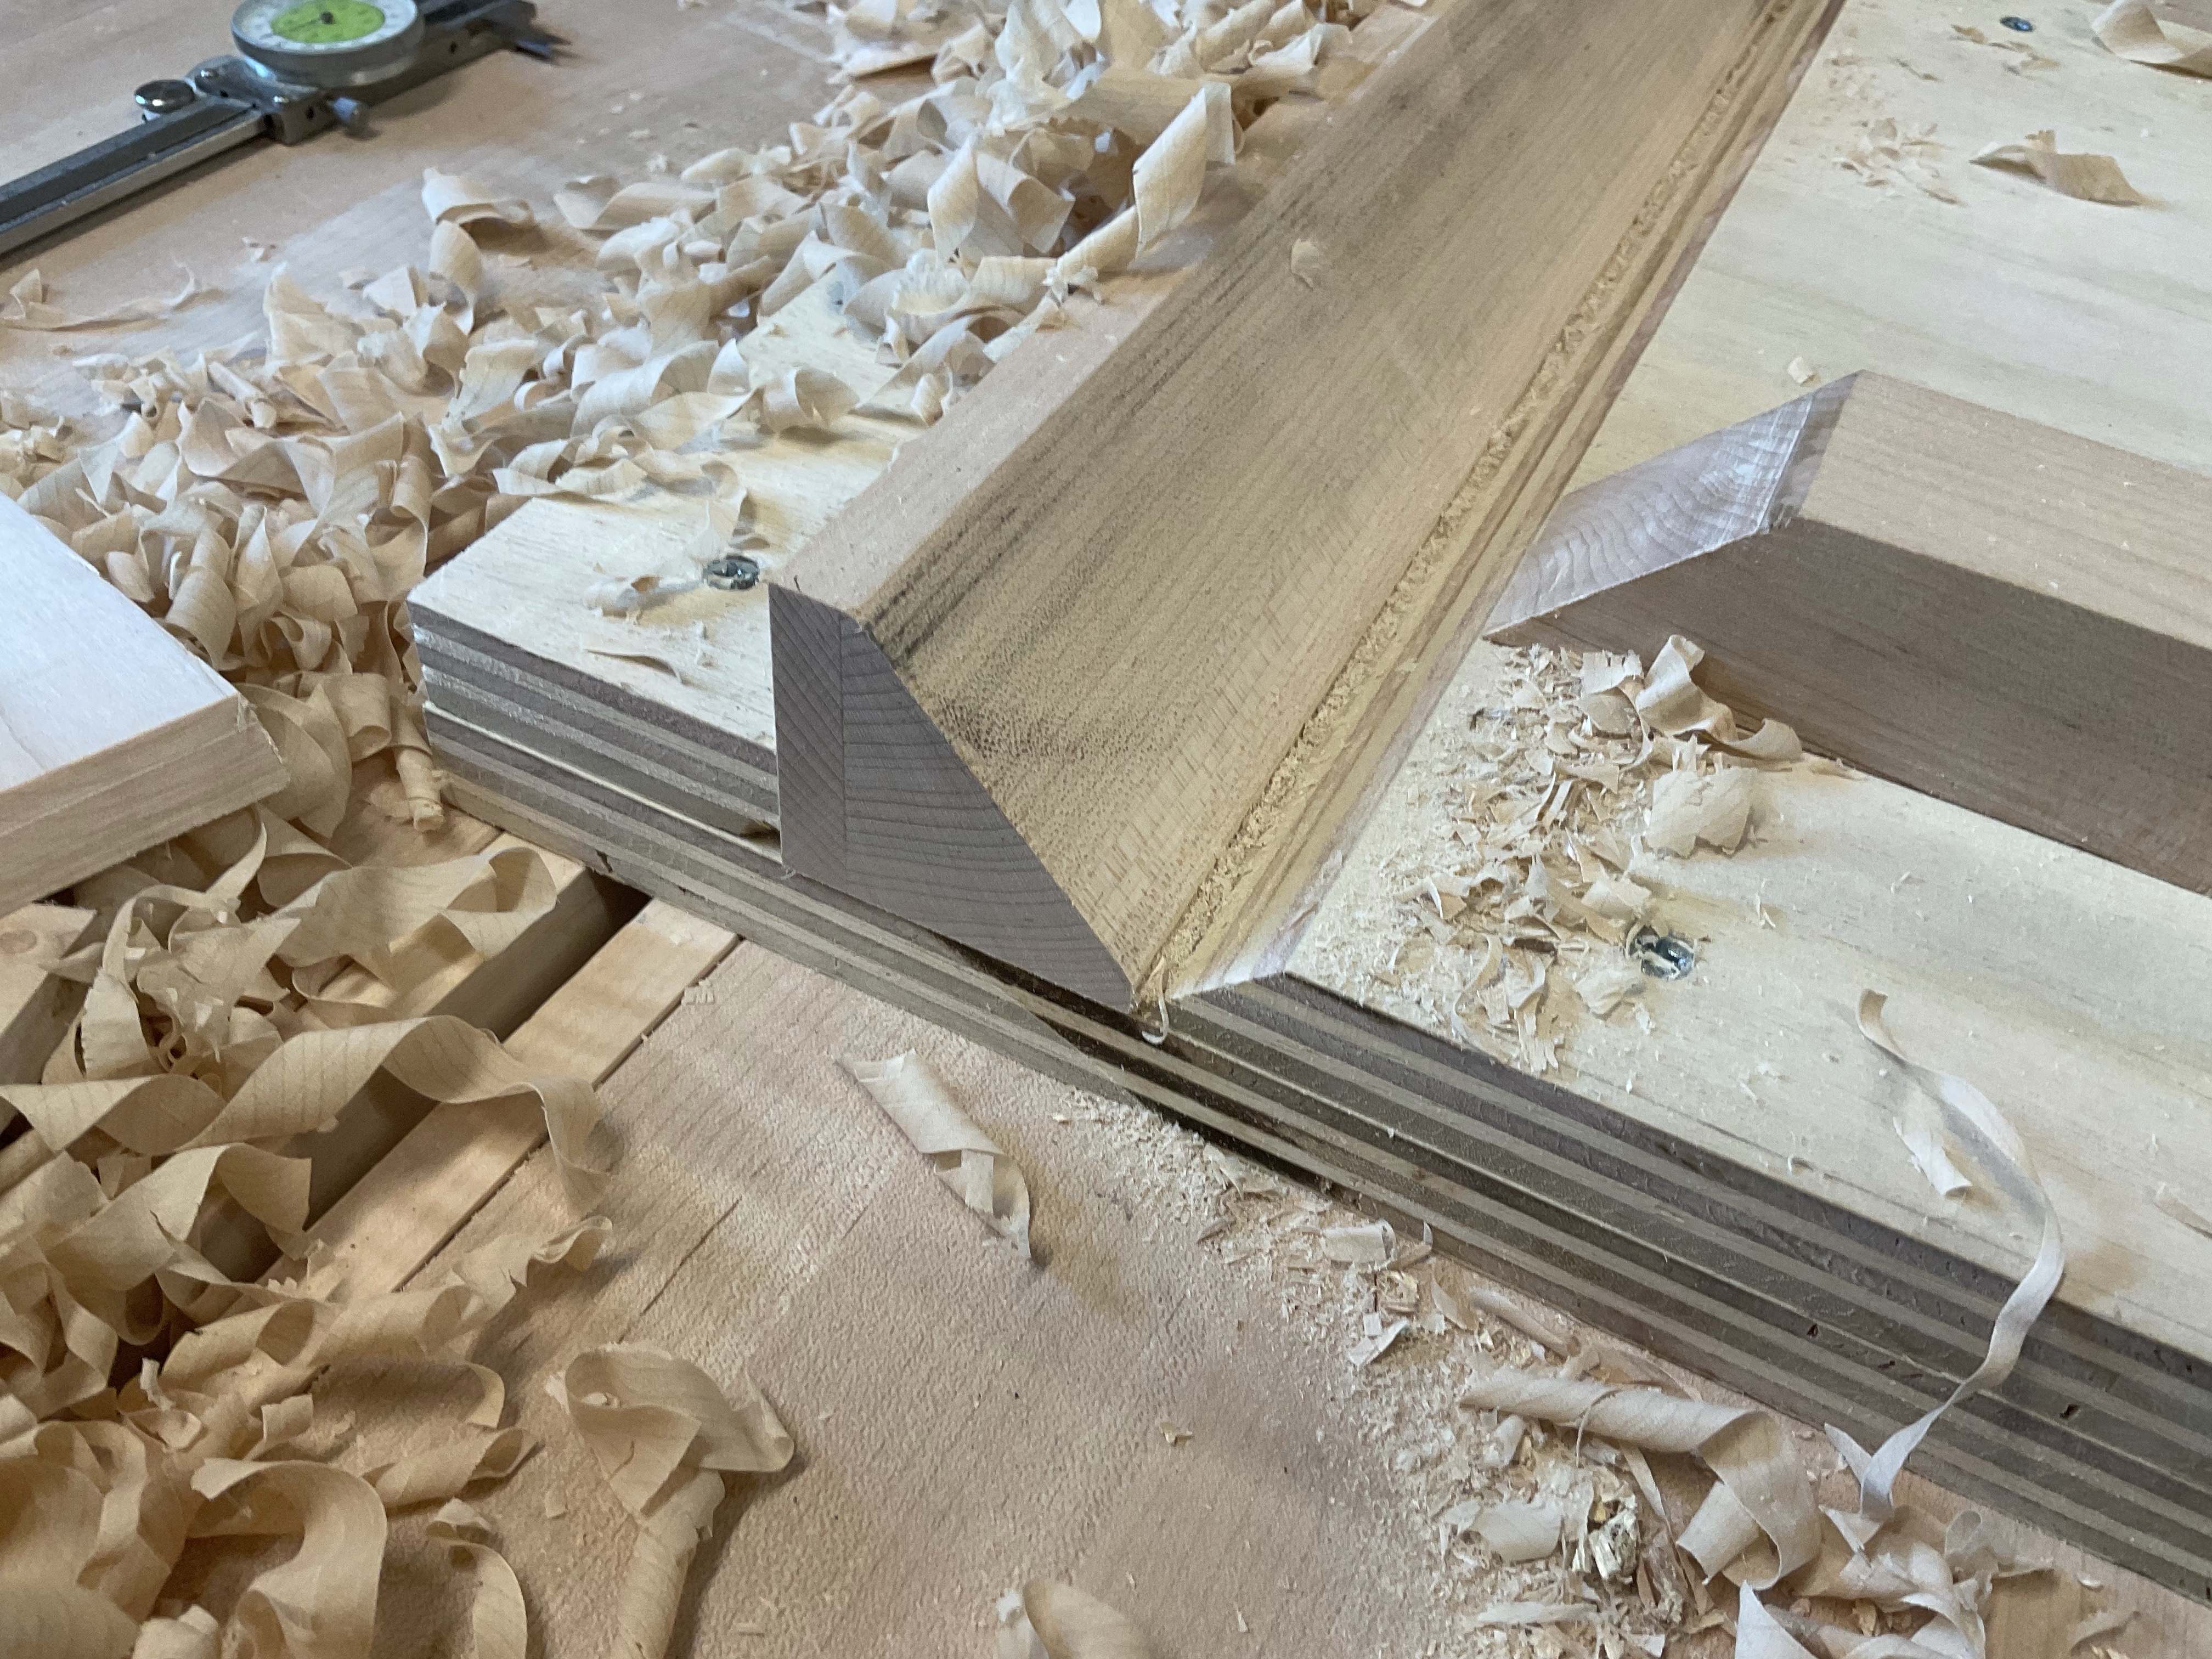
I used my shooting plane but you could easily use a number 5. And after a couple of test runs I had it tuned in and perfectly. mitered corners. This will let me try out inserts in the box that I’m making.

Box Making halted by a 4mm Screw!
Warm water splashed my face as the river’s rumble passed into the darkness, it is warm, very warm. With a jerk I find myself awake, a thunderstorm rumbling overhead and Scout licking my face looking for comfort.
Admittedly it has been a long time since I jumped headlong into a project. The shop is all but complete and my excuses no longer hold sway. Grabbing a piece of cherry left over from another project I began sizing it up for a couple of boxes I noticed in Mike Pekovich’s book ‘The Why and How of Woodworking’ not sure I’ll make the exact box, but its a simple way to get back into the swing of woodworking.

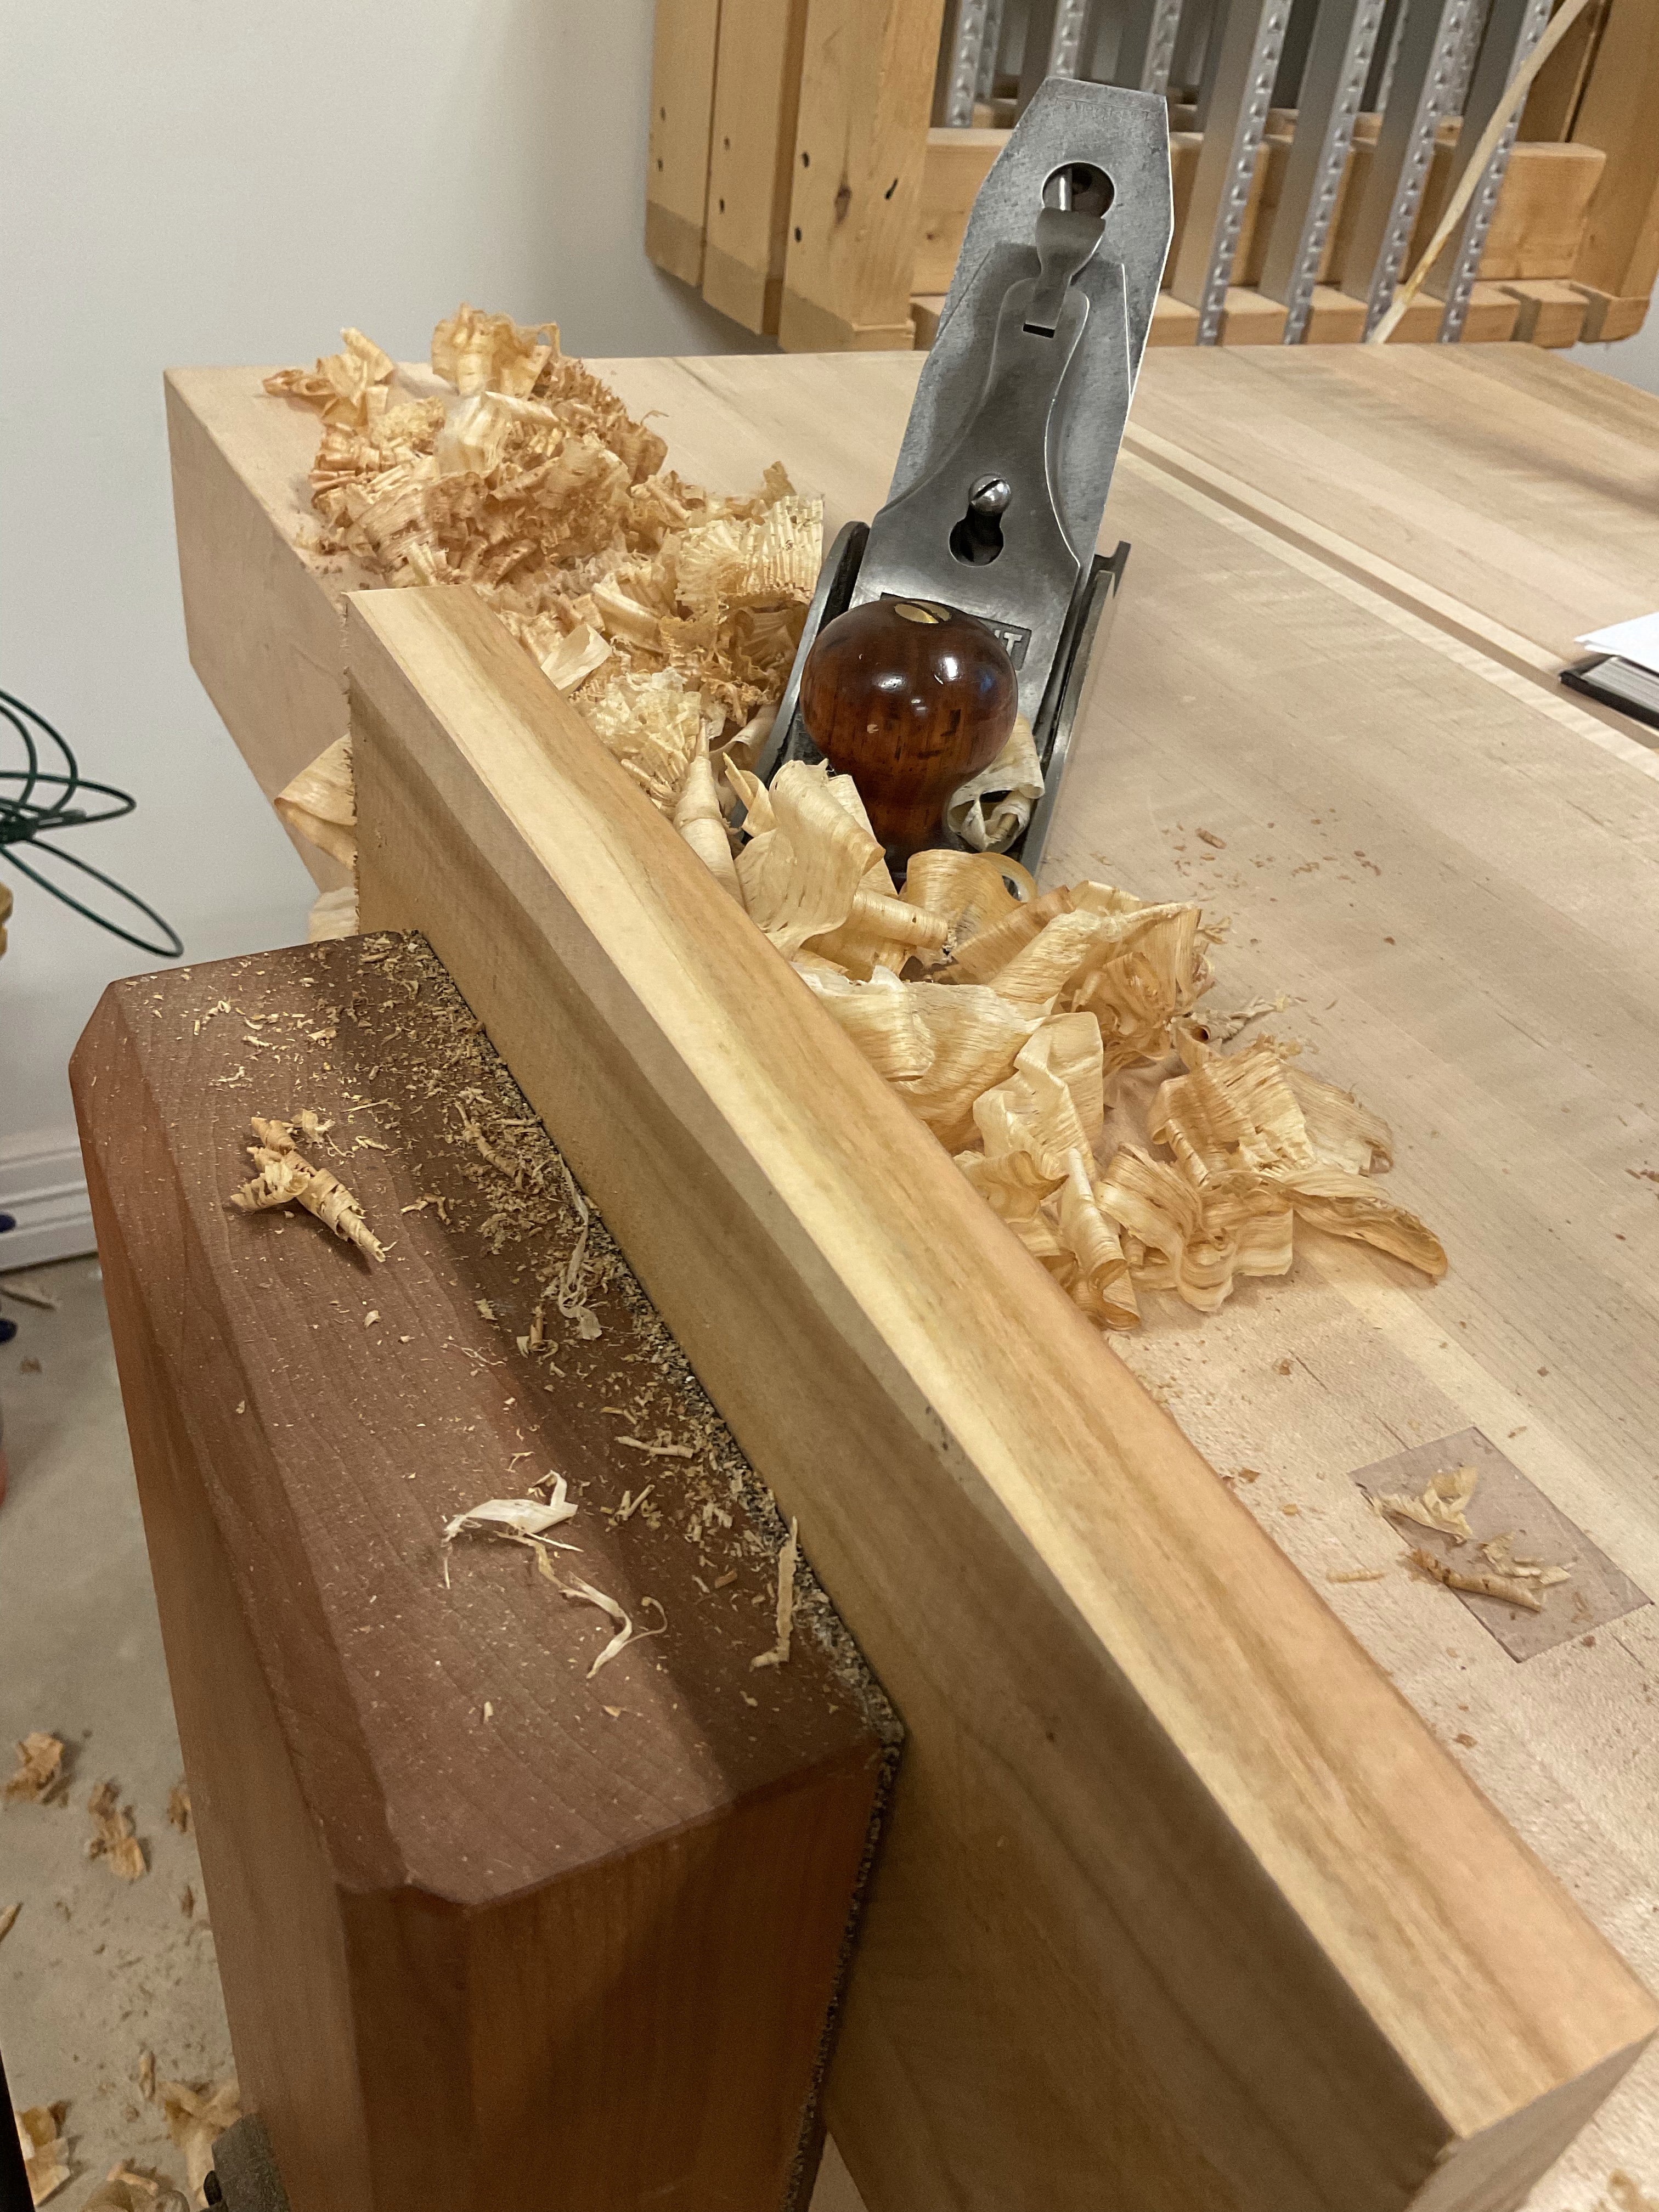
The cherry board that I have on hand is 5/4 and I need to get it down to approximately 1/2”. It’ll work great because approximately half the board is the pith. I used my Bad Axe Tool Works D8 saw to break the board down and there was a big smile on my face the entire time. The saw was singing and dust dropped quickly onto I the floor. There is something very satisfying about cutting cherry with a hand saw. If you’ve never used a Bad Axe Saw try one, the filing is magnificent. Even if you don’t get the chance visit the web site its full of great information about saws, saw sharpening etc.

Grabbing the Sargent 409 I flattened one side of each board in preparation for running it through the planer. My jointer sits in its box by the door and I can’t recall the last time I sued it. Just seems quicker to use a hand plane and a lot more pleasant! Turning to my planer I check the bed to make sure I eliminate as much snipe as possible and notice that one corner is sagging. A quick peak and the problem becomes clear a small screw 6mm to be exact is missing and there is no doubt that if it’s in my shop I long since swept it up! Stumped for the lack of a tiny screw!

Sharpening Angle Settting Jig
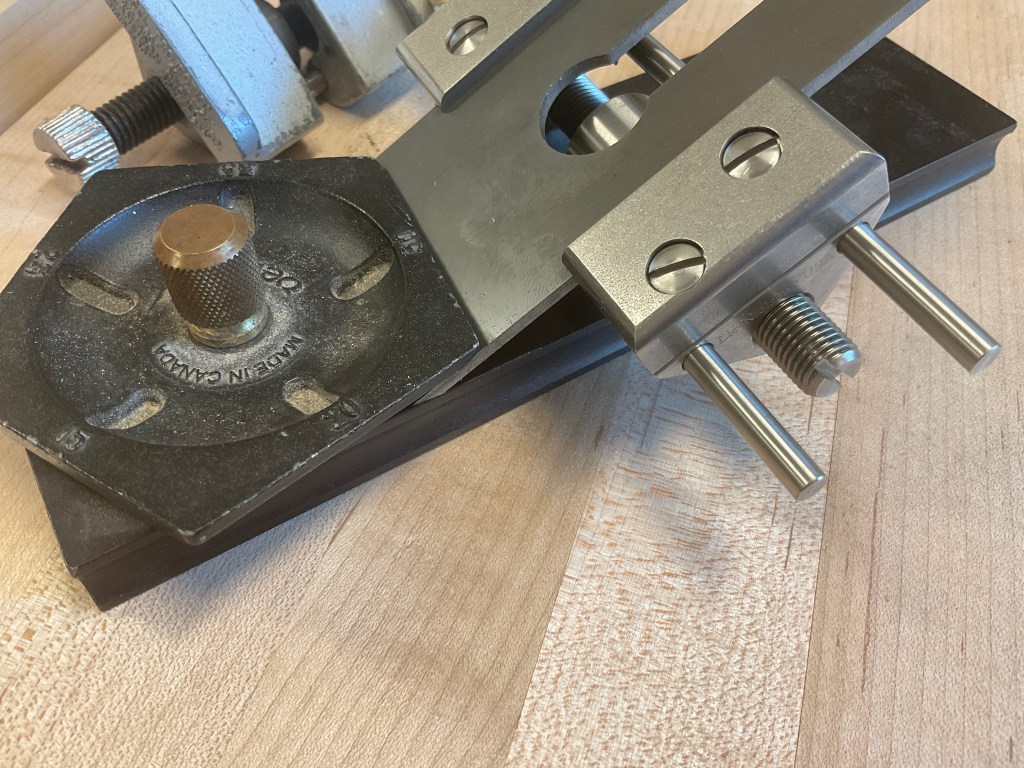
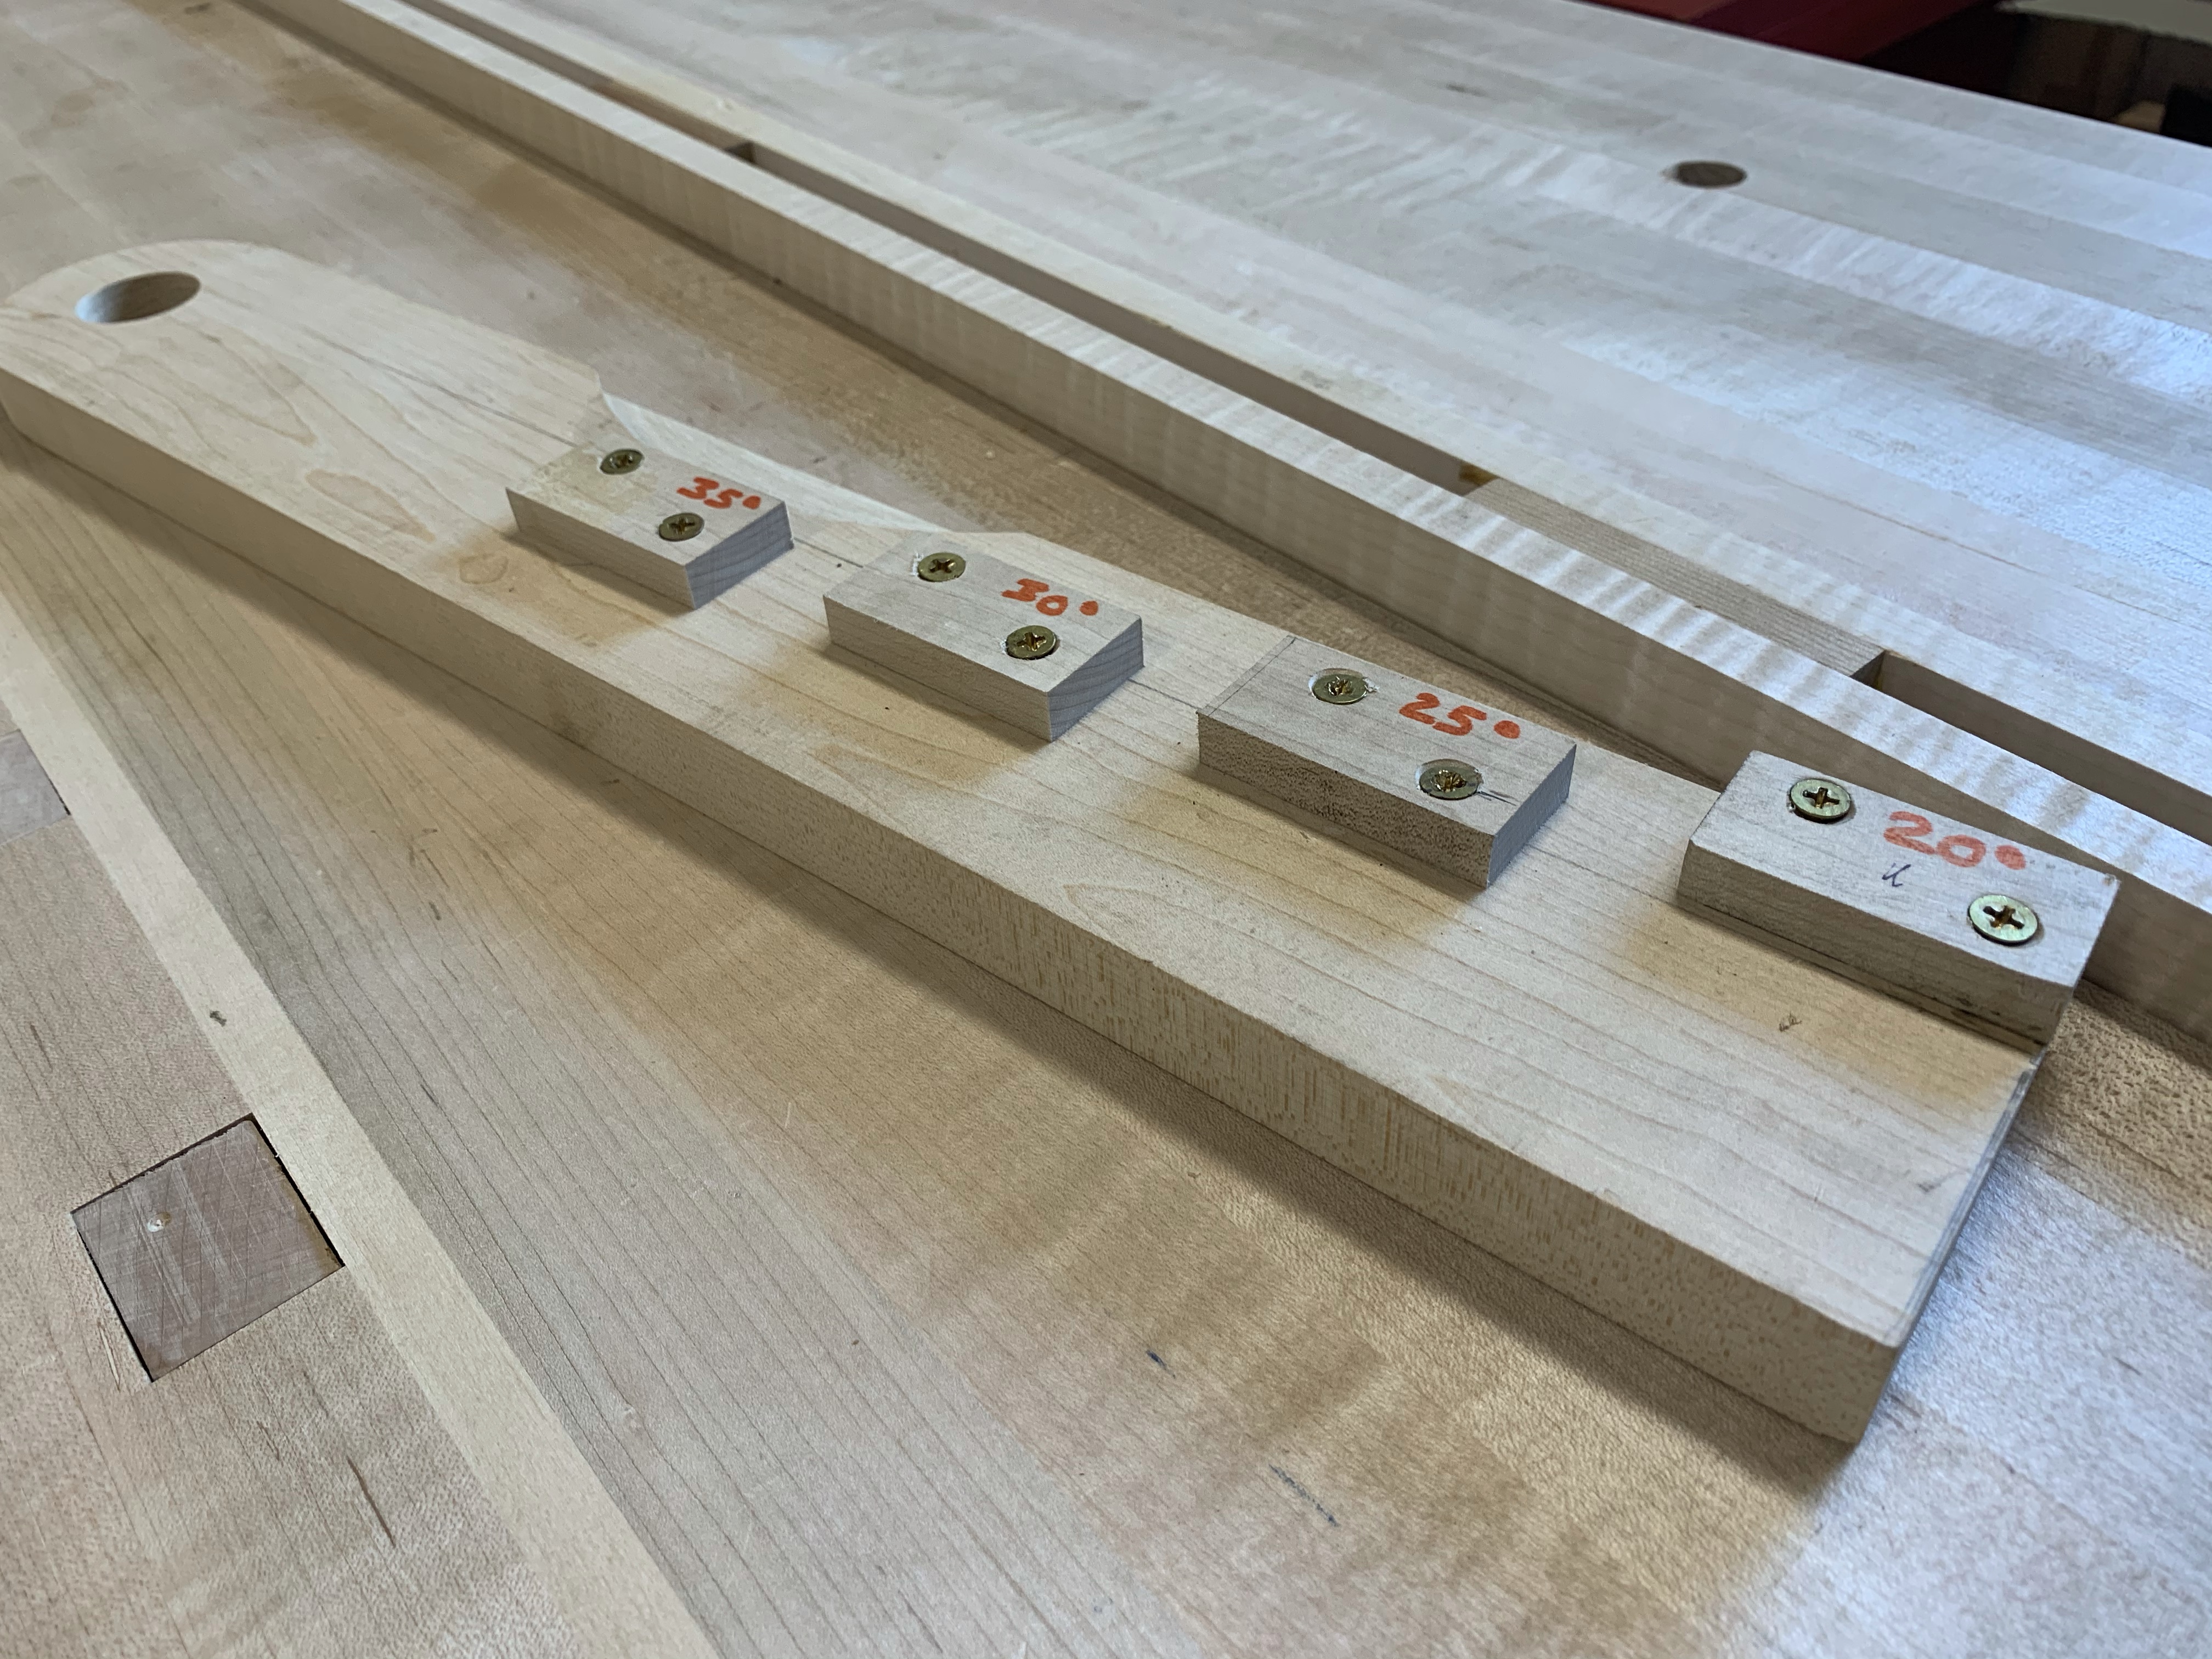
It always amazes me how long I can put off making a simple jig that can make things so much easier. The Angle setting jig that I made this week is the perfect example. If you use any of the Eclipse, Veritas, or Lie Nielsen jigs for sharpening you know that the repeatability of the sharpening angle is critical to the speed of sharpening let alone the performance of the plane or chisel. Many companies provide an angle setting jig with the sharpening jig. There are other systems that people use and it appears the simplest is to set the distance from the end of the blade to the edge of the jig

These distances don’t change as long as you are sharpening similar blades in the same jig and in this case the perfect angle is not as important as the consistency of the angle. Again THE SAME SHARPENING JIG. Notice the difference In length between the Veritas and the Lie Nielsen.
The jig I made this week is a basic copy of one built by Denab Puchalski of Lie Nielsen. I found scraps in the bins cut them to size and after a few measurements glued and screwed each to the board. Most went well, one I had to plane to make it exactly parallel to the board edge. Once finished I drilled a hole so I could hang the jig on a wall. This has made sharpening easier and more consistent and that’s always a good thing.


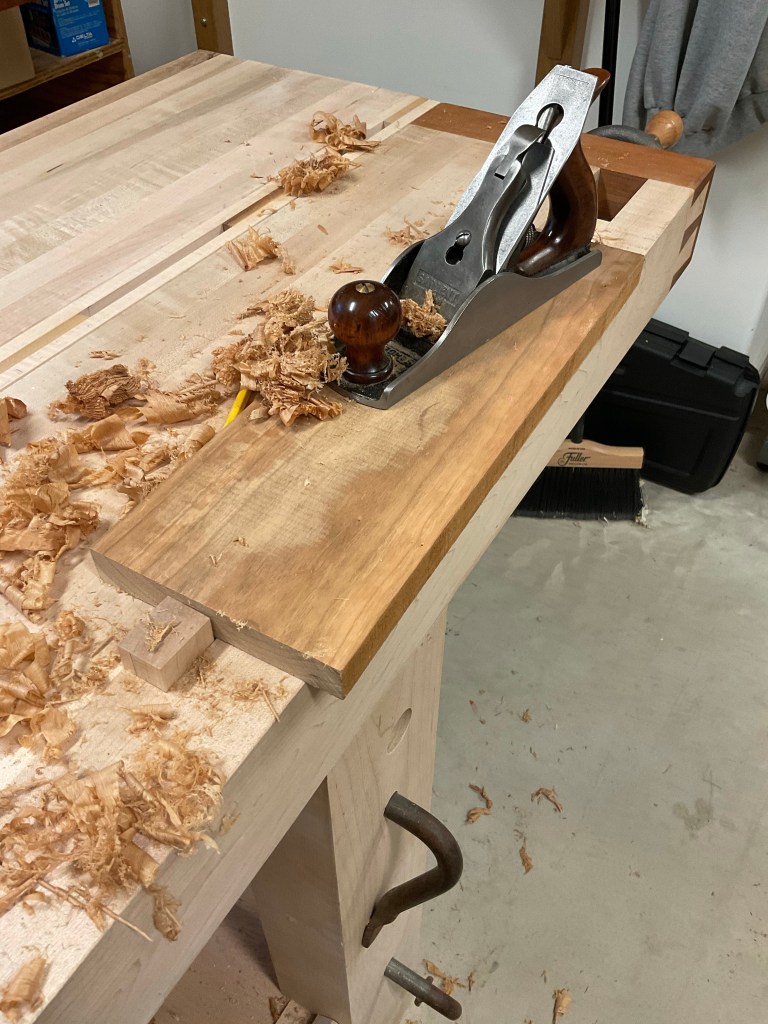
Sargent 409: A brief look
The Sargent plane admired for many years and mentioned in the post A Sargent in the House, is resting comfortably in a cardboard box by my side. Buying tools on EBay often seems to be risky, but generally I have had a great experience. Purchasing this plane was no exception and it arrived well packed and exactly as described.
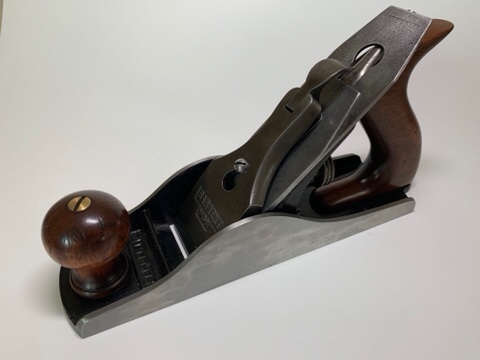
The plane has been cared for, cleaned and appears to be sharpened. It also appears that the sole has been flattened. Learning about the Sargent bench planes has been enjoyable and there are some great websites providing lots of information. Time Tested Tools is one of these sites.
There are certainly fewer Sargent planes in people’s tool boxes and the majority of mine are Stanleys. However I’m rather fond of this plane and find myself reaching for it over its Stanley cousin.
There are a few subtle differences and one major one that I discovered. Let’s take a closer look. If you are new to Stanley and Sargent Planes people typically make comparisons to the Stanley numbering system, the Stanley #4 and Sargent #409 and equivalent. The great thing about the Sargent system is that the 9 in the 409 is the length of the bed.

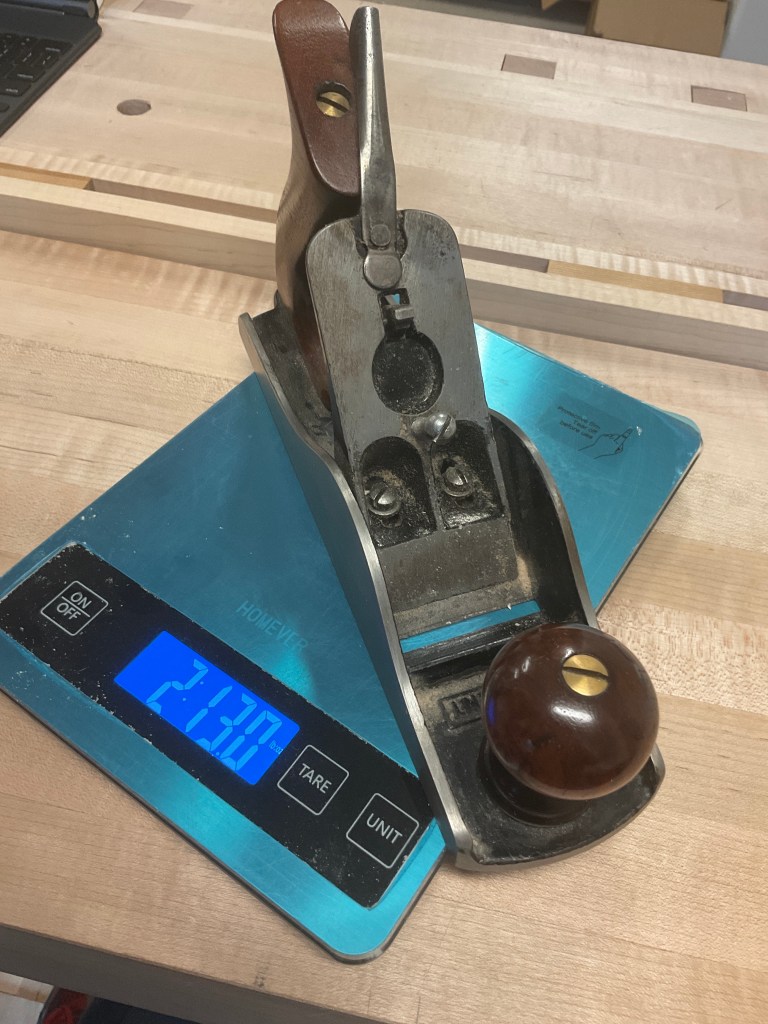
Taking the blades out of the planes The Sargent weighs 2lb 13.21oz, 2 lb 13.7 oz. not a large difference. With blades in there is a greater difference. I’ve a Veritas blade in the Stanley3 lb 12.7 ozone jand original in the Sargent 3lb 10ozSo if it’s not weight that drives preference what is it?
The front knobs are different . The Stanley having a higher profile and slightly narrower.
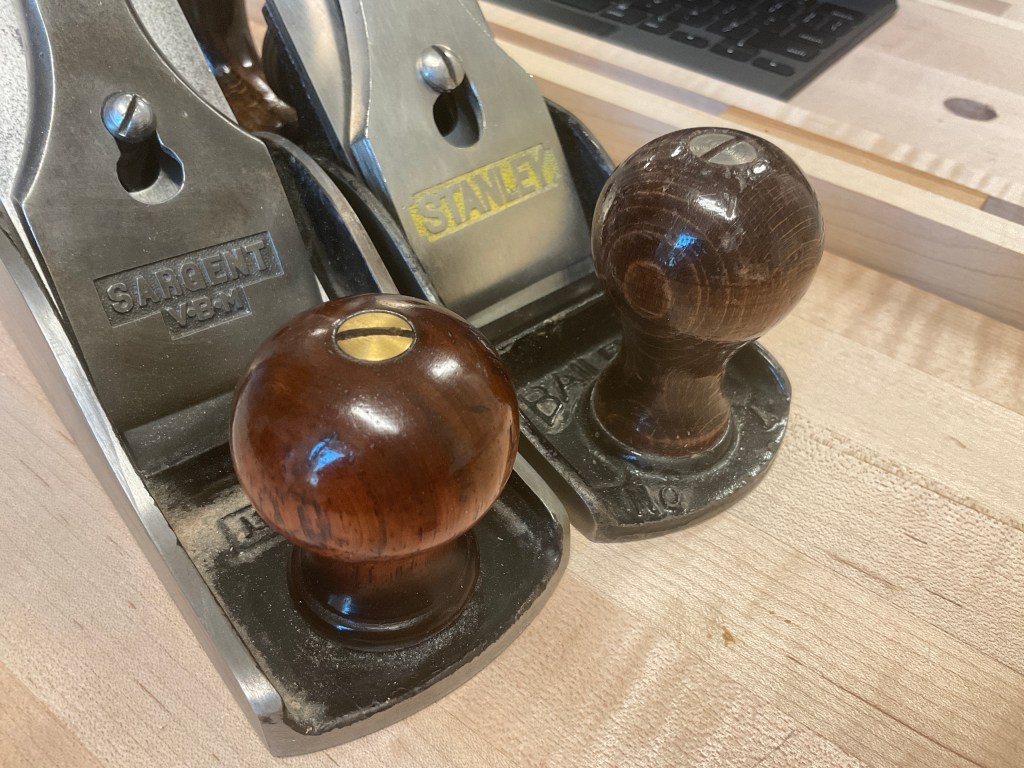
The totes are also different with the Sargent taller and at a slightly different angle although not significant.


All seem like subtle differences. The one change that takes a little getting used to is the adjustment of depth. The Stanley gets deep with a clockwise motion, while the Sargent is counter clockwise! Yes it has caught me once!

Overall there is nothing obvious that drives me to prefer one over the other, it’s just an observation that I tend to reach for the Sargent first.
