Archive
The Planes in my hand
Watching YouTube and reading many blogs, it appears everyone has an opinion on the tools a woodworker should own. I much prefer to see a picture of someone’s bench to see the planes that have actually been used.
In my tool chest and cabinet are all the standard size bench planes with the exception of a number 1. Numbers 2,3,4,5,6,7,8 stand ready for use like chess pieces on a board. Obviously the project you work on often dictates the tool you should use, however there are three bench planes that will most likely find their way into my hand.
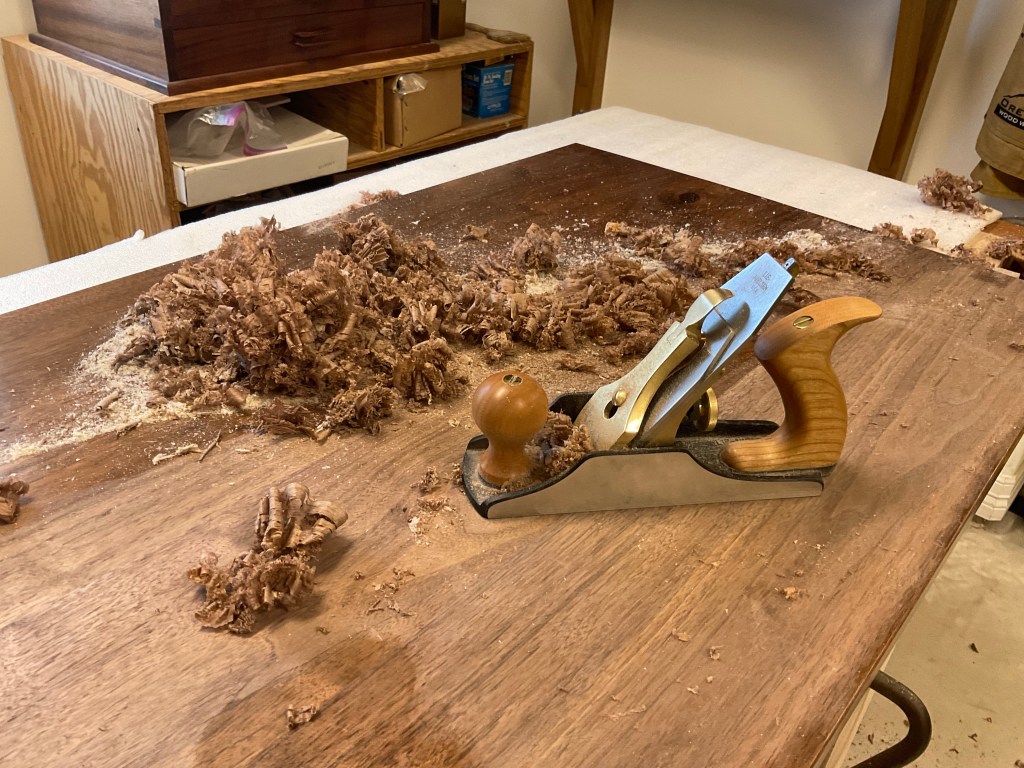
Sargent #409 – This plane is used on most projects and although officially a smoother has been used as a shooting plane, jointer, straight edge, and clamping caul. Occasionally if I’m doing a lot of work I’ll also have a Stanley #4 on the bench just to keep moving between sharpening. If you are asking why the Sargent before the Stanley , Ill direct you to another blog, but in reality it just fits differently and I like the look.

Stanley #7
A Stanley #5 is the go to plane for many people and I can’t disagree with the utility of the plane. It can handle most of the jobs of the #4 and many of the jobs of the #7, however I rarely find it on my bench. If I’m reaching for a larger plane it’s generally because I’m working a great length of wood of several feet and the bed length is critical to providing the surface I am looking for. It also has more mass. The #7 does not have the mass of a #8 which makes it easier to use and although I’ve used my #8 a few times I have not come across anything that a #7 can’t handle.

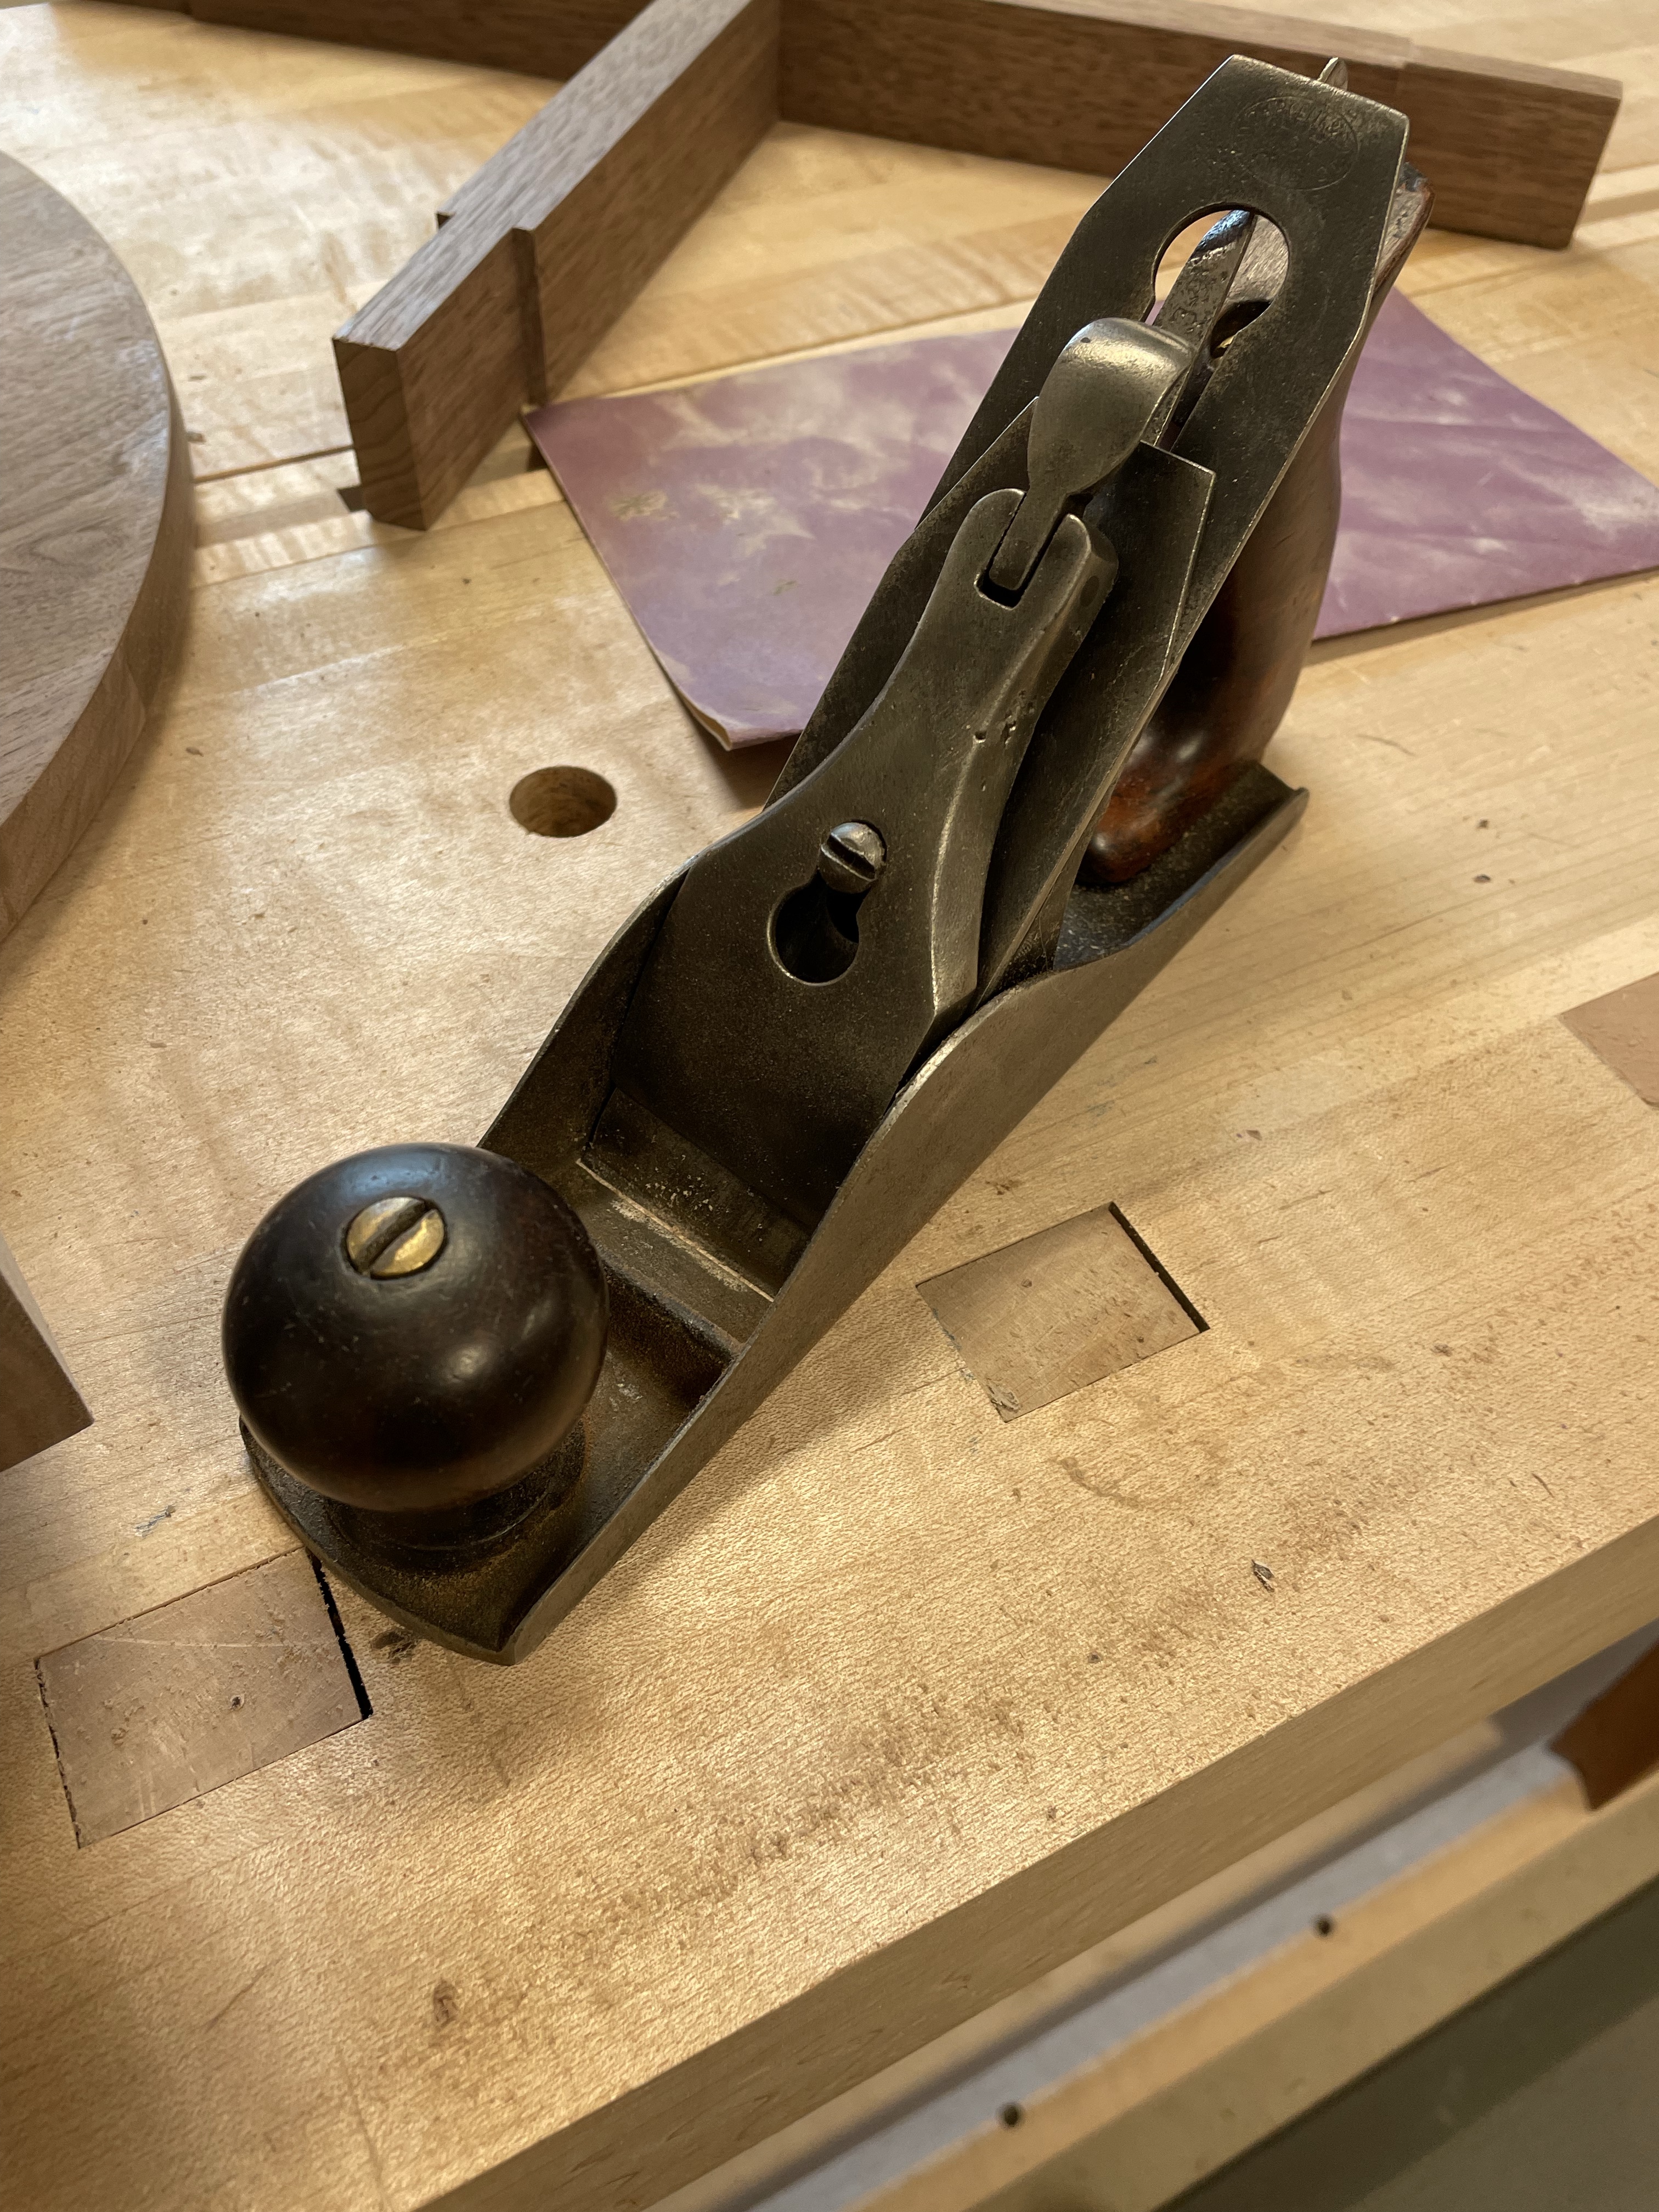
Finally my favorite bench plane is the Stanley#3 or Sargent 407. I may not use it as much as the Sargent 409 but I get a tingle when I reach for it in the cabinet. There is emotional magnetism with this plane that makes me want to use it. The lighter weight and slightly shorter bed makes it ideal for may of the small projects that I tackle.
Many people follow my blog and occasionally I get the question which plane should someone buy. It’s not something that can be easily answered, but I would initially get a #4 and if you are working with longer boards find a #7, I don’t think you would go wrong. If money is a driving factor you could get away with a #5. The other question that I’ve had is about the Lie Nielsen and Veritas versions. They’re great! When I started gathering tools the Stanley planes were widely available, very cheap and easy to repair. Today they are more expensive but still a bargain. It seemed like a low cost way to go and I’ve been very happy with my choice.
Walnut Side Table – Finishing the Top
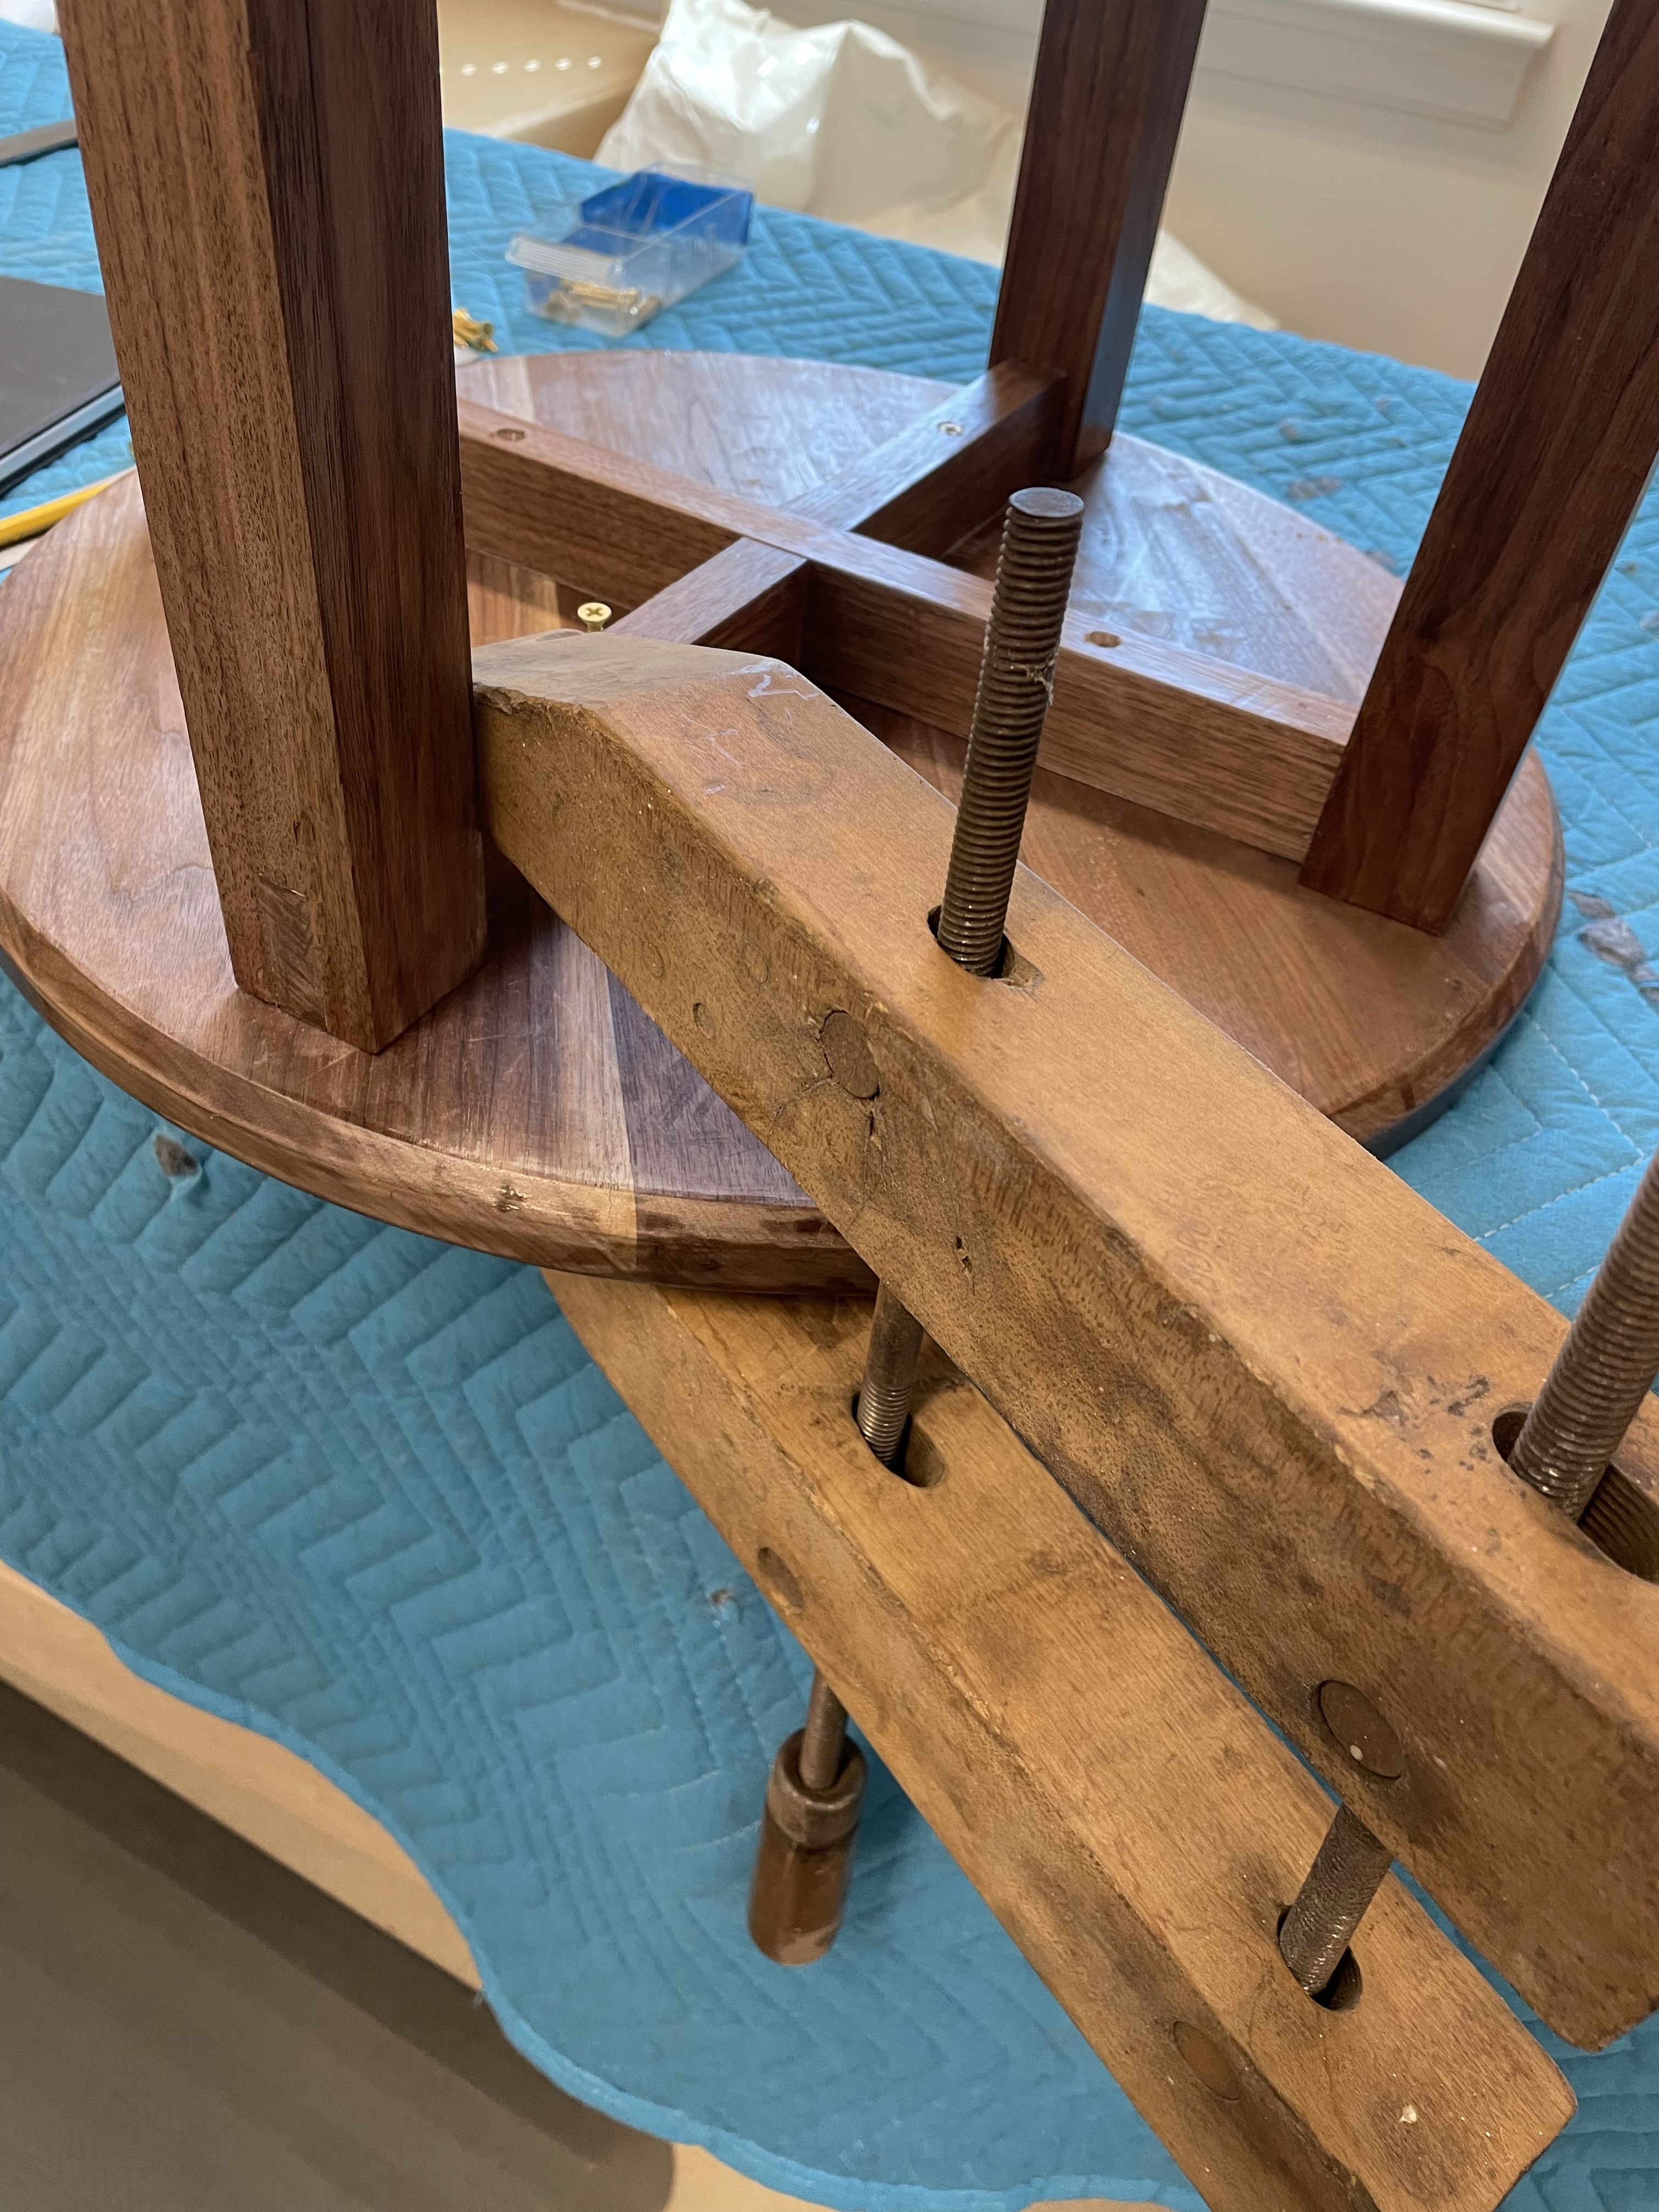
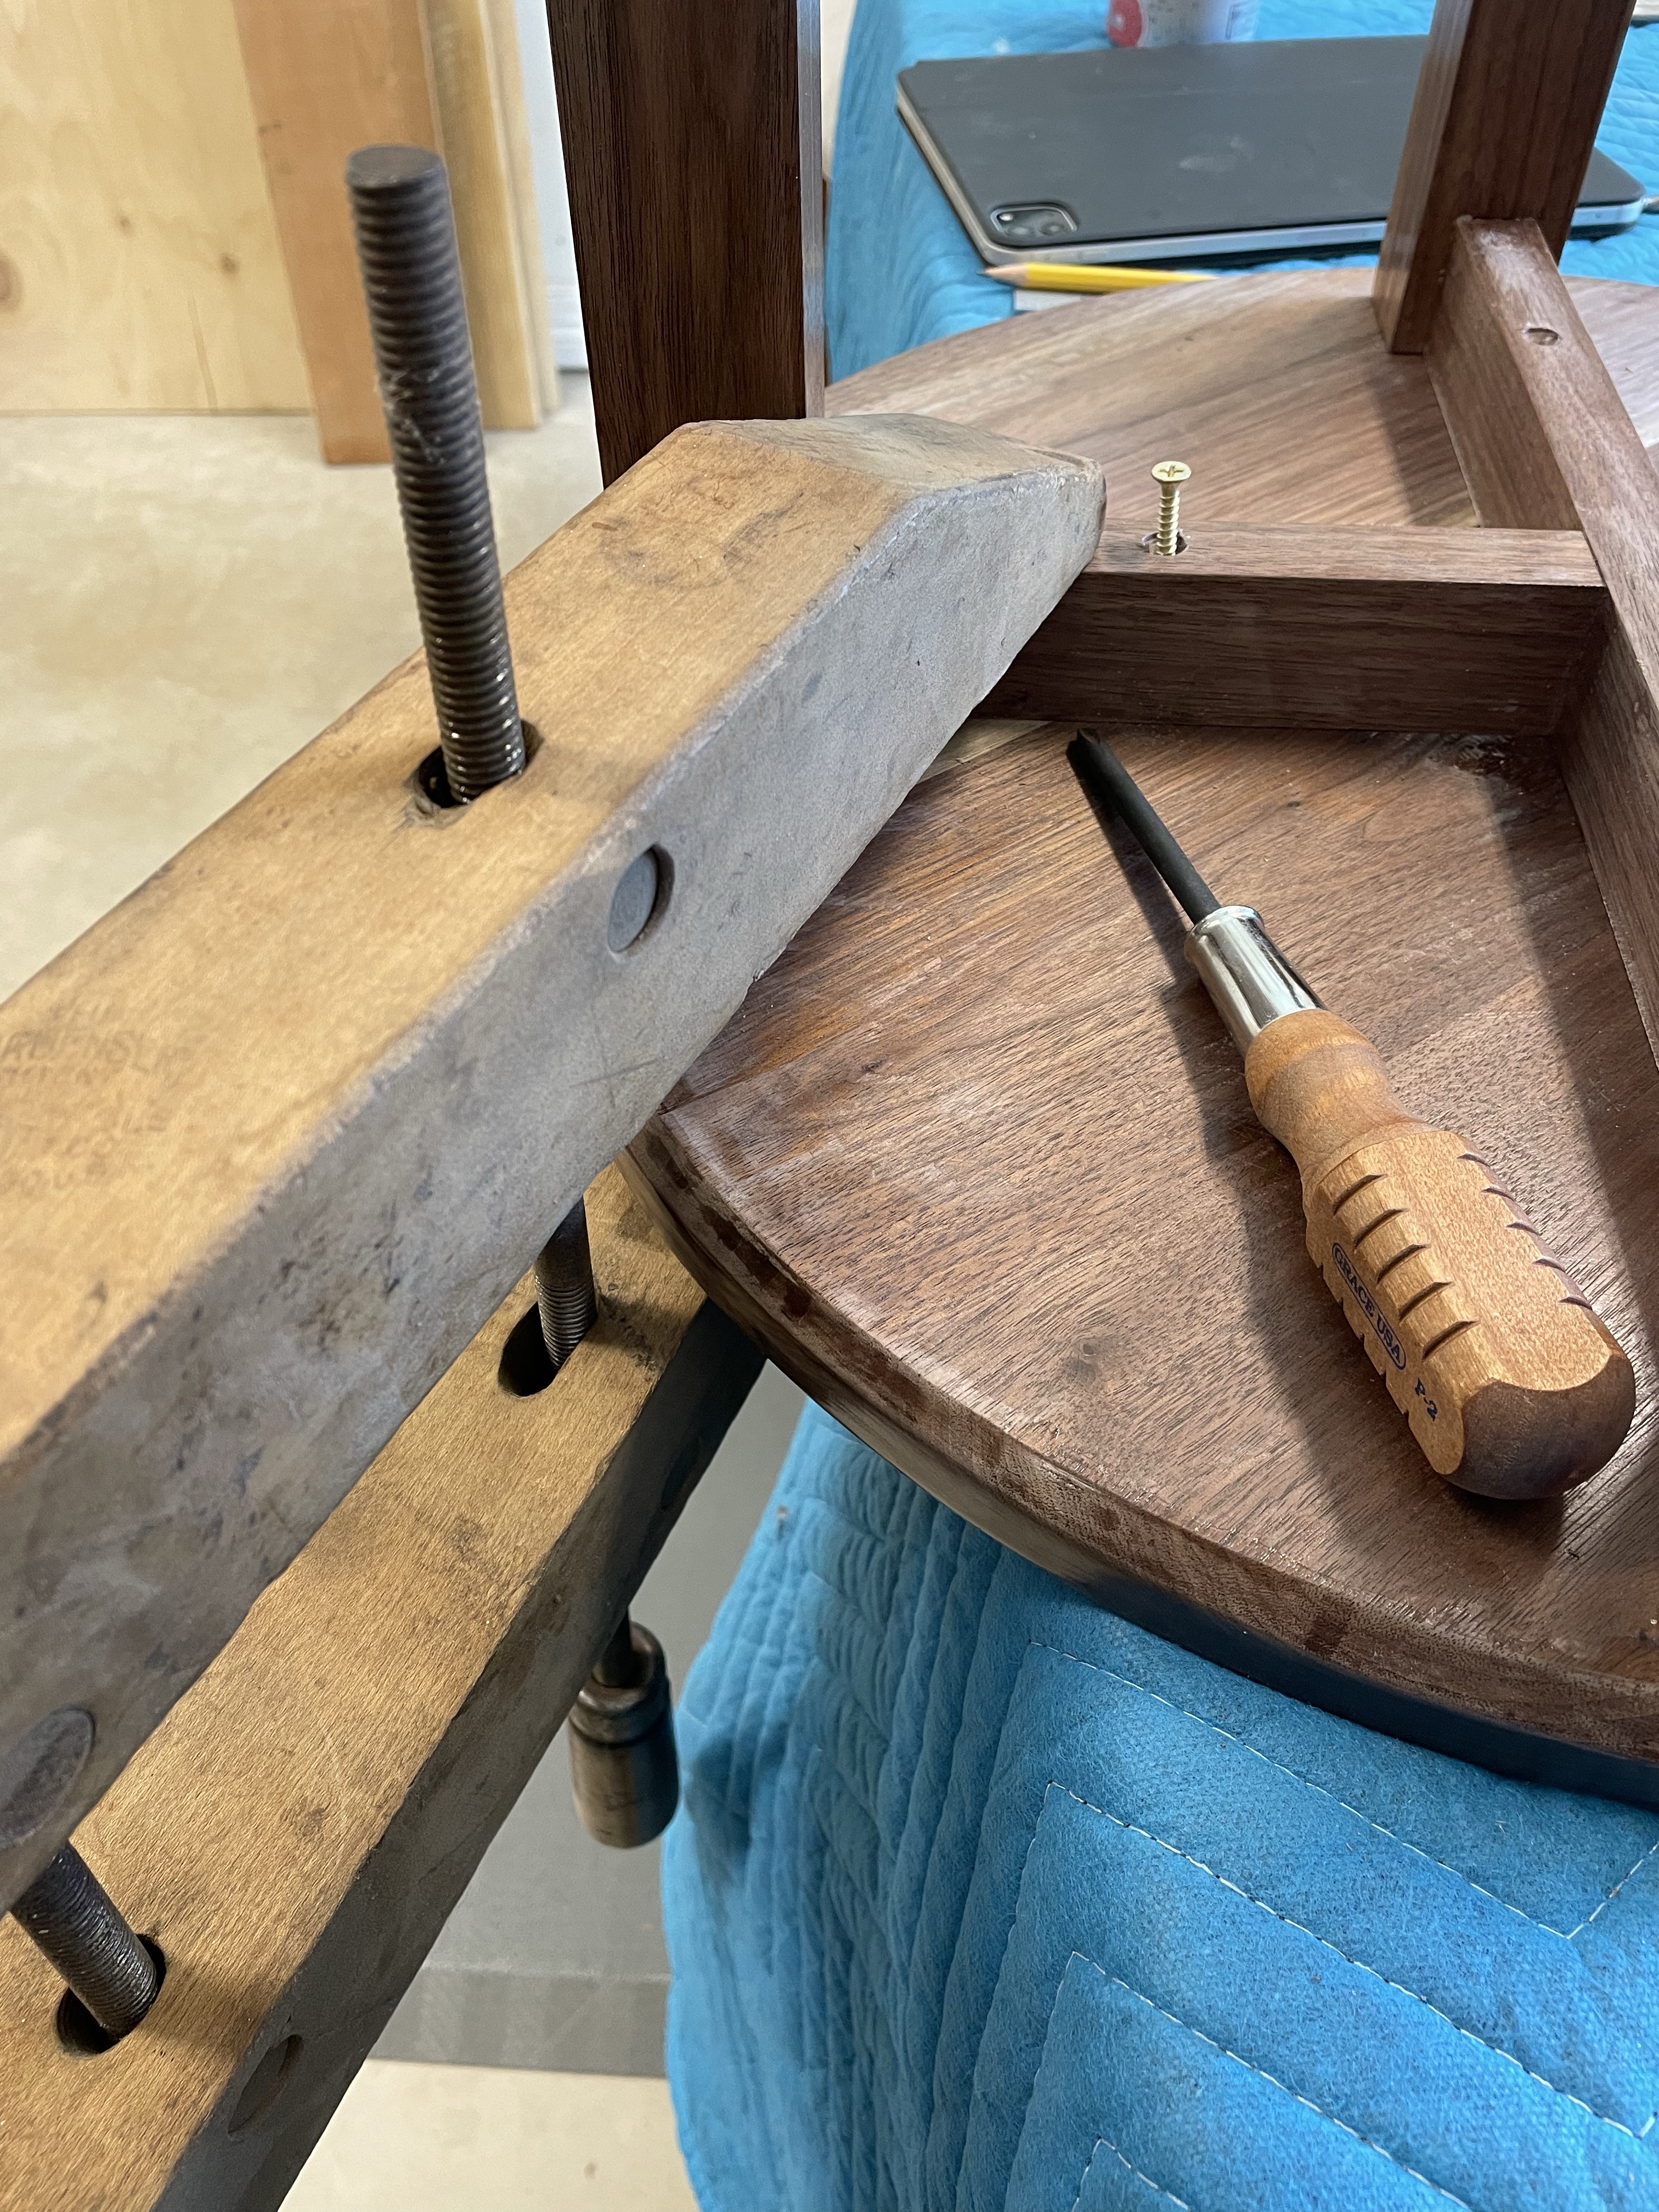
The Walnut side table has been a very enjoyable project. It was small had fun joints and is very useful. The top was screeed to the legs using oversized holes and brass screws, and once complete a final coat of finish was added.

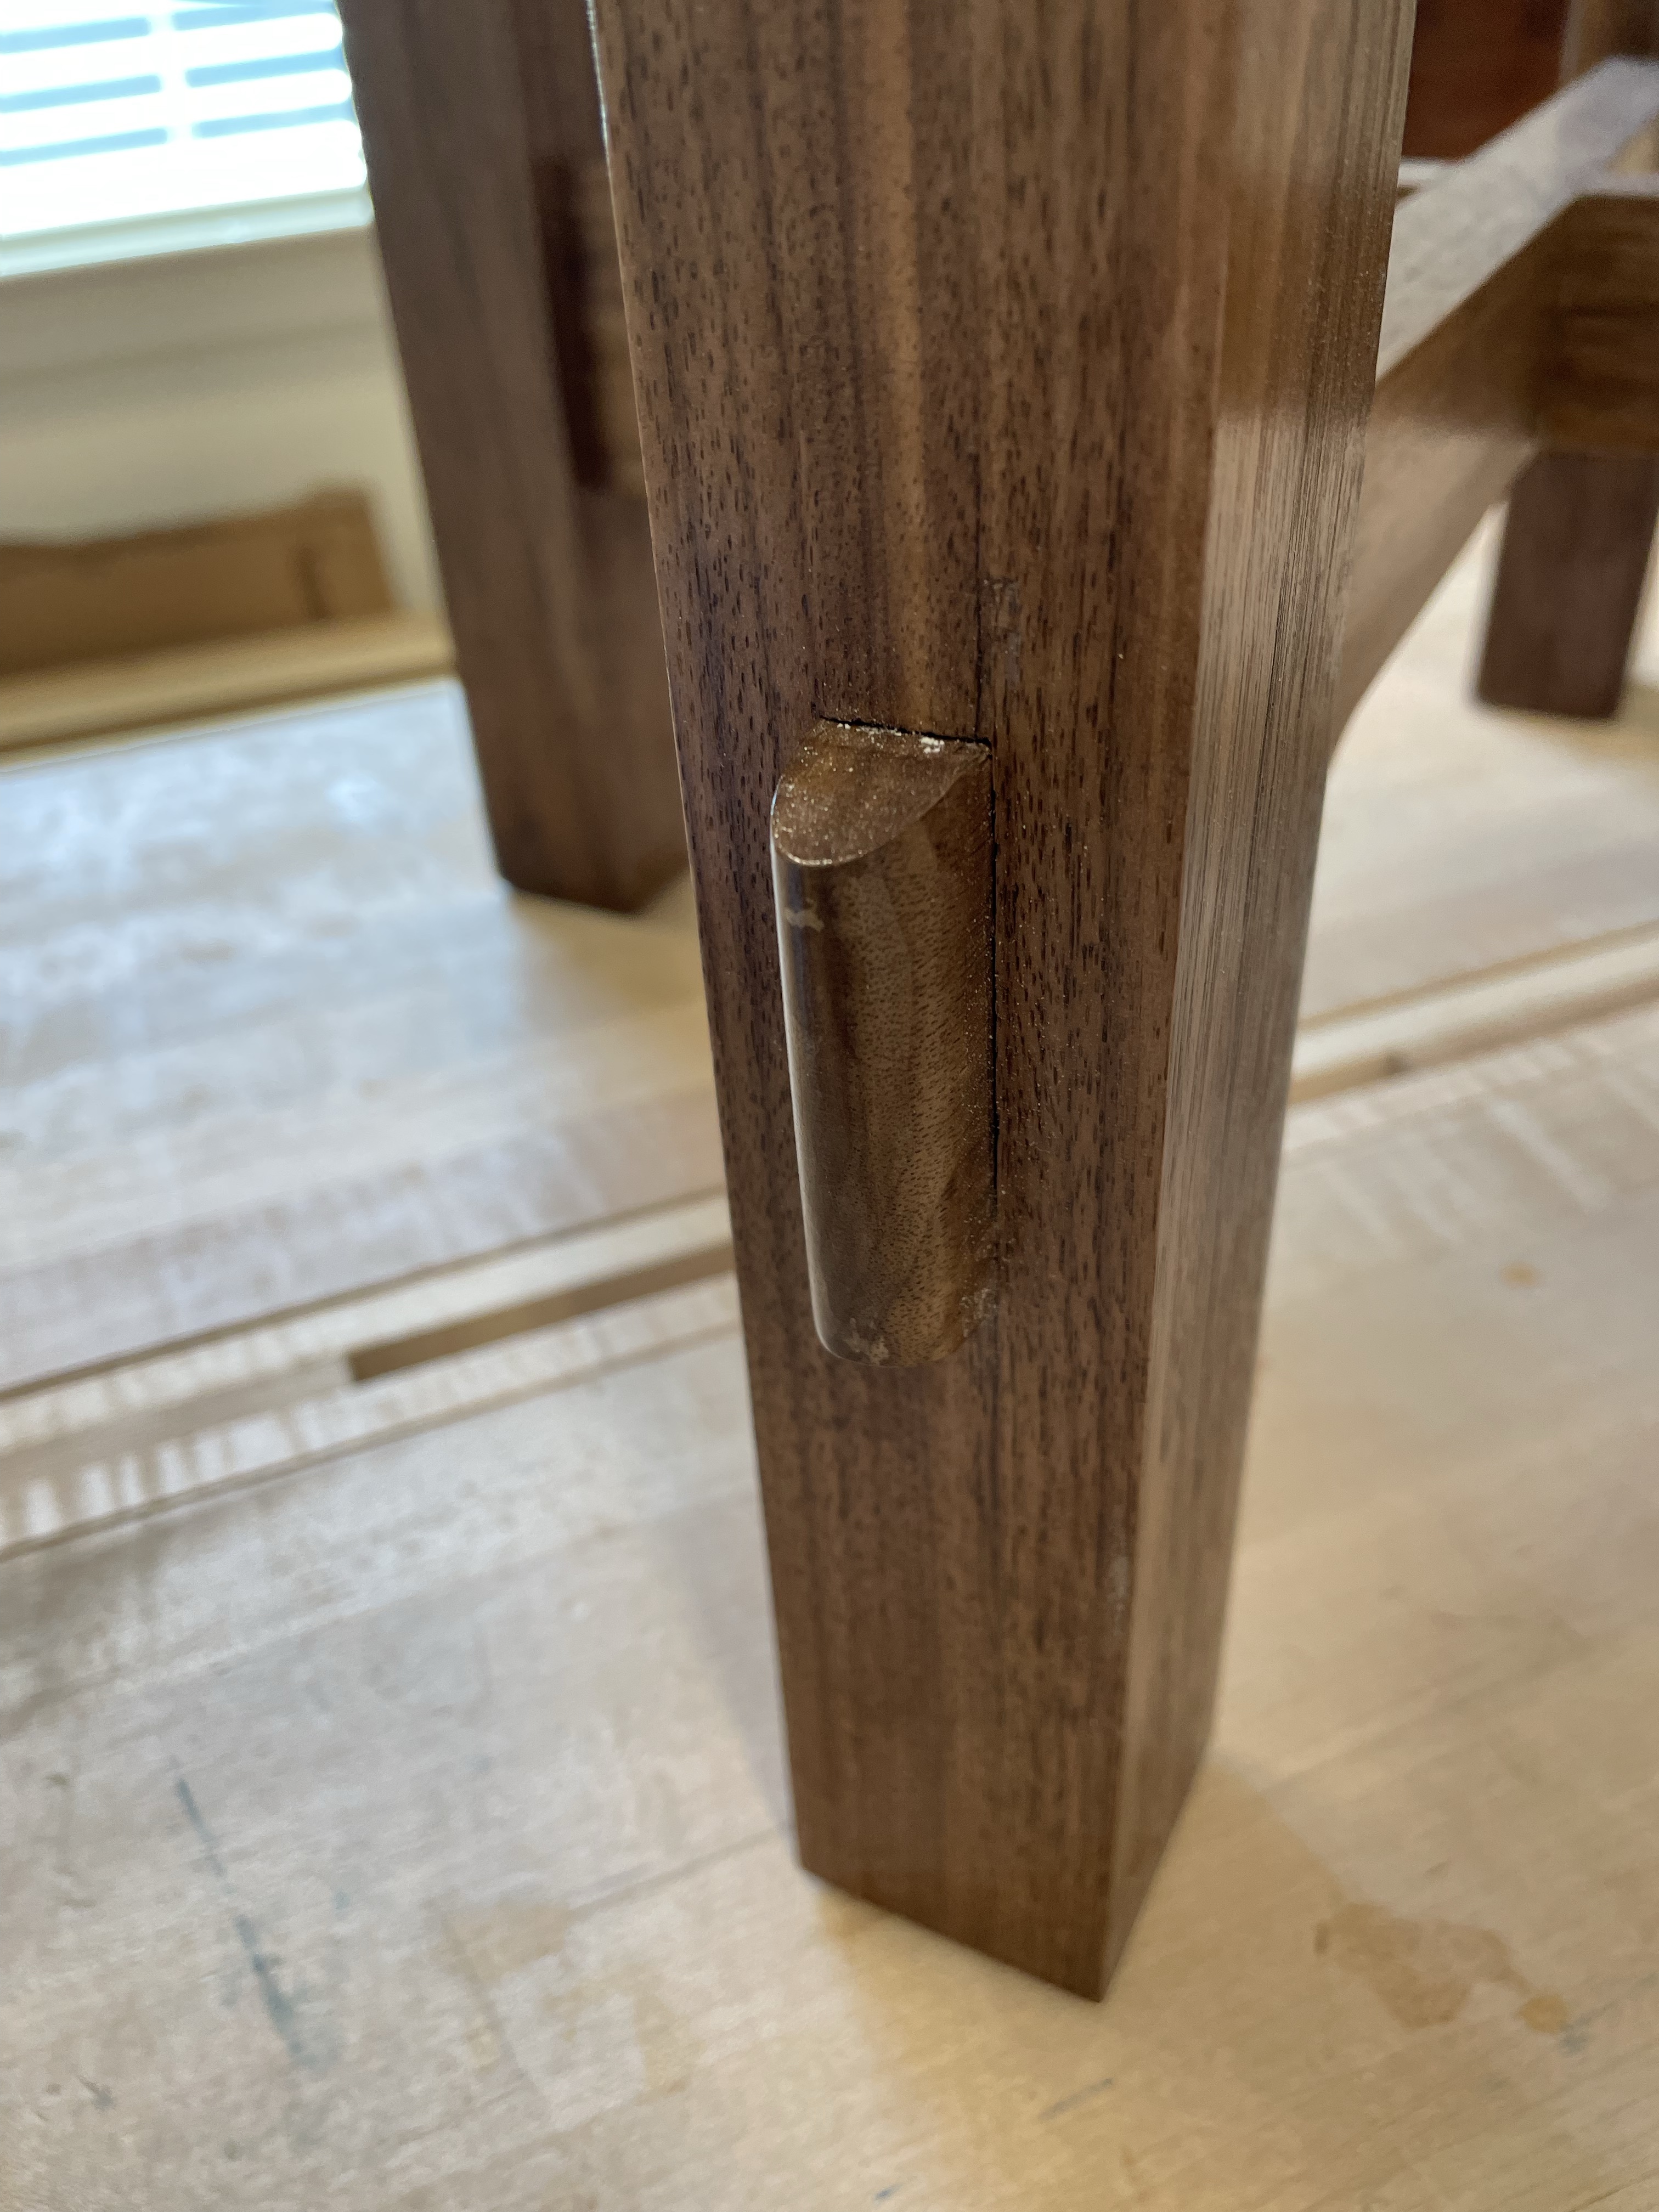
A couple of features that add character were the use of the bridal joints and through tennons along with chamfering the top. I am particularly happy with the chamfer and how it lightened the top by giving it a thinner profile.
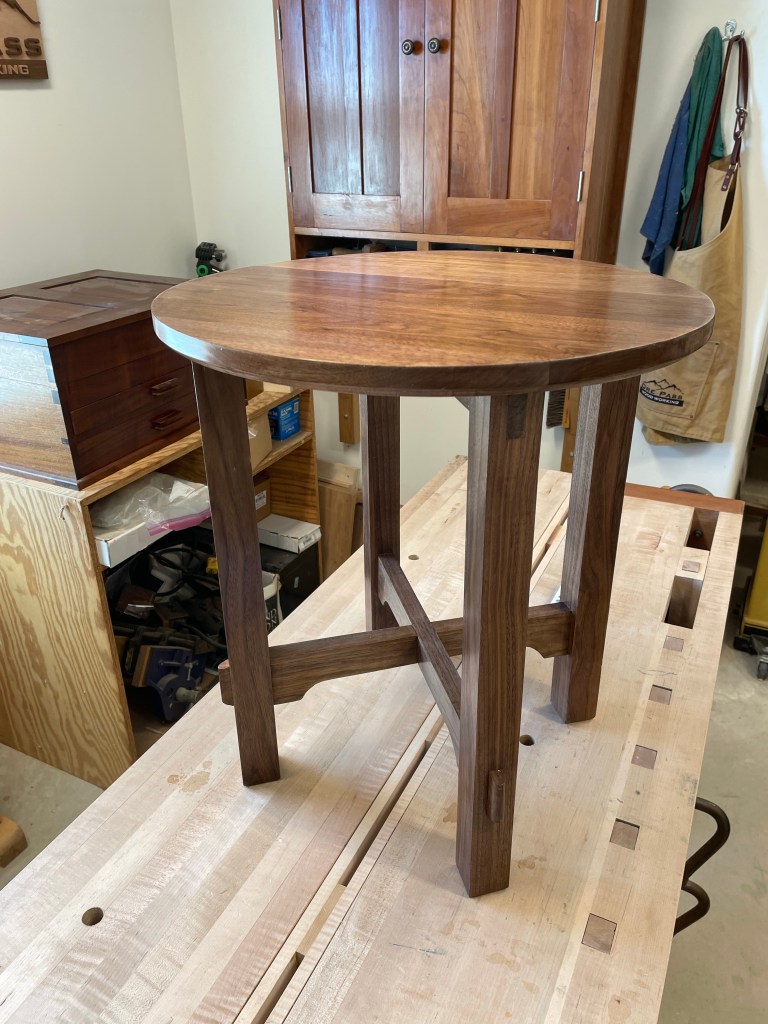
Thanks for following along, time for a new project!


Walnut Side Table Top Update
As several of you pointed out the last post concerning the crack in the side table top was unclear and incomplete. I must have accidentally sent it out over the weekend before I finished writing. Here’s the full story….
The underside was chamfered to lighten the appearance of the top. While I was using the router clamps were used to hold it in place. Unfortunately I did not ensure that the top was fully supported and after completing the routing and putting the router away the top cracked. It is a clean break over most of the length with a jagged edge on one end. I do not have pictures of my poor clamping method which consisted of a couple of boards underneath to allow the router to travel around the outside without touching the table top. I certainly should have used a better method.

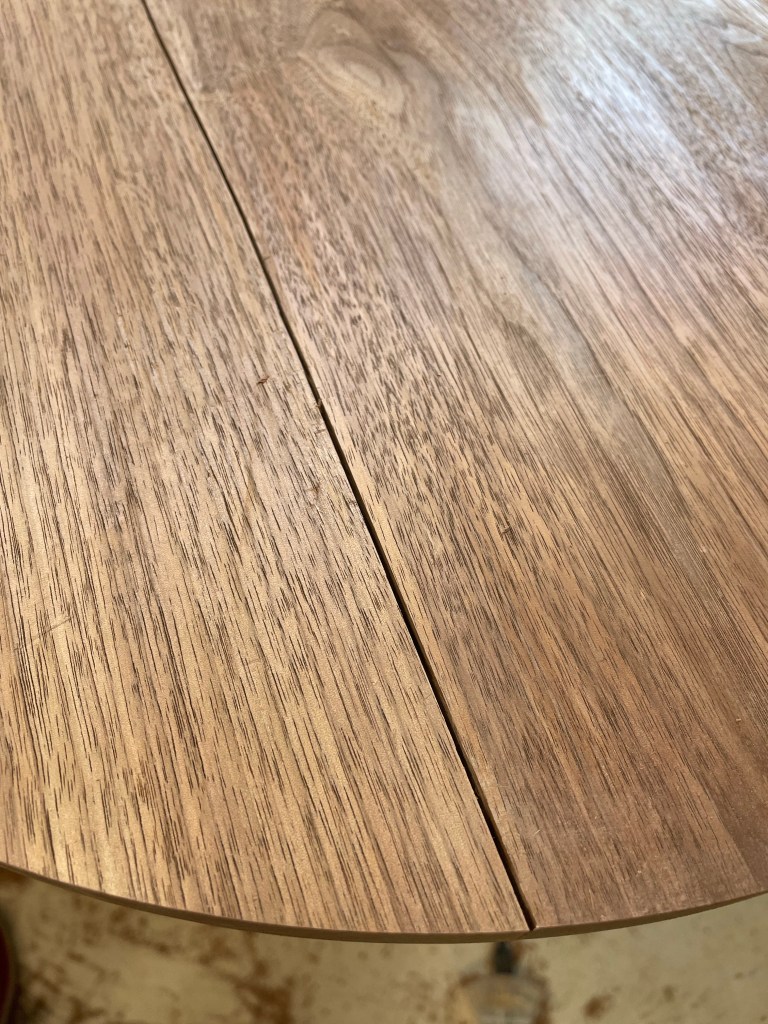
Walnut Side Table – Top Cracks
After gluing up the Table Top, rough sawing the circular outline, routing and then chamfering I guess the glue joint on the table decided it had enough.It’s a clean break most of the way down the glue line so I just added a little more glue worked it into the joint and clamped it up. Not a bad problem to solve!

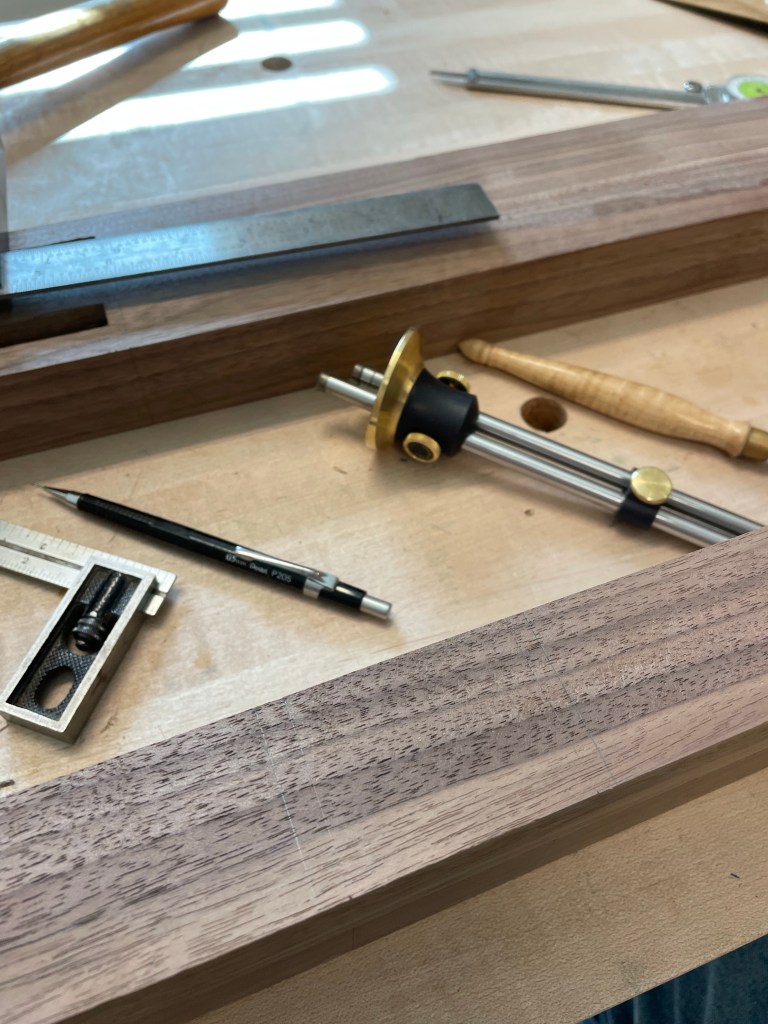
Circle Jig for a Router
I have on completed two circular projects, the first an Arts and Craft Side table and the second a similar design out of Walnut. The first attempt at cutting a circle was made using a jig and band saw and I was none to impressed with he result. Here’s a link to that blog post and If I recall correctly the limited amount that I write of that experience tells you it did not go well. When a similar project came up for the Walnut side table I took a little more time to research and come up with a plan that would have better results.

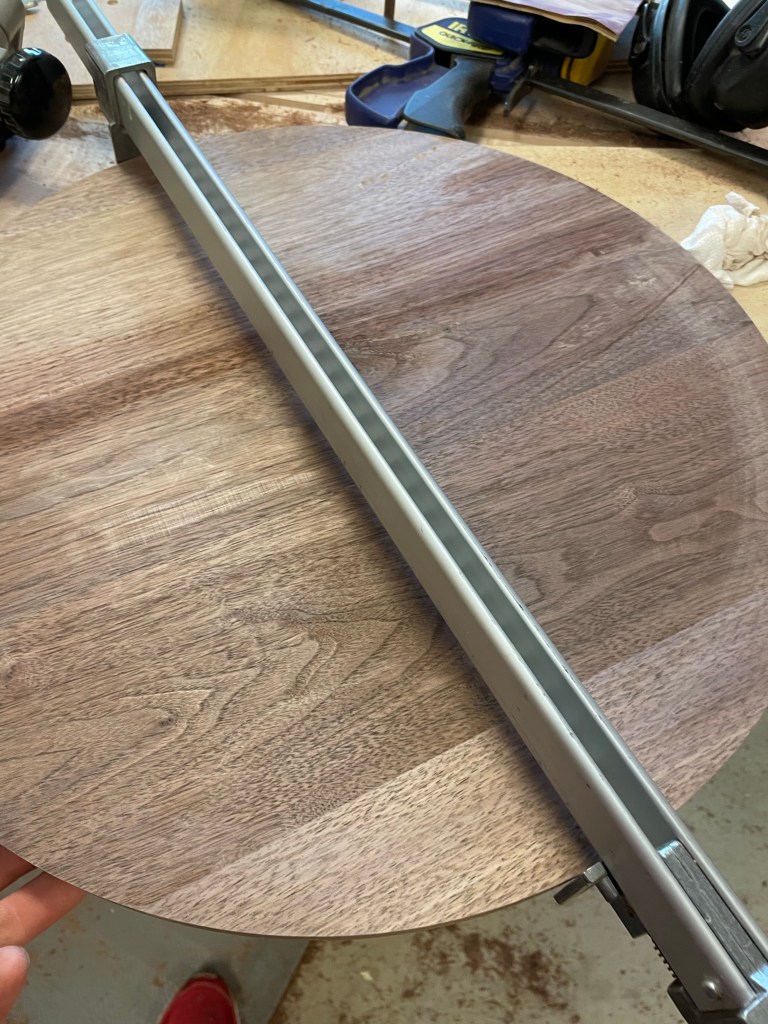
The jig I used was in a fine woodworking article, 4 Jigs for a Fixed Base, September-October 2014. It’s fairly simple and consists of a plywood arm with the Router mounted on one end and a pin that becomes the pivot point for the arm. Taking some 1/2” plywood I drew out the arm and cut it out with he bandsaw and drilled the necessary holes.


The jog looks like this when it is ready for action. I wasn’t quite sure how to connect it to the table top and departed drilling a hole directly into the top. Instead I mounted a couple of trips of blue tape to the table top and another couple of strips to a block in which I drilled the pivot hole and used superglue between the tape. That way I could peel the block off the top and leave not trace. It worked great.


although the jig worked and I was able to make a nice circular edge I do think that the jig was a little lose around the pin. when i use the jig again I think I will reinforce the hole to ensure it remains steady.
Walnut Side Table – Top
Looking through various books and images I’ve been considering the impact of changing the edges of the table top. When I made the Arts and Craft Side table a few years ago the top was approximately 7/8” thick and I wonder about the impact of a different edge. Many authors discuss “lightening” the look of the top with chamfers.
Before we work on the edges let’s get the top built. Using the smaller jointing sled mentioned in one of my previous posts I Milled up stock for the top and glued them together.
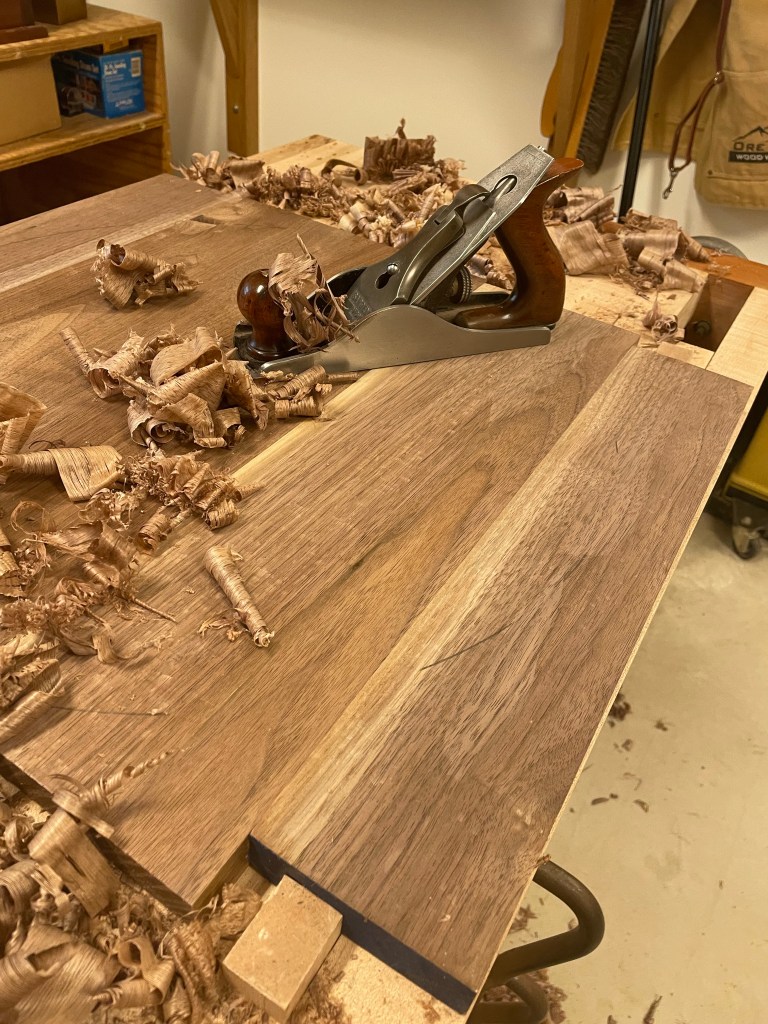
Next I planed the top flat (one day I’ll do a better job in the glue up and have less work to do). Reviewing my notes from the Arts and Craft Side table it was obvious that I had a heck of a time with the circular top. There’s several ways that I could tackle it, Bandsaw, router, hand saw so I spent a little time researching alternatives and came to the conclusion that I will trim with my bandsaw and using my router to fine tune the circle. Using a Fine woodworking article a jig was made and the top trimmed into a circle. If you are a Fine Woodworking Member or have access to a library here’s the article: 4 Jigs for a Fixed Base, September-October 2014.
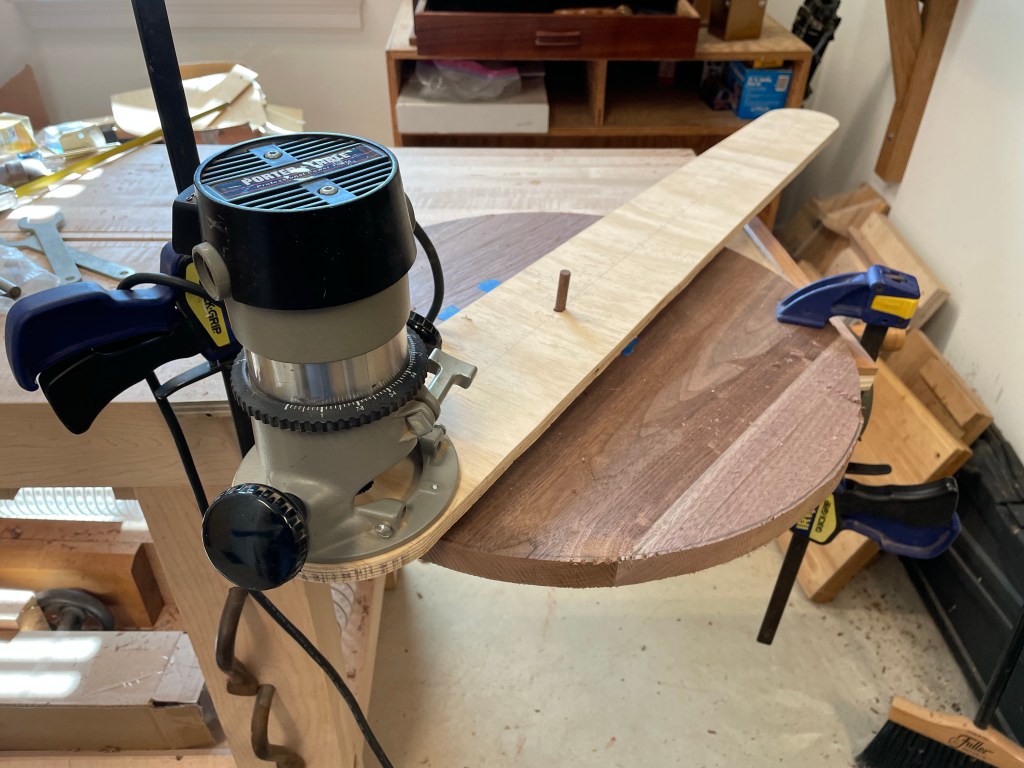
I trimmed the circle first with a flush cutting bit and then I followed along with a chamfer pit. The Chamfer posed a minor problem since the hole was smaller than the router bit. I had to make a quick base to take care of the problem.


I’ll write more details on the jig and how I attached it in another article.
Walnut Coffee Table Top Refinish
The finish was Shellac, covered with water based poly. Used many times without a problem, however this time it looked like there was cracking and scratches across the top.

My best quests is there must be something that interacted with the polyurethane so It all needs to return to bare wood and start again. Not what I wished to do but I need to correct the finish.
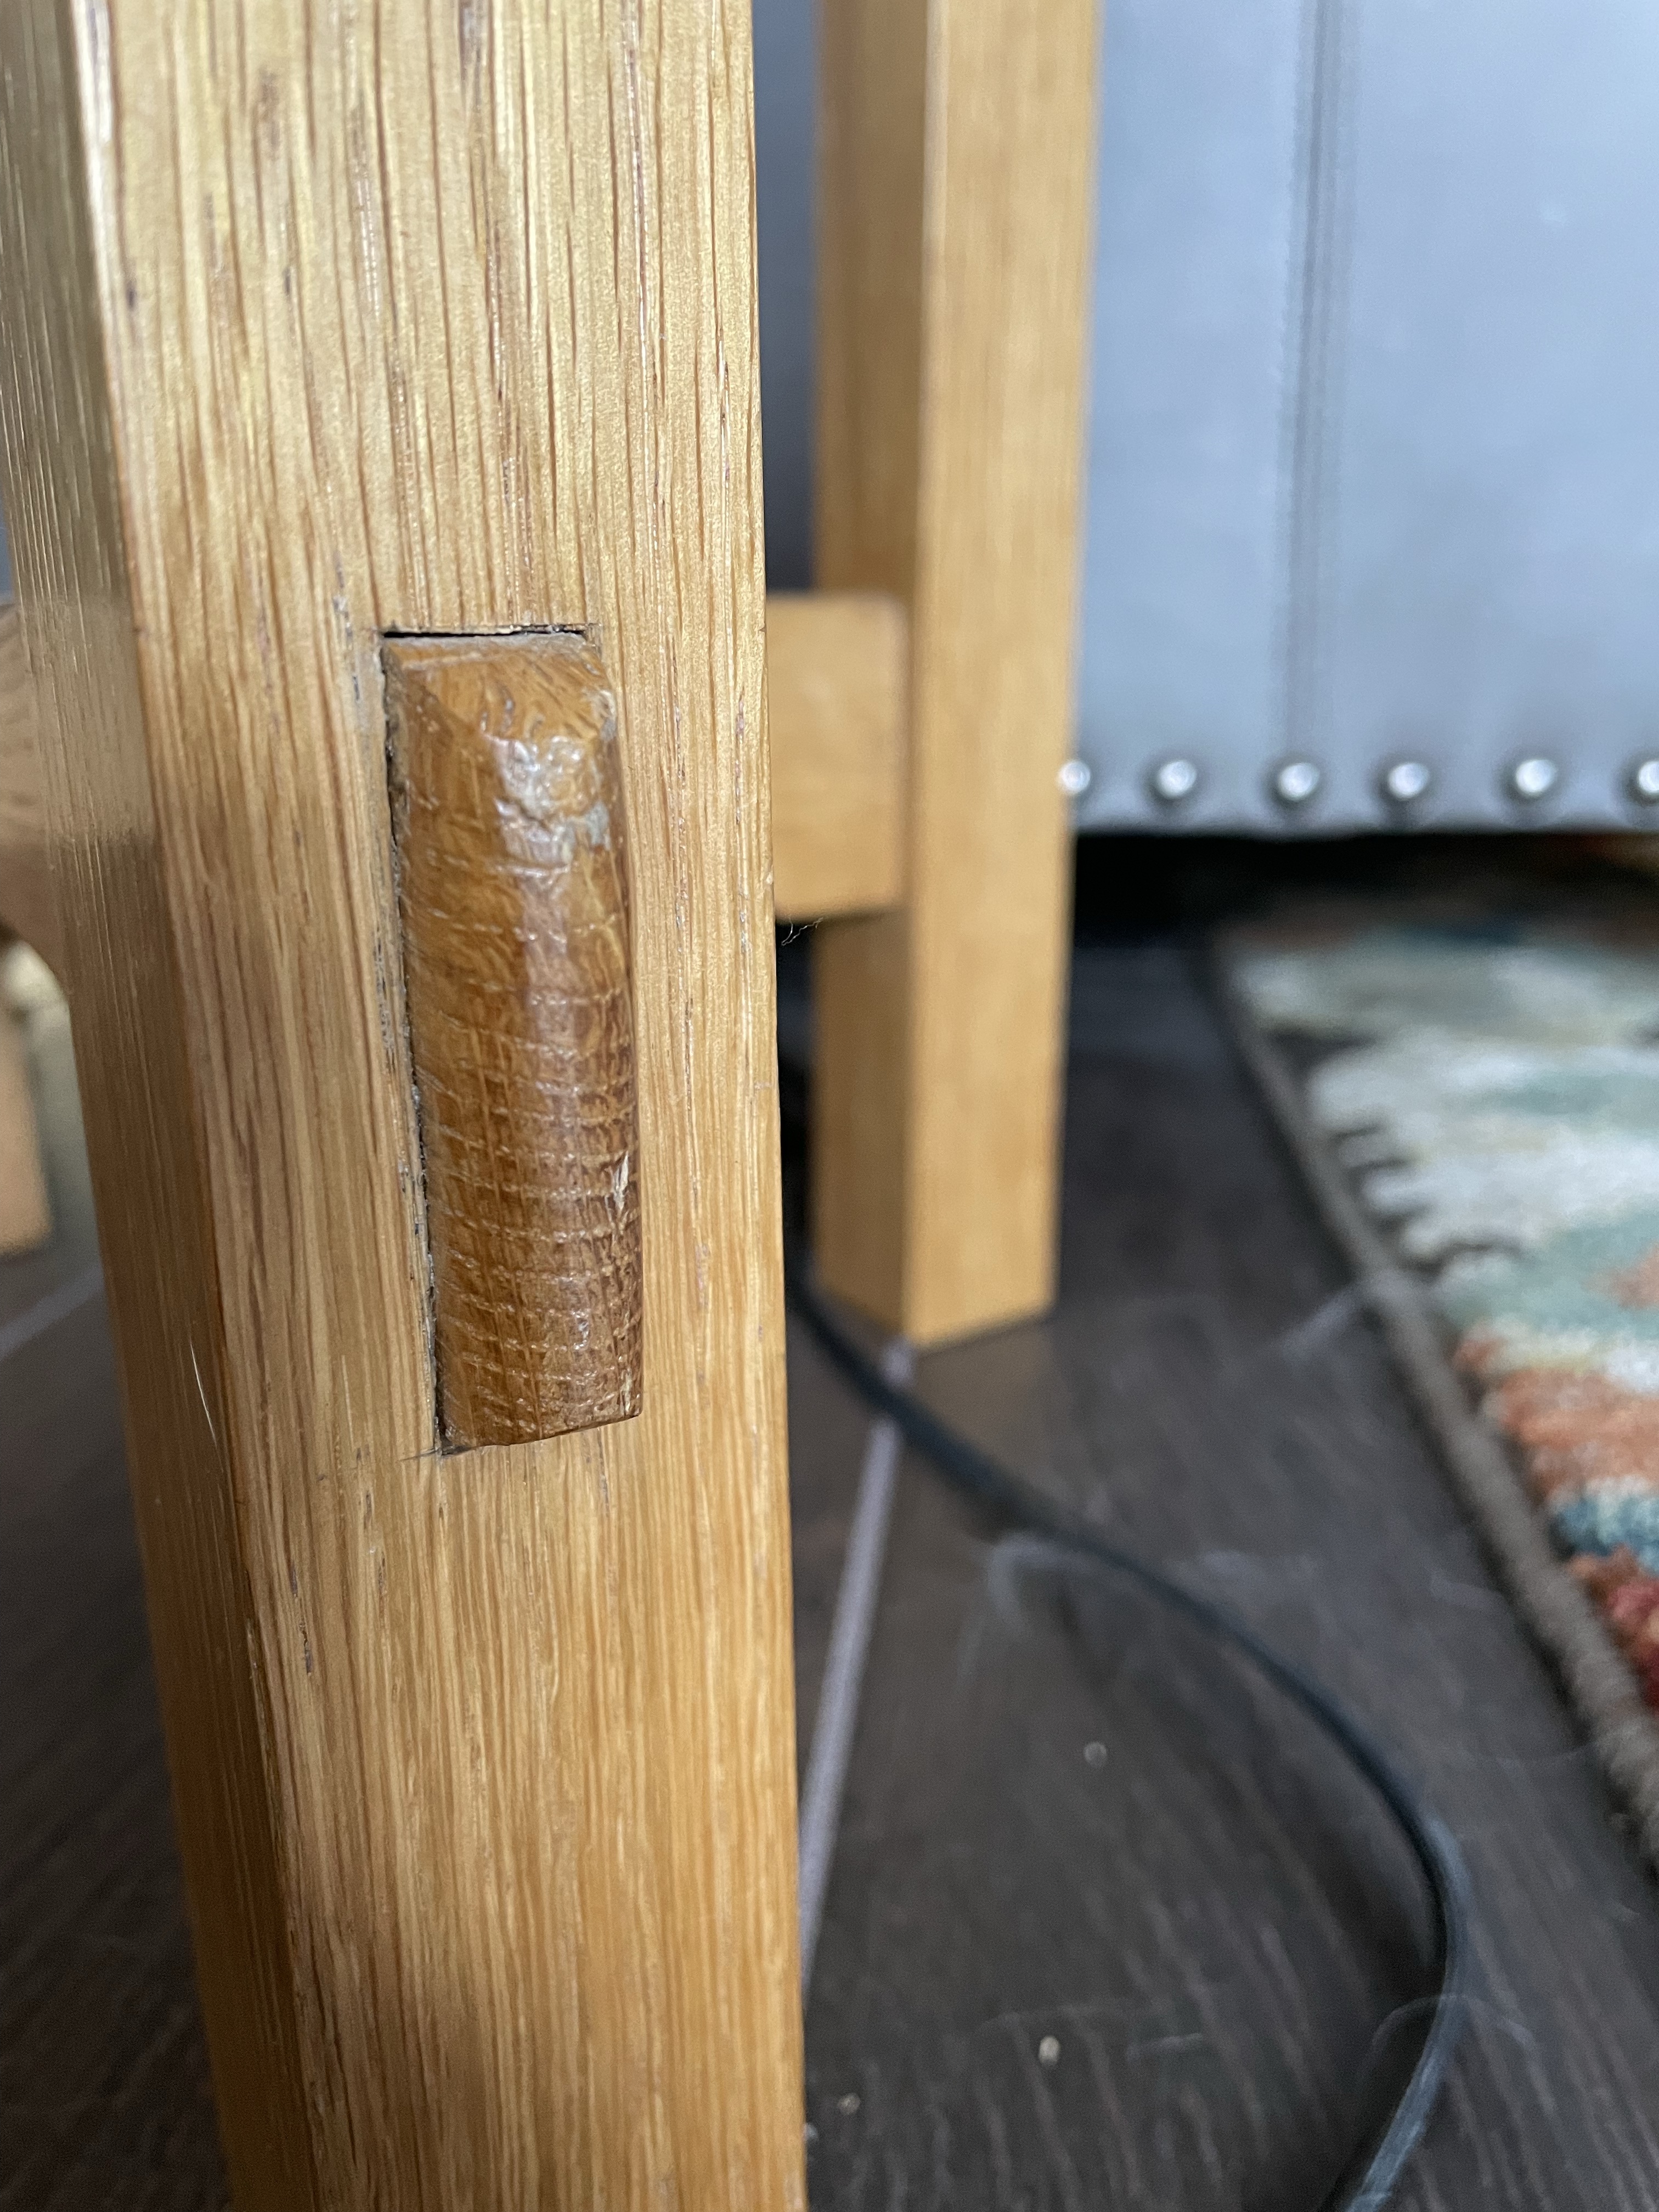
Walnut Side Table – Rounded Tenons
Several years ago I had the opportunity to take the 9 day foundations class from Paul Sellers. It was an incredible experience and one that I doubt will be available in the future. Paul has moved onto Woodworking Masterclasses and Common Woodwork as a platform to reach a larger audience. One of the projects in this class involved through tenons and a lesson in the versatility of the hand plane. If you have never tried rounding over end grain, pull out a board, sharpen up your plane and give it a go.
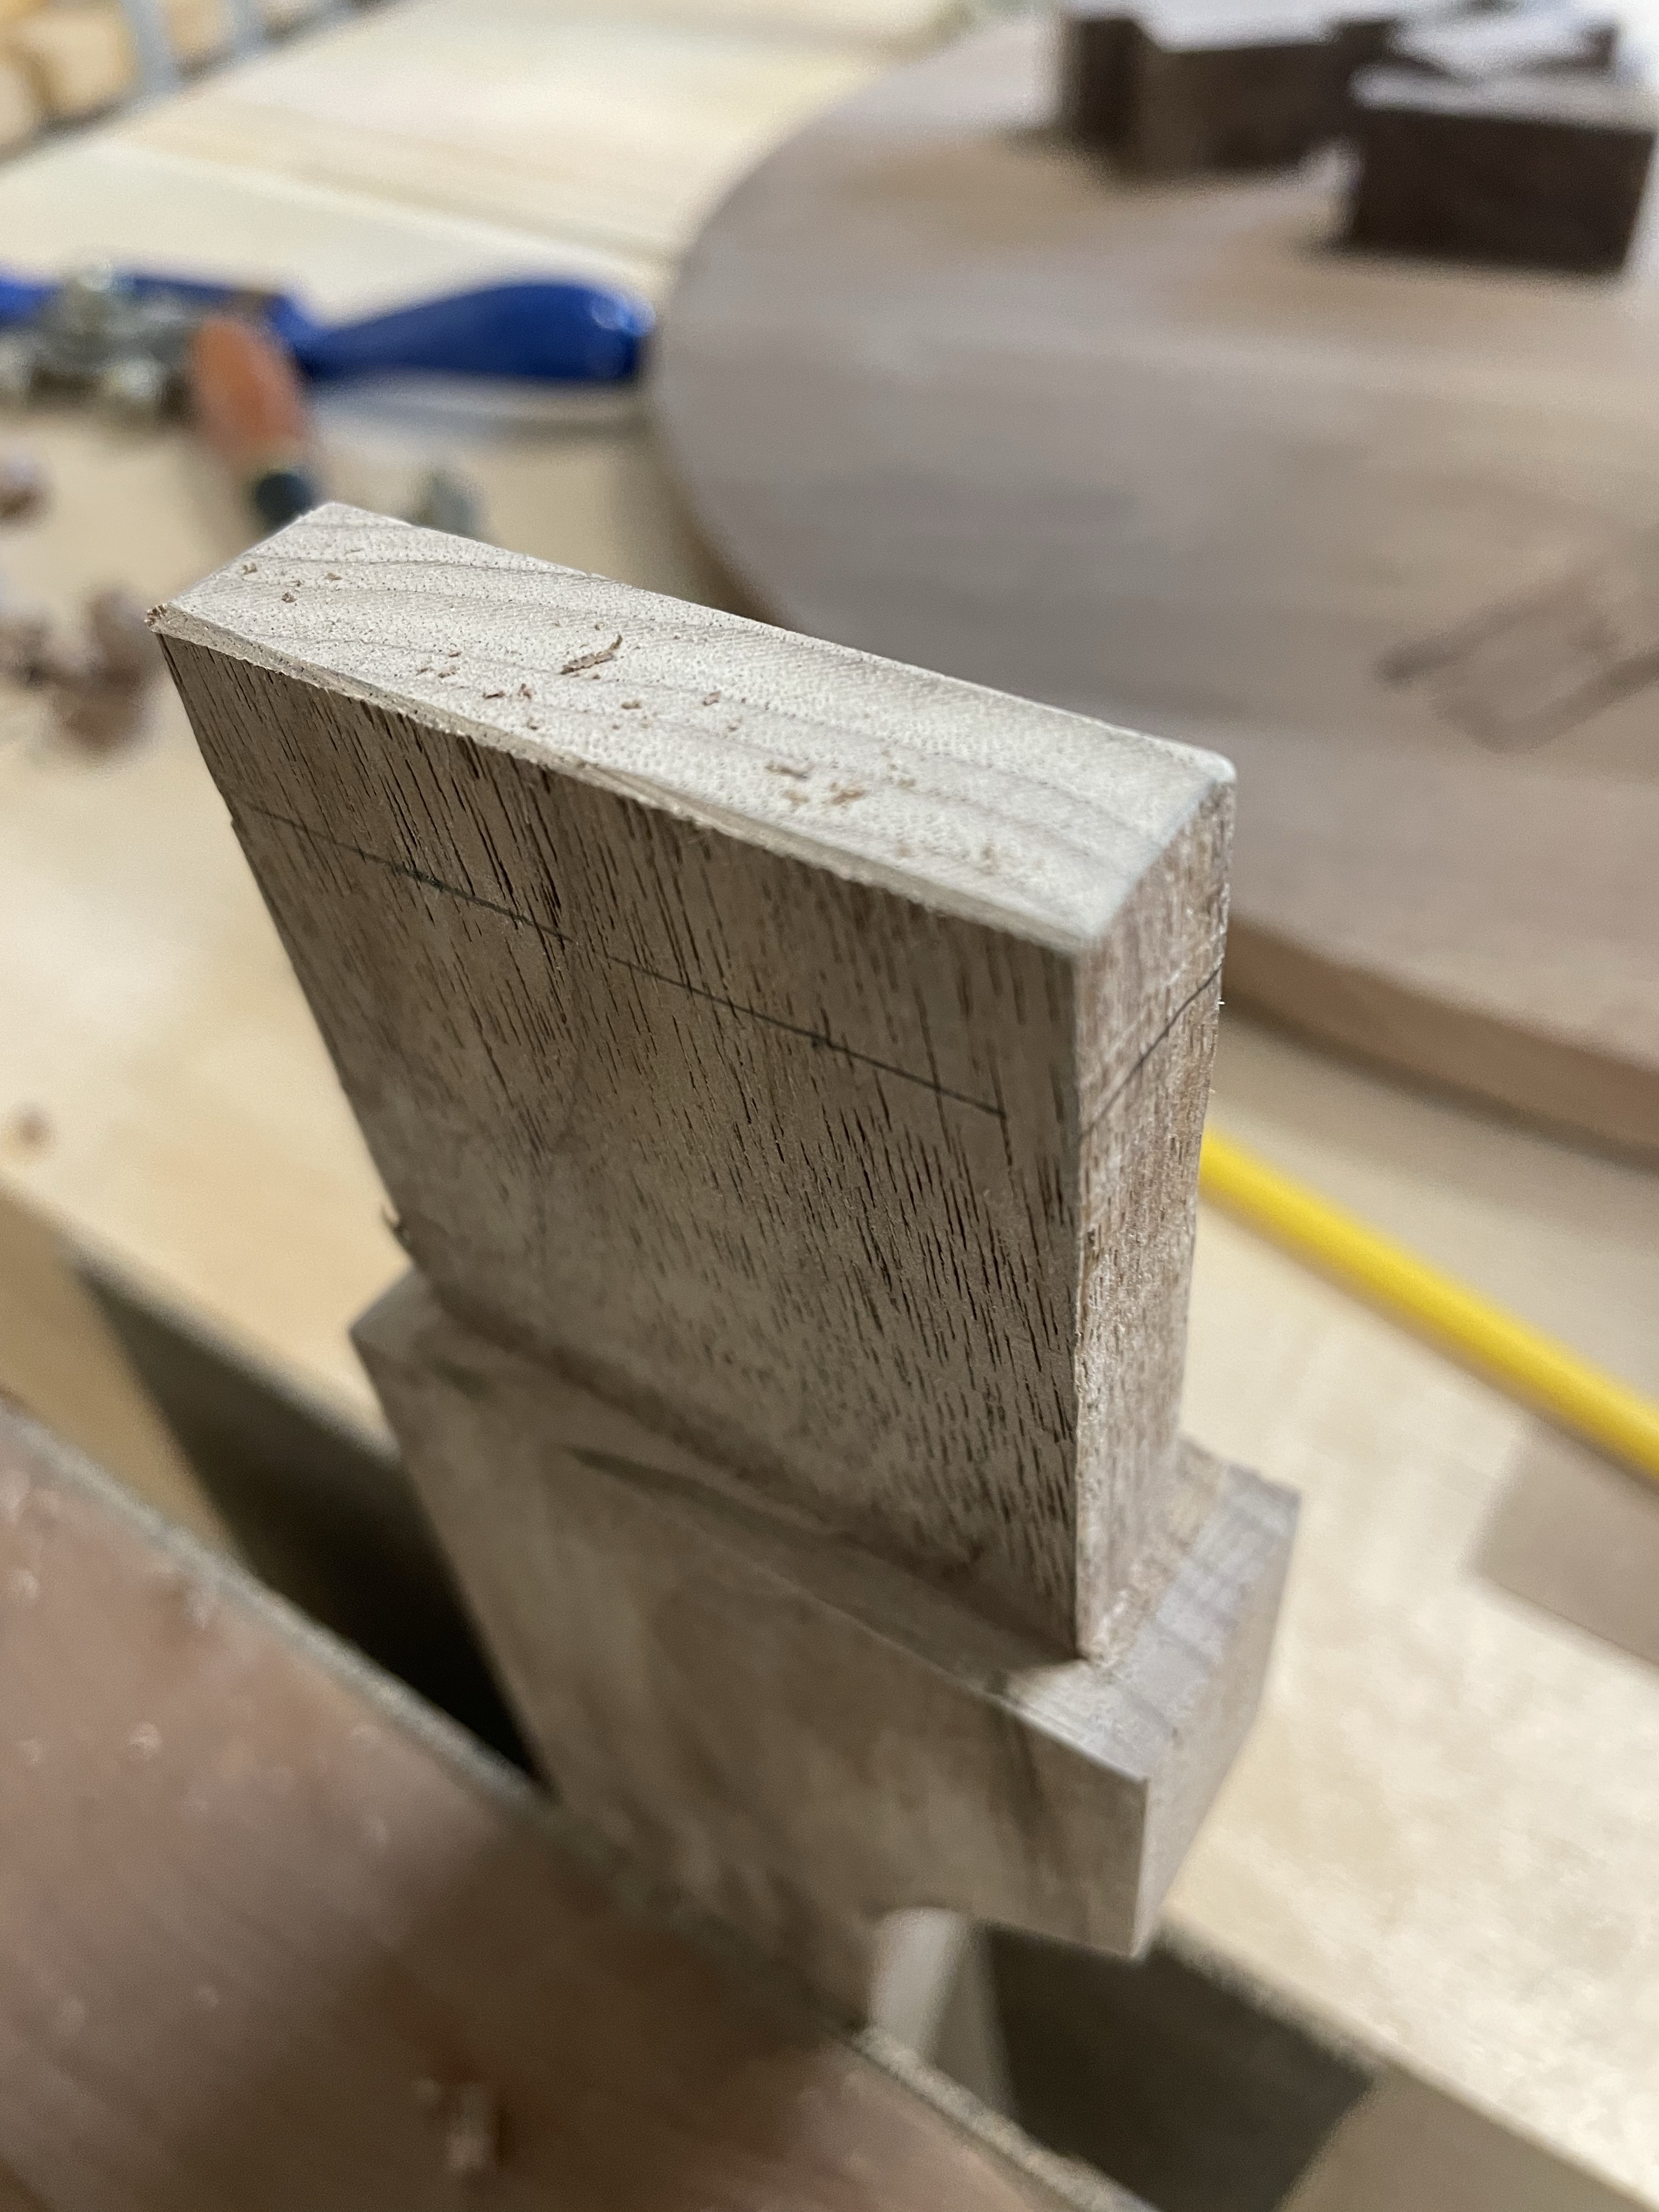
Working end grain requires a sharp blade. A few minutes on the diamond plates and the plane was ready to go. Working across the tenon I take small slices of wood working up and down the tenon until its rounded over. Watch for tear out on the ends although they will later be chamfered with a chisel. When the tenon looks balance a file or sandpaper can be used to smooth out the finished product.
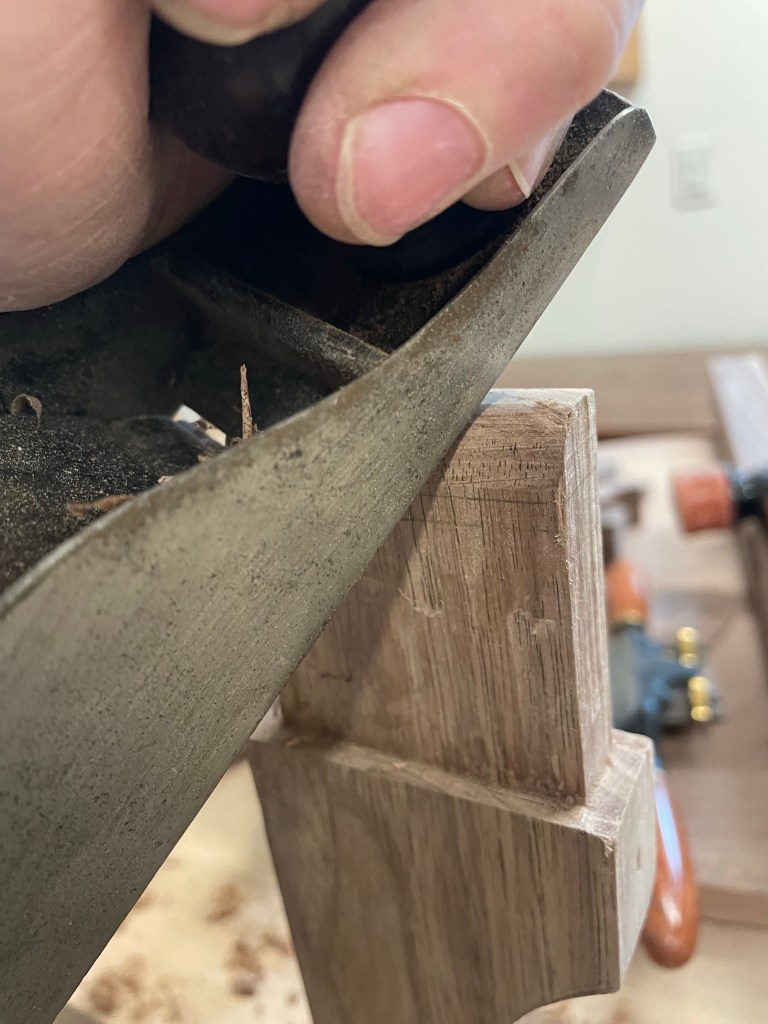

The final act of the rounded tenon is chamfering the ends. This removes any tear out and gives a nice finished look. Using a chisel it only took a couple of hits with a mallet and they are complete. And if you chip out by the tenon a little superglue may just handle the problem.


Walnut Side Table – Legs
As I looked for designs and possible dimensions for the table I came across an article and really liked the design and the challenge of using a Bridal Joint. I also like the original design used a few years ago with the exposed through mortises. I have used the exposed joints on a couple of projects from Paul Sellers, Coffee Table and Arts and Craft Side table. Use the links if you want to go to those project pages. I think that the table should use both joints. It also will allow me to try a couple of things that I have not done previously.

The article that I saw the bridal joint was actually a video series #193 Sept/Oct 2007. I also looked at other sources.

I spent some time making sure that the grain worked for the project and then squared everything up. I found the card shaper handy with the tear out that I’ve been experiencing. Anyone used one of the high angle frogs in heavy tear out?
The mortiser again made quick work and only a little clean up was needed with a chisel. Next the bridle joints which I did with hand saws and my band saw. I measured very carefully and it paid off, only minor plane work on the tenon to get it all together.


Walnut Side Table – Lumber
There are always a few additional boards left over when completing a project, these boards could sit on a rack for years collecting dust. Perhaps a small table could put them to use?

Several years ago I gathered up various pieces of White Oak from a coffee table build and built a round table that has been exactly what was needed in our living room. With a few modifications I’ll do the same with the Walnut. Legs first then moving on to the other parts of the table.

