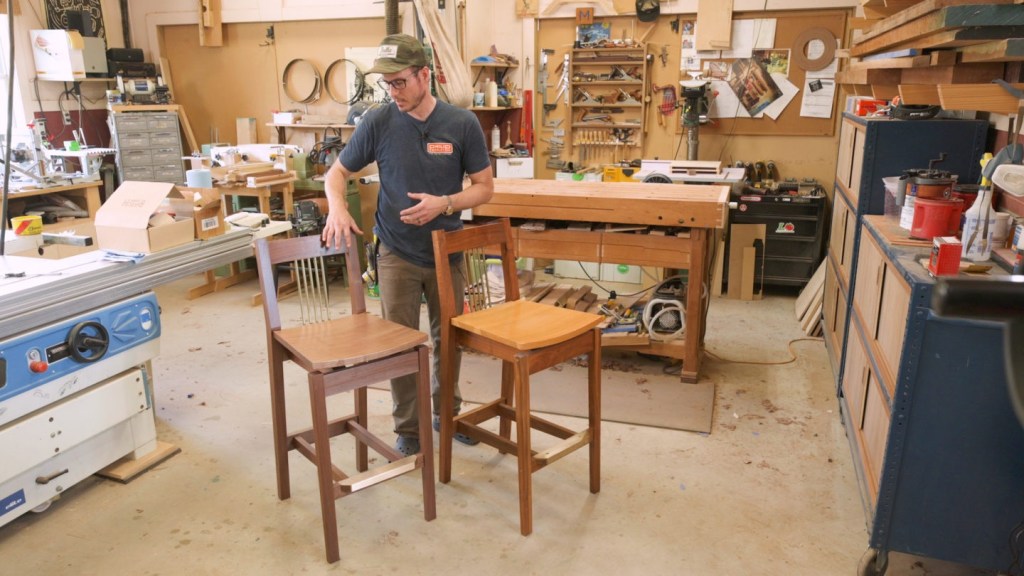
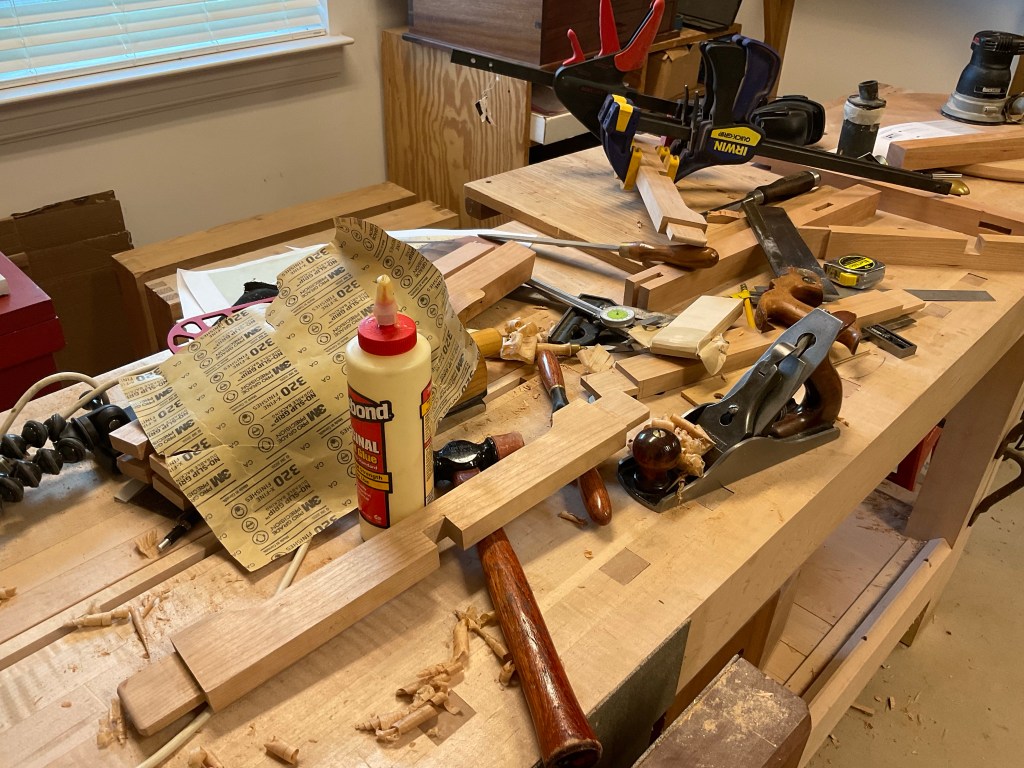
Morley Bar Stool – Legs
Getting the grain right on the legs is critical for both strength and appearance. I spent quite a lot of time with templates selecting which pieces to use and which to avoid. The lumber was then cut and dimensioned with the usual power tools. Finally I used the bandsaw to get close to the final dimensions and then it was on to the router and template. Very new techniques for me.


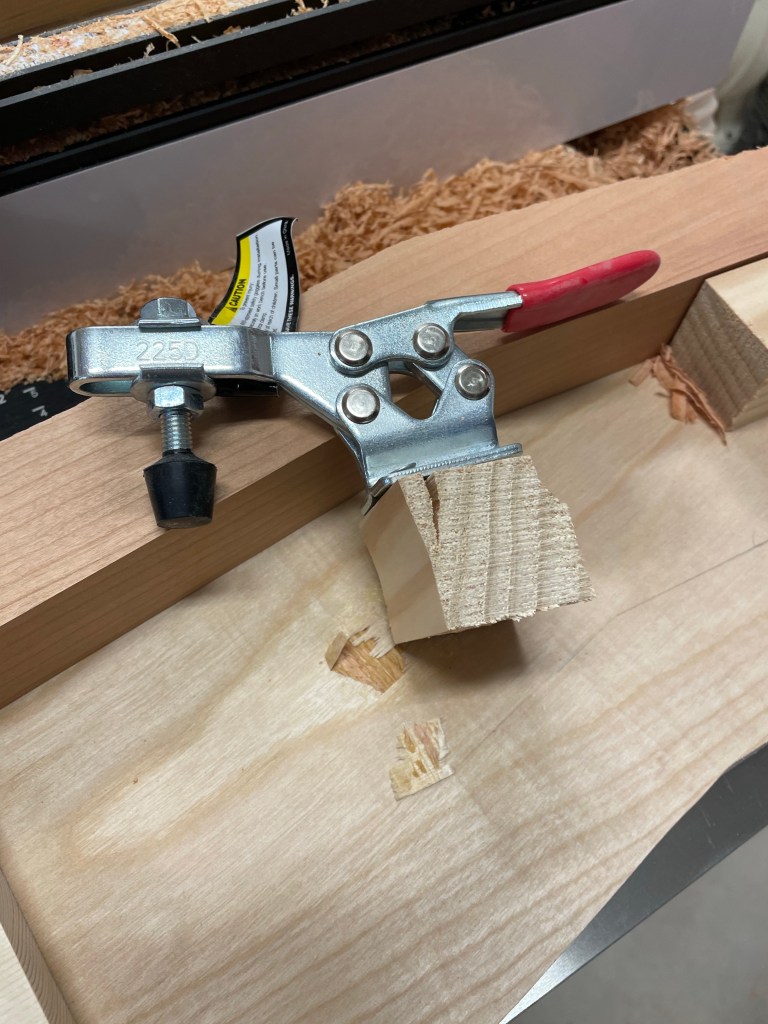
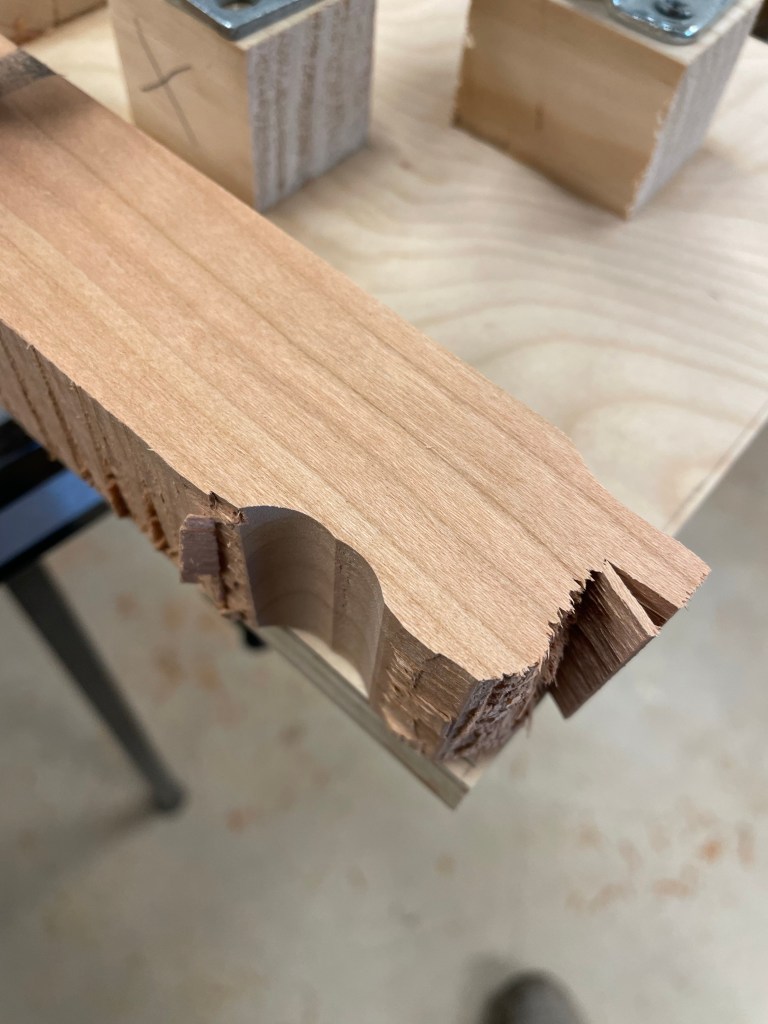
Using a guided bit and template I made the plywood jig then fastened on clamps and everything seemed to work well.

Until it didn’t….while finishing the third leg one of the clamp supports came loose and the router decided to make its own path. A few screws to repair the jig and a new piece of lumber were needed to complete the legs for all four stools.
Morley Bar Stool Seat
The original stool design has contrasting lumber for the legs and seat. its a design that I like and with the legs cherry, it made sense to go with a lighter colored maple for the seat. The seat design requires three pieces of lumber to be glued together followed by shaping on the band saw. The shaping jigs will be an entirely new process so let’s get moving!
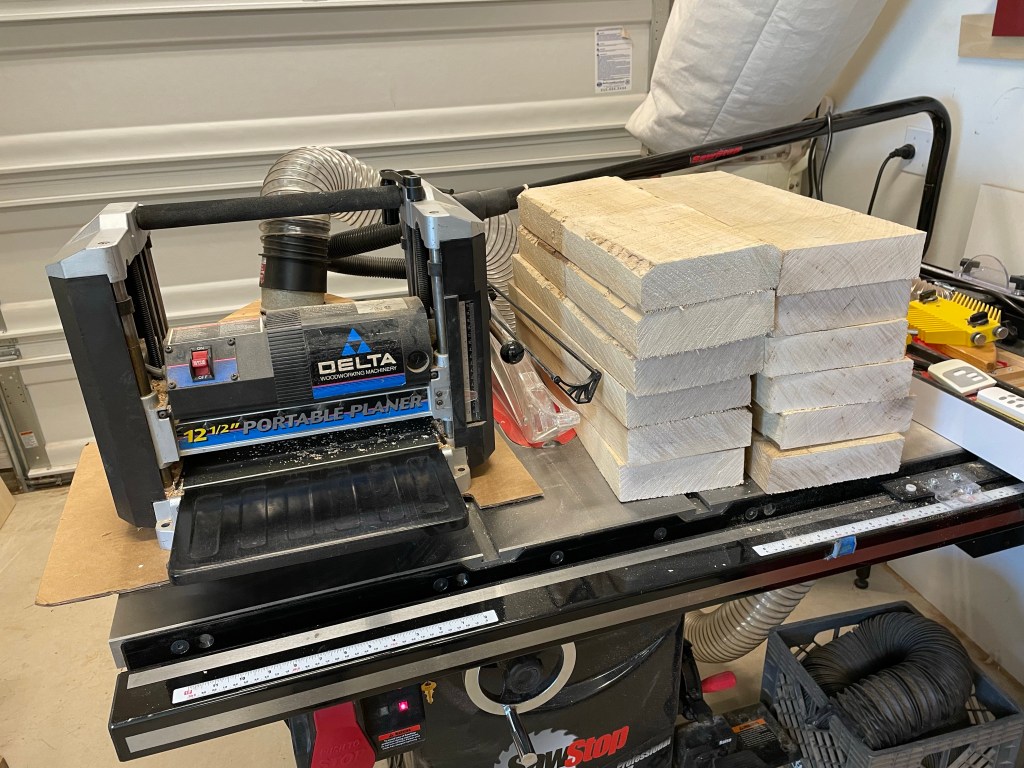
I used the usual methods for prepping the lumber to make the seat blanks. Handsaw to cut to length and then the planer to flatten the sides. Nothing unique from my other projects. Once the pieces were milled and edges square it was time for building jigs.

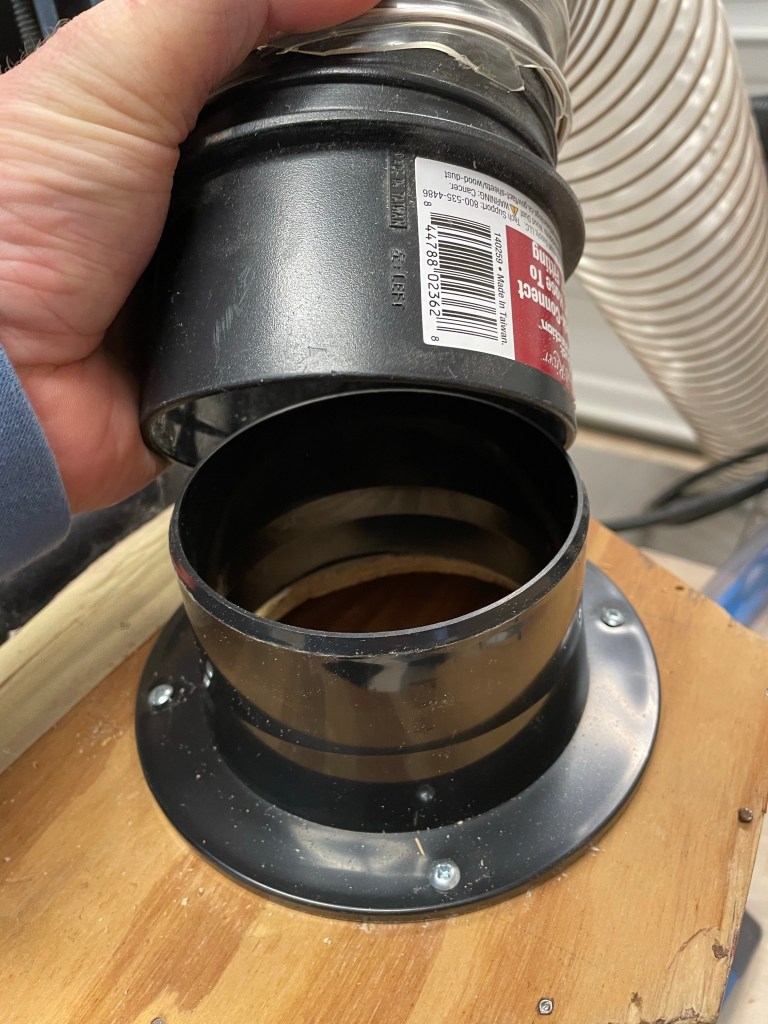
Along the way I did make a modification to my planer. I never purchased the attachment for dust collection (wish I had, but its now unavailable) and have been using a homemade attachment for many years. I finally swapped out the flange for attaching the dust hose and it is a much needed improvement.


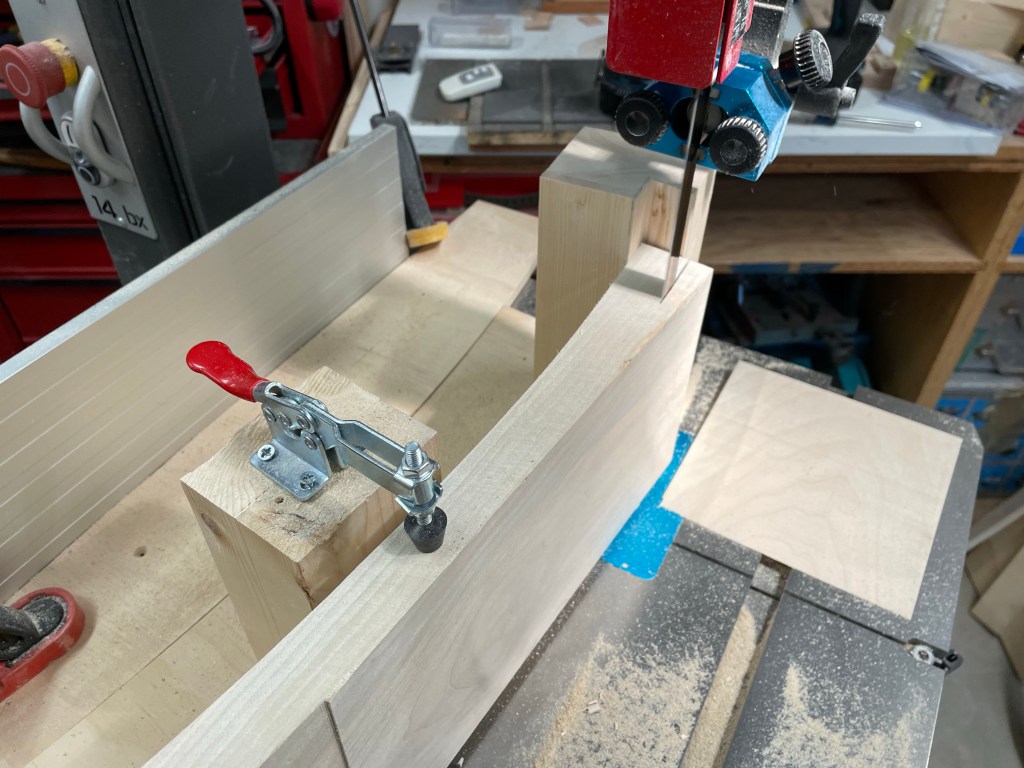
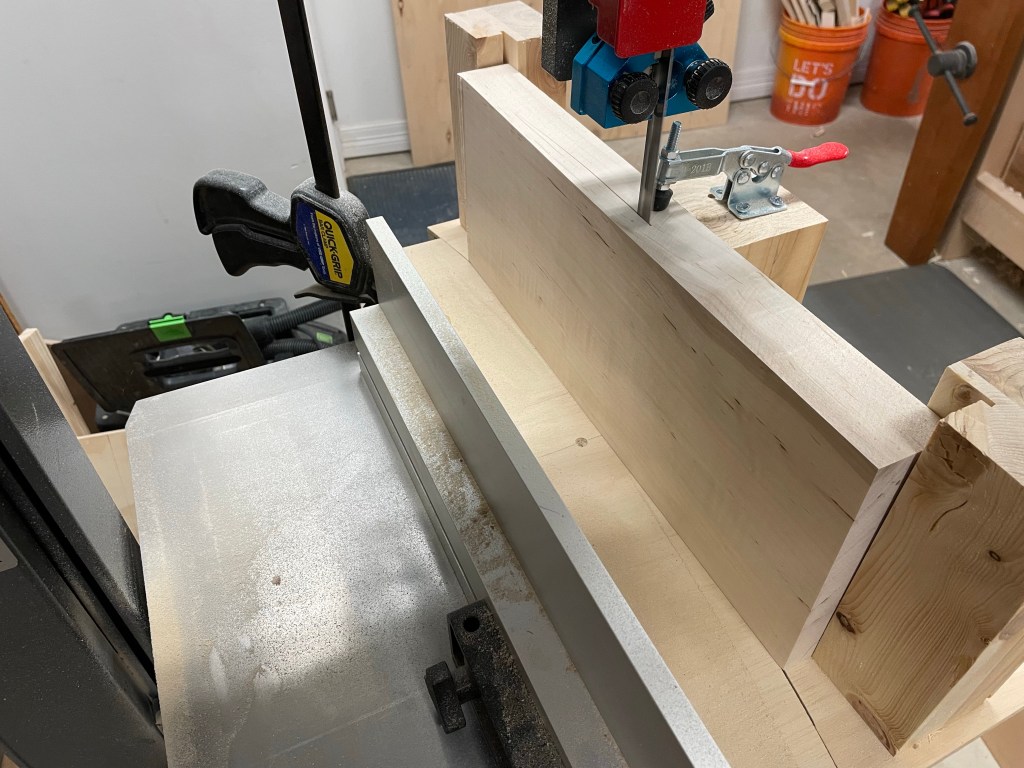
The jigs for curving the seat were relatively straight forward (I did very well on the leg jig) It’s really a piece of plywood that is trimmed to fit the curve. One piece rides inside the other on the bandsaw and with a few clamps its done.

The only issue I had was a broken bandsaw blade which looks like a manufacturing defect.

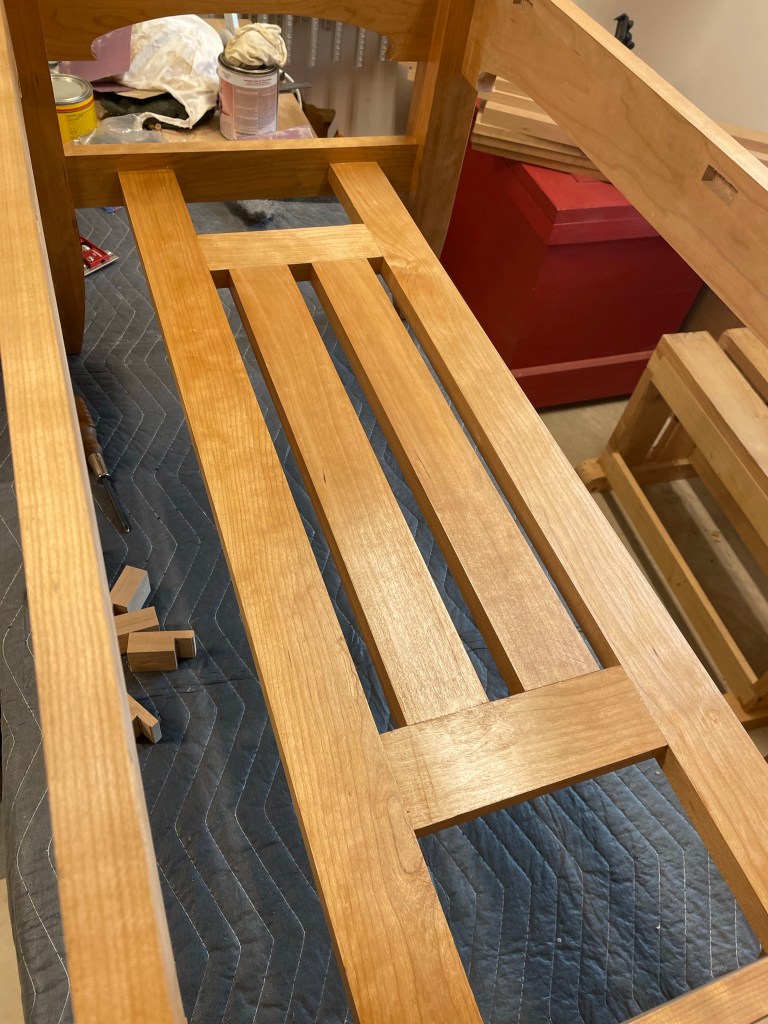
Blanks were glued and clamped and the seats are 50% complete. All it needs is some shaping and trimming.
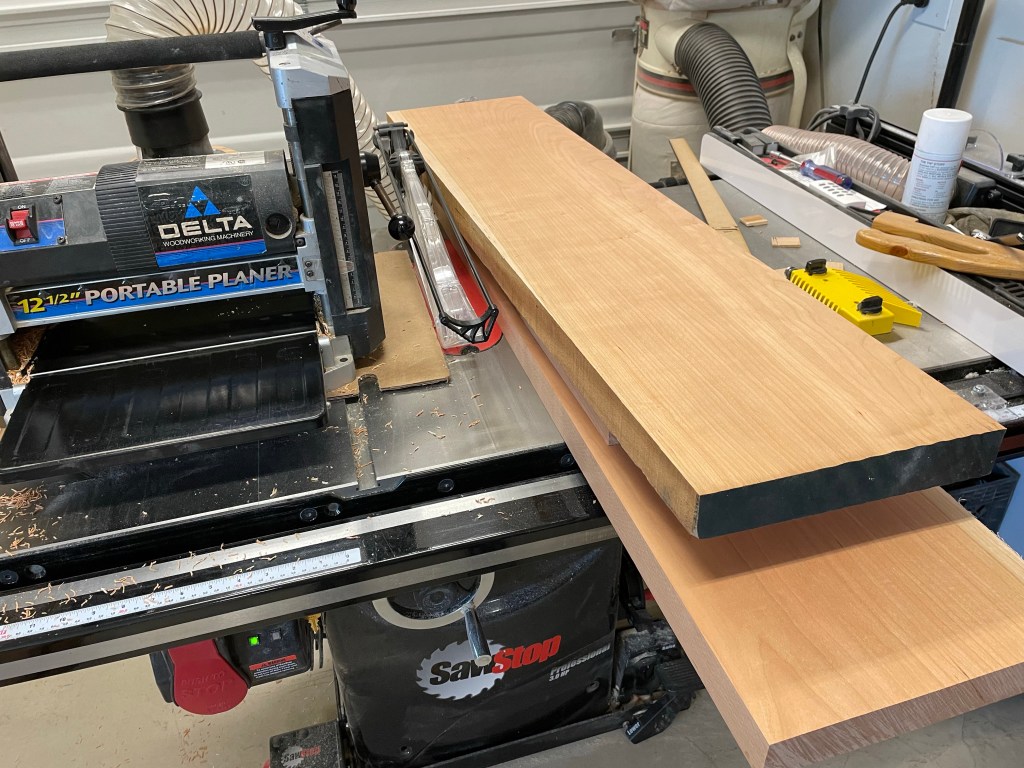
Morley Bar Stool Lumber
After downloading plans from the Wood Whisperer Guild I thought hard about the lumber in my shop what wood I would prefer to work with and what my ‘customers’ would like. There is some very nice Walnut that I have for another project that I looked at very seriously but the dimensions did not lend themselves well and the amount of waste a little concerning.
I decided to use maple for the seat and cherry for the structure. Since I didn’t consult my clients they readily agreed. Hopefully the maple and cherry will work well together. The lumber yard I use here in San Antonio has worked out well, they have a unique system, commented on a few months ago. I was very surprised at the cost of the Cherry, pleasantly surprised! Once it was in the shop I didn’t waste time cutting it into smaller pieces. My shop works fine but the 10’ lengths of lumber are quite a tripping hazard.

Starting with the Maple I crosscut it to lengths and began milling it into blanks for milling and shaping. I admit that the virus certainly took a little bit of my breath away but it felt very good to cut these by hand and I couldn’t have asked for a better saw. If you haven’t visited Bad Axe Saws lately they appear to be doing well and as they move through a change in ownership Mark Harrell is still next door and providing teaching and saw sharpening through his new company sawsharp. You can find him on instagram at SawSharp6. BTW I recommend his saws because of the excellent quality and service he has provided me over the years and have no financial or other relationship with or Bad Axe Toolworks.

The design of the seats will require a couple of jigs and the bandsaw as I move into the power tools.
Power Tools?
The final weeks of the year were busy, finally slowing when a little virus called Covid visited for the holidays. Still recovering I began slowly working on what will become the first project of 2023. Last fall I began a search for plans for bar stools. With family members living in apartments and moving frequently it seems like a good answer to providing simple seating for meals etc. Most apartments now have a high counter that can be used as a seating area and a couple of stools eliminates the need for a table and chairs.
After a lot of searching I came across the Morley Bar Stools in the Wood Whisperer Guild. Photo from the Wood Whisperer Guild.
This is a very different project from anything I would typically take on and that is where the attraction lies. The design is more modern and the techniques used based upon power tools. Initially I contemplated using hand tools but decided that it would be a unique learning experience to walk on the “Dark Side” of wood working.
On my all power tool project the first step was breaking down the stock, i immediately set about cutting the lumber into reasonable lengths using my Bad Axe D8, did you really think I could go all power tools?
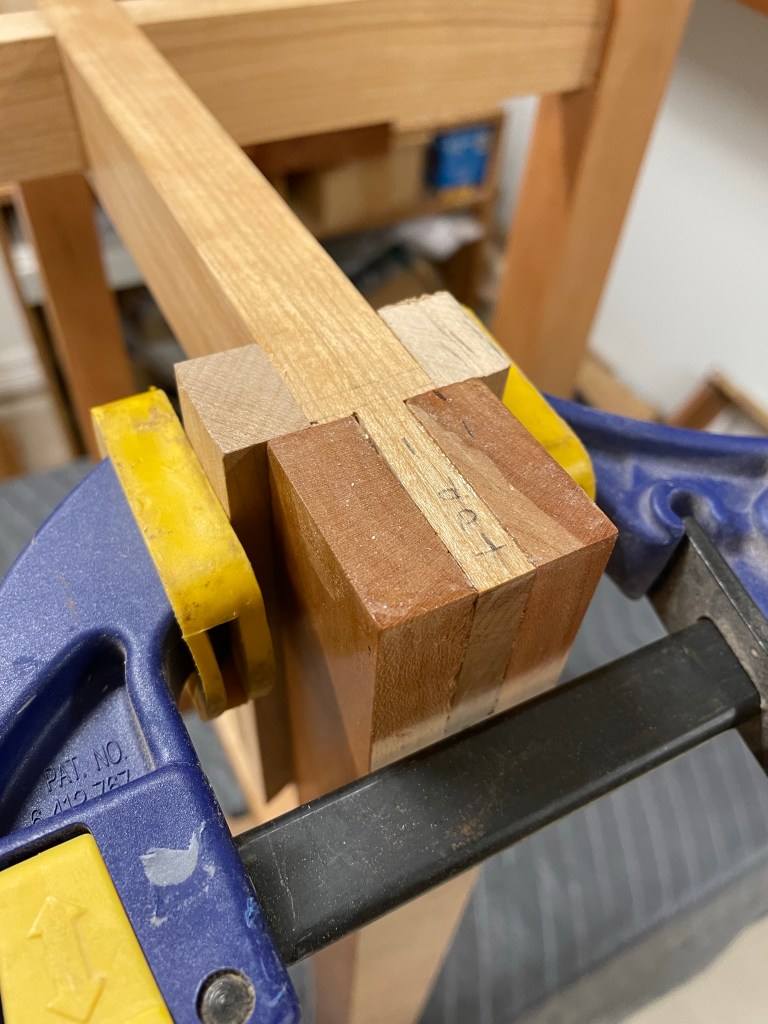
Cherry Side Table Joinery
The title mentions joinery, on this page I have now mentioned joinery three times. The pictures lead you to think that perhaps there will be many joinery photographs, however someone was more focused on cutting the joints than photographing them.

There is little new woodworking on this project. It is similar to the prior Walnut side table and the through tenons require precise measurement and chisel work. These joints were mostly cut by hand, after all cherry is a pleasure to work and the rhythmic chopping is the calm after a storm.
A couple of problems occurred while make the joints and I think this picture shows them all. The first occurred while dry fitting the saddle joint in the upper cross pieces. Although the joint fit fine the small amount of pressure when asssembling resulted in a crack along the grain. The upper right of the photograph shows this piece clamped. The second thing to notice is the organized chaos. While glueing the broken joint, I worked on several pieces to save time. What did not reveal itself until glue up was that I had planed all the pieces removing many of the marking and numbers. This suddenly revealed itself in the glue up when the LAST PIECE did not fit well!

The result of this misfit was a minor wobble when the table was glued together. This was easy to fix by planing the bottom of one leg. I sharpened up the #4 and right before the first swipe realized that a little care may save me from breaking a corner. I carefully clamped a couple of pieces of scrap to the back end and took about three strokes and the wobble was gone.
The only thing left was to screw the top and bottom together and add a couple of coats of Shellac.
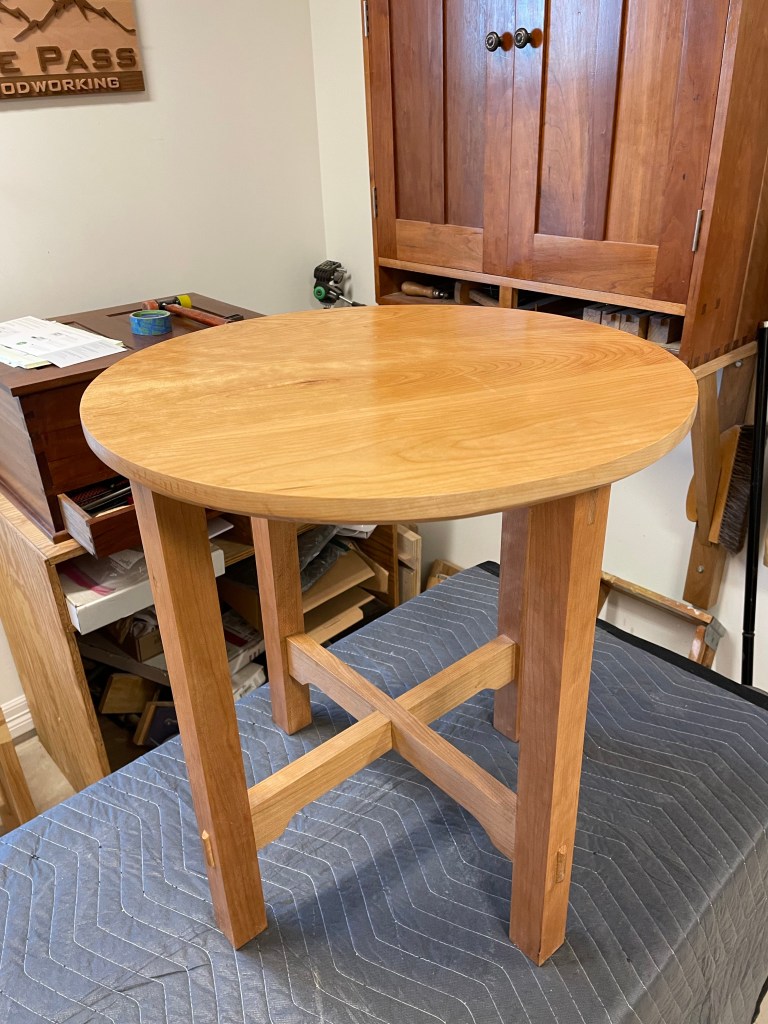
Several lessons from this piece: Repeating a project provides the chance to modify and change certain aspects. In this case the edge of the top was chamfered and the joints varied. More attention to wood grain adds to the appeal. Finishing is still a problem, but by using a rag rather then a brush it was much improved. Number your parts where you won’t remove the marks. High Angle frogs make a difference.
Cherry Side Table – Top 2
On the Walnut table I used a jig and router to cut the circular top. The system worked fairly well and I repeated for this table.
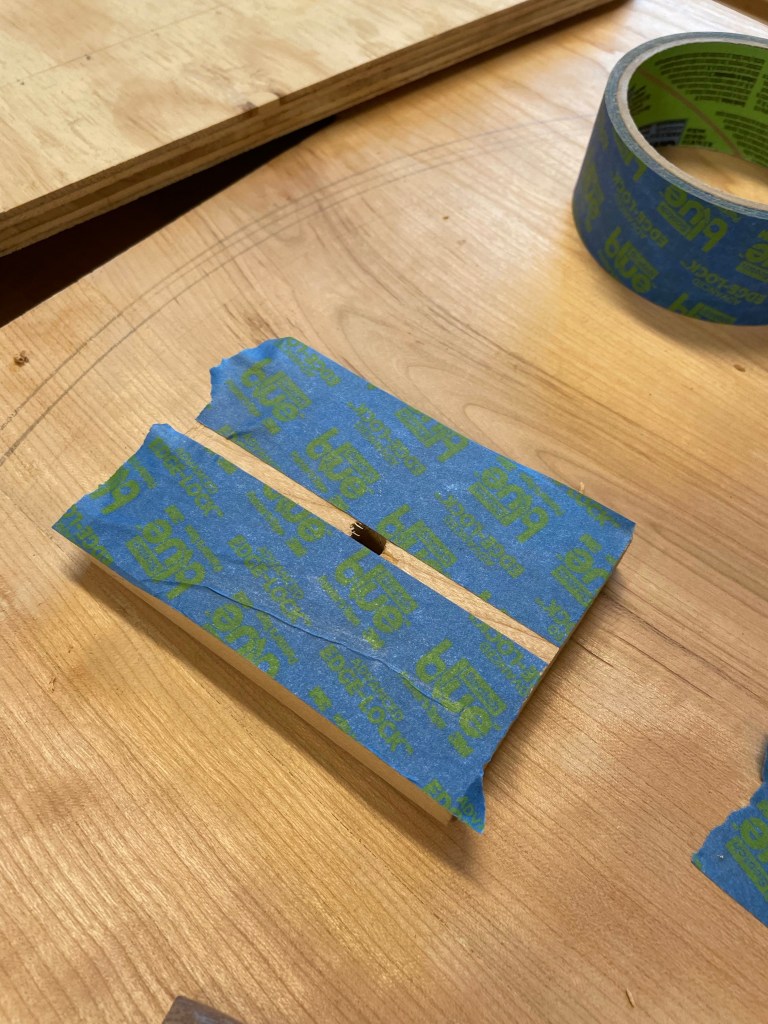

I made my own double sided tape by using masking tape with super glue in between and my circular router jig and cut the table top to size.


Just when you think that you have a great process, the lumber speaks! Routing around the last corner and a large piece came off. This required several minutes of staring at the top and a lot of mumbling. The mumbles were not able to be translated to the blog. There are several options to repair this from start again, glue a new piece on, rout a tighter radius etc. knowing that I had to chamfer the edge, I put the other bit in the router and the actual impact to the edge was small so with a spokeshave and hand plane I rounded the edge by hand and it’s not noticeable.

Cherry Side Table Top
Wanting to get the glue up of the top out of the way and move onto the joinery, I spent quite a bit of time flipping boards and matching grain. When the finish goes on we will see how it looks.
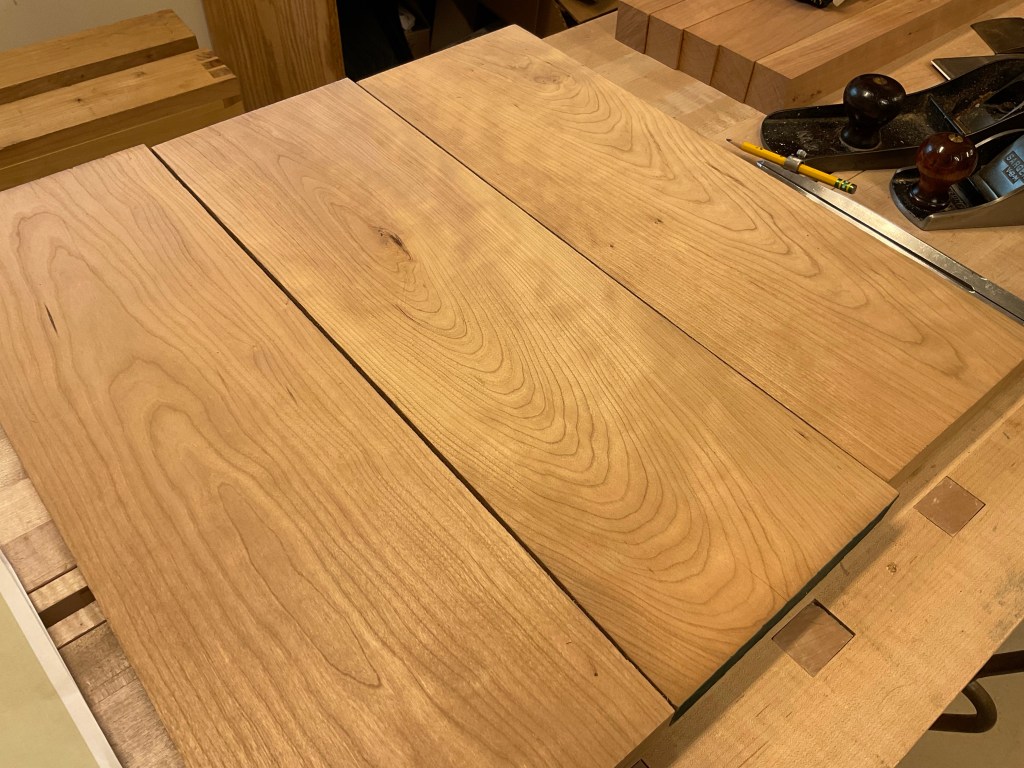
Here’s a link to my method for dimensioning stock, dimensioning without a jointer. Jointing the edges, I used my #7 plane which was really overkill. the bed length really helps to create flat edges but I could have accomplished the task with a #5 or #4. I just happen to like the #7.

In the last few projects I could have done a better job gluing the top. Aligning all of the boards has been a challenge which creates more work to prepare the top after glue up. I took a little more time and care to ensure alignment when clamping and there was definitely improvement. I suppose that I could use biscuits or dowels to help but I’ve not done that in over 10 years. I think it is something that with increased awareness will improve.

When the clamps were removed, there was a small amount of misalignment but much improved. I used two planes to smooth the top and with the tight reversing grain I was glad to have the Lie Nielsen #4 with a high angled frog. I’ll write a separate blog about why I have this plane in the near future.

Another Side Table
There’s a little cherry left over and I think it will be enough to make another round side table. So I grabbed the plans which I didn’t follow last time and won’t follow this time and gathered up the lumber.

Then I stopped everything because I had not sharpened my planes after the prior project and went out to play ball with my daughter’s dog, my friend Tim wonders why he never sees any finished projects?

Flattening and dimensioning the lumber did not take long and I spent some time looking at the previous tables to see if there were elements to change or add. The Walnut table I made a few months ago had several nice elements and the only thing I may consider is do I want to place a lower shelf on the table. I can do this at the end of the project so will probably consider it for a while.

Checking a couple of measurements from the prior table and its off to work or the grass needs to be cut.
Cherry Coffee Table – Completed
All of the parts are completed and the final steps are in sight. Clean up and sanding, installation of the top are all that is left.


Like most of my projects I intend to use shellac and finish with a coat or two of wax. It’s a very simple finish and easy to repair. Starting with the top I applied layer after layer of Shellac with intermittent sanding. I did do this table slightly different than prior projects. I have always used a brush to apply the finish and after looking at prior projects thought that a rubbed finish may eliminate some of the drips and problems. Taking an old T-shirt I carefully wiped on the layers and was very happy with the process and the finish. Interestingly, the same week there were some comments on the fine woodworking podcast that spoke exactly to the use of a pad versus a brush. Strange how these coincidences occur.
Once the top and base were finished I had to attach the top. Previously I had cut mortises in the rails so all I had to do was make the wooden brackets and attach them in with brass screws.

There are several fun lessons in this project and the curves in the legs and rails add an element of lightness to the appearance of the project. I really like the look of the chamfered top. The joinery is a challenge and when it is completed your skills have greatly improved, and who doesn’t like the look of a through tenon!


Cherry Coffee Table Top
The top was glued up a couple of weeks ago. While boards were sorted and selected for the various parts it was easy to dimension them while the tools were out.

The tabletop has always been the most stressful part of any project. It seems a simple task to prepare the rough stock, dimension the boards and ensure the edges are parallel and glue, but there is so much more to be considered.
I have some interesting table tops. There is the one that is a piece of Red Oak glued to a piece of White Oak, the one with grains that clash and the one that has boards of different shades. I continue to try and improve my work by paying attention to lumber choice and grain. It makes the finished product more pleasing to the eye. Once the stock was prepared I twisted and turned the boards until I was satisfied with the appearance and jointed the edges. As mentioned before I never unboxed my jointer after moving and all of the jointing is done with hand planes.
Once everything is ready a little glue, some clamps and we have a larger slab of wood,.


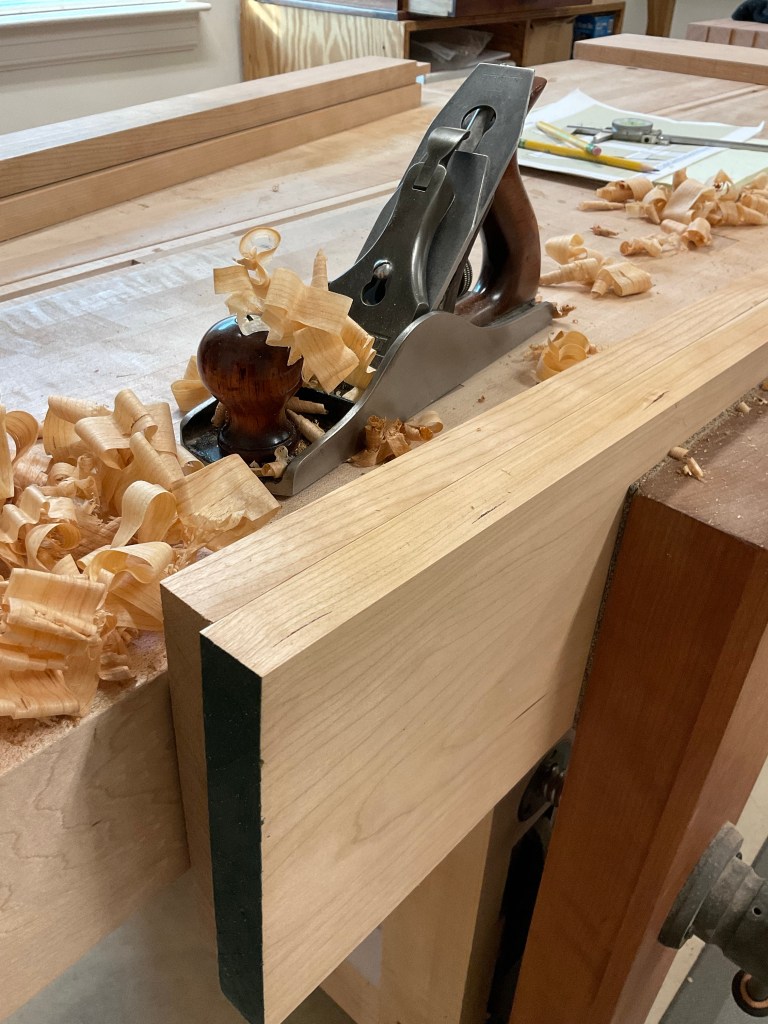
When I made the walnut side table I used a router to chamfer the edge which really changed the table appearance. I decided to make the top slightly bigger than my prior coffee table and to add the chamfered edge element on this table as well. I debated whether to make the chamfer by hand, but in the end chose a router. Almost routing on the wrong side, I flipped the top and made a careful pass around the edge.


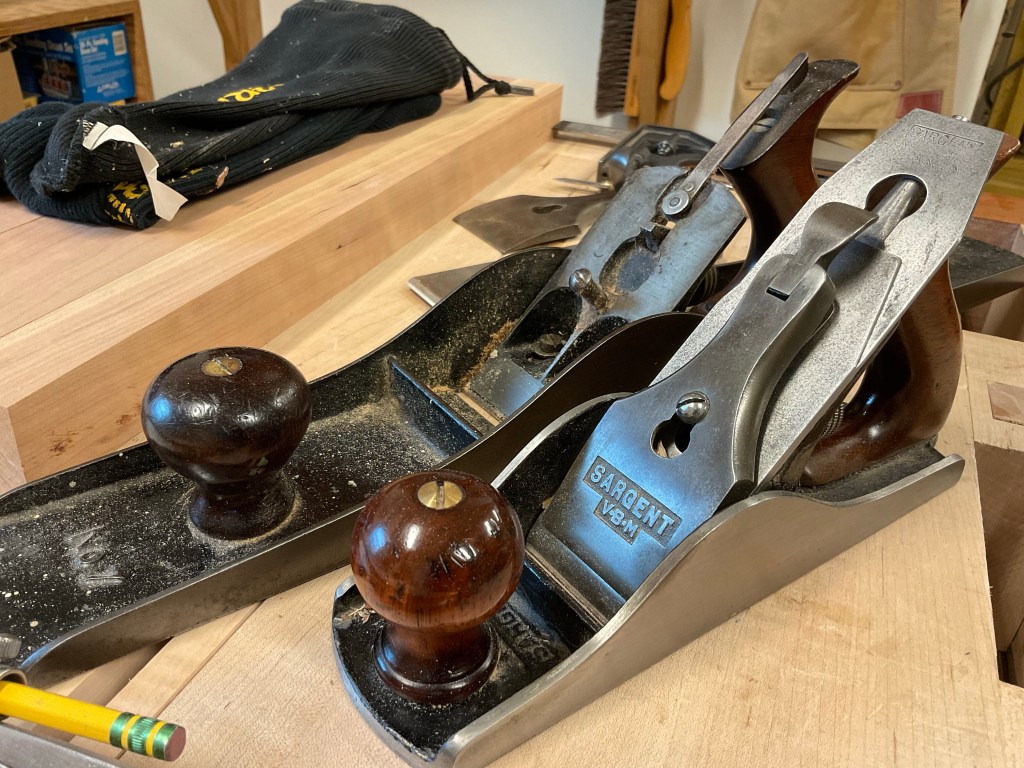
As I was finishing the Walnut Coffee Table I really struggled with tear out. Finally finishing up with scrapers. Since Then I made a quick purchase knowing that I had more figured lumber to work, I’ll write. More about the plane in the future when I have a little more time and feel that my opinion is valid, I used my regular #4 and the high angle frog Lie Nielsen on this table top and was very happy with the result.

Some final sanding and it should be ready for finish.
